HID5427卡机操作手册v1.4
hp 增霸卡V4.0 官方使用教程
目录1.产品介绍 (1)1.1产品说明 (1)1.2功能简介 (1)1.3最低硬件配置 (2)1.4支持的操作系统 (2)1.5支持的文件系统 (3)2.快速开始指南 (4)2.1安装增霸卡 (4)2.2安装流程图 (5)2.2.1 安装发送端流程图 (5)2.2.2 网络克隆接收端流程图 (6)2.3安装发送端(以﹤全新安装﹥为例) (7)2.3.1 选择安装方式——全新安装 (7)2.3.2 安装操作系统及应用软件 (9)2.3.3 安装增霸卡操作系统驱动 (10)2.3.4 安装完成 (11)2.3.5 设置发送端网络拷贝信息 (11)2.4网络克隆接收端 (12)2.4.1 网络安装接收端底层驱动 (12)2.4.2 配置接收端信息(IP地址/计算机名) .. 162.4.3 传送操作系统数据 (18)3.增量拷贝—安装、卸载软件,修改系统设置 (20)3.1增量拷贝的流程图 (20)3.2实现增量拷贝的前提条件 (21)3.3增量拷贝全过程 (21)3.3.1 准备增量数据 (21)3.3.2 执行增量拷贝 (22)3.4增量拷贝破坏后的修复 (27)4.已经安装好操作系统后安装增霸卡 (28)4.1安装增霸卡 (28)4.2选择安装方式 (28)4.2.1 简易安装和保留安装 (28)4.2.2 安装操作系统 (30)4.2.3 安装增霸卡系统驱动 (31)4.3网络克隆接收端 (31)5.高级使用指南 (32)5.1安装多操作系统 (32)5.1.1 安装增霸卡 (32)5.1.2 选择安装方式(全新安装) (32)5.1.3 用增霸卡划分硬盘分区 (33)5.1.4 安装操作系统及应用软件 (34)5.1.5 安装增霸卡操作系统驱动 (34)5.1.6 网络拷贝、自动修改IP (34)5.2临时增量部署-差异化增量拷贝 (35)5.2.1 临时增量部署可以应用以下场景 (35)5.2.2 临时增量部署的使用 (35)5.3断点续传 (36)5.3.1 断点续传可以应用以下场景 (36)5.3.2 断点续传的使用 (36)5.4网络工具 (38)5.4.1 网络升级 (39)5.4.2 传输参数 (39)5.4.3 传输CMOS (40)5.4.4 时钟同步 (40)5.4.5 传输计费 (40)5.5网络参数调节 (41)6.增霸卡管理功能设置指南 (43)6.1系统模式 (43)6.1.1 总管模式 (43)6.1.2 保护模式 (43)6.2还原/备份/保留/增量回退 (44)6.2.1 还原 (44)6.2.2 备份---也称永久写入 (45)6.2.3 暂时保留 (45)6.2.4 恢复到增量拷贝以前的状态 (45)6.3系统管理 (46)6.3.1 开机设定 (46)6.3.2 待机设置 (47)6.3.3 分区信息 (48)6.3.4 CMOS保护设置 (52)6.4网络拷贝设置 (53)6.4.1 网络拷贝模式 (54)6.4.2 接收端开机自动连线 (55)6.4.3 启用DHCP服务 (55)6.5增量设置 (55)6.5.1 操作系统增量拷贝状态 (56)6.5.2 操作系统增量拷贝特殊设置 (56)6.5.3 具体增量拷贝步骤 (56)6.6工具箱 (56)6.6.1 特殊设置 (57)6.6.1.1驱动设置 (58)6.6.1.2特殊参数设置 (58)6.6.1.3计费设置 (59)6.6.2 硬盘复制 (59)6.7系统卸载与升级 (60)6.7.1 升级 (60)6.7.2 卸载 (60)6.8保存退出 (61)7.附录一常见问题解答 (62)1.产品介绍1.1 产品说明1、增霸卡是针对计算机机房从集中部署到便捷、灵活、快速维护的新一代产品。
深圳市秦安科技有限公司 DM5404 口 4 屏 DP 超高清多屏幕 KVM 切换器 说明书
4口4屏DP超高清多屏幕KVM切换器@版权所有深圳市秦安科技有限公司印刷日期:2022/01/14版本:V1.0用户信息电话支持有关电话支持,请拨打此号码:用户通知本手册中包含的所有信息,文档和规格如有更改,恕不另行通知。
制造商对本文档的内容不作任何明示或暗示的陈述或保证,特别是对于适销性或对任何特定目的的适用性不作任何保证。
本手册中描述的任何制造商的设备均按原样出售或许可。
如果设备在购买后人为损坏,则买方(而不是制造商,其分销商或经销商)应承担全部必要的修理费用以及由于设备缺陷引起的任何附带或间接损失的全部费用。
如果在操作之前未选择正确的操作电压设置,则制造商对系统操作中造成的任何损坏概不负责。
使用前请确认电压设置正确无误。
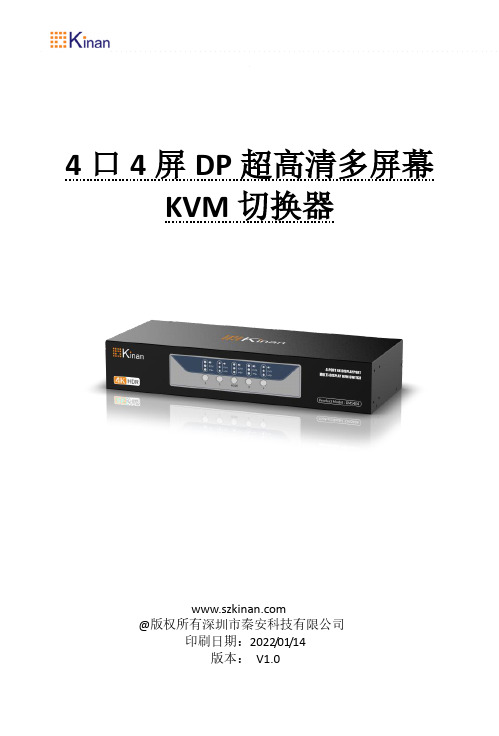
目录用户信息 (1)电话支持 (1)用户通知 (1)第一章介绍 (3)产品描述 (3)产品特性 (4)要求 (5)组件 (6)DM系列前面板 (6)LED状态面板 (7)后面板 (8)第二章硬件设置 (9)安装 (9)DM5404连接示意图 (10)DM5404级联拓展示意图 (10)第三章热键操作 (11)产品技术规格 (13)DM系列产品选型 (14)第一章介绍产品描述DM5404切换器是一款支持四进四出超高清分辨率的KVM切换器,允许用户使用一套USB 键盘、鼠标切换访问四台四个DP显示(通过级联最多8显示)接口的计算机。
输入支持DisplayPort1.2接口,输出为HDMI接口。
提供1个USB2.0集线器和 2.1 声道音频,支持丰富的低音环绕声。
支持4K UHD @ 60 Hz 和4K DCI @ 60Hz分辨率,显示生动的高清图像,同时为音乐、电影和游戏提供优质音效。
DM5404切换器除了支持前面面板按钮、热键和鼠标端口切换功能,还可以使用串行命令以帮助切换端口和配置设备设置。
切换器内置USB 2.0集线器,可以连接USB 外围设备。
支持显示动态同步,可以优化屏幕显示分辨率、降低切换端口的时间,并确保切换不同端口时,屏幕能保持现有显示状态(切换端口时,在延伸屏幕上开启的窗口不会还原成它们在主屏幕的默认设定)。
usb数据采集卡使用说明书V50(新驱动)
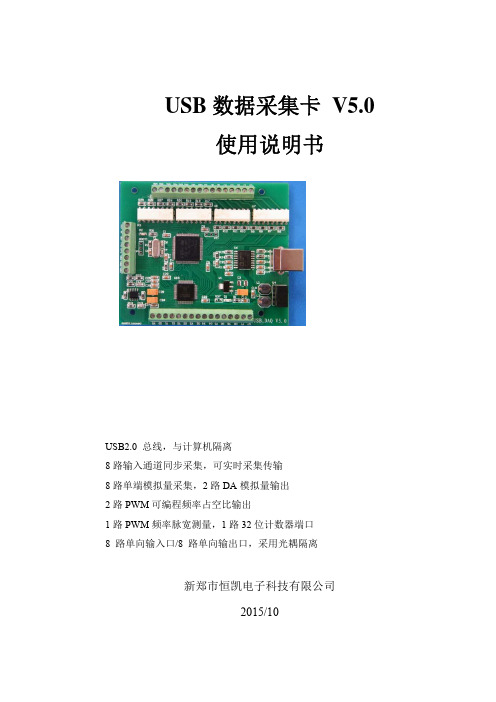
USB数据采集卡 V5.0使用说明书USB2.0 总线,与计算机隔离8路输入通道同步采集,可实时采集传输8路单端模拟量采集,2路DA模拟量输出2路PWM可编程频率占空比输出1路PWM频率脉宽测量,1路32位计数器端口8 路单向输入口/8 路单向输出口,采用光耦隔离新郑市恒凯电子科技有限公司2015/10在开始使用前请仔细阅读下面说明检查打开包装请查验如下:¾USB数据采集卡 V5.0一块;¾高屏蔽USB数据传输电缆一根;保修本产品自售出之日起一年内,用户遵守储存、运输和使用要求,而产品质量不合要求,凭保修单免费维修。
因违反操作规定和要求而造成损坏的,需缴纳器件费及相应的运输费用,如果板卡有明显烧毁、烧糊情况原则上不予维修。
如果板卡开箱测试有问题,可以免费维修(限购买板卡10天内)。
软件支持服务自销售之日起提供6个月的免费开发咨询。
目录一、 USB 数据采集卡V5.0 说明 (1)1.1 板卡简介 (1)1.2 软件支持 (2)1.3 应用领域 (2)1.4 售后服务 (2)二、性能指标 (3)2.1 USB总线性能 (3)2.2 模拟信号输入 (3)2.3 模拟信号输出 (3)2.4 数字信号输入/输出 (3)2.5 PWM测量输入 (4)2.6 计数器 (4)2.7 PWM输出 (4)2.8、工作温度 (4)三、安装与连接 (5)3.1 安装 (5)3.1.1 关于USB (5)3.1.2 USB延长线 (5)3.2 信号连接注意事项 (5)3.4 端子定义及排序说明 (6)3.4 板子尺寸 (7)3.5 各类信号链接方式 (7)四、软件的安装与使用 (10)4.1 驱动的安装与软件的使用 (10)4.1.1 驱动的安装 (10)4.1.2 软件的使用 (12)4.2 接口函数说明 (16)4.2.1 设备操作函数 (16)4.2.2 AD操作函数概况 (17)4.2.3 其它输入输出操作函数 (20)4.2.4 多板卡同时使用相关函数 (23)4.2.5 过采样及相关说明 (24)五、客户程序使用采集卡教程 (28)5.1 VC编程教程 (28)5.2 编程教程 (28)5.3 LABVIEW编程教程 (29)5.4 Labwidows/CVI (32)一、 USB 数据采集卡V5.0 说明恒凯电子-USB数据采集卡采用USB2.0高速总线接口,总线极具易用性,即插即用,是便携式系统用户的最佳选择,可以完全取代以往的PCI卡。
非接触式IC卡读卡器使用说明
文档编号: ZH-22WI-999012 版 本 号: 3.0非接触式IC 卡计时宝(SMTMJMF-V22)用 户 手 册广东智慧电子信息产业股份有限公司“智慧牌”非接触式IC 卡产品系列SMART CARD & IT SERISE®文档摘要项目名称:“智慧牌”非接触式IC卡计时宝文档编号:ZH-22WI-999012文档编写者:出版日期:参考文献:《智慧“一卡通”信息管理系统需求分析说明书》、《智慧“一卡通”信息管理系统概要设计说明书》、《GB/T18239-2000集成电路(IC)卡读写机通用规范》和《GB 4208 外壳防护等级的分类》《GB 6587.7 电子测量仪器基本安全试验》,《GB 191 包装储运图示标志》《GB 6833.5 电子测量仪器电磁兼容性试验规范辐射敏感度试验》《GB 6833.3 电子测量仪器电磁兼容性试验规范静电放电敏感度试验》等文档更新记录表内容简介“智慧牌”非接触式智能卡计时宝融合了美国、日本、西欧、香港、台湾以及中国大陆各类型企事业单位的时间管理模式特点,将通用性与智能化有机结合,可视不同的使用需求而设定相应时间管理参数。
计时宝广泛适用于考勤、门禁、巡更、会议签到、钟点记录等计时、监控功能管理,可同时控制多组外控设备,接受多组输入信号,共有四种不同的工作模式供客户选择使用,适用卡片型号为Mifare One卡、CPU卡和ID卡,是企事业单位最好的时间“管家婆”。
套装形式的“计时宝”,出厂时已配齐了安装使用的必备配件,您仅需按照本说明书传授的方法,就能十分方便地掌握,并自行完成系统的安装、设置和查询。
与之配套的软件有考勤、门禁、人事、工资等管理软件,为您解决一般性的事务管理工作,如有特殊需求可与当地经销商联系,委托开发制作。
计时宝具有操作简便,安全可靠,功能实用,快速精确等特点。
在本说明书中,详细的对计时宝做了介绍,包括外观注释、产品特性、键盘介绍、配件介绍、连接器参数、连线转换盒参数和技术参数;还详尽的介绍了计时宝的安装与检测、使用方法、网络连接;最后还列出了报警代码和纠错措施以及技术支持联络方法。
HID Global ISO卡用户指南说明书

General InformationHID Global ® ISO cards are made with outer layers of PVC and finished with a glossy surface suitable for Photo ID printing. Proximity cards and contactless smart cards contain an antenna coil and integrated electronic chip. Wiegand cards contain magnetic wire code strips.Care should be taken to follow HID Global’s handling and printingrecommendations. We hope these suggestions will help you successfully print your HID Global cards.Print DesignSurface imperfections caused by the embedded chip and antenna maycause color variations or printing voids with direct to card printers. When designing card artwork, avoid large areas with solid or half-tone backgrounds. Use artwork with varied color or pattern. If the design must print over the internal chip, we recommend the use of a reverse transfer printer. Do not place a photo portrait over the chip location or opposite the edge of a magnetic stripe.Always print a few test cards, and be prepared to make minor adjustments to the artwork to create the best appearance.Some printers are capable of edge-to-edge printing. Before running an edge-to-edge design, test several cards to check the printer’s capability.Card HandlingHID Global’s printable cards are shipped shrink wrapped. Care should be taken not to scratch the cards when opening the wrapping, especially when using a sharp object.Cards should be handled by the edges, not by the flat finished surface. Use lint free gloves or finger cots, since hand oils will transfer to the cards causing smudging, fingerprints or other distortions when printing.ACCESS experience.CorporateNorth America15370 Barranca Parkway Irvine, CA 92618-2215U.S.A.Phone: 800 237 7769 Phone: 949 732 2000Fax:949 732 2120Europe, Middle East & Africa Haverhill Business Park Phoenix Road Haverhill, Suffolk CB9 7AE EnglandPhone: +44 1440 714 850Fax: +44 1440 714 840Asia Pacific19/F 625 King’s Road North Point Island East Hong KongPhone: +852 3160 9800Fax: +852 3160 4809Latin AmericaCircunvalacion Ote. #201 B Despacho 3Col. Jardines del Moral Leon 37160, Gto. MexicoPhone: +52 477 779 1492Fax: +52 477 779 1493HID Global Offices:MKT-000006 Rev A.3© 2007 - 2010 HID Global Corporation. All rights reserved.HID GLOBAL, HID, the HID logo, iCLASS are the trademarks or registered trademarks of HID Global Corporation, or its licensors, in the U.S. and other countries.Even with careful card handling, it is possible that the image quality may vary. This can be due to printer setup variations, lot to lot material variations, environmental changes, printer types, background color selections and other variables.HID Global® is not responsible for image quality variations. These cards have been quality controlled and meet requirements for high quality images. Failure to achieve a desired image quality is not the fault of the card.Card Printing TipsFollowing these instructions will provide optimum printing results.Always check cards for noticeable debris. In some instances theremay be small pieces of vinyl on the card. Carefully clean cards using 99% pure Isopropyl alcohol and a soft, lint free cloth.The office where you print the cards should be neat, clean and free of airborne particles.Check the printer’s roller frequently. For best results, clean theprinter according to the manufacturer’s recommended intervals.Occasionally, fine scuff marks appear on the surface of cards. These marks will not affect the printer, or the outcome of the printedimages. These scuff marks may occur during final inspection andtesting.Printer manufacturers discourage printing cards which arepre-punched. The slot edge may tear the printer ribbon or interfere with card position sensors.Print your cards first, then slot punch them. For cards that arealready punched, do not print in the area near the slot. If the cardhas an embedded contact chip, keep the printing at least.0625in [1.5875 mm] away from its edges.Card SlottingHID Global cards have slot punch indicators, small dots visible on the card back which show the only allowable slot locations for the card.It is strongly suggested to use badge grippers instead of slot punching the cards. HID Global has a full line of ID Accessories allowing you to display your badge without requiring a slot punch.If you slot punch the card, carefully center the indicator marks to the punch, and punch only where the indicator marks appear. Any other position may damage the electronics. If there are no marks, the card cannot be safely punched.Always test the first card after printing and slotting. Once satisfied with the quality, continue running the full card lot.Card Slot LocationsCAUTION: Available slot punch locations are marked by3 dots on the back of the card. If dots are not present, the card cannot be safely punched.Horizontal or VerticalSlot PunchVertical Slot Punch OnlyNo Slot Punch123456Shown are card backs。
蓝光兰卡(top版)说明书V1.1

蓝光兰卡top版使用手册本手册阅读导航尊敬的客户:您好!!感谢您使用蓝光兰卡系列产品,为了您更好的使用top 版保护卡,请您仔细阅读本手册。
top版保护卡是本公司为您精心设计的针对学校和网吧进行维护的高效便捷的专业机房维护方案,并支持最新的Windows Vista操作系统。
本手册包括以下内容:『安装说明』详细说明了top版保护卡的安装过程,包括不同类型保护卡的安装,相关软件的安装方式,以及安装时的注意事项。
请参阅“2. 蓝光兰卡Plus版保护卡及操作系统的安装”。
『设定说明』详细说明了top版保护卡的各种设置、功能以及注意事项,重点对网络拷贝进行了说明。
请参阅“3. 系统设定”。
『网控说明』详细说明了网控软件的系统要求、安装、卸载以及控制端界面的详细描述。
请参阅“4. 网控软件的使用”。
目录1 蓝光兰卡TOP版保护卡简介 (1)1.1产品特点 (1)1.2功能简介 (2)1.3最低硬件配置 (2)1.4支持的操作系统 (2)1.5支持的文件系统 (3)2 蓝光兰卡TOP版保护卡及操作系统的安装 (4)2.1安装前的准备 (4)2.2安装发送端 (6)2.3安装接收端 (20)3系统设定 (22)3.1密码设定 (22)3.2工具 (23)3.3拷贝工具 (28)3.4网络拷贝功能的使用 (30)3.5更版 (39)3.6移除 (40)3.7版本信息 (41)4网控软件的使用 (42)4.1.系统安装要求 (42)4.2.软件安装 (43)4.3.网络控制端说明 (48)附录一热键提示 (66)附录二常见问题解答 (66)附录三LINUX系统安装说明 (68)致谢 (75)1 蓝光兰卡top 版保护卡简介蓝光兰卡top 版保护卡的安装流程如下:第一次安装界面自定安装选择安装方式简易安装安装底层驱动,对硬盘进行分区安装底层驱动,对硬盘剩余空间进行划分在“开机选单”界面以总管模式(CTRL+Enter)进入,安装好操作系统,应用软件,手动设置好TCP/IP完成安装安装核心驱动(INSTALL 程序)重新启动计算机安装底层驱动保留C 安装网络安装安装底层驱动完成接收端安装登录到发送端进行网络拷贝1.1产品特点1、 蓝光兰卡top 版保护卡能够使计算机机房从集中部署到便捷、灵活、快速维护的新一代产品。
HID OMNIKEY Smart Card Reader 安装手册说明书
This guide describes the HID OMNIKEY Smart Card Reader installation. Reference your driver documentation (readme) for a list of supported windows versions.Three types of installation exist:• Unattended (preferred installation)• Automatic (internet connection required)• Manual UnattendedThe Unattended installation is the preferred method. Unattended installation files are found at /omnikey . Optionally, obtain these files from an installation CD (if available).1. T o download the latest HID OMNIKEY Unattended setupdrivers, go to: /omnikey , and select Download OMNIKEY drivers .2. Select your OMNIKEY product and operating system.3. From the list, select the Unattended Setup Installer andconfirm the license agreement.4. Double-click the executable file and follow the instructionsdisplayed in the setup window.Note: In addition, download API drivers. The SYNC-API is required for applications with memory or contactless (iCLASS ®) cards. The CT-API is often required for PIN Pad readers (electronic signature applications), as well as health care applications.In standard installations, installing these APIs is suggested.For driver installation local administration rights may be required.Do not plug in the OMNIKEY reader into your computer until setup is complete.5. Execute the Unattended Setup.EXE file and follow theInstall Wizard instructions.Note: For uninstalling the OMNIKEY drivers, restart the setup or (from the control panel) use Add/Remove Programs .6. After finishing the installation, plug in your reader to the port(USB, ExpressCard ®, or PCMCIA).7. Windows automatically detects and installs the newhardware connected to the port (USB, ExpressCard, or PCMCIA).Proceed to the OMNIKEY Workbench section for testing and installation.AutomaticEnsure your computer has an online connection to the Internet.1. Connect the reader to the computer port (USB,ExpressCard, or PCMCIA).2. Windows detects the new hardware connected to the port(USB, ExpressCard, or PCMCIA) and requests the drivers.3. After the Windows Hardware Wizard opens, Windowsrequests to connect to Windows Update to search for software, click Yes, this time only .4. The OMNIKEY reader automatically is recognized and theappropriate driver installed through Windows Update.The OMNIKEY reader is ready for use.Note: If your OMNIKEY reader is CCID compliant, use a native Windows CCID driver to operate the reader. However thenative driver does not allow you to utilize the readers advanced features and functions.Proceed to the OMNIKEY Workbench section for testing the installation.ManualFor manual driver installation, local administration rights may be required.Original OMNIKEY drivers must be locally available on your computer (for example, after internet download or from a CD).1. T o download the latest OMNIKEY drivers, go to:/omnikey , and select Download OMNIKEY drivers .2. Select your OMNIKEY product and operating system.3. From the list, select the driver for download and confirm thelicense agreement.Note: In addition, download API drivers. The SYNC-API is often required for applications with memory or contactless cards (HID iCLASS). While the CT-API is often required for PIN Pad reader use (electronic signature applications), as well as health care applications.In standard installations, installing these APIs is suggested.4. After downloading the self-extracting file, execute the file toextract the drivers to the local hard drive (default path c:\HID Global ).Note: Drivers have not yet been installed.5. Select the driver location, click Next .OMNIKEY ®Smart Card Readers(USB, ExpressCard and PCMCIA)Base Models: 1021, 3021, 3121, 4040, 4121, 4321, 5021, 5025, 5121,5125, 5127, 5321, 5325, 5326, 5421, 5427, 6121, 6221, 6321U ser G Uide3121-905-ENEN, Rev A.7December 2013© 2008 - 2013 HID Global Corporation/ASSA ABLOY AB. All rights reserved.15370 Barranca Parkway Irvine, CA 92618-2215USAPage 2December 2013© 2008 - 2013 HID Global Corporation/ASSA ABLOY AB. All rights reserved.OMNIKEY Smart Card Readers (USB, ExpressCard, and PCMCIA) User Guide, 3121-905-ENEN, A.76. Once the drivers are stored on the computer, connectthe OMNIKEY reader to the port (USB, ExpressCard, or PCMCIA) and start the installation process. When the Windows Hardware Wizard requests for the driver, select Install from a list or specific location .7. Check Include this location in search and specify thelocation where the drivers are stored (for example: C:\HID Global\5x21_V1.2.9.2). Click Next . When installation is complete, click Finished .Note: If using unsigned BETA drivers, choose the Don’t search, I will choose the driver to install radio button.After finishing the installation your OMNIKEY Smart Card Reader is ready for use.Installation CheckEnsure your device is recognized and listed in the Windows Device Manager dialog, for example OMNIKEY 5x21, in the Smart Card Reader section.Note: If you are using an OMNIKEY reader with a native CCID driver, the reader is listed as a CCID compliant device.1. Open Windows Explorer. Click Start > Programs >Accessories > Click Windows Explorer .2. Open the Device Manager. Right-click Computer >Properties > click Device Manager .3. Expand the Smart card readers and ensure the OMNIKEYreader is found.Proceed to the OMNIKEY Workbench section for testing the installation.Release NotesWhen installing with Unattended or Manual options, theReadme, and Driver Release Notes are installed by default at C:\Program Files\HID Global\HID OMNIKEY Workbench .OMNIKEY Workbench1. Download the latest OMNIKEY Workbench , by goingto: /omnikey . Select Driver Downloads .2. Select your OMNIKEY product and operating system.Choose to download the OMNIKEY Workbench and confirm the license agreement. When download is complete, click Run .Note: The OMNIKEY Workbench only works with OMNIKEY readers. Older drivers use a Diagnostic tool which is available from the control panel.Start the OMNIKEY Workbench from the program shortcut. Go to Start > Programs > HID Global > OMNIKEY Workbench .OMNIKEY Workbench provides various applications. On startup the Diagnosis application shows the General Settings view with different tabs for smart card reader service status. Alsoshown is the driver file and API DLL information.The Diagnosis application also lists all connected OMNIKEY smart card reader details (per the available contact andcontactless interface).For a functional test, insert a working smart card into the reader.As a result, an ATR string and other card details will display.。
终端机操作以及日常保养手册
终端机操作以及日常保养手册一、终端机的操作说明1、营业机使用1.1在金额消费模式时(默认模式),在放卡区放上卡后,在终端机的双面显示屏上显示卡的余额,按后键盘的数字键,输入扣款金额,按后键盘的“确认”,终端蜂鸣一声,在显示屏上排显示扣款后该卡的余额,下排显示此次扣款的金额,如果输入错误,在按“确认”键之前,可以用后键盘的“清除”键来取消输入的金额,每按一下“清除”键,则取消一位,若在按“确认”键之后,则必须到机房的电脑上进行纠错操作。
若在显示屏上显示“-----”则表示此次扣款不成功,需要再次放卡扣款。
按后键盘“确认”键之后,卡才能脱离放卡区。
1.2在定额消费模式下,此种模式无需按任何键。
终端机的下排显示屏上显示份数以及单价,把卡放在终端的放卡区,终端蜂鸣一声,在显示屏上排显示扣款后该卡的余额。
若在显示屏上显示“-----”则表示此次扣款不成功,需要再次放卡扣款。
1.3修改个人卡密码,须在金额消费模式下进行。
操作方法如下:持卡人把卡放在终端的放卡区,在终端的上排显示屏上显示此卡的余额,按前键盘的F键(此时不可把卡拿开,前键盘指的是面向持卡人),在显示屏上显示“P0----”,此时在前键盘上输入此卡的当前密码,若是第一次修改密码,卡的初始密码是“8888”,则在此时输入“8888”,按“确认”,如果在按“确定”之前,则可按“清除”键来清除输入,每按一下就清除一位数字。
密码输入正确,则显示“P1----”,此时在前键盘上输入你要更改的新密码;若在“P0----”处输的密码不正确,终端蜂鸣,且显示“PE---”,重新又回到“P0----”,直到你输入正确的卡密码,才进入下一步,显示“P1----”。
输入完成后,按“确认”键,在显示屏上出现“P2----”,此时再输入新密码,按前键盘的“确认”。
此次输入的密码必须和上一步“P1----”中输入的四位数字一致,才能正确修改密码,密码修改成功提示“P120”,如果两次输入不相符,终端蜂鸣,屏幕上“P12E”,此时需要重新放卡再次进入密码修改程序。
戴尔 Inspiron 1470 1570 服务手册.pdf_1700393817.3426936说
Dell™ Inspiron™ 1470/1570 服务手册型号:P04F 和 P04G 系列类型:P04F001 和 P04G001 注、警告和严重警告本说明文件中的信息如有更改,恕不另行通知。
© 2009 Dell Inc.。
版权所有,翻印必究。
未经 Dell Inc. 书面许可,严禁以任何形式复制这些材料。
在此文本中使用的商标:D e l l 、D E L L 徽标和 Inspiron 是 Dell Inc. 的商标;Bluetooth 是 Bluetooth SIG, Inc. 拥有的注册商标并许可 Dell 使用;Microsoft 、Windows 、Windows Vista 和 Windows Vista 开始按钮徽标是 Microsoft Corporation 在美国和/或其它国家和地区的商标或注册商标。
本说明文件中述及的其它商标和商品名称是指拥有这些商标和商品名称的公司或其制造的产品。
Dell Inc. 对其它公司的商标和商品名称不拥有任何专有权益。
2009 年 8 月 Rev. A00开始之前电池光盘驱动器模块护盖内存模块无线小型插卡币形电池电源按钮护盖键盘掌垫采用 Bluetooth ® 无线技术的内部插卡硬盘驱动器 USB/音频板 扬声器 读卡器板 系统板 处理器散热器 风扇 显示屏 摄像头 刷新 BIOS注:“注”表示可以帮助您更好地使用计算机的重要信息。
警告:“警告”表示可能会损坏硬件或导致数据丢失,并告诉您如何避免此类问题。
严重警告:“严重警告”表示可能会造成财产损失、人身伤害甚至死亡。
1 模块护盖卡舌(2 个) 2 模块护盖3 固定螺钉1 电池释放闩锁2 电池3 电池槽返回目录页面开始之前Dell™ Inspiron™ 1470/1570 服务手册建议使用的工具关闭计算机拆装计算机内部组件之前本手册提供卸下和安装计算机中组件的步骤。
除非另有说明,否则假设在执行每个步骤时均已满足以下条件:l您已经执行了关闭计算机和拆装计算机内部组件之前中的步骤。
DM542全数字步进驱动器用户手册说明书
Website: Email:*******************User’s ManualForDM542Fully Digital Stepper Drive Attention: Please read this manual carefully before using the drive!DM542Digital two-phase stepper driver 一、Introduction1. OverviewDM542 is the new digital stepping motor driver of our company. It adopts the latest 32-bit DSP digital processing technology. The driver control algorithm uses advanced variable current technology and advanced frequency conversion technology.The driver has low heat generation, small motor vibration and stable operation. Users can set any subdivision within 200~51200 and any current value within the rated current, which can meet the application needs of most occasions. With built-in micro-segmentation technology, even in the case of low subdivision, high subdivision can be achieved, and the operation at low, medium and high speeds is smooth and the noise is extremely small.The parameter internal power-on auto-tuning function is integrated in the drive, which can automatically generate optimal operating parameters for different motors to maximize the performance of the motor.2. Features3. Application fieldSuitable for all kinds of small and medium-sized automation equipment and instruments, such as: engraving machine, marking machine, cutting machine, laser phototypesetting, plotter, CNC machine tool, automatic assembly equipment, etc. It is especially effective in applications where users expect small noise and high speed.二、Electrical, mechanical and environmental indicators1. Electrical indexDescription DM542Min Typical Max UnitOutput current 0.1 - 4.2 AInput supply voltage 24 36 50 VDCControl signal input current 6 10 16 mAControl signal interface level 4.5 5 28 VdcInput signal minimum pulse width 1.5 - - usStep pulse frequency 0 - 200 KHz Insulation resistance 100 MΩ2. Operating Environment and other SpecificationsCooling Natural Cooling or Forced coolingOperatingnvironmentEnvironment Avoid dust, oil fog and corrosive gasesAmbient Temperature -5℃~+50℃Humidity 40 ~90%RHVibration 5.9m/s2MAXStorage Temperature -20℃~80℃weight about 300 g●New 32-bit DSP technology●Ultra low vibration noise●Built-in high subdivision●Parameter power-on auto-tuning function●Variable current control makes the motor heat greatly reduced●The current is automatically halved at rest●4,6,8 line two-phase stepper motor●Optically isolated differential signal input●The impulse response frequency can reach up to 500KHz (factory default 160KHz) ●The current setting is convenient, and can be arbitrarily selected between 0.1-4.2A.●The subdivision setting range is 200-51200●With overvoltage, undervoltage, overcurrent protection3. Mechanical Specifications (unit: mm [inch])*Recommend use side mounting for better heat dissipation4. Elimination of Heat1)Driver’s reliable working temperature should be <70℃(158℉), and motor working temperature should be <80℃(176℉);2)It is recommended to use automatic idle-current mode, namely current automatically reduce to 50% when motor stops, so as to reduce driver heating and motor heating;3)It is recommended to mount the driver vertically to maximize heat sink area. Use forced cooling method to cool the system if necessary.三、Pin Assignment and Description1. Pin Assignment 1)Control signal interfaceName functionPUL+ Pulse signal: pulse rising edge is valid; PUL is 4.5~28Vdc at high level and 0~0.5V at low level. In order to respond reliably to pulse signals, the pulse width should begreater than 1.5μs。
- 1、下载文档前请自行甄别文档内容的完整性,平台不提供额外的编辑、内容补充、找答案等附加服务。
- 2、"仅部分预览"的文档,不可在线预览部分如存在完整性等问题,可反馈申请退款(可完整预览的文档不适用该条件!)。
- 3、如文档侵犯您的权益,请联系客服反馈,我们会尽快为您处理(人工客服工作时间:9:00-18:30)。
I 附件
编号数量
1
23AD289e/369e/456/556/656/756、ADC285/286/365/366/456/556
注意事项:
警告
开箱后,请务必清理包装材料,勿让孩童接触。
将塑料袋套在头上有窒息的危险。
适用机型:Omnikey 5427ck
读卡器
形状
名称粘机用双面贴
感应区静电贴
安装本单元需要用时约30分钟。
安装前需要自行配备十字螺丝刀一把。
关闭电源开关(OFF) 后,到安装完成为止不能将其关闭打开(ON)。
不要用湿手或脏手插入或拔出电源插头,否则会发生触电。
避开灰尘大的场所,或附近有挥发性与可燃性物品的地方。
●●●●●
1
1
1
Omnikey 5427ck 卡机
操作手册
本次操作中的部分环节需要将右侧的挡板打开。
本单元安装于复合机的机身正面触控面板下方的前盖板
本手册提供的附件和机器的图示可能与您的实际产品略有不同。
在这种情况下, 请参照您的机器外观而非图示来执行安装步骤。
此举不会导致显著的差异变化或故障。
II 31245除下盖板后,将其后的两颗螺丝卸去将复合机扫描台右侧的三颗螺丝卸去
将机身右侧挡板打开,将内部位于触控面板右侧的两颗螺丝卸去
卡机的内嵌
将触控面板左侧背部的三颗螺丝卸去
除下盖板后,将其后的两颗螺丝卸去
697810除下盖板后,将其后的两颗螺丝卸去
除下前盖板,其背面有卡扣,用于将前盖板扣于机身金属槽
在前盖板背面的凹陷处贴上双面贴,粘贴位置以凹陷处的左线与底线为准
以卡扣为基准,同时将卡机正上方的透明凸起部分粘于双面贴上
将前盖板装回原有位置,将卡机的
USB连接线放入卡槽中
11III (i)(ii)121132U盘根目录
驱动与启用
驱动的安装
将卡机的USB接口插入复合机相应位置将存放有驱动的U盘接于机身的USB接口
进入维修模式,选择【系统2】,再选择右侧的【驱动安装】
将所有盖板装回原有位置,并在前盖
板上调整静电贴的对应位置
将静电贴粘于对应位置以作标识,用
户可持卡在此处进行刷卡验证
驱动的说明
HID/EM:MF:兼容HID Prox与EM卡片
可识别MF卡片
U盘规格:小于4G、格式FAT32
驱动名称:ICC_LDR.tar (该图仅作参考,待静电贴样图到位后替换)
本单元所使用的驱动分为两种,可以通过安装不同版本的驱动,识别不同类型的卡片。
存放位置:9.5CM
3.5CM
334(iii)12选择【验证设备2】,再选择右侧的【卡2】(部分新机型选择【卡】)
选择【结束】,待出现提示后,重启设备,即卡机启用完成
选择【安装】,再选择【可加载驱动程序】,然后选择【开始】卡机的启用
进入维修模式,按【停9】,选择【管理功能选择】
待出现提示后,重启设备,即卡机驱动安装完成。