UC-3281_微型高压恒流泵_说明书_秦方科技
高压恒流泵检查步骤

高压恒流泵检查步骤高压恒流泵检查步骤一、LC-P100高压恒流泵右侧面示意图二、将流动相瓶(流动相需预先过滤并脱气)放在实验台台面上(不能放在仪器顶部)。
三、将与泵的输出口(也就是上图中的高压液流输出口,下同)相连的镙帽旋开,在泵的输出口位置接一根PEEK管(长度不限)。
四、打开排空阀,用针筒从排空管的出口端缓慢抽出约15毫升的流动相(针筒抽的同时需要将PEEK管的出口端用手指按住),以排出泵头内部的气泡。
(如果没有流动相被抽出,说明单向阀堵塞,请处理单向阀后再重复本步骤的操作,正常后再进行下一步操作。
)注:多数时候都是输入单向阀堵塞,请先处理输入单向阀,必要时再处理输出单向阀。
五、关闭排空阀(不能连接色谱柱)。
打开泵电源,按“设置”键7次,选择冲洗功能,排出泵内部管路中的气泡(注:冲洗时不接色谱柱,否则将冲坏柱子)。
观察是否有连续的液体流出?如果流动相是连续地流出,进行下一步检测;如果流动相断断续续地流出,说明某一个单向阀工作不正常(请处理单向阀后再进行第四步操作)。
六、通过仪器面板上的按键来设置流量为1毫升/分钟。
按“启动”键。
观察PEEK管的出口处是否有液体滴出(约2-3秒钟1滴,PEEK 管的出口端的水平高度应高于流动相瓶内的液位高度)。
如果有液体滴出,直接进行第八步操作。
如果没有液体滴出,进行下一步检测。
七、打开泵的机壳,观察电机是否转动(此时泵应处于运行状态)?如果电机没有转动,一般需返厂检修(请与我公司技术人员确认后再寄回我公司)。
如果电机在转动,进行下一步检测。
八、在PEEK管的出口端接一根色谱柱,色谱柱的出口处接到废液瓶。
设置流量为1毫升/分钟,按“启动”键。
观察色谱柱出口端是否有流动相滴出?观察柱压情况。
正常的情况应该是柱压先缓慢升高,然后稳定(压力稳定后脉动一般不超过0.2MPa),同时色谱柱出口端有液体流出,说明泵已工作正常,无需进行下面的测试,按以前的方式将管线连接好后即可。
高压液体泵使用说明(北京秦方)
F____ 输液泵当前流速, 可编辑。 单位: mL/min P____ 输液泵当前压力, 不可编辑。 单位: MPa
按▼进入流速设置菜单,如下
F: 1.00
此时按 Enter 键光标置于个位位置
F: 1.00
该设置区为个位数设置,通过 ▲、▼键增大减小,长按可加快数值 的变化。输入范围:0~9(10mL 泵头) ;0~49(50mL 泵头) 再按 Enter 键光标置于百分位位置
LC-3060 HPLC Pump
前
言
感谢您选用我公司微型高压输液泵,能成为我们的用户,是我们莫 大的荣幸,我们将竭诚为您提供优质服务。 为了使您能尽快掌握该产品的操作及简单的日常维护,特提供以下 操作手册。
特别说明
该泵可以由实验室工作人员,工厂试验人员或者经过培训的人员及 具有此方面职业经历的人员来操作。 本手册是该仪器必备文件,建议将其放置于仪器的旁边以备工作人 员随时查阅。 工作人员在使用仪器的过程中,应对自己的操作指令负责。对仪器 的修正工作必须在咨询过制造商并取得书面认可之后方可进行。
-8-
LC-3060 HPLC Pump
操作
该产品有两种操作模式,可以通过仪器独立控制,也可以通过计算 机反控工作站软件进行控制。若需要运行梯度,则必须使用反控工 作站软件进行控制。
菜单及操作介绍
上电后即进入主菜单,显示的参数为上次关机时的参数(10mL 泵头 为例) :
F: 1.00 P: 0.0
! 注意:
只有在主菜单下才可以执行“Run/Stop”以及“Purge” 当进行“Purge”时,默认值为 5mL/min,显示界面如下
Fpu:5mL P: 0.0
! 注意:
在任何非主菜单页面均可通过长按 Enter 键返回到主菜单。 按▼进入下一个菜单
iChrom P5100 高压恒流泵 用户手册说明书

iChrom P5100高压恒流泵用户手册声明本手册仅供用户了解、使用和维护P5100系列高压恒流泵,大连依利特分析仪器有限公司不对该手册及其引起的商务和特殊用途承担责任。
本手册中的内容如有更改,恕不另行通知。
本手册在出版时,经过了仔细审核,被认为是准确和完整的,大连依利特分析仪器有限公司对手册中可能出现的错误及由此引起的偶发或续发性伤害不负有责任。
任何情况下,大连依利特分析仪器有限公司不对因使用本手册及设备引起的后果承担责任。
本手册版权归大连依利特分析仪器有限公司所有,未经本公司授权,任何单位及个人不得将本手册全部或部分内容进行复制、转载或翻印。
前言感谢您购买本公司的仪器,为了使您更好地使用该设备,在使用仪器前请仔细阅读用户手册的内容。
本用户手册详细叙述了仪器的组成、安装、使用、维修、配件选择及相关注意事项,请根据内容正确使用。
阅读后请妥善保管,以备不时之需。
出借、转让本仪器时请将用户手册随机交付。
为安全操作,预防危险事故的发生,请务必在使用仪器前阅读以下的《安全注意事项》。
安全注意事项此处说明是与安全操作有关的重要事项,务必遵守。
本手册按照危险与损害的级别,将安全标志划分为以下三类:【警告】如不遵从此类操作,可能引起重大人员伤亡或物质损害。
物质损害指仪器损害及周围环境损害。
【小心】如不遵从此类操作,可能引起较小的人身伤害或物质损害。
较小的人身伤害指不需住院治疗就可治愈的伤害;较小的仪器损害指经过简单维修,仪器就可恢复正常使用的损害;较小的环境损害指没有对周围环境造成大的危害。
【注意】用于帮助使用者正确操作仪器,否则可能会引起不必要的仪器损伤或得不到正确的实验结果。
1.用途注意事项【警告】本机仅作为高效液相色谱仪的一个模块设备,不得在指定用途外使用,否则有引发意外事故的可能。
除有特殊说明外,本仪器不具备防爆功能。
2.场地注意事项【警告】高效液相色谱仪整机使用时,会用到大量的有机试剂,这些有机试剂大部分具有毒性与可燃性,为防止火灾的发生,室内必须通风良好,附近严禁烟火,严禁放置或使用其它可能引起火花的设备。
Micropac液压手泵说明书

l Double acting - pumps on up and down strokes l 316 stainless steel/ bronze construction l Five models cover max. pressures 50 - 700 bar l Compatible with water, oil and other liquids l Reliable- British design & manufacture l Sturdy construction- for extreme environments l Long life hard chromed stainless piston rod l Soft-seat check valve for positive sealing l Pressure gauge, release & relief valve options l User serviceable sealing & seating components l Detachable 450mm or 625mm operating handle l Nitrile seals standard - optional EPDM/ Viton®l Universal mounting orientationl Optional range of 316 fixed mounting reservoirs F E AT U R E SMicropac Hydraulic Hand Pumpfor Potentially Explosive AtmospheresADJUSTABLE RELIEF VALVE(WHERE FITTED)PRESSURE HOLD/ RELEASE VALVE (WHERE FITTED)SPIGOT FOR DETACHABLE450/625mm OPERATING HANDLE4 x 316 FIXING SCREWS SUPPLIED FOR RESERVOIR/PLATE MOUNTINGINLET HOSE ADAPTOR FOR SUCTION TUBE & STRAINEROPTIONAL STANDPIPE/ NPT ADAPTOR9/16"-18 UNF/SAE OUTLET PORT (700 BAR MODEL: G3/8) WITH G1/4 MALE ADAPTOR63mm PRESSURE GAUGE (OPTIONAL)TYPICAL APPLICATIONS: HYDROSTATIC & LEAK TESTING PRESSURE TEST RIGS HYDRAULIC TEST STANDS FILLING & CHARGINGHYDRAULIC CYLINDER ACTUATIONMANUAL OVER-RIDE/ SHUTDOWN SYSTEMSin® SEE OVERLEAF FOR SUITABILITY TO ENVIRONMENTUKEX, ATEX and IEC Ex certifiedAtmosphereAll equipment intended for use in potentially explosive atmospheres is marked in accordance with the requirements of the Equipment and Protective Systems Intended for use in Potentially Explosive Atmospheres Regulations 2016, the ATEX Directive 2014/34/EU, and BS EN ISO 80079-36:2016 .The product nameplate showsŸthe manufacturer (Sarum Hydraulics Ltd.)Ÿthe product type identificationŸthe UKCA marking, denoting conformity with the Equipment and Protective Systems Intended for use in Potentially Explosive Atmospheres Regulations 2016Ÿthe CE marking, denoting conformity with all the essential requirements of the ATEX Directive 2014/34/EUŸmarking as detailed below, denoting the compatibility of the equipment within the operating environment, firstly as defined by the Equipment and Protective Systems Intended for use in Potentially Explosive Atmospheres Regulations 2016 and the ATEX Directive 2014/34/EU and then as defined by the requirements of BS EN ISO 80079-36:2016Ÿserial numberŸcertificate issuer and reference in the defined formAccording to the Equipment and Protective Systems Intended for use in Potentially Explosive Atmospheres Regulations 2016 and the ATEX Directive 2014/34/EU, the marking denotes that the equipment is non-electrical intended to be used in Surface Industry classified as both Gas Explosive Atmosphere - Zone 1 and Explosive Atmosphere of Combustible Dust - Zone 21.According to BS EN ISO 80079-36:2016, the marking denotes that the equipment is non-electrical conforming to this standard both for EPL Gb for use in explosive gas atmospheres of Group IIC and ignition temperature greater than 85 °C, and for EPL Db for explosive dust atmospheres containing dusts of Group IIIC and maximum surface temperature less than 85 °C.MediaSubject to suitability of materials of construction, the unit is compatible for operation with group 1 liquids up to 500 bar and group 2 liquids up to 1000 bar according to the classification of liquids under the Pressure Equipment Directive 2014/68/EU, which cross refers to the Classification, Labelling and Packaging (CLP) Directive 1272/2008. These may be summarised as follows, but the text of the Directive Article 13 paragraph 1 fully defines those substances categorised as groups 1 and 2.Group 1: explosive, extremely flammable, highly flammable, flammable (where the maximum allowable temperature is above flashpoint), toxic, serious health hazards, oxidising Group 2: all other liquidsElastomer sealing options are nitrile, fluorocarbon and ethylene propylene, specified at the time of ordering.Please consult with the factory if in doubt.CertificationThis equipment is supplied with a Declaration of Conformity in accordance with the requirements of either the Equipment and Protective Systems Intended for use in Potentially Explosive Atmospheres Regulations 2016, or the ATEX Directive 2014/34/EU, or BS EN ISO 80079-36:2016. Any modificationto the equipment by a third party may invalidate the certification.II 2 GEx h IIC T6 GbII 2 DEx h IIIC T85°C DbSUITABILITY FOR THE OPERATING ENVIRONMENTINSTALLATION & MAINTENANCEINSTALLATION continuedused. Lower the pump into position and secureusing the four M8 x 65 long socket head cap screws supplied, tighten evenly to a torque of 15Nm.Before mounting the reservoir, consider ergonomics of pump handle operation; refer to pump dimensions section. Mount the reservoir on a surface that can withstand handle forces during pumping to maximum required pressure. Use the mounting holes provided; fixings are not supplied.Remote mounting: mounting detail as for reservoir. Make connection to inlet using suitable coupling, ensuring media is filtered.CONNECTIONSThe outlet connection is a 9/16" UNF SAE female port (G3/8 on 7cc/ 700 bar unit); a G1/4 male 60° coned adaptor is fitted as standard. Make connection to system using suitable swivel nut & nipple, or female adaptor fitting.The pressure gauge port is G1/4 flat bottomed and is plugged where a pressure gauge is not MISSIONINGThe reservoir may be filled by unscrewing the filler cap and topping up to desired level with clean fluid; do not over fill. Where fitted, use the dipstick to determine fluid level. Always refit filler cap after top up.Fit operating handle to handle spigot. If fitted, close the soft seat release/ hold valve by screwing knob in fully clockwise; do not overtighten. Operate the handle by moving up and down until maximum required pressure is achieved. Check for leaks in the system.To release pressure, unscrew release/ hold valve knob, slowly for a controlled release.To set relief valve, remove cap, adjust set screw whilst operating hand pump to achieve maximum pressure requirement, then refit cap.MAINTENANCEMaintenance operations should only be carried out by a competent service engineer.The inlet and outlet check valves are serviceable and employ replaceable seats. Service kits are available comprising all seals, seats, balls and springs.The pump inlet strainer should be checked periodically for fouling. To do this, the pump should be removed from the reservoir; ensure that the mounting gasket is in good condition when refitting, and that the pump mounting screws are sufficiently tightened to effect a seal between the pump and reservoir.The reservoir media should be kept clean.If using aqueous media, ensure that the reservoir is protected from low temperatures to prevent against risk of freezing.Sarum Hydraulics Ltd also offer a servicing facility; please advise before returning the unit to us.APPLICATIONPlease refer to page 2 when determining suitability for operation in a potentially explosive atmosphere.This equipment is suitable for use in both indoor and outdoor applications; the 316 stainless steel construction makes it ideal for saline environments. A range of stainless steel reservoirs is also available. The hydraulic hand pump provides manual hydraulic power for a range of applications such as manual back up systems and hydrostatic testing. It is fitted with a soft seat outlet check valve and is thus ideal for leak testing. Pumping operation is double acting; fluid is displaced on both the up and down strokes.The pump is available in 5 displacement per double stroke/ maximum pressure ranges; 7cc/ 700 bar, 12cc/400 bar, 25cc/ 200 bar, 49cc/ 100 bar, and 100cc/ 50 bar.Please refer to page 2 for compatibility with group 1 and group 2 liquids, and check materials of construction are compatible with the operating media. Sealing options are nitrile, fluorocarbon and ethylene propylene elastomers, specified at time of ordering.Depending on specification, the pump may be fitted with a soft seat pressure hold/ release needle valve, an adjustable pressure relief valve, and a pressure gauge.The 316 polished stainless steel operating handle is detachable and measures 450mm or 625mm.The pump is intended for direct mounting onto a suitable reservoir, but can also be remote mounted and piped into a system- contact factory for connection options.MATERIALSThe materials of construction are 316 stainless steel, aluminium bronze, UHMWP , PTFE and elastomeric sealing.SAFETYThis unit is a component forming part of a hydraulic pressure system. If forming part of a permanent installation, the system should be designed, operated and maintained in accordance with statutory requirements and other relevant instructions. A risk assessment covering safe installation, operation and maintenance should always be carried out prior to use.INSTALLATIONThe pump can be mounted vertically or horizontally; the pump inlet has to be fully immersed in the pumped media at all times.Reservoir mounting: refer to pump dimensions section for mounting interface detail. The reservoir top plate requires cut outs for the pump barrel, relief and release drain ports and four M8 tapped holes for pump mounting. The reservoir should be vented to atmosphere. Cut the pump dip tube and filter assembly so that the filter end touches the reservoir base. The inlet hose connector is designed to accept 9.5mm i.d. nylon tube (12mm i.d. on 100cc units). Push the tube onto the barbed pump inlet. Locate the mounting gasket supplied with the pump onto the reservoir top plate such that the release/relief valve drain holes align. No jointing compound should bePROTECTING THE ENVIRONMENTDESIGNED FOR LIFEDIMENSIONSSPECIFICATIONNom. operating hand load (625mm, max. pressure): 460N Compatibility: group 1 and group 2 liquids- see page 2 for full details. Typical applications; water, water-glycol, mineral oil (nitrile seals). Fluorocarbon and EPDM sealing options- check compatibility first; if in doubt, consult factory.Ambient operating temperature range: -20 to 40°C Media operating temperature range:Nitrile: -35 to 80°CFlurocarbon: -26 to 80°C EPDM: -50 to 80°C Weight: 7kgFor reservoir specifications , please refer to our MR Displacement/ double stroke, max. operating pressure:MW-3-7: 7cc, 700 bar MW-3-12:12cc, 400 bar MW-3-25: 25cc, 200 bar MW-3-49: 49cc, 102 bar MW-3-100: 100cc, 50 bar Max. flow (typical):100cc/stroke = 4 litres/ minute 50cc/ stroke = 2 litres/ minute 25cc/ stroke = 1 litre/ minute 12cc/ stroke = 0.5 litres/ minute7cc/ stroke = 0.3 litres/ minuteCIRCUIT DIAGRAM- RELEASE AND RELIEF VALVES SHOWNSarum Hydraulics LimitedUnit 1 Danebury Court, Salisbury, SP4 6EB, UK Tel: 44(0)1722 328388 Fax: 44(0)1722 414307email:*****************************.uk We invest heavily and continuously in product development.Specifications are therefore liable to change without prior notification.ORDERING CODES FOR PUMP AND RESERVOIRWe are a long established ISO 9001:2015 certificated designer and manufacturer of hydraulic equipment.Full details of other products in our range are available from:。
恒流泵使用步骤及注意事项 恒流泵如何操作

恒流泵使用步骤及注意事项恒流泵如何操作恒流泵是一种可定量加液或抽液的科学仪器,该仪器具有:输送流量稳定、连续可调、输送物质不与外界接触,可防止污染及体积小、重量轻、性能牢靠等优点。
因此,恒流恒流泵是一种可定量加液或抽液的科学仪器,该仪器具有:输送流量稳定、连续可调、输送物质不与外界接触,可防止污染及体积小、重量轻、性能牢靠等优点。
因此,恒流泵广泛使用于各厂矿企业、大专院校、医院及科研单位,并成为生产和科研试验中必不可少的仪器设备之一,凡是需要微量、定量输液或抽液的场合均可使用。
恒流泵使用步骤:1、在第一次使用恒流泵的时候,首先将调速旋钮调到最小位置,然后接通电源,此时指示灯亮、“T”字轮开始运作,调整调速旋钮,察看仪器转动是否正常,正常后即可使用。
2、流量是由调速旋钮来掌控,流量可在1—600毫升/小时范围内连续可调。
3、调距板(即泵头前后的滑动板)的调整螺丝是用于调整液体压力的,一般只要拧到有液体流动即可,调整时需要注不要拧的太急、太紧,否则滚子会拧死。
4、使用恒流泵的顺逆开关,可以更改流量反向,会使加液体更改为抽液,加压更改为抽压。
5、加速(按钮)开关的作用紧要适用于在较慢转速时不更改原来流量清洗管道时使用。
6、依据需要可在硅胶管两端再接上其他管子,将液体输送到需要的地方去。
恒流泵备有两种规格的管子,可依据流量需要选用,使用粗管子时,只要将粗管子置于粗管槽内即可。
恒流泵使用注意事项:1、使用恒流泵时调压板不要请不要在拧得太紧,以免“扎死”泵头,一般调到有液体流出即可,以免泵头,硅胶管在泵头内部应涂上润滑油,以延长其使用寿命。
2、泵头在快速运转中,切勿按动“顺/逆”开关,若要按动,则先将速度调慢后再按动,然后再将速度至原来速度,即将电压表读数调至原来值。
3、恒流泵在使用期间,应随时注意硅胶管是否完好,一般在中速情况下运转为佳,当发觉硅胶管使用老化时,应适时更换硅胶管。
当恒流泵开始运转时,硅胶管可能有向一端肿起现象,可用手拉直即可。
陕西亚成微电子股份有限公司 RM9026A B 双电压高压线性恒流芯片说明书

产品概述:RM9026A/B是一款高压线性全电压LED 高压驱动芯片,可以根据输入电压的高低切换灯珠的串并联方式,兼容120Vin和230Vin 两种工作模式,主要应用于球泡灯,吸顶灯等LED光源模组。
高PF或者无频闪应用,内置600V集成MOS。
RM9026A恒功率,线电压补偿模块可以有效的抑制电压波动时候输入功率的变化,线电压在一定的范围里波动时,芯片可以保持一定的恒功率的功能。
RM9026B支持PWM调光/模拟调光功能。
应用领域:⏹LED日光灯管T5/T8/T10…⏹LED灯丝灯/球泡灯/蜡烛灯…⏹其它小功率的LED电光源典型特点:⏹灯串串并联方式芯片控制自动转换⏹内置500V高压MOS,最大输出电流2*100mA⏹RM9026A具备功率补偿功能⏹RM9026B具备数字模拟调光功能⏹芯片具有过温保护功能⏹芯片应用无EMI问题⏹应用于球泡灯、投光灯、筒灯等管脚定义:RM9026A RM9026B 管脚说明:管脚名称管脚描述OUT1内部集成高压MOS漏端VCC供电端口VSP线电压检测端口CS1电流检测端口CS2电流检测端口CP功率补偿端口DIM模拟/数字调光端口SPC串并联控制端口OUT2内部集成高压MOS漏端GND芯片地典型应用:产品型号说明:产品型号具体说明RM9026A双压恒功率OTP140℃RM9026B双压DIM调光OTP140℃极限参数:符号参数参数范围CS电流采样输入电压-0.3V to7VTJ工作结温范围-40℃to150℃Tc工作温度-40℃to100℃TSTG储存温度范围-55℃to150℃注:极限值是指超出该工作范围,芯片有可能损坏。
推荐工作范围是指在该范围内,器件功能正常,但并不完全保证满足个别性能指标。
电气参数定义了器件在工作范围内并且在保证特定性能指标的测试条件下的直流和交流电参数规范。
对于未给定上下限值的参数,该规范不予保证其精度,但其典型值合理反映了器件性能。
电气参数:(无特别说明情况下,TA=25℃)符号参数测试条件最小典型最大单位VCC_ONVCC启动电压V CC=10V,DIM/CP悬空141uA V CS1/V CS2CS参考电压600mVI OUT输出电流驱动能力V OUT=30V5100mAV OUT集成MOS漏端耐压V OUT=30V500VF DIM PWM调光频率范围2001000HzV DIM模拟调光输入范围输出功率0%~100%0 1.2V I_DIM调光脚输出电流30uAICP 流入CP端口电流有效控制VCS电流范围0500uAOTP过温调节RM9026A&RM9026B140℃OTP过温调节RM9026AB&RM9026BB125℃订购信息:订购型号封装形式包装方式卷盘尺寸编带RM9026A ESOP-84000只/盘13寸RM9026B ESOP-84000只/盘13寸。
恒流恒压(闭环)控制板使用说明书
恒流恒压恒流恒压((闭环闭环))控制板JP JP--HLHY HLHY--6使用说明书使用说明书目 录一、用途及特点............................................................................................1 二、技术参数................................................................................................1 三、型号义释................................................................................................1 四、控制板外型尺寸控制板外型尺寸、、主要元器件及端子说明........................................1 五、接线示意图............................................................................................3 六、故障分析 (3)一、用途及特点1、该控制板配合晶闸管智能模块可实现恒流或恒压控制功能,广泛应用于电动机或发电机励磁、蓄电池充电、各类电源等。
2、该控制板设计独特、外型美观,该控制板带有金属屏蔽罩可屏蔽干扰、保护控制板且方便安装。
3、该控制板采用霍尔传感器取样,控制精度高(恒流、恒压精度均≤1%)、稳定性好、采样电路与控制电路隔离、安全可靠。
4、该系列恒流恒压(闭环)控制板适应主电路额定输入电压范围宽(交流380V、660V、1140V)。
应按照铭牌中所标电压对应使用。
二、技术参数1、控制电源:+12±0.5V/1A、-12±0.5V /0.3A。
成都海汛流体科技有限公司 MNY 系列微型调速水泵 说明书
MNY系列微型调速水泵说明书前言首先非常感谢您选择成都海汛流体科技有限公司的产品。
您购买的产品、服务或特性等受成都海汛流体科技有限公司相关合同和条款的约束,本文档中描述的全部或部分产品、服务或特性可能未包含在您的购买或使用范围之内。
除非合同另有约定,成都海汛流体科技有限公司对本文档内容不做任何明示或暗示的声明或保证。
由于产品版本升级或其他原因,本文档内容会不定期进行更新。
除非另有约定,本文档仅作为使用指导,本文档中的所有陈述、信息和建议不构成任何明示或暗示的担保。
摘要本文为MNY系列微型调速水泵相关说明,用于指导相关技术人员了解该产品特性。
读者对象本文档适用于产品使用人员和相关技术人员。
您非常了解您的产品,并对所需微型泵的相关参数、规格大小等信息有明确概念。
关键字水气两用、PWM调速、保护功能、转速反馈、关键参数、操作说明版本记录成都海汛流体科技有限公司地址:成都市武侯区武科西一路85号网址:目录前言 (1)目录 (2)1产品特征 (3)1.1产品命名 (3)1.2水气两用 (3)1.3长寿命、低干扰 (3)1.4调速功能 (3)1.5转速反馈 (4)1.6保护功能 (4)1.7免维护、无污染传输 (4)1.8耐腐蚀性良好 (4)1.9安装无限制 (4)2产品认证 (5)3技术参数 (6)3.1关键参数 (6)3.2抽水、排水高度 (6)3.3产品版本 (7)3.4使用条件 (8)3.5产品材质 (9)3.6过滤问题 (9)3.7噪音和消音器 (9)3.8配套管径 (9)3.9电机启动电流 (9)4操作说明 (11)4.1信号线说明 (11)4.2接线说明 (12)5注意事项 (14)6三维尺寸图 (15)7产品外观 (16)1产品特征1.1产品命名□□□□□□□□-□□□版本代码:1是简化版,2是标准版,3是品质版。
控制特征代码压力代码:表示负压/正压级别。
电压代码:1是12V,2是24V,3是5V,4是12V以下不包含5V,5是12~24V中间电压,6是24V以上电压。
AHL系列空气驱动高压液体泵操作与维护手册说明书
AHL Series PumpAir Driven, High Pressure Liquid Pump Operation and Maintenance Manual Manual: 02-9242ME | April 2022Operation & Maintenance Manual | 04/2202-9242ME : AHL Series Pump2FAILURE, IMPROPER SELECTION OR IMPROPER USE OF THE PRODUCTS AND/OR SYSTEMS DESCRIBED HEREINOR RELATED ITEMS CAN CAUSE DEATH, PERSONAL INJURY AND PROPERTY DAMAGE.This document and other information from Parker Hannifin Corporation, its subsidiaries and authorized distributors provide product and/or system options for further investigation by users having technical expertise. It is important that you analyze all aspects of your application and review the information concerning the product or system in the current product catalog.Due to the variety of operating conditions and applications for these products or systems, the user, through its own analysis and testing, is solely responsible for making the final selection of the products and systems and assuring that all performance, safety and warning requirements of the application are met.The products described herein, including without limitation, product features, specifications, designs, availability and pricing, are subject to change by Parker Hannifin Corporation and its subsidiaries at any time without notice.ALL PARKER VALVES MUST PASS A RIGID OPERATIONAL AND LEAKAGE TEST BEFORE LEAVING THE FACTORY. IT IS RECOMMENDED AFTER ANY REASSEMBLY, THE VALVE SHOULD BE TESTED BY THE USER FOR OPERATION AND LEAKAGE. IF THESE INSTRUCTIONS ARE NOT FULLY COMPLIED WITH, THE REPAIRED PRODUCT MAY FAIL AND CAUSE DAMAGE TO PROPERTY OR INJURY TO PERSONS. PARKER HANNIFIN CANNOT ASSUME RESPONSIBILITY FOR PERFORMANCE OF A CUSTOMER SERVICED VALVE.Live Chat Support is available from /IPD when the Chat icon “ ” is visible on screen.Parker Instrumentation Products Divison (IPD)02-9242ME : AHL Series PumpOperation & Maintenance Manual | 04/223Product DrawingsTypical Pump Cross Sectional View ....................................................................................4 AHL Pump Dimensional View (5)Operation & Maintenance Information1.0 Introduction ............................................................................................................ 62.0 Meaning of Safety Words .......................................................................................... 63.0Product Specification (6)4.0 Unpacking ..............................................................................................................65.0 Tools ...................................................................................................................... 66.0 Installation .............................................................................................................. 7 6.1 Compressed Air Supply ........................................................................................... 7 6.2 Liquid Section ......................................................................................................... 87.0 Pump Start-Up ........................................................................................................ 88.0 Process Media ........................................................................................................ 99.0Pump Functionality (10)10.0 Suggested Maintenance (10)T roubleshooting Information11.0 Repair Kit Options ................................................................................................. 11 12.0 AHL Series Drawings ............................................................................................. 12 13.0 Trouble Shooting-Pneumatic Section ...................................................................... 15 14.0 Trouble Shooting-High Pressure, Liquid Section .. (16)15.0 Service (16)T able of ContentsPageOperation & Maintenance Manual | 04/2202-9242ME : AHL Series Pump4Typical Pump: Cross Sectional View(ASL Pump Shown)02-9242ME : AHL Series PumpOperation & Maintenance Manual | 04/225AHL Pump Dimensional ViewNote:• Each Mounting Bracket includes (2) 9/16" (14.29) holes for 1/2" Bolts.• Primary Dimensions: Inches• Secondary Dimensions: (Millimeters)6Section 3.0 Product SpecificationsSection 1.0IntroductionThe Parker Autoclave Engineers pump discussed in this manual is operated using compressed air up to 110 psi (7.6 bar) max, however maximum inlet air pressure is limited by the maximum liquid output pressure. Autoclave Engineers AHL Series pumps are used for pumping oil, water, and oil/water mixtures.Special seals are also available for chemical service. Please contact Parker Autoclave Engineers to discuss availability of special seals. The pump operates using a pressure ratio of the air piston surface area to the liquid plunger surface area.(Output liquid pressure = actual pump pressure ratio x input air pressure). Refer to the product literature for eachpump model’s actual air pressure ratio.Section 2.0Meaning of Safety WordsA safety related message is identified by a safety alert symbol and a signal word to indicate the level of risk involved with a particular hazard. The definitions of the three signal words are as follows:Special notes intended to bring attention to procedures that must be followed to ensure proper installation and performance will be placed in a box labeled NOTICE.Section 4.0The pump has been assembled and pressure tested at Examine all material within the container and checkSee assembly drawing for product specifications:- Pump Geometry- Pump Materials of Construction- Maximum Allowable Working Pressure- Maximum Working Temperature- Pressure Ratio- Displacement- Repair Kit Part Numbers- Torque Information- WeightsUnpackingParker Autoclave Engineers and is ready to be put into service. The shipping carton should be opened and the contents carefully examined upon receipt from the carrier. Make sure there is no obvious damage to the contents. DO NOT use the equipment if any damage is evident. If damage has occurred, file a claim with the shipper before contacting Parker Autoclave Engineers Service Department.against the packing list to be sure all items are accounted for and are not damaged. Verify that the equipment model number supplied agrees with what was ordered.Section 4.0UnpackingAt minimum, the tools required for installation of the pump include a torque wrench, an open end wrench adapter (crows foot adapter) and an open end adjustable wrench. Refer to the Tools, Maintenance and Installation Manual provided with the Data Book for information on torque wrenches and torque values for Parker Autoclave Engineers tubing and fittings.Section 5.0ToolsOperation & Maintenance InformationOperation & Maintenance Manual | 04/22 02-9242ME: AHL Series Pump02-9242ME : AHL Series PumpOperation & Maintenance Manual | 04/227Section 6.0InstallationSection 6.1Compressed Air SupplyUnless otherwise noted, all air line accessories for the pump air drive should have, at minimum, a 1/2" FNPT connection. The tubing/piping used to connect the components should have the maximum ID the pressure rating will allow. Reducing the size before the air inlet will reduce air pressure flow andreduce flow rate of the pump.NOTICEThe main air drive connection port on the pump is afemale 1" FNPT and is located in the spool base housing. An additional female 1/8" FNPT air pilot valve connection port is located in the middle plate at the opposite side of the 1" NPT air inlet.This pilot connection must be plumbed to an unregulated and filtered air source. The purpose of this connection is to aid in low pressure differential start-up and restart of the pump while providing a more accurate pressure control. The pump will not function if this unregulated air supply is not connected to the pilot valve supply port.The use of an air line lubricator is not required and is not recommended. The oil in the air lubricator will cause the factory installed grease to be purged from the pump. Once an air lubricator is used the pump can never again be operated withoutan air lubricator.NOTICEAn air line filter with a minimum 5 microns filtration rating must be used on the supply line. If the air supply is not dry, a mist separator must be used to remove moisture in the air line.The pump is designed to function from 20 psi to 110 psi (1.4 to 7.6 bar) air input pressure, however maximum inlet air pressure is limited by the maximum liquid output pressure.Operation & Maintenance Manual | 04/2202-9242ME : AHL Series Pump8Section 4.0UnpackingAll AHL series pumps have high pressure liquid outletports located on the side of the pump head’s. The suc-tion inlet ports on all AHL series pumps are positioned opposite of the inlet checks.Inlet: A liquid filter with at least a 100 mesh size must be installed before the suction port inlet to preventdamage to the check valves and high pressure seals due to debris.Section 6.2Liquid Section For best performance, a liquid supply reservoir should be located higher than the inlet gland on the pump to create a small pressure head. Be sure to make an air tight seal between the reservoir and the pump inlet connection. The connections between the reservoir and pump inlet should not be reducedfrom the FNPT connection size.NOTICERefer to product literature for inlet connection details for each pump. The tubing or piping should be made from a corrosion resistant material and sized with a maximum ID to fit the inlet pipe connections.Restricting flow at the liquid inlet will cause problems with check valve performance and reduceoutput flow.NOTICEOutlet: The outlet tubing ID must, at minimum, match the same size of the pump check valve gland port. Refer to product literature for outlet connections details for each pump. Reducing outlet tubing or connection will reduce output liquid flow capacity.Section 4.0UnpackingSection 7.0Pump Start-Up Air Line SchematicAs shown above, a filtered main air supply line is required. The air line then must be split through a tee. One line will attach to the 1/8" FNPT pilot valve connection in the middle plate of the pump.The air pressure on this connection must be higher than the regulated main air supply on the air drive section. The second line out of the tee will go to a pressureregulator which can be set to achieve the desired output liquid pressure according to the pressure ratio of the pump.In order for the pump to flow properly, both outletsmust be plumbed together into a tee to onesingle outlet.NOTICEAIR02-9242ME : AHL Series PumpOperation & Maintenance Manual | 04/229The pumps unique design allows for self priming.To prime, regulate the air pressure to between 5-15 psi or use an air flow regulator to reduce to a slow stroke frequency. With the high pressure side connected to a vented system, allow the pump to cycle till a consistent flow of liquid is achieved. Let the pump flow freely to purge any air in the liquid system. Loosening the outletgland or pipe can also assist in priming the pump.Increase the air pressure using the air pressure regulator until you achieve your desired output liquid pressure. At this point the pump will stall. You can calculate the output pressure by multiplying the input air supply by the actual pressure ratio of the pump. The pump will automatically restart if there is a drop in downstream high pressure.Section 4.0UnpackingSection 8.0Process Media Parker Autoclave Engineers pumps discussed in thismanual are used for pumping oil, water and oil/water mixtures. Special seals are also available for chemical service. Please contact Parker Autoclave Engineers todiscuss availability of special seals.Pumps are not designed to run for long periods of time without liquid process media. Short, dry pumping cycles should not be a cause for concern.However, pumps are built using lubricant in the seal areas and pumping without fluid will wear away lubricant and compromise the seal .The operating temperatures of the pump are between 0°F to 140°F (18°F to 60°F).Operation & Maintenance Manual | 04/2202-9242ME : AHL Series Pump10Section 4.0UnpackingSection 9.0Pump Functionality When the pump is installed, maximum system air isconnected to 1/8" FNPT pilot air inlet and is sealed off by pilot valve assembly in the top end cap and does not enter the spool housing. Regulated air is connected to the spool housing at the 1" FNPT pump inlet.1. Regulated inlet air pressure enters the spool housing and is diverted to the air cylinders and their pistons, which causes one p lunger to build pressure in one of the hydraulic pump heads while the second plunger performs asuction stroke that will pull liquid into the second hydraulic pump head.2. When a hydraulic pump head is in the suction stroke, the plunger is moving away from the head causing the inlet check valve to open, which allows liquid to be drawn into the head while the outlet check valve is forced closed.3. When the hydraulic pump head is buildingpressure, the plunger is moving toward the head compressing the fluid and forcing the inlet check valve to close and the outlet check valve to open.4. The air pistons continue to move until a pistonhits the pilot valve assembly in the end cap.5. The pilot control valve shifts allowing max system air pressure to shift the spool valve so that it now directs air drive pressure through to the opposite side of the pistons in the air cylinders and pushes the air piston and liquid plunger in the opposite direction.6. While the air drive pressure is acting on the pressure side of the piston, the opposing area of the piston’s are vented through the exhaust mufflers.7. This action causes the reverse action of step #1 (the suction head will change to acompression stroke, while the pressurize head will change to a suction stroke).8. The air pistons continue to move until a piston hits the pilot valve assembly in the second end cap which will again cause the spool to shift and divert air to move the pump in theopposite direction.Section 4.0UnpackingSection 10.0Suggested MaintenanceA.Before each pump use, a quick inspection should be performed to insure there are no loose bolts, nuts, set screws or check valve glands. Tighten any lose bolts and fittings according to the torque values listed on the pump assembly drawing. A visual inspection should also be made before each use and at startup to make sure there is no evidence of fluid leaks from isolation chamber drain ports, check valves connections and muffler. If liquid mists out of the muffler for more than 5 strokes, it is time to replace your hydraulic high pressure seals. Refer to the troubleshooting guide for solutions to these fluid leaks.B.The maintenance schedule of the pumpdepends on the frequency of use, cleanliness of media, type of media, cycle rates, output pressures, cleanliness of air or any other conditions that may be damaging to sealintegrity. Once a clear pattern develops of how long a pump is in service before pumpperformance declines, it is recommended to perform maintenance in advance of this time frame. At minimum, perform maintenance on the pump once a year as described below.9. This alternating action of steps #1 to step #8 continues until the maximum outlet hydraulic pressure is reached based on the pressure ratio of the pump.02-9242ME : AHL Series PumpOperation & Maintenance Manual | 04/2211Maintenance would include:• Re-lubrication or replacement of spool valve o-ring• Re-lubrication or replacement of air drive seals• Re-lubrication or replacement of pilot valve o-rings and gaskets• Replace check valve components • Replace high pressure hydraulic sealsC.Maintenance instructions are supplied with appropriate rebuild kits. Kit part numbers are listed on the assembly drawing.Section 4.0Unpacking Section 11.0AHL Series Repair Kit Options02-9242ME: AHL Series Pump12Operation & Maintenance Manual | 04/221302-9242ME: AHL Series Pump1402-9242ME : AHL Series PumpOperation & Maintenance Manual | 04/2215TroubleshootingSection 4.0UnpackingSection 13.0Troubleshooting - Pneumatic Section Problem: Pump will not operate with low air pressure.Cause:Excessive friction of o-rings on the spool valve has increased the pressure requiredto move spool.Solution: Replace and lubricate the o-rings on spoolProblem: Pump can only be actuated at high air pressure.Cause: a) Air is leaking through the piston guide bushing in the top end cap.b) Air is leaking through the o-rings betweenthe top end cap and air cylinder.Solution: a) Replace and lubricate o-rings on upperplunger and between bushing and top cap. b) Replace and lubricate o-ring on lip of topend cap.Problem: Pump will not run and air escaped throughthe exhaust muffler. Cause: a) Spool valve o-rings are leaking. b) Spool sleeve o-rings are leaking. c) Outside o-ring(s) on air piston(s) is leaking. d) Seal between air piston and liquid plungeris leaking.Solution: a) Replace and lubricate spool valve o-rings.b) Replace and lubricate sleeve o-rings.c) Replace and lubricate air piston o-ring(s). d) Replace o-ring on bottom plunger (two piece plunger designs), or add Loctite 2760 thread locker with sealant on plungerthreads (one piece plunger designs).Problem: Pump will not run and air escapes through the small hole in the spool valve housing.Cause:Spool valve sleeve o-rings are leaking.Solution: Replace and lubricate spool valve o-rings.Problem: Pump will not run and air escapes through the pilot valve vent in the bottom end cap.Cause: Pilot valve gasket or o-ring is not sealing inthe bottom cap.Solution: Replace and lubricate pilot valve gasket and o-ring. If necessary, also replace the tappet rod.Problem: Pump operates at a high frequency and short strokes.Cause:The top or bottom pilot valves are defective.Solution: Replace and lubricate both pilot valve gaskets and o-rings. If necessary also replace the tappet rods.Problem: Pump will not run and air flows out of the separation plate vent (double stage pump only).Cause: The rod seal in the separation plate is leaking.Solution: Replace and lubricate rod seal assembly.Problem: Pump functions slowly or doesn’t operate at all.Cause: a) Condensation from air supply is freezing the spool valve.b) Air muffler is clogged.Solution: a) Stop pump for a short period and replace or add a mist separator in the air line. b) Clean or replace air muffler.Operation & Maintenance Manual | 04/2202-9242ME : AHL Series Pump16Section 4.0UnpackingSection 14.0Troubleshooting - High Pressure, Liquid Section Problem: Pump does not produce liquid flow, operates irregularly or does not maintain pressure.Cause: a) Air in the hydraulic system. b) Suction line excessively long. c) Suction tubing sized too small. d) Failure of one of the check valves. e) Liquid inlet filter is blocked.f) High pressure seal excessively worn.Solution: a) Check inlet suction line and connections for leaks and allow pump to flow freely downstream so as to remove any air. b) Shorten liquid supply line.c) Increase tubing ID size between reservoir and pump inlet.d) Clean or replace both inlet and outlet check valve assemblies. e) Clean or replace liquid inlet filter.f) Replace high pressure seal assembly.Problem: When air is applied to pump the spool will not actuate.Cause: Unregulated air pilot feed line pressure was shut off at the same time as regulated main air drive pressure. This caused the Pilot Control Valve to stop in an incorrect positionat shutdown.Solution: Assure unregulated pilot air, regulated air drive and shutoff valve are arranged as shown in the “Air Line Schematic” in Section 7.0.Turn off regulated air drive pressure.Pressure should now only be supplied to the unregulated pilot connection.Press the manual push button switch on either end of Pilot Control Valve (see image below). This will shift the Pilot Control Valve and then the spool to the position required for restart. Now supply pump with main regulatedair pressure.Pilot Control ValveSection 4.0Unpacking Section 15.0ServiceParker Autoclave Engineers now require all pump repairbe sent to an authorized repair facility. Contact Parker Autoclave Engineers for recommendations. Pumps returned for service should be accompanied with the model number, serial number, manufacture date and problems you are experiencing.02-9242ME: AHL Series Pump18Operation & Maintenance Manual | 04/22Parker’s Motion & Control TechnologiesAt Parker, we’re guided by a relentless drive to help our customers become more productive and achieve higher levels of profitability by engineer-ing the best systems for their requirements. It means looking at customer applications from many angles to find new ways to create value. What-ever the motion and control technology need, Parker has the experience, breadth of product and global reach to consistently deliver. No companyknows more about motion and control technology than Parker. For further information call 1-800-C-Parker.02-9242ME April 2022© 2022 Parker Hannifin Corporation | Instrumentation Products Division1005 A Cleaner WayHuntsville, AL 35805 USA Tel: 256.881.2040Fax: /IPDOperation and Maintenance Manual AHL Series: Liquid PumpsParker WorldwideNorth AmericaUSA – Corporate, Cleveland, OH Tel: +1 256 896 3000USA – IPD, Huntsville, AL Tel: +1 256 881 2040*****************USA – IPD, (Autoclave), Erie, PA Tel: +1 814 860 5700*******************CA – Canada, Grimsby, Ontario Tel +1 905-945-2274*********************South AmericaAR – Argentina, Buenos Aires Tel: +54 3327 44 4129 ******************BR – Brazil, Diadema, SP Diadema, SPTel: +55 11 4360 6700******************CL – Chile, Santiago Tel: +56 (0) 2 2303 9640******************MX – Mexico, Toluca Tel: +52 722 275 4200*******************Asia PacificAU – Australia, Dandenong Tel: +61 (0)2 9842 5150******************************CN – China, Shanghai Tel: +86 21 2899 5000*****************************HK – Hong Kong Tel: +852 2428 8008IN – India, MumbaiTel: +91 22 6513 7081-85ID – Indonesia, Tangerang Tel: +62 2977 7900********************JP – Japan, Tokyo Tel: +(81) 3 6365 4020******************KR – South Korea, Seoul Tel: +82 2 559 0400*******************MY – Malaysia, Selangor Tel: +603 784 90 800*******************SG – Singapore,Tel: +65 6887 6300*******************TH – Thailand, Bangkok Tel: +66 2 186 7000*********************TW – Taiwan, Taipei Tel: +886 2 2298 8987*************************VN – Vietnam, Hochi Minh City Tel: +848 382 508 56**********************Europe, Middle East, AfricaAE – UAE, Dubai Tel: +971 4 812 7100********************AT – Austria, Wiener Neustadt Tel: +43 (0)2622 23501-0*************************AT – Eastern Europe, Wiener Neustadt Tel: +43 (0)2622 23501 900****************************AZ – Azerbaijan, Baku Tel: +994 50 2233 458****************************BE/LU – Belgium, Nivelles Tel: +32 (0)67 280 900*************************BG – Bulgaria, Sofia Tel: +359 2 980 1344**************************BY – Belarus, Minsk Tel: +48 (0)22 573 24 00*************************CH – Switzerland, Etoy Tel: +41 (0) 21 821 87 00*****************************CZ – Czech Republic, Klecany Tel: +420 284 083 111*******************************DE – Germany, Kaarst Tel: +49 (0)2131 4016 0*************************DK – Denmark, Ballerup Tel: +45 43 56 04 00*************************ES – Spain, Madrid Tel: +34 902 33 00 01***********************FI – Finland, VantaaTel: +358 (0)20 753 2500*************************FR – France, Contamine s/Arve Tel: +33 (0)4 50 25 80 25************************GR – Greece, Athens Tel: +30 210 933 6450************************HU – Hungary, Budapest Tel: +36 223 885 470*************************IE – Ireland, DublinTel: +353 (0)1 466 6370*************************IT – Italy, Corsico (Ml)Tel: +39 02 45 19 21***********************KZ – Kazakhstan, Almaty Tel: +7 7273 561 000****************************NL – The Netherlands, Oldenzaal Tel: +31 (0)541 585 000********************NO – Norway, Stavanger Tel: +47 66 75 34 00************************PL – Poland, Warsaw Tel: +48 (0)22 573 24 00************************PT – Portugal, Leca da Palmeira Tel: +351 22 999 7360**************************RO – Romania, Bucharest Tel: +40 21 252 1382*************************RU – Russia, Moscow Tel: +7 495 645-2156************************SE – Sweden, Spånga Tel: +46 (0)8 59 79 50 00************************SK – Slovakia, Banská Bystrica Tel: +421 484 162 252**************************SL – Slovenia, Novo Mesto Tel: +386 7 337 6650**************************TR – Turkey, Istanbul Tel: +90 216 4997081************************UA – Ukraine, KievTel: +48 (0)22 573 24 00*************************UK – United Kingdom, Warwick Tel: +44 (0)1926 317 878********************ZA – South Africa, Kempton Park Tel: +27 (0)11 961 0700*****************************Questions?8325 Hessinger Drive Erie, PA 16509 USA Tel: 814 860 5700Fax: 814 860 Instrumentation Products Division。
恒流泵操作规程
恒流泵操作规程
1操作步骤:
1.1将电源线插在电源插座上,接通电源,打开恒流泵后面的开关。
1.2选择转动方向,按旋转方向键选定方向,←为逆时针方向,逆时针指示灯
亮,表示逆时针旋转,→为顺时针方向,顺时针指示灯亮,表示顺时针旋转。
1.3 选择速度增减,按增速键或减速键。
1.4 选择启停键,按一次为启动,则恒流泵处于工作状态,再按一次则为停止运行。
1.5 设定为转速定时时,按定时选择键,流量定时指示灯亮;按定时选择键,分装定时指示灯亮,待设定完成后,按启停键,恒流泵进入工作状态。
- 1、下载文档前请自行甄别文档内容的完整性,平台不提供额外的编辑、内容补充、找答案等附加服务。
- 2、"仅部分预览"的文档,不可在线预览部分如存在完整性等问题,可反馈申请退款(可完整预览的文档不适用该条件!)。
- 3、如文档侵犯您的权益,请联系客服反馈,我们会尽快为您处理(人工客服工作时间:9:00-18:30)。
文件编号:2-208-601 LC-3060 HPLC Pump操作手册版本:V 2011-02LC-3060 HPLC Pump前言感谢您选用我公司微型高压输液泵,能成为我们的用户,是我们莫大的荣幸,我们将竭诚为您提供优质服务。
为了使您能尽快掌握该产品的操作及简单的日常维护,特提供以下操作手册。
特别说明该泵可以由实验室工作人员,工厂试验人员或者经过培训的人员及具有此方面职业经历的人员来操作。
本手册是该仪器必备文件,建议将其放置于仪器的旁边以备工作人员随时查阅。
工作人员在使用仪器的过程中,应对自己的操作指令负责。
对仪器的修正工作必须在咨询过制造商并取得书面认可之后方可进行。
拆箱拆开仪器包装,检查设备及附件是否在运输中被损坏,若损坏应即向有关运输公司及承运商提出责任声明。
清点对照装箱清单检查清点,若有遗漏及差错,应及时与制造商联系。
- 1 -Operation Manual - 2 -LC-3060 HPLC Pump目 录简介 (5)前面板 (6)前面板介绍 (6)泵头及压力传感器 (7)后面板 (8)操作 (9)菜单及操作介绍 (9)输液泵与计算机的连接 (15)维护 (17)拆卸泵头部件 (17)泵头的拆分 (18)组装泵头 (19)安装泵头 (19)单向阀的拆装和清洗 (20)技术参数 (22)- 3 -Operation Manual - 4 -LC-3060 HPLC Pump 高压输液泵是相关配套系统的关键部件之一,是系统的动力装置,为整个系统提供稳定的流量。
简介微型高压输液泵输送的流动相可能会使用有机酸、有机碱、无机酸、无机碱等腐蚀性液体,为避免次生杂质对分析带来影响,设计中尽可能的采用相对惰性的材料,接触流动相的介质有:经钝化处理的316不锈钢、PTFE、PEEK等。
该产品的压力范围为:10mL泵头:0~45MPa,流速范围0.01~9.99mL/min;50mL泵头:0~25MPa,流速范围0.01~49.99mL/min。
该产品为双柱塞串联式往复泵,采用了先进的电子脉动抑制技术,这样很大程度上消除了凸轮脉动对输液泵流量的影响,大大地保证了流量的准确性和稳定性。
电子脉动抑制技术的采用,取代了传统的机械缓冲器,彻底解决了由于机械缓冲器频繁泄露所导致的重大故障。
同时也使得输液系统的死体积降到了最低。
该产品的输液结构模式为串联式。
较并联式结构少两只单向阀,进而由单向阀故障所导致的系统故障率会减少50%,至于并联式结构交替供液所产生的流速波动同样需进行进一步的抑制,就并联式结构本身来讲并不能彻底根除流速的波动。
该产品在不同的色谱柱阻尼下流动相的输送效率问题(单向阀的启闭、流动相的压缩性等)由相应的参数进行自动调整补偿,以保证色谱系统流速的稳定性。
该产品的流速范围可通过更换泵头及相应的系统参数进行调整。
即可由10mL的分析型轻松转换为50mL的半自备型。
该产品可通过RS232/485接口由色谱工作站进行控制。
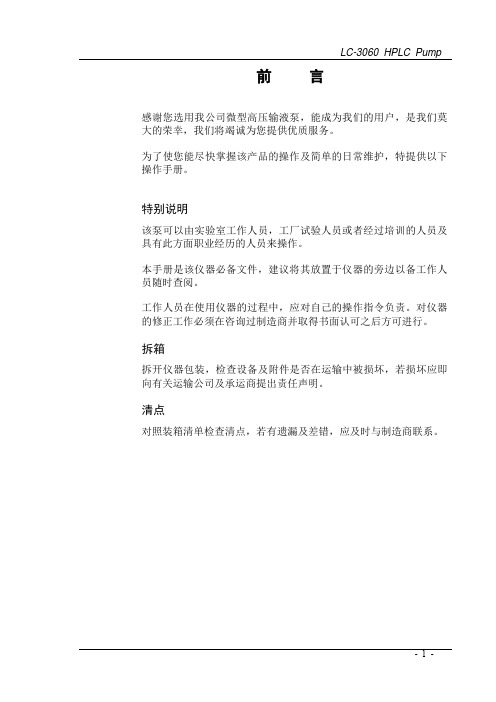
- 5 -Operation Manual- 6 -前面板前面板介绍高压输液泵的前面板包括LCD 显示区、薄膜按键区、泵头、压力传感器。
如图1所示。
图1 前面板1)LCD 显示和设置按键区 4)冲洗按钮2)压力传感器 5)泵头 3)运行-停止按钮LCD 显示区以多页方式显示,通过按动“▲”、“▼”键来进行翻页。
主菜单页显示输液泵的当前运行流速、当前压力。
同时LCD 显示区的上方“Flow(mL/min)”用于标示流速的单位,下方“Pressure(MPa)”用于标示当前压力的单位,其它菜单页面显示信息及功能详见“仪器操作”章节。
确认键“Enter ”激活设置页面和确认参数。
通过“run/stop ”键启动和停止泵的运行。
冲洗键“Purge ”键启动冲洗功能,并且不受输液泵运行状态的影响,冲洗默认流速为5mL/min。
3451 2LC-3060 HPLC Pump- 7 -泵头及压力传感器图2 泵头、柱塞后冲洗装置及压力传感器1)出液口 5)连接管 9)泵头固定螺钉 2)压力传感器6)U 型连接管 10)泵头 3)冲洗阀旋钮7)柱塞后冲洗管 11)下阀座4)废液口8)上阀座 12)吸液管连接口泵头是输液泵的核心部件,内部的单向阀、高压密封圈及柱塞杆的品质决定输液泵的性能。
杂质的侵扰可能导致单向阀关闭不严,从而可导致流速的波动;长时间的运行后,密封圈及柱塞杆的磨损可导致密封不严而漏液,从而导致输液泵不能正常的输液。
所以,输液泵的日常维护尤为重要。
拆卸泵头时,可将图 2 -12)吸液管连接口处的吸液管拆下来,拆下图2 -5)连接管,然后松开四个泵头固定螺钉图2 -9)即可将泵头部件拆下来,进而进行所需的维护。
进一步的维修步骤请参考后面章节的相关描述。
压力传感器用于实时显示泵的运行压力。
同时该组件设计有放泻阀,旋松手轮即可实现泻流功能,此功能主要用于提高流动相更换的速度,以及用于排泄泵内的气泡。
59 10 8 11 32 6 147 12Operation Manual- 8 -后面板高压输液泵的后面板装有多种插槽、接口,用于连接电源、控制操作以及数据通信等。
图3 高压输液泵的后面板1) RS-485通信接口 2) L PG 阀控制接口 3) RS-232通信接口 4) 24VDC 电源插座RS-232、RS-485通信接口用于计算机的反控。
LPG 阀控制接口,用于控制四元低压梯度模块。
电源插座连接直流24V3A 电源。
! 注意:确信电源供电正确,电源接错会导致危险及仪器损坏!1 2 3 4LC-3060 HPLC Pump 操作该产品有两种操作模式,可以通过仪器独立控制,也可以通过计算机反控工作站软件进行控制。
若需要运行梯度,则必须使用反控工作站软件进行控制。
菜单及操作介绍上电后即进入主菜单,显示的参数为上次关机时的参数(10mL泵头为例):F____ 输液泵当前流速,可编辑。
单位:mL/minP____ 输液泵当前压力,不可编辑。
单位:MPa按▼进入流速设置菜单,如下此时按Enter键光标置于个位位置该设置区为个位数设置,通过▲、▼键增大减小,长按可加快数值的变化。
输入范围:0~9(10mL泵头);0~49(50mL泵头)再按Enter键光标置于百分位位置- 9 -该设置区为百分位设置,通过▲、▼键增大减小,长按可加快数值的变化。
输入范围:0~99流速范围显示:10mL泵头:0.00~9.9950mL泵头:0.00~49.99当参数设置完成后,按Enter确认,光标消失。
再按▲回到主菜单。
此时,便可开始泵的运行。
! 注意:只有在主菜单下才可以执行“Run/Stop”以及“Purge”当进行“Purge”时,默认值为5mL/min,显示界面如下! 注意:在任何非主菜单页面均可通过长按Enter键返回到主菜单。
按▼进入下一个菜单显示的参数为上次关机时的参数,按Enter激活、切换光标。
输入参数方法同流速设置。
说明:压力范围根据泵头的类型(大小、介质材料)协调,如下:10mL泵头不锈钢 0~45MPa10mL泵头 PEEK 0~25MPa50mL泵头不锈钢 0~15MPa50mL泵头 PEEK 0~15MPa当参数设置完成后,按Enter确认,光标消失。
再按▼切换到下一个菜单。
按Enter激活光标,按▲执行自动调零,同时光标消失。
再按▼切换到下一个菜单。
该菜单为更换泵头时进行设置,10mL、50mL两种泵头可选。
当更换设置时,在该菜单下,按Enter激活光标,按下“▼”或“▲”均可更新设置为另一种。
如下:按▼切换到下一个菜单。
该菜单为更换泵头时进行设置,steel、peek两种泵头可选。
当更换设置时,在该菜单下,按Enter激活光标,按下“▼”或“▲”均可更新设置为另一种。
如下:按▼切换到下一个菜单。
该菜单第一行为设备的序列号。
工厂调试时录入,用户不可更改。
该菜单第二行为计数器菜单。
记录该设备输送的液体容积总量,用户不可更改。
单位:L按▼切换到下一个菜单。
按Enter激活光标,按▲恢复出厂设置,同时光标消失。
再按▼切换主菜单。
相关说明:9仅当系统当前实际显示压力处于最小和最大压力限之间,系统才能正常运行。
9最小压力限在系统运行之前必须置“0”,否则系统不运行,并发出警告音按任意键取消报警并返回主菜单。
9最大压力限可根据用户色谱柱(阻尼)承压范围自行设定,但不可超越设备最大压力(45MPa)。
当系统运行压力超过所设定的最大压力,系统停止运行并发出警告音。
按任意键取消警告并返回主菜单。
9流速的突变增大可使色谱柱(阻尼)压力瞬间增大,此时可能导致色谱柱(阻尼)损坏!最大压力限的变化幅度应适度。
9可在运行过程中调整设置最小压力限,当系统由于气泡或流速急剧变小时,可能导致色谱柱(阻尼)压力急剧下降,此设置可保证系统在此类情况下停止运行。
进而及时处理故障。
冲洗(Purge)快捷键的操作! 注意:未打开冲洗阀而进行直接冲洗可能会损坏色谱柱!冲洗操作可快速更换流动相或排除气泡。
旋松旋松冲洗阀旋钮,按“Purge”键,启动冲洗,再按“Purge”键停止冲洗。
冲洗工作结束后拧紧冲洗阀旋钮。
! 注意:在旋松冲洗阀旋钮时,会有流动相从前端孔内流出,可用备件中手拧PEEK接头及PTFE管将该液流倒入废液瓶。
如图所示。
若吸液管内大面积充满气泡,或希望更快速使泵头充满流动相,可辅助使用备件中60mL注射器及手拧PEEK接头,如图示旋入冲洗阀旋钮前端的孔内,再拧松旋钮,抽动注射器,此时流动相会经由泵头抽入注射器,以达到快速换相。
结束后再旋紧旋钮,此时可取下注射器。
! 注意:用注射器快速换相时,泵出口应连接色谱柱,或将泵出口进行封堵。
柱塞的后冲洗柱塞的后冲洗可除去柱塞后部的缓冲盐等结晶体或其他颗粒性杂质。
清洗液的选择可根据流动相的性质来选择。
比如流动相是缓冲盐时,可使用二次水来清洗(若长期使用,可加入10%左右的甲醇或异丙醇,以防止二次水变质)。
输液泵与计算机的连接高压输液泵可以通过RS-232/RS-485串行接口与计算机实施通信。
串行接口位于仪器后面板。
维护拆卸泵头部件! 注意:残留在泵头中的有机溶剂,可能会刺激皮肤,影响健康。
用合适的溶剂(如甲醇等)冲洗泵头,再换用二次蒸馏水冲洗十五分钟。
然后再进行泵头的更换和维护工作。
操作:9将输液泵所连接的流动相溶剂瓶置于泵头水平面以下,松开图2 -12)处的“吸液管”。
9用扳手松开图2 -5)所示“连接管”。
9用S=3的六角扳手松开“图2 -9)泵头安装螺钉”,并移除泵头安装螺钉。
! 注意:在拆卸“泵头安装螺钉”时,应用一只手握紧泵头,另一只手用六角扳手慢慢拧松螺钉,并且应按对角线轮流松动四个螺钉,每次松动大约半圈,直到把四个螺钉同时拆除。