Z155DIII3HD三轴云台用户手册v1.0_cn
HD3000使用手册

目录第1章HD3400L 文本显示器硬件概述 (1)1.1基本描述 (1)1.2产品规格 (1)1.3产品结构及定义 (2)1.4外型尺寸及安装方法 (4)1.5键盘功能列表 (4)第2章HD3000组态软件使用介绍 (6)2.1HD3000画面组态软件基本概述 (6)2.1.1. HD3000 软件的运行要求 (6)2.1.2. 工程文件和人机交互画面 (6)2.1.3. 工程画面内容 (6)2.1.4. HD3000 软件的操作步骤 (6)2.2组态用户监控画面 (6)2.2.1. 组态软件界面说明 (7)2.3菜单“文件” (8)2.3.1. 新建工程 (8)2.3.2. 打开工程 (10)2.3.3. 保存工程 (11)2.3.4. 关闭工程 (11)2.3.5. 工程另存为 (12)2.3.6. 退出 (12)2.4菜单“编辑” (12)2.4.1. 新建画面 (12)2.4.2. 复制画面 (13)2.4.3. 删除画面 (13)2.4.4. 元件复制 (13)2.4.5. 元件粘贴 (13)2.5菜单“工具” (14)2.5.1. 用户设备配置 (14)2.5.2. 系统设置 (14)2.5.3. 报警信息设置与查询 (16)2.5.4. 字动态文本的文本库编辑 (18)2.5.5. 动态图片的图片库编辑 (19)2.5.6. 下载设置 (19)2.5.7. 下载 (19)2.6菜单“元件” (20)2.6.1. 文本 (21)2.6.2. 位动态文本 (22)第3章HD3400L与不同的串口设备的连接方法 (40)3.1和利时 LM 系列 PLC (40)3.2西门子 S7-200 系列 PLC (41)3.3OMRON 全系列 PLC (41)3.4三菱 FX 系列 PLC (43)3.5松下 FP 系列 PLC (44)3.6永宏 FB 系列 PLC (45)3.7光洋 S 系列 PLC (46)3.8施耐德(莫迪康)NEZA/TWIDO 系列 PLC (46)3.9LG Master-K 系列 PLC (48)3.10富士 SPB 系列 PLC (49)3.11台达 DVP 系列 PLC (50)3.12VIGOR 系列 PLC (51)3.13AB Micrologix 系列 PLC (52)3.14GE-FANUC VersaMax 、90-30 系列 PLC (53)3.15Emerson-EC20 系列 PLC (54)3.16DANFOSS 变频器 (55)3.17MODBUS 协议通讯说明 (56)3.18多台串口设备的连接方式 (57)第4章HD3400L操作使用方法 (59)4.1文本显示器和所连串口设备的联机通讯 (59)4.2画面切换 (59)4.3数据输入 (59)4.4状态监控 (60)4.5多状态设定使用说明 (60)第5章HD3400L常见问题解答 (62)5.1上电开机无显示、黑屏 (62)5.2电源灯亮,LCD 屏亮但无显示 (62)5.3不能下载工程文件 (62)5.4为何不能进行数据输入 (62)5.5密码设定无效 (62)5.6如何实现功能键作用 (62)5.7X-Y 曲线图属性如何设置 (62)5.8怎样依次循环查看画面 (62)5.9通讯正常,但有时通讯指示“TxD”灯为何不亮 (62)5.10通讯灯指示慢闪,LCD 屏显示“COM ERR!” (63)5.11与 OMRON PLC 通讯注意事项 (63)第1章 HD3400L 文本显示器硬件概述1.1基本描述HD3400L文本显示器是连接可编程序控制器(PLC)或具有串口通讯能力电气设备的小型人机界面 (HMI) 产品,它能以文字、数据、指示灯、图形、图片等基本元素来完成所连接串口设备的数据显示、状态显示、数据输入等功能,从而使设备的操作人员能够实时监控设备的运行情况。
三轴说明书1

第一部分概述1.1系统概述非常感谢您使用本公司的点胶控制系统!本系统可以配合多种类型的点胶设备使用,满足您对加工的不同要求。
先进的DSP控制技术,使系统速度更快,同时系统具有友好的人机操作界面,有效的提高了生产效率;控制系统采用平滑曲线调速,使机械运行更平稳,降低整机的噪音,延长机械的使用寿命!在使用之前,请您仔细阅读使用说明书,以确保正确使用本系统。
请妥善保存说明书,以便随时查阅。
因配置不同,有些机器不具备本书所列的部分功能,详情以相应的操作功能为准。
1.2注意事项请不要由非专业人员对电气系统进行维修和调试,这将会降低设备的安全性能,扩大故障,甚至造成人员的伤害和财产损失。
请不要在控制箱周围堆放杂物,并在使用过程中,定期清除控制箱表面和过滤网的灰尘,以保持系统的良好通风,利于散热。
未经授权,请勿擅自改动产品,由此而引起的后果本公司不负任何责任!警告确有必要需打开机箱盖板时,必须在切断电源5分钟后并在专业人员指导下,才允许接触电控箱内的部件!禁止机器在工作时,禁止接触任何运动部件或打开控制设备,否则可能造成人员伤害或导致机器不能正常工作!禁止电器设备在潮湿、粉尘、腐蚀性气体、易燃易爆气体场所工作,否则可能造成触电或火灾!1.3 工作环境通风良好,环境卫生,尘埃少;储存空间温度:0-50°;工作空间温度:5-40°;工作空间相对湿度:30%-90%无结露。
1.4 系统供电及接地1.4-1供电要求本电控系统使用DC24V直流电源供电根据机器配置不同,消耗功率在0.1-0.2KW之间。
1.4-2接地要求为了防止电器设备因漏电、过压、绝缘等原因造成的触电或火灾事故,请您将电控可靠接地。
接地电阻要小于100欧姆,导线长度在20米以内,导线横截面积大于1.0平方毫米。
第二部分系统说明与应用2.1接口及按键说明:(图1)(图2)2.2系统简介硬件接口简介本系统可直接提供,四个轴接口X、Y、Z、U,四个轴各有对应的零位到位信号,其中X、Y轴还分别提供两个硬件限位信号(上限位、下限位)。
Multi 三轴手持便携相机 稳定器快速入门V1.0说明书

动相机,点击“相机”进入;安装手机拍摄用户,点击“手机”进入) *安装手机使用时也可连接手机蓝牙:进入手机蓝牙设置——搜索蓝牙设备“Smatphone Gimbal”——点击连接,连接成功后稳定器可控制手机原生相机拍照&录像 *【常见问题】手机蓝牙能连上,APP蓝牙连不上? 1.还原(初始化)手机网络设置;2.关闭wifi或断开蓝牙设备“Smar tphone Gimbal"的连接;3.重新连接操作
常见问题(FAQ)
Q: 开机后电机为什么抖动/震动? A: 确认是否把相机装上再开机,稳定器螺丝是否拧紧,开机前是否调平,确认相机是否过轻,电机扭力过大。 解决解决方案:安装好相机再开机;固定螺丝拧紧;开启稳定器前先调平(具体参照第6页调平); 稳定器出厂默认的电机力度较大,在使用重量较轻的相机时,可能会出现震动的情况。通过APP调小电机扭力 (Hohem Gimbal——设置——电机选项)。
13
9.蓝牙连接
10.人脸追踪拍照
11.快门
12.全景环拍
13.移动延时摄影(含追踪录像)
11
APP其他功能 1. 云台参数设置:(可保存个性化的情景参数/应用场景) A.跟随速度设置(可调整航向/俯仰/横滚三轴的跟随速度快/慢) B.摇杆速度设置(调整摇杆控制转动速度快/慢) C.跟随死区区间(死区范围内,稳定器不跟随) D.微调(可对横滚&俯仰轴进行强制性小角度调整,如为达到理想水平状态强制调整角度) E.摇杆控制方向切换(摇杆方向与轴的转动方向一致/相反) F.电机选项:扭力设置(可调整航向/俯仰/横滚三个电机的扭力大小。如手机过轻导致的云
3轴控制器使用手册
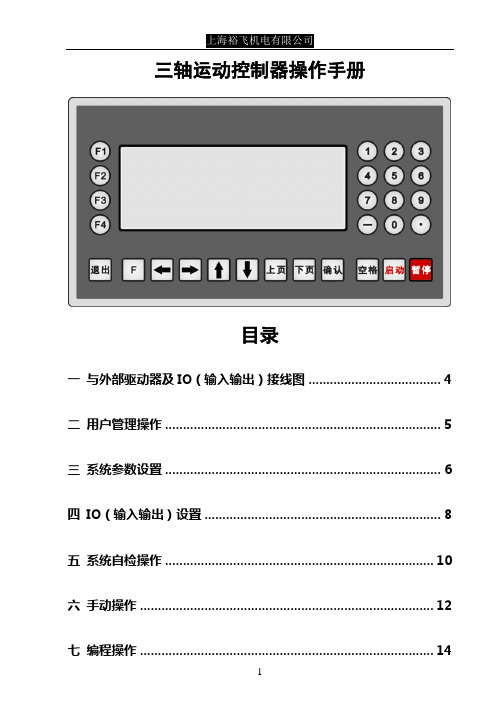
三轴运动控制器操作手册目录一与外部驱动器及IO(输入输出)接线图 (4)二用户管理操作 (5)三系统参数设置 (6)四IO(输入输出)设置 (8)五系统自检操作 (10)六手动操作 (12)七编程操作 (14)八自动执行 (16)九指令详解 (18)十电子齿轮计算及公式 (20)十一编程案例 (23)十二常见问题及处理 (28)一与外部驱动器及IO(输入输出)接线图1.控制器与步进驱动器或伺服驱动器的连接(红色线为1号线)2.IO(外接开关及继电器)的接线图(红色线为1号线)注:因输入采用低电平有效,若选用光电开关,则需要选择NPN型。
二用户管理操作注意:所有重要参数只有用户登录以后才可修改保存。
防止他人随意更改参数,影响加工质量。
从主画面进入参数设置,并进入用户管理,进行密码输入。
输入用户密码,按确认键,若输入正确,则提示“用户登陆成功”,否则提示“密码错误,请重新输入”。
用户密码出厂值为“123456”。
用户登录成功后,则可进行加工参数的修改保存。
否则加工参数不可修改保存。
然后直接按退出按键,对系统参数及IO设置进行编辑,编辑完成,再次进入用户管理,并选择用户退出,按确认键,当前参数设置里的内容全部不可更改。
若需要修改,再次进入用户管理进行登录。
注:用户密码可以修改。
但是必须要记忆下新设的密码,否则加工参数将不可修改保存。
三系统参数设置从主界面的参数设置里进入系统参数,通过移动光标,对光标所在位置进行数据修改。
共分5屏,按“上页”“下页”键切换。
控制参数修改完毕可进入速度参数界面进行速度的参数修改,共3屏,修改方式同上。
修改完成后,按参数保存进入参数保存界面,按确认键对当前修改完成的数据进行保存。
若保存成功则提示“参数保存成功”。
注:加工过程中禁止进行参数保存。
按空格键,可将当前参数值清零。
当设定的速度值小于启动速度时,则速度值为启动速度。
当启动速度值设为0时,默认为控制器的最小极限速度。
四IO(输入输出)设置从主界面的参数设置里进入IO设置,对外部输入及输出进行定义,共5屏。
金三立摄像机说明书V1.0
第三章 安装 .......................................................................................................................................................... 8
第四章 技术规格 ................................................................................................................................................ 18
第六章 菜单操作 ................................................................................................................................................ 32
第五章 操作须知 ................................................................................................................................................ 25
云台使用说明书

样可能会损坏产品。
NO
MAX
Do not exceed the recommended load limit of the tripod
or/and head.(Please refer to the product specifications),
or it may damage the product.
请勿长时间将产品放置在太阳下,避免长时间将本产 品放置在高温下,例如靠近汽车玻璃数小时。
Please keep from high temperatures and direct exposure to bright sunlight for extended periods of time.(For example:put it in the wagon box or behind) the glass for a long time.
此产品不需要经常添加润滑油,若需要时,可使用标 准机械用润滑油。
OIL
Under most situations,There is no need to lubricate any parts of this product.But if required,please use the standard lubricant oils and grease.
2. Install the head into the tripod bowl,then clockwise the head on the tripod steady.
把手 Pan Bar Handle
中置支撑 Mid-level spreader
快装板
QR Plate
快装板可实现前后水平滑动+/-20mm,从而保证器材的平衡状态。
HD Network Mini PT Dome 摄像头用户手册说明书
HD Network Mini PT Dome CameraUser’s ManualVersion 1.0.0WelcomeThank you for purchasing our Network camera!This user’s manual is designed to be a reference tool for your system.Please read the following safeguard and warnings carefully before you use this series product! Please keep this user’s manual well for future reference!Important Safeguards and Warnings1.Electrical safetyAll installation and operation here should conform to your local electrical safety codes.The power shall conform to the requirement in the SELV (Safety Extra Low Voltage) and the Limited power source is rated 12V DC or 24V AC in the IEC60950-1. (Refer to general introduction)Please note: Do not connect two power supplying sources to the device at the same time; it may result in device damage! The product must be grounded to reduce the risk of electronic shock. We assume no liability or responsibility for all the fires or electrical shock caused by improper handling or installation.We are not liable for any problems caused by unauthorized modification or attempted repair.2.Transportation securityHeavy stress, violent vibration or water splash are not allowed during transportation, storage and installation.3.InstallationDo not apply power to the camera before completing installation.Please install the proper power cut-off device during the installation connection.Always follow the instruction guide the manufacturer recommended.4.Qualified engineers neededAll the examination and repair work should be done by the qualified service engineers.We are not liable for any problems caused by unauthorized modifications or attempted repair.5.EnvironmentThis series network camera should be installed in a cool, dry place away from direct sunlight, inflammable, explosive substances and etc.Please keep it away from the electromagnetic radiation object and environment.Please make sure the CCD (CMOS) component is out of the radiation of the laser beam device. Otherwise it may result in CCD (CMOS) optical component damage.Please keep the sound ventilation.Do not allow the water and other liquid falling into the camera.Thunder-proof device is recommended to be adopted to better prevent thunder.The grounding studs of the product are recommended to be grounded to further enhance the reliability of the camera.6. Daily MaintenancePlease shut down the device and then unplug the power cable before you begin daily maintenance work.Do not touch the CCD (CMOS) optic component. You can use the blower to clean the dust on the lens surface.Always use the dry soft cloth to clean the device. If there is too much dust, please use the water to dilute the mild detergent first and then use it to clean the device. Finally use the dry cloth to clean the device.Please put the dustproof cap to protect the CCD (CMOS) component when you do not use the camera. Dome enclosure is the optical component, do not touch the enclosure when you are installing the device or clean the enclosure when you are doing maintenance work. Please use professional optical clean method to clean the enclosure. Improper enclosure clean method (such as use cloth) may result in poor IR effect of camera with IR function.7. AccessoriesBe sure to use all the accessories recommended by manufacturer.Before installation, please open the package and check all the components are included.Contact your local retailer ASAP if something is broken in your package.Table of Contents1General Introduction (1)1.1Overview (1)1.2Features (1)1.3Specifications (2)2Structure (4)2.1Components (4)2.2Framework and Dimension (4)3Device Installation (6)3.1Installation Steps (6)3.2Restore Factory Default Setup Introduction (8)4Quick Configuration Tool (9)4.1Overview (9)4.2Operation (9)5Web Operation (11)5.1Network Connection (11)5.2Login and Main Interface (11)6FAQ (13)Appendix Toxic or Hazardous Materials or Elements (14)1General Introduction1.1OverviewThis series network camera integrates the traditional camera and network video technology. It adopts video data collection, transmission together. It can connect to the network directly without any auxiliary device.This series network camera uses standard H.264 video compression technology, which maximally guarantees the video quality.It supports the IR night vision function. In the night environments, the device can use the IR light to highlight the object which is suitable for the surveillance function in the low illumination environments. The waterproof design conforms to the IP 66 level. It has the sound waterproof function suitable for use in the outdoor environments.It can be used alone or used in a network area. When it is used lonely, you can connect it to the network and then use a network client-end. Due to its multiple functions and various uses, this series network camera is widely used in many environments such office, bank, road monitor and etc.1.2Features1.3SpecificationsPlease refer to the following sheet for network camera performance specification.2 Structure2.1 ComponentsYou can refer to the following figure for structure components information. See Figure 2-1.Figure 2-1Sheet 2-1Sheet 2-22.2 Framework and DimensionPlease refer to the following two figures for dimension information. The unit is mm. See Figure 2-2 and Figure 2-3.Figure 2-2 Dimension illustration 1Figure 2-3 Dimension illustration 23Device Installation3.1Installation StepsImportantBefore the installation, please make sure the installation environments can at least support 3x weight of the camera.Figure 3-1Please follow the steps listed below to install the device. Please refer to Figure 3-1 for reference. Step 1Please take the installation position map in the accessories bag, and then paste it on the ceiling or the wall according to your monitor area requirements. Draw and then dig three plastic expansion bolts holes in the installation surface and then insert three expansion bolts in the holes. Secure these three bolts firmly. Please draw the cable out from the cable exit when you install the device.Step 2Adjust the device installation pedestal to the proper position and then line up the three screw holes in the device pedestal to the three plastic expansion bolt holes in the installation position. Put the three self-tapping screws in the three plastic expansion bolts and lock them firmly.Step 3Aim the three slots on the dome body to the three corresponding snaps on the installation pedestal and then push up slowly until you hear a clear sound “KA”.Step4Screw the three M2.5*7 hexagon socket head stainless screws (in figure 2-1) into the corresponding threaded holes of the dome body to tighten the installation pedestal and prevent falling.Note: The device supports bottom cable exit and side cable exit; refer to the following figure for side cable exit.Figure 3-2Please earth the GND port of the device to enhance the device reliability. The GND port is near the cable exit port on the rear of the dome. The GND screw uses the M2X5 pan screw. See Figure 3-3 for more information.Figure 3-3NoteThis series product supports two cable exits. One is from the bottom and the other is from the side. Please refer to the following figure for cable exit from the side information.3.2Restore Factory Default Setup IntroductionImportantPlease use RESET button when device is running.Step1Take down the dome from the installation pedestal.Step2Unscrew two screws.Step3Long press the RESET button to complete the reset function. See Figure 3-4.Figure 3-44 Quick Configuration Tool4.1 OverviewQuick configuration tool can search current IP address, modify IP address. At the same time, you can use it to upgrade the device.Please note the tool only applies to the IP addresses in the same segment.4.2 OperationDouble click the “ConfigTools.exe” icon, you can see an interface is shown as in Figure 4-1.In the device list interface, you can view device IP address, port number, subnet mask, default gateway, MAC address and etc.Figure 4-1 Search interfaceSelect one IP address and then right click mouse, you can see an interface is shown as in Figure 4-2. Select the “Open Device Web” item; you can go to the corresponding web login interface.Figure 4-2 Search interface 2If you want to modify the device IP address without logging in the device web interface, you can go to the configuration tool main interface to set.In the configuration tool search interface (Figure 4-1), please select a device IP address and then double click it to open the login interface. Or you can select an IP address and then click the Login button to go to the login interface. See Figure 4-3.In Figure 4-3, you can view device IP address, user name, password and port. Please modify the corresponding information to login.Please note the port information here shall be identical with the port value you set in TCP port in Web Network interface. Otherwise, you cannot login the device.If you are using device background upgrade port 3800 to login, other setups are all invalid.Figure 4-3 Login promptAfter you logged in, the configuration tool main interface is shown as below. See Figure 4-4.Figure 4-4 Main interfaceFor detailed information and operation instruction of the quick configuration tool, please refer to the Quick Configuration Tool User’s Manual included in the resources CD.5 Web OperationThis series network camera products support the Web access and management via PC.Web includes several modules: Monitor channel preview, system configuration, alarm and etc.5.1 Network ConnectionPlease follow the steps listed below for network connection.●Make sure the network camera has connected to the network properly.●Please set the IP address, subnet mask and gateway of the PC and the network camerarespectively. Network camera default IP address is 192.168.1.108. Subnet mask is 255.255.255.0.Gateway is 192.168.1.1●Use order ping ***.***.***.***(* network camera address) to check connection is OK or not.5.2 Login and Main InterfaceOpen IE and input network camera address in the address bar. See Figure 5- 1.Figure 5- 1 IP addressThe login interface is shown as below. See Figure 5- 2.Please input your user name and password.Default factory name is admin and password is admin.Note: For security reasons, please modify your password after you first login.Figure 5- 2 Web loginAfter you successfully logged in, please install WEB plug-in unit. Please refer to the Web Operation Manual included in the resource CD for detailed operation instruction.See Figure 5- 3.Figure 5- 3 Web monitoring window6FAQAppendix Toxic or Hazardous Materials or ElementsO: Indicates that the concentration of the hazardous substance in all homogeneous materials in the parts is below the relevant threshold of the SJ/T11363-2006 standard.X: Indicates that the concentration of the hazardous substance of at least one of all homogeneous materials in the parts is above the relevant threshold of the SJ/T11363-2006 standard. During the environmental-friendly use period (EFUP) period, the toxic or hazardous substance or elements contained in products will not leak or mutate so that the use of these (substances or elements) will not result in any severe environmental pollution, any bodily injury or damage to any assets. The consumer is not authorized to process such kind of substances or elements, please return to the corresponding local authorities to process according to your local government statutes.Note●This user’s manual is for reference only. Slight difference may be found in user interface.●All the designs and software here are subject to change without prior written notice.●All trademarks and registered trademarks mentioned are the properties of their respectiveowners.●If there is any uncertainty or controversy, please refer to the final explanation of us.●Please visit our website for more information.。
锐迪安 三脚架云台 产品手册说明书
Radian TRIPOD BALL HEAD23Attaching/Removing the Radian ™ Ball HeadTo mount the ball head to the tripod:1. Lift the Quick-Release Locking Latch on the tripod.2. Press and hold the Platform Release Button andfully seat ball head into the tripod. Once seated, the ball head can be oriented in any direction. 3. Rotate the Quick-Release Locking Latch down tothe locked position.4. To remove the ball head, follow these steps inreverse order.NOTE: If needed, the locking latch can be repositioned by shifting the latch to the left and rotating the latch up/down to reposition.Quick-Release PlateQuick-ReleaseBubble LevelDrag Tension KnobPress the Quick-Release Button on the tripod to seat the ball head.Quick-Release Locking LatchBase Panning KnobCounterweight HookTo help stabilize the tripod in windy conditions, hang a weight from the Counterweight Hook.Radian TRIPOD BALL HEAD45Tilt ActionThe ball head’s tilt can be adjusted by unlocking the ball head. This allows you to position your optic at the desired angle. For extreme angle, or full vertical orientation, rotate the head into one of the two cutaways.• To unlock the ball head, rotate the Ball Locking Knob counter-clockwise until the head moves freely. Adjust to your desired position and lock the ball head.• To lock the ball head, rotate the Ball Locking Knob clockwise until you feel tension on the knob.Panning ActionThe Radian ™ Ball Head can be adjusted to allow you to pan across a scene without adjusting the ball head’s angle. This is particularly helpful while glassing wildlife moving across a field, maintaining a flexible shooting position for your mounted rifle.To use the Panning Base Knob:• To unlock the panning base, twist the Panning Base Knob counter-clockwise.• To lock the panning base, twist the Panning Base Knob clockwise. You may also adjust the drag of the panning base by tightening the Panning Base Knob, but not locking it down completely. This will allow you to have more control for smoother panning across a scene.Adjusting Drag TensionThe drag tension can be adjusted on the Radian ™ Ball Head for when the head is in the unlocked position, allowing you to pan and tilt the ball head. This is helpful when viewing fast-paced action scenes. To adjust the drag tension, unlock the ball head by rotating the Ball Locking Knobcounter-clockwise. Turn the Drag Tension Knob clockwise to increase the drag tension, or counter-clockwise to decrease the drag tension.NOTE: Once the drag tension is set, it will stay at this tension no matter how much the Ball Locking Knob is loosened.Rotate the Ball Locking Knob to adjust position or lock in place.Adjust the Drag Tension Knob.Rotate the Panning Base Knob to pan or lock in place.Radian TRIPOD BALL HEAD67Attaching Optics to Ball HeadThe Radian ™ Ball Head uses Arca-Swiss style quick-release plates. To mount your optic to the tripod:1. Twist the Quick-Release Locking Knob counter-clockwise to remove the Quick-Release Plate.2. Attach the plate to your optic. Be sure to tighten the Mount Bolt from the bottom side of theplate and flip the D-ring so it lies flat.3. Place the Quick-Release Plate back into the tripod head and turn the Quick-Release LockingKnob clockwise to securely lock the plate in the head. NOTE: To mount binoculars to the tripod, a binocular adapter is required. Purchase Vortex ® binocular adapters from your local dealers.NOTE: Some optics are designed to be Arca-Swiss compatible and can be mounted to the tripod head without the need for plates.TIP: Purchase additional quick-release plates for your optics so it is easy for you to switch equipment.Quick-Release Plate and Mount BoltQuick-Release Locking KnobVIP WARRANTYOUR UNCONDITIONAL PROMISE TO YOU.We promise to repair or replace the product. Absolutely free.Unlimited UnconditionalLifetime Warranty************************•800-426-0048Note: The VIP Warranty does not cover loss, theft, deliberate damage, or cosmetic damagenot affecting product performance.For additional information, and the most up-to-dateproduct manuals, visit 。
三轴机床操作教程
返回
主页面
传输软件winDNC V4.0
新建连接 编辑修改 复制连接
连接/断开
删除连接
默认连接
没有连接
已经连接
连接设定 返回 主页面
连接设定
连接名称
中文、英文、数 字、符号都可以
系统型号 确定完成 取消退出
必须是 8050M | 8055M
串口选择
连接频率
必须是 38400 Bd
选择要加工程 序的文件夹 返回 主页面 选择要加工程 序的文件夹
三轴机床操作教程
机床解锁 A. 开启机床 B. 机床回零 C. 关闲机床 D. 对对刀仪
西班牙Fagor系统操作
E. 启动主轴 F. 关闭主轴 G. 设定原点 H. 检验原点 I. 执行程序 J. 终止程序 K. 平面铣削 L. 调整原点 R. 手动对刀 M. 传输软件 N. 刀具检查 O. 断刀处理 P. 四个坐标 S. 机床的维护
断ቤተ መጻሕፍቲ ባይዱ处理
一:记程序 1。当前加工的命令值的Z值记下
2。复位退出
3。更换刀具对刀 4。记下当前的行数 具体操作:
主菜单(MAIN MENU) 记下当前程序名与行数 F7(+)下一页 F1 (状态) F2 (DNC)
二:电脑改程序
返回 主页面
删剪程序
返回
实例操作
用记事本或其它可以把程序打开的软件打开当前加工的 程序→ 编缉 →转到→输入行号→确定 为考虑当前加工的 过渡光滑把光标提前几个程序(在程序的后面单击)→回 车几下把程序分隔开→再往上找一个“Z”值检查核对是 否与记下的命令值相符合→(符合后)再“ZXXX”复制→ 滚动鼠标的中键→移至分隔开的程序的上一行“粘贴” →再往上找第一个X值“复制” →粘贴在Z值的前一行→ 再往上找第一个Y值“复制” →粘贴在Z值的前一行X值 的后面→把光标放在XY值前空白行→把下拉菜单条往上 移到顶部→按下键盘的“Shift” →在G54的后面第一个Z 值(即安全高度或下刀距离)单击光标→按住“Delete” (删除)→文件另存为(注意保存的文件必须要是“PIM” 格式→然后就可以调用此程序进行加工 主页面
云终端X3用户手册
云终端X3————用户手册重要声明首先感谢您使用本公司的云终端设备。
为了让您能够轻松自由地使用本设备,在您开机使用之前,请仔细阅读我们随机提供的说明书,以便您能正确使用本机。
由于产品版本升级或其它原因,本文档内容会不定期进行更新。
除非另有约定,本文档仅作为使用指导,本文档中的所有陈述、信息和建议不构成任何明示或暗示的担保。
本说明书中的资讯资料如有变更,恕不另行通知,且不承担此手册产生的错误或者疏漏引起的任何责任。
注意事项●为保证使用安全,请用本产品专用电源适配器。
●在开机状态,切勿直接拔掉电源,避免突然断电损坏盒子。
●产品使用过程中请勿随意移动设备。
●请勿将产品放在高温、低温环境中,尽量保持工作环境的散热通风、防潮防水。
●请勿投掷、敲击或摇晃机盒,非专业人员的不得擅自拆卸机盒,不当操作可能会导致装置损毁。
●请勿使用刺激性的化学制品、清洁剂或腐蚀性的清洁剂来清洁机体。
关于云终端X3更多资讯欢迎访问华科官网/目录1 部件描述 ........................................................................... 错误!未定义书签。
2 连接 (5)2.1 连接显示器 (5)2.2 连接网线 (5)2.3 连接鼠标和键盘 (6)2.4 连接耳机和麦克风 (6)2.5 连接电源 (6)3 操作指南 (7)3.1 远程连接设置 ...................................................... 错误!未定义书签。
3.1.1 查找主机 (6)3.1.2 配置与快捷方式 (6)3.1.3关机与本机IP (7)3.2 控制面板 (7)3.2.1 网络 (7)3.2.2 显示与声音 (7)3.2.3 外设与启动................................................... 错误!未定义书签。
- 1、下载文档前请自行甄别文档内容的完整性,平台不提供额外的编辑、内容补充、找答案等附加服务。
- 2、"仅部分预览"的文档,不可在线预览部分如存在完整性等问题,可反馈申请退款(可完整预览的文档不适用该条件!)。
- 3、如文档侵犯您的权益,请联系客服反馈,我们会尽快为您处理(人工客服工作时间:9:00-18:30)。
相机设置
云台对相机设置有要求,请根据您的产品型号阅读相关内容。
Canon 5D Mark III
/
相
机
设 置
模式转盘
短片拍摄
安 1. 设置相机模式为快门优先自动曝光(Tv)或者手动曝光(M)模式。
装 2. 将实时显示拍摄 / 短片拍摄( / )开关拨到短片拍摄位置。
3. 按下 <AF.DRIVE> 按钮,将驱动模式设置为 (10 秒自拍 / 遥控)或 4. 将镜头上的图像稳定器开关 STABILIER 拨至 OFF 位置。
用于连接 GCU 与无线视频传输模块,传输模拟视频 信号。
iOSD Mark II 连接线 ×1
用于连接 GCU 与 DJI iOSD Mark II。
Micro-USB 连接线 ×1
用于连接 GCU 与 PC 进行参数调节与固件升级等。
CAN-Bus 连接线 ×1
GCU 通过 CAN-Bus 总线端口与飞控系统 M.C. 通信。
云台安装固定夹 ×4
用于安装云台到起落架上。
接收机安装板 ×1
用于压紧 GCU,并且为接收机或其他元件提供安装 位置。
压线夹 ×1
用于整理云台上的线材。
相机安装螺丝 ×2
用于安装相机到云台上。
镜头环安装螺丝 ×1
用于安装镜头环到云台上。
4 © 2014 大疆创新 版权所有
5D
GCU
ROLL TILT PAN MODE SHUT AUX1 AUX2 AUX3
Z15-5D III (HD) 支持的 DJI 飞控系统的固件版本 WooKong M: V5.26 A2: V2.1
2 © 2014 大疆创新 版权所有
产品简介
Z15-5D III (HD) 是一款先进的高科技专业航拍云台,结构精密、内置独立 IMU 模块精确控制云台姿态; 集成云台专用伺服驱动模块、HDMI-HD/AV 模块等;支持方向锁定控制、FPV 模式 ( 复位 ) 和非方向 锁定控制三种工作模式。
全景拍照程序总共拍摄 37 张照片,总拍摄时间约为 100 秒。
在全景拍照程序完成前,云台不受遥控器摇杆控制。若想终止全景拍照程序,拨动一次 AUX1 开关 即可,云台将恢复 MODE 通道所设置的控制模式。
11 © 2014 大疆创新 版权所有
Zenmuse Z15-5D III (HD) 用户手册
将 HD/AV 切换开关拨到 HD 位置。
断开 HDMI-HD/AV 模块与相机连线时,请先取下相机,再从相机上拔下 HDMI-HD/AV 接头。 请确保将驱动模式设置为 (10 秒自拍 / 遥控)或 2(2 秒自拍 / 遥控)。
10 © 2014 大疆创新 版权所有
Zenmuse Z15-5D III (HD) 用户手册
可变
为 0°
遥控器控制受控受控Fra bibliotek不受控
姿态增稳 **
有
有
有
云台消抖
有
有
有
摇杆命令的含义
三轴上的摇杆杆量对应云台转动 速度,中位速度为 0°/s,端点为 最大速度
三轴上的摇杆杆量对应 云台转动速度,中位速 度为 0°/s,端点为最大 速度
——
摇杆线性控制 线性
线性
——
注 *:云台指向为云台绕 PAN 轴旋转后的指向。 注 **:姿态增稳指云台 ROLL/TILT 方向不跟随飞行器 ROLL/PITCH 方向变化。
安 装
安装镜头
镜头
相机 固定环 ①
②
1. ①将固定环套入镜头,②并将镜头装到相机上,注意固定环的安装方向。
8 © 2014 大疆创新 版权所有
安装相机与云台
Zenmuse Z15-5D III (HD) 用户手册
镜头固定环螺丝
安 装
相机安装螺丝 2. 安装相机到云台中,调整相机。 3. 先拧紧上部的相机安装螺丝;再拧紧下部的相机安装螺丝;最后拧紧镜头固定环螺丝。
旋转 360°共拍摄 12 张照片; 2. 云台俯仰角度自动调整为 30°并保持不动,Pan 轴每旋转 30°触发一次快门,Pan 轴旋转 360°共
拍摄 12 张照片; 3. 云台俯仰角度自动调整为 60°并保持不动,Pan 轴每旋转 30°触发一次快门,Pan 轴旋转 360°共
拍摄 12 张照片; 4. 云台俯仰角度自动调整为 90°,触发一次快门,拍摄 1 张照片。
工作模式
云台指向 *
方向锁定模式
产
品
简
非方向锁定模式
FPV 模式 ( 复位 )
介
当机头方向变化时,云台指向跟 机头方向变化时云台指 云台指向与开机时飞
随机头指向变化
向不跟随机头指向变化 行器机头指向一致
云台与机头相对 云台与机头保持相对角度不变
角度的关系
云 台 与 机 头 相 对 角 度 云台与机头相对角度
2(2 秒自拍 / 遥控)。
5. 建议快门速度调整为 1/100 秒到 1/30 秒。若使用手动曝光模式,请自行设置好光圈值并且将 ISO
设置为自动。
菜单设置中,加下划线字体部分为必须设置值;用户如果不选择推荐值进行设置,可能会 导致拍摄画面闪烁。 建议使用 SD 卡进行拍摄,使用 CF 卡会降低云台平衡性,可能会导致拍摄画面闪烁。
16
工作模式 /AUX1/AUX2/AUX3 切换开关的设置
16
工作模式切换开关设置
16
AUX1 切换开关设置
17
AUX2 切换开关设置
17
AUX3 切换开关设置
18
调参软件
18
安装驱动程序和调参软件
18
基础设置
18
升 级
19
信 息
19
试 飞
20
飞行前检查
20
飞行测试
21
附 录
22
注意事项
22
全景拍照过程中,云台从触发快门到下一次转动有 1.5 秒的静止时间,即相机测光、对焦、 曝光的时间总共 1.5 秒。请事先设置好相机的曝光时间和测光对焦方式。如果相机测光和对 焦时间超过 1.5 秒,相机在曝光时云台处于转动状态,将造成画面拖影。
旋转方向 360°
云 台
描
述
接收机安装板 伺服驱动模块1
压线夹
电机输入命令端口 接GCU的G6端口
减震球
伺服驱动模块3 镜头固定环安装螺丝 云台 LED 状态指示灯
HD/AV 切换开关
镜头安装位置
横滚方向 ±25°
伺服驱动模块 2
俯仰方向 -120°~ +15°
HDMI 连接线
7 © 2014 大疆创新 版权所有
DJI 和 Zenmuse 为大疆创新所有的注册商标。本文出现的产品名称、品牌等,均为其所属公司的商 标或注册商标。本产品及手册为大疆创新版权所有。未经许可,不得以任何形式复制翻印。
阅读提示
符号说明
重要注意事项
操作、使用提示
Z15-5D III (HD) 搭配使用的相机与镜头型号列表 相机型号 Canon 5D Mark III 镜头型号 Canon EF 24mm f/2.8 IS USM
备用包 ×1
减震球、备用螺丝、云台安装固定夹。
DJI
Zenmuse Z15-5D III (HD) 用户手册
盒 内 物 品 清 单
DJI
5 © 2014 大疆创新 版权所有
目录
警告和免责申明
2
阅读提示
2
符号说明
2
产品简介
3
盒内物品清单
4
云台描述
7
相机设置
8
安 装
8
安装镜头
8
安装相机与云台
螺丝包 ×1
用于锁紧安装云台固定夹 (2.5*8 杯头螺丝 )。
10 针 -9 针连接线 ×2
用于连接 GCU 与云台。
7 针连接线 ×1
用于连接 GCU 和 DJI Lightbridge 机载端。
8 针- 6 针连接线 ×2
用于连接 GCU 与云台。
舵机线包 ×1
用于连接云台与接收机。
AV 视频电源线 ×1
相机连线 / 快门控制
相 相机连线
机 连 Z15-5D III (HD) 云台支持将遥控器信号转换为红外快门信号,请正确连接相机到云台并确保相机设 线
置正确。 快 门 控 制
HDMI-HD/AV 连接线
1. 通过 HDMI-HD/AV 连接线将云台的 HDMI-HD/AV 模块与相机 HDMI OUT 端口连接。 2. 使用普通的无线视频传输模块,将 HD/AV 切换开关拨到 AV 位置;使用高清的无线视频传输模块,
360°全景拍照
Z15-5D III (HD) 云台具有 360°全景拍照功能。360°全景拍照通过 GCU 的 AUX1 通道控制。拨动一 次 AUX1 开关,云台即启动全景拍照功能;再次拨动则关闭该功能。 以下为 360°全景拍照程序: 1. 功能开启后,云台俯仰角度自动调整为 0°并保持不动 , Pan 轴每旋转 30°触发一次快门,Pan 轴
3 © 2014 大疆创新 版权所有
盒内物品清单
云台 ×1
盒
内置 DJI 专用伺服驱动模块,HDMI-HD/AV 模块以
内
及独立 IMU 模块。
物
品
清
单
云台控制器 (GCU)×1
通过 CAN-Bus 总线与飞控系统相连实现通讯;通过 与无线视频模块连接,输出视频信号。
镜头固定环 ×1
用于固定相机镜头。
确保镜头朝向与机头朝向一致。 连接云台到起落架上时,确保减震装置上下平面平行,保证减震装置无拉伸扭曲。 安装云台时,注意使整体平衡,尽量使重心落在上图 Z 轴上。 出厂时云台重心已调好,重心位置直接决定云台性能好坏,因此请勿自行调整云台重心。 云台为高精度控制装置,请勿拧开其它任何螺丝,避免损坏云台或导致性能下降。 尽量避免插拔云台上编码器专用线端口和电机命令输入端口上的连接线,请勿改变云台机 械结构。 确保所有连线正确,否则可能导致云台工作异常甚至失控。