ATEN KVM 使用说明书
kvm切换器使用方法

kvm切换器使用方法KVM切换器使用方法。
KVM切换器是一种非常实用的设备,它可以帮助我们在多台电脑之间进行快速切换,提高工作效率。
下面,我将为大家介绍一下KVM切换器的使用方法。
首先,我们需要准备一台KVM切换器和多台电脑。
接下来,按照以下步骤进行操作:1. 将KVM切换器与电脑和显示器连接好,确保连接正确无误。
2. 打开KVM切换器的电源,并等待设备启动完成。
3. 在KVM切换器上找到切换按钮,通常是一个物理按钮或者是一个数字键盘上的快捷键。
不同的KVM切换器可能有不同的切换方法,可以参考使用说明书进行操作。
4. 当KVM切换器启动完成后,我们就可以通过切换按钮来切换不同的电脑了。
只需要按下切换按钮,就可以在不同的电脑之间进行切换,非常方便快捷。
5. 在切换电脑后,我们可以在显示器上看到当前所连接电脑的画面,这样就可以方便地在多台电脑之间进行操作了。
6. 当我们需要在不同的电脑之间进行文件传输或者数据共享时,也可以通过KVM切换器来实现。
只需要切换到需要操作的电脑,就可以进行文件传输等操作了。
7. 在使用完KVM切换器后,记得关闭所有电脑和显示器,并将KVM切换器的电源关闭,以节省能源。
总的来说,KVM切换器是一种非常实用的设备,可以帮助我们在多台电脑之间进行快速切换,提高工作效率。
希望以上介绍的使用方法能够帮助到大家,让大家能够更加方便地使用KVM切换器。
以上就是关于KVM切换器使用方法的介绍,希望对大家有所帮助。
如果还有其他问题,可以查阅相关的使用说明书或者咨询售后服务人员。
祝大家使用愉快!。
kvm使用指南
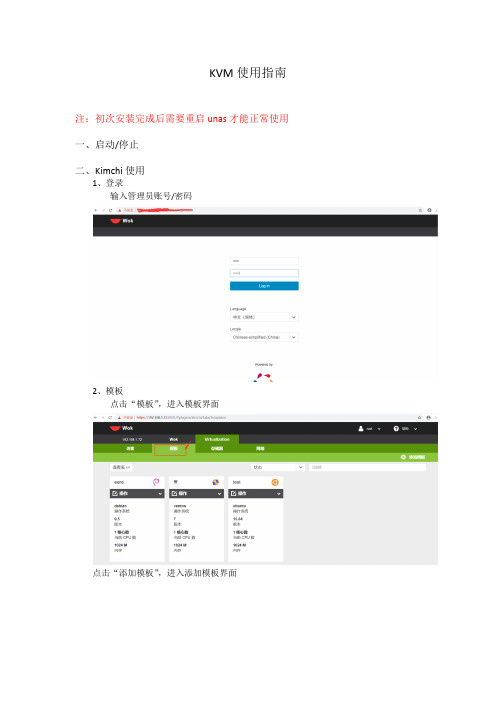
KVM使用指南注:初次安装完成后需要重启unas才能正常使用一、启动/停止二、Kimchi使用1、登录输入管理员账号/密码2、模板点击“模板”,进入模板界面点击“添加模板”,进入添加模板界面填写模板名称默认选择映像模板(iso文件)选择映像模板有两种方式:a.填写自定模板的的路径b.选择下面列表显示的任一模板(这个列表显示的模板来源于已激活的存储器里面的iso文件)任取一种方式即可之后点击最下面的“创建”按钮。
3、存储器(模板选择时使用)点击“添加存储器”填写存储池名称选择存储池类型填写存储池对应的路径(如果类型为DIR,那么路径就是iso文件所在目录)填写完成,点击“创建”按钮要使用某个存储池,需要点击“激活”来激活它;不使用时,点击“取消激活”按钮。
4、虚拟机这个界面用来管理已创建的虚拟机点击“查看表”,切换视图创建虚拟机,点击如下图所示“Add Guest”创建虚拟机创建虚拟机界面如下图:填写虚拟机名称,选择一个模板,之后点击“创建”,即可创建虚拟机模板:显示用户已创建的所有模板点击“操作”,显示可对某个虚拟机进行的操作1.编辑2.克隆3.迁移4.启动5.删除点击“启动”,启动虚拟机点击“操作”,现实下列操作选项1.查看控制台进入虚拟机的控制台界面首次进入,如下图(以debian演示):也可通过点击如下图箭头所指进入控制台2.查看序列号3.编辑4.迁移5.重置6.暂停/恢复7.关闭8.断电9.删除。
ATEN KVM 多电脑切换器 用户手册
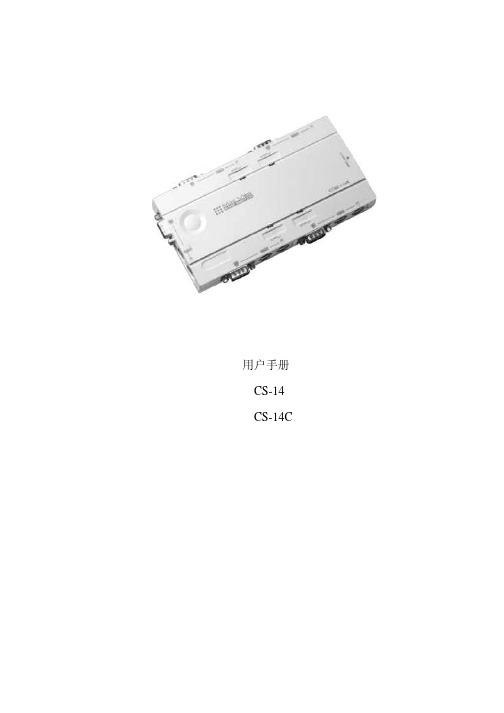
用户手册CS-14 CS-14CCS-14包装说明如下:- 1 4端口小型KVM 切换器(CS-14或CS-14C)-1用户手册此外,CS-14C包装也包括:2 CS 定做的延长线缆(1.2米)2 CS 定做的延长线缆(1.8米)请仔细阅读此用户手册,并按照说明进行安装及操作,避免对CS-14或其他附件设备造成损坏。
宏正自动科技股份有限公司ATEN PAPE-1143-2000 1999版所有产品名称和商标都已注册,版权所有。
概述Master View CS-14 KVM (键盘、鼠标、显示器)是一种控制设备,可以实现通过一个控制端(键盘、鼠标、显示器)访问4台主机。
在Master View KVM系列产品研制出来之前,从一个控制端控制多台主机的唯一方式是通过连线复杂且造价昂贵的网络系统。
现在,通过使用Master View CS-14, 您就可以方便快捷地实现对4台主机的访问。
Master View CS-14提供了两种对所接系统便捷的访问方式:使用位于前面板上的Selection (选择)按钮;从键盘输入热键组合。
安装简单快捷,只需将对应线缆连接起来即可。
无需安装光盘,因此没有复杂繁琐的安装程序,也无须考虑不兼容的问题。
因为Master View CS-14直接接收键盘输入信息,所以它可以在任何硬件平台上进行操作,也可以与所有操作系统兼容。
Master View CS-14是省时、省钱的最佳选择。
因为CS-14支持通过一个控端台控制两台PC 主机,所以避免了为每台主机配置独立键盘、鼠标、显示器的费用支出,同时节省了工作空间,也避免了不断从一台电脑移动到另一台电脑的麻烦。
功能特性。
支持Microsoft IntelliMouse及多数的滾轮滑鼠。
键盘与鼠标模拟功能-避免计算机出错启动。
进行切换时,将保存之前Caps Lock、Num Lock和Scroll Lock的状态。
支持最高分辨率1920 x 1440。
ATEN KVM KN2124v_技术培训

KN2124v内容摘要•硬件介绍•OSD介绍•软件介绍•KN2124v 与KN4132 对比•常见问题与解答KN2124v 前视图1.电源LED 指示灯2.端口LED 指示灯1.绿色–在线LED 指示灯2.橙色–位置LED 指示灯3.联机LED 红色: 10 Mbps, 橙色: 100 Mbps, 绿色: 1000 Mbps4. USB 端口(仅限于键盘、鼠标和U 盘)5. 重置按钮6.端口切换按钮7. 音频和麦克风输出口12643571.电源插座2.电源开关3.次要LAN 端口4.PON 端口(PN0108)5.接地终端6.主要LAN 端口7.调制解调器端口8.本地控制端端口9.KVM 端口KN2124v 后视图123475689•KA7120 / KA9120–针对PS/2 接口电脑•KA7170 / KA9170–针对USB 接口电脑, (所有平台)•KA7130 / KA9130–针对配备mini-DIN8 (键盘/鼠标) 和13W3(VGA) 接口的Sun 设备•KA7140 / KA9140–支持到VT100 终端服务器/设备适配器安装图KN2124v登录用户名: administrator密码: password添加相关端口双击则连接仅限于管理员用户种类:SA à超级管理员, Admin à管理员, Normal userà用户通道编号:0 à本地控制端通道, 1~4 à远程用户端口操作系统: Win, Mac, SUN线缆长度: 短(0~10米), 中等(10~25米), 长(25~50米)访问模式: 分享, 占有, 独占访问模式占有:独占:用户管理-帐户可创建多达64 个用户帐户用户帐户6-16个字符8-16 个字符群组添加用户到群组完全访问权仅浏览无访问权用户管理-群组可创建多达64 个群组群组权限设置权限群组成员添加用户到群组完全访问权仅浏览无访问权冗余电源风扇和温度检测l6种风扇速度和4个温度感应器。
数位KVM讯号延长器 CE790使用者说明书
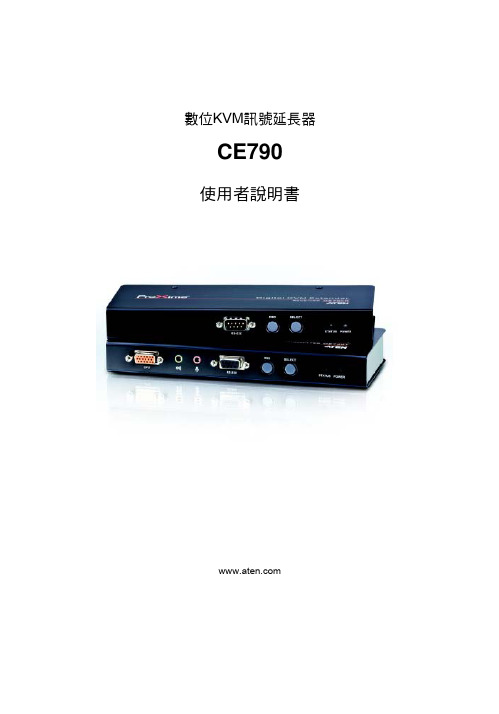
數位KVM訊號延長器CE790使用者說明書CE790 User Manual操作方法 (19)概述 (19)LED指示燈顯示 (19)啟動OSD (19)OSD主視窗 (20)CE790T (20)CE790R (20)OSD操作 (21)OSD功能 (22)視訊品質(只有CE790T) (22)喇叭 (22)麥克風 (22)傳送目標設定(只有CE790T) (23)接收來源設定(只有CE790R) (24)設定功能 (25)Baud Rate設定 (27)Return (返回) (27)預設IP位址 (27)OSD功能簡表 (28)CE790T (28)CE790R (28)第四章 (29)韌體升級功能 (29)更新前準備 (29)附錄 (31)一般 (31)機架安裝 (33)技術支援 (34)全球 (34)北美 (34)產品規格表 (35)疑難排除 (36)保固條件 (36)vi第一章介紹產品介紹CE790是一款具備自動判別連接線(Auto-MDIX),且具備RS-232序列功能的IP-Based KVM訊號延長器,其可讓一組遠端的USB控制端(USB鍵盤、螢幕及USB 滑鼠)透過Intranet企業內部網路存取電腦系統。
CE790系統包含一台連接至電腦系統的傳送裝置(CE790T)及一台可置放於使用者端的接收裝置(CE790R);由於其可讓遠端控制端透過標準的TCP/IP網路存取電腦系統,因此可適用於任何需從便利的地方使用控制端,但必須將系統設備安置在安全地方 – 遠離擁擠、髒亂與忙碌的使用環境,例如工廠或建築工地。
CE790亦可滿足以控制及安全為目的的應用,您可將系統安置在安全的區域,並同時將控制端放置在便於使用者存取的地方,十分適用於高保密性的資料系統管理。
CE790所具備的進階功能包括: 1)訊號傳送裝置(Transmitter)與接收裝置(Receiver)均支援OSD螢幕選單,設定與操作十分簡易; 2) 可使用價格實惠的Cat 5e連接線,透過標準TCP/IP LAN區域網路內,不需額外加裝KVM多電腦切換器即可進行單點對單點、單點對多點、以及多點對多點的管理; 3) Transmitter與Receiver裝置均內建RS-232序列埠,可連接序列終端設備以進行組態設定,或連接如觸控式螢幕與條碼掃瞄器等序列設備;4) 訊號傳送裝置(Transmitter)提供了一組專屬的KVM連接埠,可讓您簡單且容易地將KVM切換器安裝至您的整體架構中;5)使用特製的ASIC可確保可靠度與相容性。
ATEN Altusen CN9950 单端口KVM over IP交换机说明书

1-Local / Remote Share Access Single PortKVM over IP SwitchCN9000 / CN9600 / CN9950User ManualCN9000 / CN9600 / CN9950CN9000 / CN9600 / CN9950 User Manual iiEMC InformationFEDERAL COMMUNICATIONS COMMISSION INTERFERENCE STATEMENTThis equipment has been tested and found to comply with the limits for a Class A digital device, pursuant to Part 15 of the FCC Rules. These limits are designed to provide reasonable protection against harmful interference when the equipment is operated in a commercial environment. This equipment generates, uses, and can radiate radio frequency energy and, if not installed and used in accordance with the instruction manual, may cause harmful interference to radio communications. Operation of this equipment in a residential area is likely to cause harmful interference in which case the user will be required to correct the interference at his own expense.This device complies with Part 15 of the FCC Rules. Operation is subject to the following two conditions: (1) this device may not cause harmful interference, and (2) this device must accept any interference received, including interference that may cause undesired operation.FCC CautionAny changes or modifications not expressly approved by the party responsible for compliance could void the user's authority to operate this equipment.WarningOperation of this equipment in a residential environment could cause radio interference.AchtungDer Gebrauch dieses Geräts in Wohnumgebung kann Funkstörungen verursachen.KCC Statement :CN9000 / CN9600 / CN9950 User Manual iiiIndustry Canada StatementThis Class A digital apparatus complies with Canadian ICES-003.RoHS This product is RoHS compliant.About This ManualThis manual is provided to help you get the most out of your CN9000 / CN9600 / CN9950. It covers all aspects of the device, including installation, configuration, and operation.The models covered in this manual include:An overview of the information found in the manual is provided below.Chapter 1, Introduction , introduces you to the CN9000 / CN9600 / CN9950 KVM over IP Switch, its purpose, features and benefits, with its front and back panel components described.Chapter 2, Hardware Setup , provides step-by-step instructions for setting up the device, and explains its basic operation procedures.Chapter 3, Browser Login , describes how to log into the CN9000 / CN9600 / CN9950 with a browser, and the various functions included.Chapter 4, Configuration , explains the CN9000 / CN9600 / CN9950’s system settings that can be configured to suit its working environment.Chapter 5, Accessing Remote Server , describes how to access the CN9000 / CN9600 / CN9950 remotely.Model Product Name CN90001-Local / Remote Share Access Single Port VGA KVM over IP Switch CN96001-Local / Remote Share Access Single Port DVI KVM over IP Switch CN99501-Local / Remote Share Access Single Port 4K DisplayPort KVM over IP SwitchCN9000 / CN9600 / CN9950 User Manual ivChapter 6, The Windows Client Viewer , explains how to remotely access the server connected to the CN9000 / CN9600 / CN9950’s port using a WinClient, Java Client, and Web Client viewerChapter 7, Local Access , describes how to access the CN9000 / CN9600 / CN9950 locally.Chapter 8, The Log File , shows how to use the log file utility to view the events that take place on the CN9000 / CN9600 / CN9950.Chapter 9, The Log Server , explains how to install and configure the Log Server.Appendix , provides specifications and other technical information regarding the CN9000 / CN9600 / CN9950.Conventions This manual uses the following conventions:MonospacedIndicates text that you should key in.[ ]Indicates keys you should press. For example, [Enter] means topress the Enter key. If keys need to be chorded, they appeartogether in the same bracket with a plus sign between them:[Ctrl+Alt].1.Numbered lists represent procedures with sequential steps.♦Bullet lists provide information, but do not involve sequential steps.>Indicates consecutive selections, such as options on a menu ordialog box. For example, Start > Run means to open the Startmenu, and then select Run .Indicates critical information.CN9000 / CN9600 / CN9950 User Manual Package ContentsCN9000♦1CN9000 KVM over IP Switch♦1KVM cable (SPHD to VGA, PS/2, USB)♦1USB Type-A to USB Mini-B cable♦1power adapter♦1mounting kit♦1control terminal block♦1foot pad set (4 pcs)♦1user instructions*CN9600♦1CN9600 KVM over IP Switch♦1KVM cable (DVI-D, USB Type-A, audio)♦1USB Type-A to USB Mini-B cable♦1power adapter♦1mounting kit♦1user instructions*CN9950♦1CN9950 KVM over IP Switch♦1DisplayPort cable♦1USB Type-A to USB Type-B cable♦1USB Type-A to USB Mini-B cable♦1power adapter♦1mounting kit♦1control terminal block♦1foot pad set (4 pcs)♦1user instructions*vCN9000 / CN9600 / CN9950 User Manual vi*Features may have been added to the CN9000 / CN9600 / CN9950 since this manual was released. Please visit our website to download the most up-to-date version.Check to make sure that all components are present and in working condition. If you encounter any problems, please contact your local dealer.Read this manual thoroughly and follow the installation and operation procedures to prevent any damage to the unit and/or any devices connected to it.Product InformationFor information about all ATEN products and how they can help you connect without limits, visit ATEN on the Web or contact an ATEN Authorized Reseller. Visit ATEN on the Web for a list of locations and telephone numbers:International North America CN9000 / CN9600 / CN9950 User Manual viiUser Information Online RegistrationBe sure to register your product at our online support center:Telephone SupportFor telephone support, call this number:User NoticeAll information, documentation, and specifications contained in this manual are subject to change without prior notification by the manufacturer. The manufacturer makes no representations or warranties, either expressed or implied, with respect to the contents hereof and specifically disclaims any warranties as to merchantability or fitness for any particular purpose. Any of the manufacturer's software described in this manual is sold or licensed as is . Should the programs prove defective following their purchase, the buyer (and not the manufacturer, its distributor, or its dealer), assumes the entire cost of all necessary servicing, repair and any incidental or consequential damages resulting from any defect in the software.The manufacturer of this system is not responsible for any radio and/or TV interference caused by unauthorized modifications to this device. It is the responsibility of the user to correct such interference.The manufacturer is not responsible for any damage incurred in the operation of this system if the correct operational voltage setting was not selected prior to operation. PLEASE VERIFY THAT THE VOLTAGE SETTING IS CORRECT BEFORE USE.International International886-2-8692-6959China86-400-810-0-810Japan81-3-5615-5811Korea82-2-467-6789North America 1-888-999-ATEN ext 49881-949-428-1111CN9000 / CN9600 / CN9950 User ManualContentsEMC Information. . . . . . . . . . . . . . . . . . . . . . . . . . . . . . . . . . . . . . . . . . . . . ii About this Manual. . . . . . . . . . . . . . . . . . . . . . . . . . . . . . . . . . . . . . . . . . . .iii Conventions . . . . . . . . . . . . . . . . . . . . . . . . . . . . . . . . . . . . . . . . . . . . .iv Package Contents . . . . . . . . . . . . . . . . . . . . . . . . . . . . . . . . . . . . . . . . . . . v Product Information . . . . . . . . . . . . . . . . . . . . . . . . . . . . . . . . . . . . . . . . . .vi User Information. . . . . . . . . . . . . . . . . . . . . . . . . . . . . . . . . . . . . . . . . . . . vii Online Registration . . . . . . . . . . . . . . . . . . . . . . . . . . . . . . . . . . . . . . . vii Telephone Support . . . . . . . . . . . . . . . . . . . . . . . . . . . . . . . . . . . . . . . vii User Notice. . . . . . . . . . . . . . . . . . . . . . . . . . . . . . . . . . . . . . . . . . . . . vii 1.IntroductionOverview. . . . . . . . . . . . . . . . . . . . . . . . . . . . . . . . . . . . . . . . . . . . . . . . . . .1 Features and Benefits. . . . . . . . . . . . . . . . . . . . . . . . . . . . . . . . . . . . . . . . .2 Hardware. . . . . . . . . . . . . . . . . . . . . . . . . . . . . . . . . . . . . . . . . . . . . . . .2 Management. . . . . . . . . . . . . . . . . . . . . . . . . . . . . . . . . . . . . . . . . . . . .3 Easy-to-Use Interface. . . . . . . . . . . . . . . . . . . . . . . . . . . . . . . . . . . . . .4 Advanced Security . . . . . . . . . . . . . . . . . . . . . . . . . . . . . . . . . . . . . . . .4 Virtual Media. . . . . . . . . . . . . . . . . . . . . . . . . . . . . . . . . . . . . . . . . . . . .4 Virtual Remote Desktop . . . . . . . . . . . . . . . . . . . . . . . . . . . . . . . . . . . .5 System Requirements . . . . . . . . . . . . . . . . . . . . . . . . . . . . . . . . . . . . . . . .6 Remote User Computers . . . . . . . . . . . . . . . . . . . . . . . . . . . . . . . . . . .6 Servers . . . . . . . . . . . . . . . . . . . . . . . . . . . . . . . . . . . . . . . . . . . . . . . . .6 Cables. . . . . . . . . . . . . . . . . . . . . . . . . . . . . . . . . . . . . . . . . . . . . . . . . .7 Supported Video Resolutions . . . . . . . . . . . . . . . . . . . . . . . . . . . . . . . .8 Operating Systems . . . . . . . . . . . . . . . . . . . . . . . . . . . . . . . . . . . . . . . .8 Browsers. . . . . . . . . . . . . . . . . . . . . . . . . . . . . . . . . . . . . . . . . . . . . . . .9 Components. . . . . . . . . . . . . . . . . . . . . . . . . . . . . . . . . . . . . . . . . . . . . . .10 CN9000 Front View. . . . . . . . . . . . . . . . . . . . . . . . . . . . . . . . . . . . . . .10 CN9000 Rear View. . . . . . . . . . . . . . . . . . . . . . . . . . . . . . . . . . . . . . .11 CN9000/CN9950 Side View . . . . . . . . . . . . . . . . . . . . . . . . . . . . . . . .12 CN9950 Front View. . . . . . . . . . . . . . . . . . . . . . . . . . . . . . . . . . . . . . .13 9950 Rear View. . . . . . . . . . . . . . . . . . . . . . . . . . . . . . . . . . . . . . . . . .14 CN9600 Front View. . . . . . . . . . . . . . . . . . . . . . . . . . . . . . . . . . . . . . .15 CN9600 Rear View. . . . . . . . . . . . . . . . . . . . . . . . . . . . . . . . . . . . . . .16 2.Hardware SetupMounting. . . . . . . . . . . . . . . . . . . . . . . . . . . . . . . . . . . . . . . . . . . . . . . . . .17 Attaching the Bracket . . . . . . . . . . . . . . . . . . . . . . . . . . . . . . . . . .17Rack Mount. . . . . . . . . . . . . . . . . . . . . . . . . . . . . . . . . . . . . . . . . .18Wall Mount . . . . . . . . . . . . . . . . . . . . . . . . . . . . . . . . . . . . . . . . . .19 Hardware Installation . . . . . . . . . . . . . . . . . . . . . . . . . . . . . . . . . . . . . . . .20 CN9000. . . . . . . . . . . . . . . . . . . . . . . . . . . . . . . . . . . . . . . . . . . . . . . .21 CN9600. . . . . . . . . . . . . . . . . . . . . . . . . . . . . . . . . . . . . . . . . . . . . . . .22 viiiCN9000 / CN9600 / CN9950 User Manual CN9950. . . . . . . . . . . . . . . . . . . . . . . . . . . . . . . . . . . . . . . . . . . . . . . . . . .23 DCE and DTE Ports . . . . . . . . . . . . . . . . . . . . . . . . . . . . . . . . . . . . . . . . .24 3.Browser LoginLogging In. . . . . . . . . . . . . . . . . . . . . . . . . . . . . . . . . . . . . . . . . . . . . . . . .25 Main Screen . . . . . . . . . . . . . . . . . . . . . . . . . . . . . . . . . . . . . . . . . . . . . . .27 4.ConfigurationIntroduction. . . . . . . . . . . . . . . . . . . . . . . . . . . . . . . . . . . . . . . . . . . . . . . .29 Basic Setting. . . . . . . . . . . . . . . . . . . . . . . . . . . . . . . . . . . . . . . . . . . . . . .30 User Management. . . . . . . . . . . . . . . . . . . . . . . . . . . . . . . . . . . . . . . .30 User Information . . . . . . . . . . . . . . . . . . . . . . . . . . . . . . . . . . . . . .30Role. . . . . . . . . . . . . . . . . . . . . . . . . . . . . . . . . . . . . . . . . . . . . . . .30Permissions. . . . . . . . . . . . . . . . . . . . . . . . . . . . . . . . . . . . . . . . . .31 Account Policy. . . . . . . . . . . . . . . . . . . . . . . . . . . . . . . . . . . . . . . . . . .32 Sessions . . . . . . . . . . . . . . . . . . . . . . . . . . . . . . . . . . . . . . . . . . . . . . .33 Maintenance . . . . . . . . . . . . . . . . . . . . . . . . . . . . . . . . . . . . . . . . . . . .34 Upgrade Main Firmware . . . . . . . . . . . . . . . . . . . . . . . . . . . . . . . .34Update Display Information. . . . . . . . . . . . . . . . . . . . . . . . . . . . . .35Backup / Restore. . . . . . . . . . . . . . . . . . . . . . . . . . . . . . . . . . . . . .36Terminal. . . . . . . . . . . . . . . . . . . . . . . . . . . . . . . . . . . . . . . . . . . . .38 Advanced Setting . . . . . . . . . . . . . . . . . . . . . . . . . . . . . . . . . . . . . . . . . . .39 Device Information . . . . . . . . . . . . . . . . . . . . . . . . . . . . . . . . . . . . . . .39 General . . . . . . . . . . . . . . . . . . . . . . . . . . . . . . . . . . . . . . . . . . . . .39 Network. . . . . . . . . . . . . . . . . . . . . . . . . . . . . . . . . . . . . . . . . . . . . . . .41 IP Installer . . . . . . . . . . . . . . . . . . . . . . . . . . . . . . . . . . . . . . . . . . .42Service Ports. . . . . . . . . . . . . . . . . . . . . . . . . . . . . . . . . . . . . . . . .42Redundant NIC . . . . . . . . . . . . . . . . . . . . . . . . . . . . . . . . . . . . . . .43IPv4 Settings . . . . . . . . . . . . . . . . . . . . . . . . . . . . . . . . . . . . . . . . .43IPv6 Settings . . . . . . . . . . . . . . . . . . . . . . . . . . . . . . . . . . . . . . . . .44Network Transfer Rate. . . . . . . . . . . . . . . . . . . . . . . . . . . . . . . . . .44DDNS. . . . . . . . . . . . . . . . . . . . . . . . . . . . . . . . . . . . . . . . . . . . . . .44 ANMS . . . . . . . . . . . . . . . . . . . . . . . . . . . . . . . . . . . . . . . . . . . . . . . . .45 Event Destination. . . . . . . . . . . . . . . . . . . . . . . . . . . . . . . . . . . . . .45SMTP Settings. . . . . . . . . . . . . . . . . . . . . . . . . . . . . . . . . . . . . . . .46Authentication . . . . . . . . . . . . . . . . . . . . . . . . . . . . . . . . . . . . . . . .48 Security. . . . . . . . . . . . . . . . . . . . . . . . . . . . . . . . . . . . . . . . . . . . . . . .51 Login Failures . . . . . . . . . . . . . . . . . . . . . . . . . . . . . . . . . . . . . . . .51Filter. . . . . . . . . . . . . . . . . . . . . . . . . . . . . . . . . . . . . . . . . . . . . . . .52Encryption . . . . . . . . . . . . . . . . . . . . . . . . . . . . . . . . . . . . . . . . . . .54Security Level . . . . . . . . . . . . . . . . . . . . . . . . . . . . . . . . . . . . . . . .54Mode . . . . . . . . . . . . . . . . . . . . . . . . . . . . . . . . . . . . . . . . . . . . . . .55Private Certificate . . . . . . . . . . . . . . . . . . . . . . . . . . . . . . . . . . . . .55Certificate Signing Request. . . . . . . . . . . . . . . . . . . . . . . . . . . . . .57 Console Management. . . . . . . . . . . . . . . . . . . . . . . . . . . . . . . . . . . . .59 OOBC . . . . . . . . . . . . . . . . . . . . . . . . . . . . . . . . . . . . . . . . . . . . . .59ixCN9000 / CN9600 / CN9950 User ManualxDial Out. . . . . . . . . . . . . . . . . . . . . . . . . . . . . . . . . . . . . . . . . . . . .61 Serial Console. . . . . . . . . . . . . . . . . . . . . . . . . . . . . . . . . . . . . . . .63 Date/Time . . . . . . . . . . . . . . . . . . . . . . . . . . . . . . . . . . . . . . . . . . . . . .66 Time Zone. . . . . . . . . . . . . . . . . . . . . . . . . . . . . . . . . . . . . . . . . . .66 Date / Time . . . . . . . . . . . . . . . . . . . . . . . . . . . . . . . . . . . . . . . . . .66 Network Time . . . . . . . . . . . . . . . . . . . . . . . . . . . . . . . . . . . . . . . .67 Customization. . . . . . . . . . . . . . . . . . . . . . . . . . . . . . . . . . . . . . . . . . .67 Mode. . . . . . . . . . . . . . . . . . . . . . . . . . . . . . . . . . . . . . . . . . . . . . .68 USB IO Settings . . . . . . . . . . . . . . . . . . . . . . . . . . . . . . . . . . . . . .68 Multiuser Mode . . . . . . . . . . . . . . . . . . . . . . . . . . . . . . . . . . . . . . .68 Exit Macro. . . . . . . . . . . . . . . . . . . . . . . . . . . . . . . . . . . . . . . . . . .69 Reset. . . . . . . . . . . . . . . . . . . . . . . . . . . . . . . . . . . . . . . . . . . . . . .69 Preferences . . . . . . . . . . . . . . . . . . . . . . . . . . . . . . . . . . . . . . . . . . . . . . .70 User Preferences . . . . . . . . . . . . . . . . . . . . . . . . . . . . . . . . . . . . . . . .70 Logs . . . . . . . . . . . . . . . . . . . . . . . . . . . . . . . . . . . . . . . . . . . . . . . . . .71 Remote Console. . . . . . . . . . . . . . . . . . . . . . . . . . . . . . . . . . . . . . . . .72 Remote Console Preview . . . . . . . . . . . . . . . . . . . . . . . . . . . . . . .72 Telnet Viewer . . . . . . . . . . . . . . . . . . . . . . . . . . . . . . . . . . . . . . . .72 Download . . . . . . . . . . . . . . . . . . . . . . . . . . . . . . . . . . . . . . . . . . . . . .73 About . . . . . . . . . . . . . . . . . . . . . . . . . . . . . . . . . . . . . . . . . . . . . . . . . . . .73 Viewer. . . . . . . . . . . . . . . . . . . . . . . . . . . . . . . . . . . . . . . . . . . . . . . . . . . .73 Logout. . . . . . . . . . . . . . . . . . . . . . . . . . . . . . . . . . . . . . . . . . . . . . . . . . . .745.Accessing Remote ServerIntroduction. . . . . . . . . . . . . . . . . . . . . . . . . . . . . . . . . . . . . . . . . . . . . . . .75 Web, Windows and Java Client Viewer . . . . . . . . . . . . . . . . . . . . . . . . . .76 The Windows Client AP . . . . . . . . . . . . . . . . . . . . . . . . . . . . . . . . . . . . . .77 Download . . . . . . . . . . . . . . . . . . . . . . . . . . . . . . . . . . . . . . . . . . . . . .77 Starting Up . . . . . . . . . . . . . . . . . . . . . . . . . . . . . . . . . . . . . . . . . . . . .77 The Java Client AP. . . . . . . . . . . . . . . . . . . . . . . . . . . . . . . . . . . . . . . . . .80 6.The Windows Client ViewerThe Win / Java Client Control Panel. . . . . . . . . . . . . . . . . . . . . . . . . . . . .81 Control Panel Functions . . . . . . . . . . . . . . . . . . . . . . . . . . . . . . . . . . .82 Macros . . . . . . . . . . . . . . . . . . . . . . . . . . . . . . . . . . . . . . . . . . . . . . . .85 Hotkeys. . . . . . . . . . . . . . . . . . . . . . . . . . . . . . . . . . . . . . . . . . . . .85User Macros . . . . . . . . . . . . . . . . . . . . . . . . . . . . . . . . . . . . . . . . .87System Macros . . . . . . . . . . . . . . . . . . . . . . . . . . . . . . . . . . . . . . .91 Video Settings. . . . . . . . . . . . . . . . . . . . . . . . . . . . . . . . . . . . . . . . . . .93 Gamma Adjustment. . . . . . . . . . . . . . . . . . . . . . . . . . . . . . . . . . . .94 The Message Board . . . . . . . . . . . . . . . . . . . . . . . . . . . . . . . . . . . . . .96 The Button Bar . . . . . . . . . . . . . . . . . . . . . . . . . . . . . . . . . . . . . . .96Message Display Panel. . . . . . . . . . . . . . . . . . . . . . . . . . . . . . . . .97Compose Panel. . . . . . . . . . . . . . . . . . . . . . . . . . . . . . . . . . . . . . .97User List Panel . . . . . . . . . . . . . . . . . . . . . . . . . . . . . . . . . . . . . . .97CN9000 / CN9600 / CN9950 User Manual Virtual Media. . . . . . . . . . . . . . . . . . . . . . . . . . . . . . . . . . . . . . . . . . . .98 Virtual Media Icons . . . . . . . . . . . . . . . . . . . . . . . . . . . . . . . . . . . .98Virtual Media Redirection. . . . . . . . . . . . . . . . . . . . . . . . . . . . . . . .98Smart Card Reader . . . . . . . . . . . . . . . . . . . . . . . . . . . . . . . . . . .101 Zoom. . . . . . . . . . . . . . . . . . . . . . . . . . . . . . . . . . . . . . . . . . . . . . . . .101 The On-Screen Keyboard. . . . . . . . . . . . . . . . . . . . . . . . . . . . . . . . .102 Mouse Pointer Type . . . . . . . . . . . . . . . . . . . . . . . . . . . . . . . . . . . . .103 Mouse DynaSync Mode . . . . . . . . . . . . . . . . . . . . . . . . . . . . . . . . . .104 Automatic Mouse Synchronization (DynaSync). . . . . . . . . . . . . .104Manual Mouse Synchronization. . . . . . . . . . . . . . . . . . . . . . . . . .104Mac and Linux Considerations . . . . . . . . . . . . . . . . . . . . . . . . . .105 Open GUI (Configuration). . . . . . . . . . . . . . . . . . . . . . . . . . . . . . . . .106 Control Panel Configuration . . . . . . . . . . . . . . . . . . . . . . . . . . . . . . .107 The Web Client Control Panel. . . . . . . . . . . . . . . . . . . . . . . . . . . . . . . . .109 Web Client Video Settings. . . . . . . . . . . . . . . . . . . . . . . . . . . . . . . . .110 Web Client On-Screen Keyboard . . . . . . . . . . . . . . . . . . . . . . . . . . .111 Web Client Mouse Pointer Type . . . . . . . . . . . . . . . . . . . . . . . . . . . .111 Virtual Media. . . . . . . . . . . . . . . . . . . . . . . . . . . . . . . . . . . . . . . . . . .112 Web Client Mouse Sync Mode . . . . . . . . . . . . . . . . . . . . . . . . . . . . .113 7.Local AccessLocal Console. . . . . . . . . . . . . . . . . . . . . . . . . . . . . . . . . . . . . . . . . . . . .115 Local OSD. . . . . . . . . . . . . . . . . . . . . . . . . . . . . . . . . . . . . . . . . . . . .117 Laptop USB Console (LUC) . . . . . . . . . . . . . . . . . . . . . . . . . . . . . . . . . .118 8.The Log FileThe Log File Screen . . . . . . . . . . . . . . . . . . . . . . . . . . . . . . . . . . . . . . . .121 9.The Log ServerInstallation. . . . . . . . . . . . . . . . . . . . . . . . . . . . . . . . . . . . . . . . . . . . . . . .123 Starting Up . . . . . . . . . . . . . . . . . . . . . . . . . . . . . . . . . . . . . . . . . . . . . . .123 The Menu Bar. . . . . . . . . . . . . . . . . . . . . . . . . . . . . . . . . . . . . . . . . . . . .124 Configure. . . . . . . . . . . . . . . . . . . . . . . . . . . . . . . . . . . . . . . . . . . . . .125 Events. . . . . . . . . . . . . . . . . . . . . . . . . . . . . . . . . . . . . . . . . . . . . . . .126 Search. . . . . . . . . . . . . . . . . . . . . . . . . . . . . . . . . . . . . . . . . . . . .126Maintenance . . . . . . . . . . . . . . . . . . . . . . . . . . . . . . . . . . . . . . . .127 Options . . . . . . . . . . . . . . . . . . . . . . . . . . . . . . . . . . . . . . . . . . . . . . .127 Help. . . . . . . . . . . . . . . . . . . . . . . . . . . . . . . . . . . . . . . . . . . . . . . . . .128 The Log Server Main Screen . . . . . . . . . . . . . . . . . . . . . . . . . . . . . . . . .128 Overview. . . . . . . . . . . . . . . . . . . . . . . . . . . . . . . . . . . . . . . . . . . . . .128 The List Panel. . . . . . . . . . . . . . . . . . . . . . . . . . . . . . . . . . . . . . . . . .129 Panel Showing Logs of the Selected Units. . . . . . . . . . . . . . . . . . . .129 AppendixSafety Instructions. . . . . . . . . . . . . . . . . . . . . . . . . . . . . . . . . . . . . . . . . .131xiCN9000 / CN9600 / CN9950 User ManualxiiGeneral. . . . . . . . . . . . . . . . . . . . . . . . . . . . . . . . . . . . . . . . . . . . . . .131 Rack Mounting . . . . . . . . . . . . . . . . . . . . . . . . . . . . . . . . . . . . . . . . .133 Technical Support. . . . . . . . . . . . . . . . . . . . . . . . . . . . . . . . . . . . . . . . . .134 International . . . . . . . . . . . . . . . . . . . . . . . . . . . . . . . . . . . . . . . . . . .134 North America. . . . . . . . . . . . . . . . . . . . . . . . . . . . . . . . . . . . . . . . . .134 IP Address Determination. . . . . . . . . . . . . . . . . . . . . . . . . . . . . . . . . . . .135 IP Installer. . . . . . . . . . . . . . . . . . . . . . . . . . . . . . . . . . . . . . . . . . . . .135 Browser. . . . . . . . . . . . . . . . . . . . . . . . . . . . . . . . . . . . . . . . . . . . . . .136 AP Windows Client . . . . . . . . . . . . . . . . . . . . . . . . . . . . . . . . . . . . . .136 IPv6. . . . . . . . . . . . . . . . . . . . . . . . . . . . . . . . . . . . . . . . . . . . . . . . . . . . .138 Link Local IPv6 Address . . . . . . . . . . . . . . . . . . . . . . . . . . . . . . . . . .138 IPv6 Stateless Autoconfiguration . . . . . . . . . . . . . . . . . . . . . . . . . . .139 Port Forwarding . . . . . . . . . . . . . . . . . . . . . . . . . . . . . . . . . . . . . . . . . . .140 Keyboard Emulation. . . . . . . . . . . . . . . . . . . . . . . . . . . . . . . . . . . . . . . .141 Serial Port Pin Assignment. . . . . . . . . . . . . . . . . . . . . . . . . . . . . . . . . . .142 Trusted Certificates. . . . . . . . . . . . . . . . . . . . . . . . . . . . . . . . . . . . . . . . .143 Overview. . . . . . . . . . . . . . . . . . . . . . . . . . . . . . . . . . . . . . . . . . . . . .143 Installing the Certificate. . . . . . . . . . . . . . . . . . . . . . . . . . . . . . . . . . .144 Certificate Trusted. . . . . . . . . . . . . . . . . . . . . . . . . . . . . . . . . . . . . . .145 Mismatch Considerations . . . . . . . . . . . . . . . . . . . . . . . . . . . . . . . . .145 Self-Signed Private Certificates . . . . . . . . . . . . . . . . . . . . . . . . . . . . . . .147 Examples . . . . . . . . . . . . . . . . . . . . . . . . . . . . . . . . . . . . . . . . . . . . .147 Importing the Files. . . . . . . . . . . . . . . . . . . . . . . . . . . . . . . . . . . . . . .147 Troubleshooting . . . . . . . . . . . . . . . . . . . . . . . . . . . . . . . . . . . . . . . . . . .148 General Operation. . . . . . . . . . . . . . . . . . . . . . . . . . . . . . . . . . . . . . .148 Windows . . . . . . . . . . . . . . . . . . . . . . . . . . . . . . . . . . . . . . . . . . . . . .150 Java. . . . . . . . . . . . . . . . . . . . . . . . . . . . . . . . . . . . . . . . . . . . . . . . . .151 Sun Systems. . . . . . . . . . . . . . . . . . . . . . . . . . . . . . . . . . . . . . . . . . .152 Mac Systems. . . . . . . . . . . . . . . . . . . . . . . . . . . . . . . . . . . . . . . . . . .153 The Log Server. . . . . . . . . . . . . . . . . . . . . . . . . . . . . . . . . . . . . . . . .153 Additional Mouse Synchronization Procedures . . . . . . . . . . . . . . . . . . .154 Windows:. . . . . . . . . . . . . . . . . . . . . . . . . . . . . . . . . . . . . . . . . . . . . .154 Sun / Linux . . . . . . . . . . . . . . . . . . . . . . . . . . . . . . . . . . . . . . . . . . . .155 Virtual Media Support. . . . . . . . . . . . . . . . . . . . . . . . . . . . . . . . . . . . . . .156 WinClient ActiveX Viewer / WinClient AP. . . . . . . . . . . . . . . . . . . . .156 Java Applet Viewer / Java Client AP. . . . . . . . . . . . . . . . . . . . . . . . .156 Administrator Login Failure. . . . . . . . . . . . . . . . . . . . . . . . . . . . . . . . . . .157 Specifications . . . . . . . . . . . . . . . . . . . . . . . . . . . . . . . . . . . . . . . . . . . . .158 CN9000. . . . . . . . . . . . . . . . . . . . . . . . . . . . . . . . . . . . . . . . . . . . . . .158 CN9600. . . . . . . . . . . . . . . . . . . . . . . . . . . . . . . . . . . . . . . . . . . . . . .159 CN9950. . . . . . . . . . . . . . . . . . . . . . . . . . . . . . . . . . . . . . . . . . . . . . .160 Limited Warranty. . . . . . . . . . . . . . . . . . . . . . . . . . . . . . . . . . . . . . . . . . .162。
kvm切换器使用方法
kvm切换器使用方法
KVM切换器使用方法。
KVM切换器是一种非常实用的设备,可以帮助用户在多台电脑之间进行快速切换,提高工作效率。
下面我们来详细了解一下KVM 切换器的使用方法。
首先,准备工作。
在使用KVM切换器之前,我们需要确保所有要连接的电脑和设备都处于关闭状态。
然后,将KVM切换器的电源线插入电源插座,接通电源。
接着,连接设备。
将KVM切换器的主控端口与显示器、键盘、鼠标等外设连接好。
然后,将要控制的电脑与KVM切换器的对应端口连接好,确保连接牢固。
接下来,开机测试。
依次将要控制的电脑开机,此时我们可以通过操作KVM切换器来切换不同的电脑。
一般来说,KVM切换器有相应的快捷键或按钮来实现切换功能,可以根据设备的说明书来操作。
在使用过程中,我们还需要注意一些细节。
首先,要确保KVM 切换器的连接线路不要过长,以免影响信号传输质量。
其次,注意及时更换电池,保证KVM切换器的正常使用。
最后,使用完毕后,要及时关闭所有电脑和设备,避免长时间空转造成能源浪费。
总的来说,KVM切换器的使用方法并不复杂,只要按照上述步骤进行操作,就可以轻松实现多台电脑的快速切换。
希望以上内容对您有所帮助,祝您使用愉快!。
aten CS428 KVM 控制器 说明书
4控制端 / 8端口KVM切换器CS428用户手册CS428 User ManualFCC 信息本产品是通过FCC认证的A级产品。
在居住环境使用可能会对通讯造成干扰,因此建议用户可采取适当的防护措施。
本产品已经过测试,完全符合A级电子设备要求和FCC认证的第15部分规范。
这些规范是为了在商业环境下使用该设备,而能避免有害干扰,并提供有效保护所规范的规定。
该设备会产生并辐射电磁波,如果用户未能按照该用户手册的说明以进行安装和使用,将可能对通讯造成有害干扰,如果在居住区域使用而造成此种情况,用户将自行解决并负相关责任。
RoHS此产品符合RoHS规范。
SJ / T 11364-2006以下信息与中国市场销售相关。
iiCS428 User Manual 用户信息在线注册请在本公司的在线支持中心注册您的产品。
u国际--- u北美--- /product_registrationu中国地区--- 电话支持u国际--- 886-2-8692-6959u北美--- 1-888-999-ATENu中国地区---86-010-5160-1602用户注意事项制造商有修改与变更手册所包含的信息、文件和规格表的权利,且不需事前通知。
制造商不会保证、明示、暗示或法定声明其内容或特别否认其对于特殊用途的可销售性和适用性。
本手册所描述的任何被销售与授权的制造商软件亦同。
如果在购买后发现软件程序有瑕疵,购买者(及非制造商、其经销商或其购买商家)将需承担所有因软件瑕疵所造成的必要服务费用、维修责任及任何偶然事件或间接损害。
制造商并不担负任何未经授权调整本设备所造成的收音机及/或电视干扰的责任,用户必须自行修正干扰。
操作前如未正确选择操作电压的设定,制造商将不担负因此所导致任何损害的责任。
使用前请务必确认电压设置为正确的。
iiiCS428 User Manual包装明细CS428包装明细如下:u 1 CS428 KVM切换器u 2 KVM线缆(2L-1701S)u 1 电源适配器u 1 机架安装套件u 1 用户手册*请仔细检查确认所有部件是否完整,且运输过程中是否受到损坏。
使用者說明書-首頁-Aten艾腾艾腾艾腾艾腾
KVM on the NET™ 遠端電腦管理方案CS1708i / CS1716i使用者說明書CS1708i / CS1716i User Manualvi電源開啟 (21)菊鍊串接安裝圖 (22)第三章 (23)基本操作 (23)連接埠選擇 (23)手動切換 (23)OSD螢幕選單/GUI (23)熱鍵切換 (23)熱插拔 (24)熱插拔機台 (24)熱插拔電腦連接埠 (24)熱插拔控制端連接埠 (24)第四章 (27)近端控制端操作 (27)介紹 (27)OSD主選單 (28)OSD操作 (29)OSD主選單標頭 (29)OSD功能鍵介紹 (30)F1 GOTO (30)F2 LIST (31)F3 SET (32)F4 ADM (34)F5 SKP (36)F6 BRC (37)F7 SCAN (38)F8 LOUT (39)熱鍵操作 (40)介紹 (40)啟動熱鍵模式 (41)熱鍵切換連接埠 (42)熱鍵設定操作 (45)熱鍵簡表 (47)第五章 (49)瀏覽器登入 (49)介紹 (49)登入 (49)畫面元件 (52)使用者存取圖示 (52)管理者圖示 (52)第六章 (53)管理者功能 (53)介紹 (53)CS1708i / CS1716i User Manual 一般功能 (General) (54)網路功能(Network) (55)存取連接埠 (Access Port) (55)IP位址 (IP Address) (56)DNS Server (57)IP安裝器(IP Installer) (57)結束作業 (57)安全性(Security) (58)登入字串 (60)ANMS (進階網路管理伺服器) (61)RADIUS設定 (62)RADIUS例舉 (63)CC管理設定 (63)LDAP設定 (63)Log Server (日誌伺服器)設定 (65)使用者管理員 (66)客製化功能 (68)自動登出 (68)登入失敗 (68)工作模式 (69)滑鼠同步化模式 (69)重置 (70)維護 (71)韌體更新 (71)備份設定/使用者資料 (72)重新匯入設定/使用者資料 (73)第七章 (75)Windows Client 檢視 (75)開始作業 (75)控制面板 (77)設定熱鍵 (79)視訊調整 (81)留言板功能 (82)按鈕列 (82)螢幕鍵盤 (84)清單功能 (86)連接埠名稱 (88)連接埠操作 (90)連接埠工具列 (90)重喚GUI (90)OSD熱鍵簡表 (91)工具列圖示 (91)自動掃描模式 (92)viiCS1708i / CS1716i User Manualviii畫面分割模式 (93)設定頁面 (95)管理者頁面 (97)一般資訊 (97)使用者管理員 (98)網路設定 (101)ANMS設定 (102)安全性(Security) (103)客製化功能(Customization) (104)第八章 (107)Java Client 檢視 (107)開始作業 (107)第九章 (111)日誌檔案 (111)日誌檔案畫面 (111)第十章 (113)日誌伺服器 (113)安裝 (113)開始作業 (114)選單列 (115)Configure (設定) (115)Events (事件) (116)Options (選項) (118)Help (說明) (118)日誌伺服器主頁面 (119)介紹 (119)清單區塊 (120)事件區塊 (120)第十一章 (121)應用程式操作 (121)介紹 (121)Windows Client用戶端軟體 (121)安裝 (121)開始作業 (122)連線 (124)操作方式 (125)結束連線 (125)Java Client用戶端軟體 (126)開始作業 (126)操作方式 (127)第十二章 (129)韌體升級功能 (129)下載韌體升級套件 (129)CS1708i / CS1716i User Manual 開始更新 (131)升級失敗 (133)附錄 (135)安全指示 (135)一般 (135)機架安裝 (137)全球 (138)北美 (138)疑難排除 (139)管理者 (139)一般操作 (139)Java Client用戶端程式 (140)日誌伺服器 (141)畫面分割模式 (142)Windows Client用戶端程式 (140)Sun系統 (141)鍵盤模擬 (143)Mac鍵盤 (143)Sun鍵盤 (144)決定IP位址的方式 (145)IP安裝器 (145)瀏覽器 (146)AP Windows Client (146)信賴認證 (149)介紹 (149)安裝認證 (150)認證信賴 (151)產品規格表 (152)連接表 (153)CS1708i (153)CS1716i (153)支援的KVM切換器 (154)恢復原始的工廠預設值 (155)保固條件 (156)ix第一章介紹介紹CS1708i / CS1716i為擁有遠端管理能力的IP-based KVM多電腦切換器,可讓遠端管理人員與本地端存取與操控多台電腦。
四合一型ATEN KVM资料SC4-2010_LCD_KVM
2010.08.27
45
案例分析: 广播电视台
• ATEN 解决方案: KL3116T 16-端口 双滑轨 触摸屏 KVM 多电脑切换器 • 优势:
- KL3116T 是基于GUI的一个理想解决方案,可以提供跨平台支持,但不需要鼠 标/键盘输入. - TV电台可以及时切换处理上千个录像带,而替代之前一次仅传输一个VTR录像 带的做法,以节省时间、工作量和成本. - 无需再连接不必要的外围设备,KL3116T 的解决方案无需占用很多空间.
• 案例分析 • 整合解决方案
2010.08.27
2
LCD KVM 解决方案优势
• • • • •
流线型机身设计,仅占有不到1U 机架空间 整合解决方案,节省费用 灵活扩展,轻松升级 支持多平台,此解决方案适用于服务器机房 超 A级TFT 面板; 零坏点保证
2010.08.27
3
LCD KVM 解决方案优势
2010.08.27
44
案例分析: 广播电视台
• 应用环境: 广播电视台 • 挑战: - 广播电视台希望将所有储存的 VTR 内容转换成 HD 格式.
- 希望有12个完整的传输系统来管理上千个需要被处理的 VTR 录像带 - 由于每个系统需使用多台电脑,以提供必要的计算能力,所以电台需要一个解 决方案,以中央管理12个系统和所有连接电脑
10
产品特性
专属启动键
允许用户方便启动热键和 呼出OSD 菜单
支持自动扫描/广播模式
扫描& 监控所有连接的电脑状态
通过按钮, OSD, 热键进行端口选择
大部分机种可以快速地切换到目标主机,具备端口选择和7段LED指 示灯。
可调整的 LCD 位置
- 1、下载文档前请自行甄别文档内容的完整性,平台不提供额外的编辑、内容补充、找答案等附加服务。
- 2、"仅部分预览"的文档,不可在线预览部分如存在完整性等问题,可反馈申请退款(可完整预览的文档不适用该条件!)。
- 3、如文档侵犯您的权益,请联系客服反馈,我们会尽快为您处理(人工客服工作时间:9:00-18:30)。
CS-9134/9138使用说明书CS-9134CS-9138使用硬件环境:操作端(键盘、显示器、鼠标):*一般标准CRT或LCD液晶显示器。
*标准PS/2鼠标。
*PS/2键盘。
计算机端:*配有VGA显示器卡。
装配有PS/2鼠标及键盘插孔。
本产品外观功能说明前面版1、各埠LED灯各端口LED灯位于前面版按键上方。
上面为连接显示灯,下方为选择显示灯:连接显示灯:橘色LED灯亮时,表示所连接计算机处于开机状态。
如果LED灯闪烁时表示正在使用串级CS-9134/9138。
选择显示灯:绿色LED灯亮时,表示此埠被选择中。
LED灯闪烁时,表示被选择的埠正在自动监视中。
2、选择按键*第1及第2键同时按三秒以上,键盘及鼠标重新设定激活(Reset)。
*第7及第8键同时按则自动监视开始。
3、统声音:系统声音由此发出。
4、重新设定:请用细长物轻按3秒,CS-9134/9138将重新设定激活(Reset)。
5、电源LED灯:灯亮时表示CS-9134/9138电源开启中。
背面版1、器插孔:本产品为不需外加电源设计。
电源由所连接的计算机取得。
一般而言,外加电源只限于1)串级时。
2)计算机供电不足或不稳定时。
2、操作端:*如为第一级使用,请由此接上操作端的显示器、键盘、鼠标。
*如为串级使用,请连接到上一级的计算机端。
3、计算机端:请由此接上计算机端。
CS-9138连接示意图本产品安装程序注意:为能快速且正确安装,请于安装前确认所有机器是否全部关机。
单机使用时1.请于CS-9134/9138接上操作端的显示器、键盘、鼠标。
2.单机时,请使用本公司的三合一高品质KVM专用线材连接计算机。
3.如要外加电源,请将变压器接上。
(请注意:CS-9134/9138计算机键盘端口取得所需电源,如供电不足,请外加电源供应器)4.请将计算机电源打开。
串级第二级使用时(串一级使用):如将CS-9134/9138计算机端第一端口串级另一台CS-9134/9138,增加3/7台计算机连接使用。
如将第二级电脑端接满CS-9134/9138可连接16/64台计算机。
串级第二级使用安装程序如下:1.请将所连接机器电源关毕。
2.请用本公司的三合一高品质KVM专用线材将第一级的CS-9134/9138计算机端与第二级的CS-9134/9138操作端连接上。
3.请用本公司的三合一高品质KVM专用线将第二级的CS-9134/9138计算机端口接上各台想连接使用的计算机。
4.第二级串接之其它CS-9134/9138,请重复1~3的操作程序。
5.请将第二级的CS-9134/9138的电源供应器接上。
6.请将第一级的CS-9134/9138的电源供应器接上。
7.请将计算机电源打开。
串级第三级使用时(串二级使用):三级安装程序与二级安装程序相同。
三级安装最多可接到64/512台计算机。
(请注意:CS-9134/9138最多只提供三级串级)串级第二级使用安装程序如下:1.请将所连接机器电源关闭。
2.请使用本公司的三合一高品质KVM专用线材将第二级的CS-9134/9138计算机端与第三级的CS-9134/9138操作端连接上。
3.请用本公司的三合一高品质KVM专用线材将第三级的CS-9134/9138计算机端口接上各台想连接使用的计算机。
4.第三级串接之其它CS-9134/9138,请重复1~3的操作程序。
5.请依次将第三级、第二级、第一级的CS-9134/9138的电源供应器接上。
6.请将计算机电源打开。
操作方法热机插拔:CS-9134/9138支持热机插拔。
正确热机插拔动作如下。
*计算机端热机插拔:1)请将线材插回原来的移除的埠。
2)请先将鼠标插回后再插键盘。
3)如曾移除线材请将第一台重新激活(请按Reset键)。
*操作端热机插拔:1)移除鼠标后,请插回原移除埠。
如此鼠标可立即使用。
2)如插入与原来不同的鼠标时,请将所有CS-9134/9138及计算机关机至少10秒钟后再打开。
注意:热机插拔后如果键盘、鼠标无反应,请将第一台CS-9134/9138的1键和2键同时按3秒,重新激活设定。
切换选择:CS-9134/9138提供三种切换方式:1)手动按键式。
2)组合键式切换。
3)显示器表示(OSD)切换手动。
*手动按键式:使用CS-9134/9138前面版按键切换,切换后LED灯也将切换到已切换的埠。
*组合键式切换:1)按键盘同一边的[Ctrl]+[Alt]+[Shift]。
2)请输入10以外各埠的ID代码后输入[Enter]。
*OSD显示器表示功能。
有关各埠ID编号:如能熟悉埠ID编号识别方式,将能快速切换连接之计算机端口。
埠ID最多以3位数表示CS-9134/9138或计算机之端口号或串级级数。
第一位数字表示第一级之计算机端口号。
第二位数字表示第二级之计算机端口号。
第三位数字表示第三级之计算机端口号。
键盘例:1、只使用一台CS-9134/9138,想切换到第三台计算机时,键盘切换如下:[Ctrl]+[Alt]+[Shift]+[3]+[Enter]2、用第一级第二埠做串级时,如要选择第二级的第三台计算机,请输入:[Ctrl]+[Alt]+[Shift] 23 [Enter]此时选择埠ID为233、用第一级第二埠做串级,再用第二级第四埠做串级,如要选择第三级的第一台计算机,请输入:[Ctrl]+[Alt]+[Shift] 241 [Enter] 此时选择埠ID为241OSD使用说明:OSD提供除了组合键以外的切换方式。
特别在大型系统使用时,端口ID将不易记忆。
OSD操作由主画面开始,请按同一边的Ctrl键两次开启OSD主画面。
OSD操作方式*按[Esc]键将已选择取消,或回到上一个画面。
如果画面为第一个画面,则自动将OSD画面关闭。
*使用键盘上、下键可上下移动OSD画面光棒。
*可使用键盘的[Page Up]、[Page Down]键切换至前后OSD画面。
*将光棒移动到欲选择的选项,按下[Enter]键选择。
OSD主画面:*PN此数字列显示连接计算机的端口ID。
最简单的切换方式为使用光棒移动至想切换埠后按[Enter]键切换。
*QV如已选择快速监视(请参考以下F2、F4),将显示三角符号。
*C显示已连接且已开机的计算机。
*NAME输入各埠名称(请参考以下F5)。
功能选择:*Go To:1)将光棒移至想切换位置后按[Enter]键。
2)输入埠ID或已设定名称后按[Enter]键。
*Scan:按[F2]键将开启OSD的快速自动监视功能,将返复自动监视已设定快速自动监视之计算机。
将依F6设定之时间自动监视。
解除自动监视按[Space]请注意:1、如果自动监视没接计算机之空端口或未开机之计算机端口而停止自动监视,画面将无显示,此时请用组合键切换方式切换至已开机之计算机端口。
2、换计算机时,各端口ID前会出现□S符号表示已自动快速监视过。
*List:此功能选项可增加或限制OSD表。
附属功能如下:1、ALL列出已连接的埠ID及名称一览表;2、QVIEW只显示已设定快速自动监视一览表;3、POWERED ON+QVIEW只显示已设定快速自动监视且已开机计算机一览表;4、QVIEW+NAME只显示已设定快速自动监视或已命名一览表;5、NAME只显示已命名一览表。
6、POWERED ON只显示已开机计算机一览表。
*QV:可选择或解除快速自动监视之设定。
使用方式为将光棒移至想设定之选项后按QV相对应的功能键。
若此埠已设定快速自动监视则将显示三角符号,反之则不显示三角符号。
*Edit:可使用此功能选项来输入、修改或删除命名。
命名方式如下:1、移至想设定之选项。
2、按Edit对应功能键。
3、可输入新命名或修改/删除命名。
最多可命名至15个字符。
4、编辑完成后请按[Enter]键。
*Set:按Set对应功能键显示OSD画面即可变更设定:1、将光棒移至想选择之选项后按[Enter]键。
OSD保安措施CS-9134/9138设有密码保防功能。
如已设定密码请在使用前输入密码。
密码设定方式如下:1、进入SET选项显示设定画面。
2、将光棒移至密码设定(Set Password)后按[Enter]。
3、请输入新密码后按[Enter]键。
(密码最多为8字符、请使用英文字母或数字)4、为确认输入之密码是否正确,请输入一次后按[Enter]键。
如两次密码都相同,则将出现以下完成信息:SET PASSWORD OK如两次密码不相同,则将出现以下信息:PASSWORD NOT MATCHCS-9138常用级联图。