
爱普生培训资料:EPSON安装板要求
EPSON 机械手安装板要求
机械手型号 C 3
水平方向最大扭力500N·M
水平方向最大反作用力800N
垂直方向最大扭力600N·M
垂直方向最大反作用力2500N
安装板厚度要求30mm以上钢板安装板粗糙度要求<25µm
机械手型号G 1
水平方向最大扭力100N·M
水平方向最大反作用力200N
垂直方向最大反作用力300N
安装板厚度要求15mm以上钢板安装板粗糙度要求<25µm
机械手型号G 3
水平方向最大扭力300N·M
水平方向最大反作用力2000N
垂直方向最大反作用力1000N
安装板厚度要求20mm以上钢板安装板粗糙度要求<25µm
机械手型号G 6
水平方向最大扭力500N·M
水平方向最大反作用力2500N
垂直方向最大反作用力1500N
安装板厚度要求20mm以上钢板安装板粗糙度要求<25µm
机械手型号G 10
水平方向最大扭力1000N·M 水平方向最大反作用力4500N
垂直方向最大反作用力2000N
安装板厚度要求20mm以上钢板安装板粗糙度要求<25µm
机械手型号G 20
水平方向最大扭力1000N·M 水平方向最大反作用力7500N
垂直方向最大反作用力2000N
安装板厚度要求20mm以上钢板安装板粗糙度要求<25µm
机械手型号P S 3
水平方向最大扭力300N·M
水平方向最大反作用力500N
垂直方向最大扭力460N·M
垂直方向最大反作用力1100N
安装板厚度要求30mm以上钢板安装板粗糙度要求<25µm
机械手型号P S 3 L
水平方向最大扭力530N·M
水平方向最大反作用力500N
垂直方向最大扭力880N·M
垂直方向最大反作用力1000N
安装板厚度要求30mm以上钢板安装板粗糙度要求<25µm
机械手型号PS3LP
水平方向最大扭力530N·M
水平方向最大反作用力500N·M
垂直方向最大扭力880N·M
垂直方向最大反作用力1000N
安装板厚度要求30mm以上钢板安装板粗糙度要求<25µm
机械手型号P S 5
水平方向最大扭力530N·M
水平方向最大反作用力600N·M
垂直方向最大扭力880N·M
垂直方向最大反作用力1300N
安装板厚度要求30mm以上钢板安装板粗糙度要求<25µm
机械手型号RS3-351
水平方向最大扭力500N·M
水平方向最大反作用力1200N
垂直方向最大反作用力1100N
安装板厚度要求20mm以上钢板安装板粗糙度要求<25µm
机械手型号LS3-401S 水平方向最大扭力250N·M
水平方向最大反作用力1000N
垂直方向最大反作用力1000N
安装板厚度要求20mm以上钢板安装板粗糙度要求<25µm
机械手型号S5-A701
水平方向最大扭力600N·M
水平方向最大反作用力1000N·M 垂直方向最大扭力800N·M
垂直方向最大反作用力3000N
安装板厚度要求30mm以上钢板安装板粗糙度要求<25µm
机械手型号S5-A901
水平方向最大扭力900N·M
水平方向最大反作用力1400N·M 垂直方向最大扭力900N·M
垂直方向最大反作用力3500N
安装板厚度要求30mm以上钢板安装板粗糙度要求<25µm
机械手型号LS6-602S 水平方向最大扭力350N·M
水平方向最大反作用力1500N
垂直方向最大反作用力1500N
安装板厚度要求20mm以上钢板安装板粗糙度要求<25µm
机械手型号RS4-551
水平方向最大扭力500N·M
水平方向最大反作用力1400N
垂直方向最大反作用力1100N
安装板厚度要求20mm以上钢板安装板粗糙度要求<25µm。
EPSON机械手LS系列安装及接线指导书
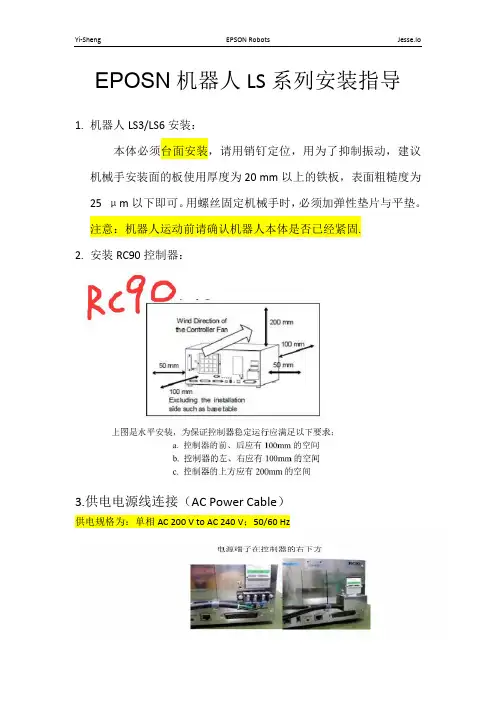
EPOSN机器人LS系列安装指导1.机器人LS3/LS6安装:本体必须台面安装,请用销钉定位,用为了抑制振动,建议机械手安装面的板使用厚度为20 mm以上的铁板,表面粗糙度为25 μm以下即可。
用螺丝固定机械手时,必须加弹性垫片与平垫。
注意:机器人运动前请确认机器人本体是否已经紧固.2.安装RC90控制器:3.供电电源线连接(AC Power Cable)供电规格为:单相AC 200 V to AC 240 V;50/60 Hz4.连接机器人马达电缆(M/C Power Cable)5.连接编码器电缆(M/C Signal cable)6.紧急开关及安全门端子排连接a. 紧急功能接头(25pin)图片:b.急停25pin信号分布表c.急停接线图(如果急停线接错有可能导致主板烧坏):d.常用急停25pin接线图参考:{根据急停接线图,(安全门短接,采用内部24V与0V(pin22~25))}7.I/O(输入输出)接线:a. I/O接头(50pin)图片b.50pin信号配置(共24个输入,16个输出):采用I/O远程控制时,为方便调试,必须有的信号为:输入信号:Pin2:输入No.0 (Start);用于启动机械手运动Pin6:输入No.4 (Stop);用于停止机械手运动Pin7:输入No.5 (Pause) ;用于暂停机械手运动Pin8:输入No.6 (Continue) ;用于继续机械手运动;Pin9:输入No.7 (Reset) ;用于复位机械手的急停,机械手的错误报警信号。
输出信号:Pin10:输出No.0 (Ready) ;用于监控控制器是否上电并启动OKPin11:输出No.1 (Running) ;用于监控机械手程序是否运行Pin12:输出No.2 (Paused) ;用于监控机械手是否暂停Pin13:输出No.3 (Error) ;用于监控机械手是否发生异常报警Pin14:输出No.4 (EstopOn) ;用于监控急停是否被按下或急停故障报错c.输入信号接线:RC90控制器输入电路使用双向光电耦合器,所以可以采用NPN与PNP两种接线方式,输入电流要求: 10 mA TYP/+ 24 V输入时,因此可进行下述2种配线。
爱普生EPSON EPL-6200 installation manual说明书

安裝說明放置紙張開啟電源將印表機連接至電腦Array請翻面Copyright © 2006 Seiko Epson Corporation. All rights reserved.Printed in XXXXXX XX.XX-XX XXX安裝印表機軟體Windows使用者1.請確定已關閉印表機的電源。
2.將印表機百寶箱光碟片放入光碟機中。
3.出現此畫面時,請按下『繼續』鍵。
4.請按下『接受』鍵。
5.出現此對話框時,請按下『安裝』鍵開始安裝。
6.請依照螢幕上的指示完成安裝。
Mac OS使用者1.請確定已關閉印表機的電源。
2.將印表機百寶箱光碟片放入光碟機中。
3.Mac OS 8/9 使用者,請雙擊〝EPSON〞圖示,然後再雙擊〝Mac OS 8/9〞圖示Mac OS X使用者,請雙擊〝EPSON〞圖示,然後再雙擊〝Mac OS X〞圖示。
請按下『接受』鍵。
出現此對話框時,請按下『安裝』鍵開始安裝。
請依照螢幕上的指示完成安裝。
10/100 BaseTX使用者EPL-6200不支援EpsonNet EasyInstall。
若要在網路界面上使用印表機,請依照下列的步驟操作:使用印表機百寶箱光碟片安裝印表機驅動程式。
Network Utilities光碟片中的EpsonNet Config來設定印表機的網路界面。
若您是使用Windows95、98或MeNetwork Utilities光碟片中安裝EpsonNet Print)新增一個Standard TCP/IP Port。
若您是使用Windows95、98或MeEpsonNet Print新增一個Standard TCP/IP Port)詳細步驟,請參考Network Utilities。
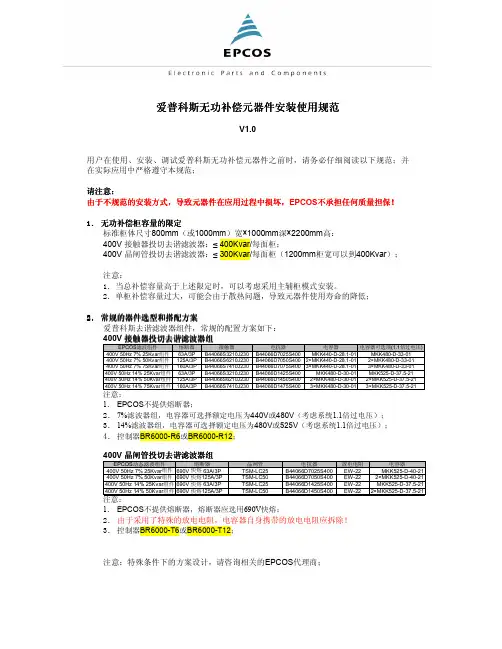
爱普科斯无功补偿元器件安装使用规范
=爱普科斯无功补偿元器件安装使用规范爱普科斯无功补偿元器件安装使用规范V1.0用户在使用、安装、调试爱普科斯无功补偿元器件之前时,请务必仔细阅读以下规范;并在实际应用中严格遵守本规范;请注意请注意::由于不规范的安装方式由于不规范的安装方式,,导致元器件在应用过程中损坏导致元器件在应用过程中损坏,,EPCOS 不承担任何质量担保不承担任何质量担保!!1. 无功无功补偿柜容量的限定补偿柜容量的限定补偿柜容量的限定标准柜体尺寸800mm (或1000mm )宽×1000mm 深×2200mm 高: 400V 接触器投切去谐滤波器:≤ 400Kvar/每面柜;400V 晶闸管投切去谐滤波器:≤ 300Kvar/每面柜(1200mm 柜宽可以到400Kvar );注意:1.当总补偿容量高于上述限定时,可以考虑采用主辅柜模式安装。
2.单柜补偿容量过大,可能会由于散热问题,导致元器件使用寿命的降低;2. 常规的器件选型和搭配方案常规的器件选型和搭配方案爱普科斯去谐滤波器组件,常规的配置方案如下: 400V 接触器投切去谐滤波器组接触器投切去谐滤波器组1. EPCOS 不提供熔断器;2. 7%滤波器组,电容器可选择额定电压为440V 或480V (考虑系统1.1倍过电压); 3. 14%滤波器组,电容器可选择额定电压为480V 或525V (考虑系统1.1倍过电压); 4. 控制器BR6000-R6或BR6000-R12;400V 晶闸管投切去谐滤波器组晶闸管投切去谐滤波器组1. EPCOS 不提供熔断器,熔断器应选用690V 快熔;2. 由于采用了特殊的放电电阻,电容器自身携带的放电电阻应拆除! 3. 控制器BR6000-T6或BR6000-T12;注意:特殊条件下的方案设计,请咨询相关的EPCOS 代理商;=3. 关键元器件的关键元器件的安装安装安装尺寸尺寸尺寸注意:以下都是标准常用的产品规格尺寸,特殊型号请咨询相关EPCOS 代理商;BR6000控制器的安装尺寸控制器的安装尺寸:控制器的外形尺寸为144mm 宽×144mm 高×55mm 深控制器为嵌入式门上安装,柜门开孔尺寸为:138mm×138mm ;电容器的安装尺寸电容器的安装尺寸:MKK440-D-28.1-01 MKK480-D-33-01MKK480-D-30-01 MKK525-D-40-21=EW-22放电电阻的安装尺寸放电电阻的安装尺寸:仅应用于动态投切外形尺寸为 90mm 宽 x 50mm 高 x 100 mm 深MKK525-D-37.5-21=电抗器电抗器的安装尺寸的安装尺寸的安装尺寸:晶闸管安装尺寸晶闸管安装尺寸:TSM-LC25和TSM-LC50外形尺寸为:157mm 宽 x 200mm 高 x 180 mm 深 安装尺寸:=接触器的安装尺寸接触器的安装尺寸:B44066S3210J230B44066S6210J230和B44066D7410J230=元器件外观的检查4.元器件外观的检查收到货物后,首先要检查产品的外包装是否完好;对于外包装已经有破损的器件,需要打开包装核查元器件是否已经损坏;对于电容器,由于是金属铝罐外壳,运输和安装过程中应特别注意;如果电容器表面的凹陷超过0.5mm,禁止使用该电容器!晶闸管模块同样属于比较精密的元器件,运输和安装过程中应特别注意;收到货物时,发现有损坏的器件,应马上通知EPCOS相关代理商;EPCOS不接收在客户已经签收货物后,再对产品提出任何外观疑义的投诉; 5.元器件的安装注意事项元器件的安装注意事项电容柜内关键元器件的安装规范如下:元器件的布置:元器件的布置柜前安装熔断器和接触器(晶闸管模块);柜后安装电容器和电抗器,电容器必须安装在电抗器的下面,严禁将电抗器安装在电容器下面,或将电容器和电抗器安装在同一层安装板上;控制器安装在柜前门上;柜体后门靠近电抗器的位置安装排风风扇,柜前门下面安装进风风扇(或通风栅);为了保证柜内上下,前后的空气流通,请使用安装条架安装元器件,严禁采用整块安装板安装;电容器的安装:电容器的安装使用电容器底部的安装螺栓固定电容器,并按规定的扭矩固定电容器!PhaseCap,PhaseCap HD:底部固定螺栓规格:M12,扭矩10Nm;Phi Cap:电容器直径>53mm,底部固定螺栓规格:M12,扭矩10Nm;电容器直径<53mm,底部固定螺栓规格:M8,扭矩4Nm;注意:不按规定的扭矩安装电容器,容易造成电容器底部螺栓断裂!电容器底部的安装螺栓,同时还起到外壳接地的作用!用电缆将电容器底部M12或M8固定螺栓同系统接地极接通,也可以将电容器直接安装到与系统接地体连通的导体上;为了确保良好的、恒定的导电率和足够的电流承受能力,必须除去接地体上的漆层!如果接地是通过电容器的安装底板来实现的,必须刮去齿形垫和螺母上面底板的漆层!在有良好散热措施的情况下,安装电容器时,电容器外壳之间的间距保持20mm以上的散热距离,同时为了保证电容器的过压分离装置的安全释放,电容器端子顶部距离最近的安装部件(或元器件)之间的距离保持20mm以上的距离;=电抗器的安装电抗器的安装: 电抗器通过底部四个安装孔同柜体安装条架固定;电抗器是发热源,工作时的温升可以达到60℃以上(例如,环境温度为30℃时,电抗器温度可以达到90℃左右);电抗器应该远离其它对温度敏感的元器件;电抗器左右之间的保持100mm 的间距,电抗器同其上部的元器件至少保留150mm的距离;将柜后门排风扇安装在靠近电抗器的位置;晶闸管模块的安装晶闸管模块的安装: 动态补偿的晶闸管模块安装时,在模块垂直向上、向下与其它元器件最少保留100mm 的空间,左右相邻模块间距保持至少20mm 间距;控制器的安装控制器的安装: 控制器为门上嵌入式安装;柜门上控制器安装高度要适合人的视觉和操作需要,安装高度在1700mm 左右;电容器自带放电电阻的安装电容器自带放电电阻的安装: EPCOS 电容器均自带放电电阻;放电电阻可以非常方便地从电容器SIGUT 端子顶部以插件的形式安装; 在触摸电容器前,请先将电容器放电或端子短接! 陶瓷放电电阻表面不能有裂纹; 放电电阻管脚不能有开裂;安装后,陶瓷放电电阻应该比较平整,松紧合适,不能有任何倾斜或松动;电容接触器的安装电容接触器的安装:接触器可以采用35mm 导轨安装,或开孔固定安装; 接触器可以在环境温度50℃和标称容量范围以内使用; 如果超过50℃使用,其投切能力大幅度下降;接触器必须安装在不受其它元器件发热影响的条件下;接触器不能使用在使用频率较高的场合,每年投切次数必须限制在5000次以内;注意注意::EPCOS 不接收任何由于不按本规范安装电容柜不接收任何由于不按本规范安装电容柜,,而导致元器件失效的投诉而导致元器件失效的投诉!!=推荐的安装推荐的安装方式如下方式如下方式如下: 接触器投切去谐滤波柜晶闸管投切去谐滤波柜=错误的安装方式错误的安装方式如下如下如下:: 电抗器安装在电容器下面电抗器安装在电容器下面: 错误原因:下面电抗器散发的热量直接影响到电容器,降低电容器使用寿命;电抗器和电容器安装在同一层电抗器和电容器安装在同一层安装板上安装板上安装板上: 错误原因:不但上下层之间通风散热不好,而且电容器还会受到旁边电抗器的影响;=导线规格的选择6.导线规格的选择优质多股铜芯软电缆连接,推荐的导线规格如下: 对于电容柜内元器件的连接,推荐采用优质多股铜芯软电缆优质多股铜芯软电缆电缆的连接规范7.电缆的连接规范对于电容柜内元器件之间同电缆的连接,请务必注意以下事项:接触器同电缆连接注意事项:接触器同电缆连接注意事项严禁将电缆搪锡后,再同接触器相连接;严禁将电缆压接电缆接头后,再同接触器相连接;严禁将电缆搪锡并压接电缆接头后,再同接触器相连接;EPCOS的电容器接触器的接线端子本身为电缆钳压紧形式,正确的接线方法是先将电缆除去绝缘层后,无需做任何处理,可以直接接入接触器端子内,然后拧紧!所以操作时,要防止电缆线芯分叉;按推荐的电缆规格,每相尽量只连接单根电缆,避免接线过密使热量聚集;错误的电缆处理方法:错误的电缆处理方法=电抗器电抗器同电缆连接注意事项同电缆连接注意事项同电缆连接注意事项: 电抗器的主回路接线端子处为母线排结构,所以电缆同电抗器的连接时,请采用合适的电缆接头,按标准的制造工艺压接,严禁将电缆线芯搪锡后再压接电缆接头; 按推荐的电缆规格选择连接电缆;一台电抗器再连接多只电容器的情况下,建议电抗器出线排使用1片多孔小铜排进行转接,参见下图;由于电抗器的温度传导,电缆连接端子处,容易产生热量聚集,因此接线处要保证接线质量和制作工艺;接线时不能强行将电缆弯曲,电容柜内的电缆应远离电抗器,严禁走线时,将电缆外绝缘皮同电抗器外表面相接触,电缆应架空走线;电抗器上会附带温度接点,正常状态下为常闭点,可以用来控制该回路,使其高温情况下退出运行;也可以将该点做输出报警;也可以不使用!电容器电容器同电缆连接注意事项同电缆连接注意事项同电缆连接注意事项: 电容器每相接线端子仅允许连接一根电缆; 按推荐的电缆规格连接电容器;请不要在电容器端子上并联多个电容器,电容器之间需要并联时,可以在上一级电抗器的端子处并联;电缆采用管状端头连接电容器(严禁将电缆线芯搪锡严禁),操作步骤如下:1. 电缆剥去长约12mm 的绝缘外皮,套上对应的管状端头,如图1;2. 然后用专门的压接工具(如Weidmuller 的PZ16)压接,如图2所示,3. 压接后,电缆端头的形状如图3所示;4. 同样压好另外两根导线,然后依次接到电容器端子内,如图4;5. 采用专用螺丝刀,扭矩1.2Nm 紧固三个螺钉;电缆同电容器端子连接的时候,应避免电缆接头和电缆本身过度弯曲,避免使用任何其它形式的机械应力作用在电容器端子上;=在电容器端子上施加过度的应力,会造成电容器端子内部损坏,从而引起泄漏,最终导致保险装置失效!保证电缆同电容器端子接线可靠,根据以下要求的固定扭矩来固定;不能在超过电容器端子的最大标称电流的情况下,使用电容器。
手册_EPSON培训手册
12
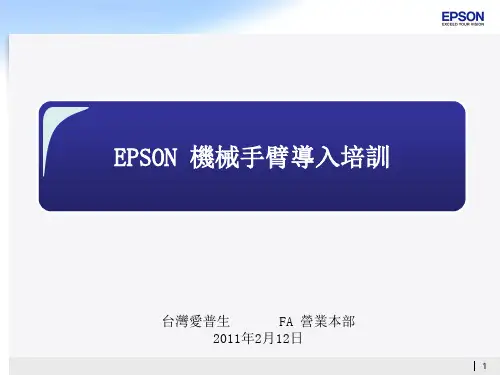
五、SPEL+語言
4.變數的類型 變數有很多種類型,使用前先說明類型,格式為:數據類型變量名。例如: Integer i,定義變量i為整型數據。另外,代入的數據和變量的類型必須一致。在下 表中列出SPEL+ 語言中使用的數據類型。
13
六、動作指令
1. 動作指令分類
使機械手臂動作的指令叫作動作指令。 可分為:PTP動作指令,CP動作指令,Curves動作指令,Joint動作指令。
17
六、動作指令
5. 速度設定指令 5.1 PTP指令的速度設定
Speed 功能用於設定PTP動作速度的百分比 格式:Speed s,[a,b] 說明:s 速度設定值;a 第三軸上升速度設定值;b 第三軸下降速度設定值。 範例:1. Speed 80 2. Speed 80,40,30
圖2
NOTE:
1、Jump不能用於6軸機械手臂,6軸機械手臂只能使用Jump3和Jump3 CP指令 2、Jump3CP指令用法與Jump3類似,不同在於Jump3CP是3個CP動作的组合 3、SCARA機械手臂Z軸上升或下降動作時,使用Jump指令可以提高運动速度
3.4 BMove 、TMove、CVMove 指令
表1
7
二、硬體概要
系统組成圖示
8
三、EPSON RC+ 用戶界面
9
四、示教
1. 微調Jog &Teach介面
打開Jog&Teach介面: Tools →Robot Manager →Jog&Teach或點選工具檔
圖標後,選擇Jog&Teach介面。如下圖示
Mode說明:
World:在當前的局部坐標系、工具坐標系、機械手臂属性、ECP坐標系上,向X、Y、Z轴的方向微調動 作。如果是SCARA型機械手臂,也可以向U方向微動。如果是垂直6軸型機械手臂,則可以向U方向(傾 斜)、V方向(仰卧)、W方向(偏轉)微動。 Local: 向定義的局部坐標系的方向微動移動。 Tool : 向工具定義的坐標系的方向微動移動。 Joint : 各機械手臂的關節單獨微調移動。不是直角坐標型的機械手臂使用Joint模式時,顯示單獨的 微調按钮。 ECP : 在用當前的外部控制點定義的坐標系上,微調動作。
爱普生EPSON TM88 通用影票卖品票券打印机安装手册说明书
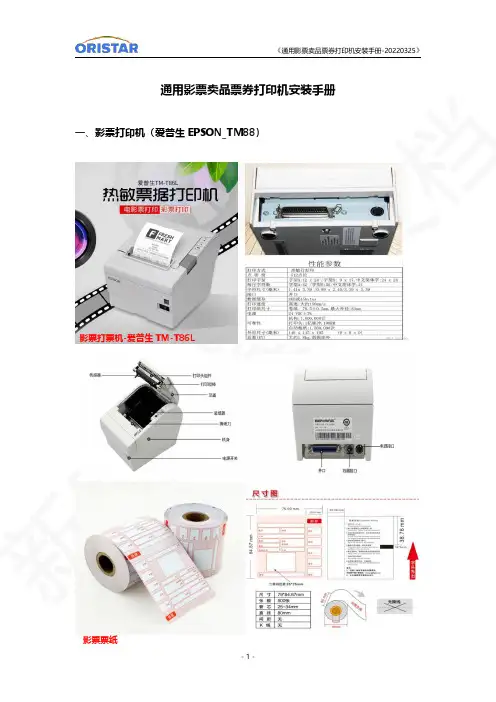
通用影票卖品票券打印机安装手册一、影票打印机(爱普生EPSON_TM88)影票打票机-爱普生TM-T86L影票票纸点击:在线客服-在线咨询-下载中心-常用软件-T86L打印机驱动EPSON影票打印机驱动TM.win7,进行下载双击安装驱动包如果系统以往安装过对应驱动,提示如下图,选择覆盖默认下一步:默认选择XP下一步选择EPSON TM_T88III Receipt,完成安装完成后,提示重启电脑3、驱动接口配置重启过电脑后,控制面板-找到新安装好的打印机驱动端口页面设置-打印机对应的端口,以及勾选掉“启用双向支持”查询确认打印机对应电脑的实际接口测试打印:常规页面-测试打印,测试正常打印为正常。
二、小票打印机(芯烨POS58)1、驱动下载POS58驱动下载:https:///online/upload/xzzx/changyongruanjian/windows.POS58.exe 2、驱动安装双击安装安装包,启动安装默认下一步,直至完成安装根据实际型号选择不同的票纸大小3、驱动接口配置控制面板,找到已安装好的驱动右键属性,端口页面配置打印机具体的接口如果钱箱是直接插在打印机上的,直接按下图方式选择打开方式并确定测试打印页面,正常打印即可完成。
三、票券打印机(TEC B-SX5-CN)1、驱动安装依据影院提供驱动默认安装完成2、驱动接口配置60X50mm的标签纸,打印如下图:打印机设置:在电脑控制面板打印机首选项中,设置纸张大小为60MMX50MM,衬底宽度全部修改为0在打印机卷TAB页面,设置为有间距的标签打印机位置偏移量调节,根据实际打印效果,可以调整水平偏移和垂直偏移量,较少调整打印出来的条码,如果太大或者把条码下面的文字盖住了,那么就要修改客户端的配置文件来调整配置文件目录(默认安装目录):C:\Program Files(x86)\TClient修改条码大小和高度。
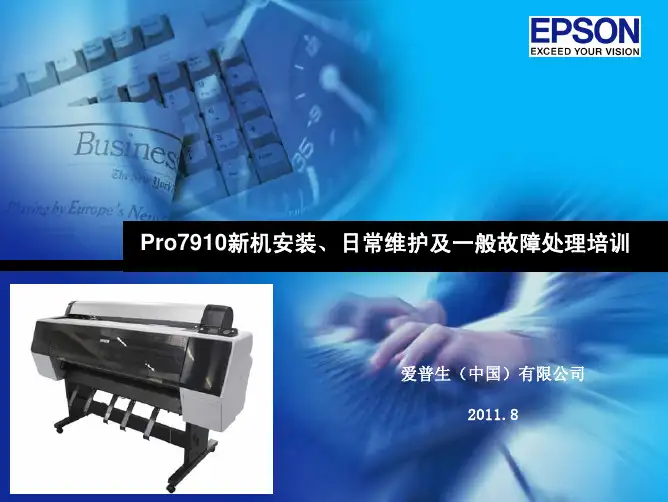
EPSON Pro7910新机安装、日常维护及一般故障处理 培训
图一
图二
第22页
4.打印头清洗
打印头全色清洗和逐色清洗
第23页
第三部分:一般故障处理
1、墨盒不识别如何对应 2、面板提示黑墨不匹配
第24页
1.墨盒不识别如何对应
(1)当墨盒出现下列两种问题时请参照下列方法解决
由于Pro7910/9910采 用了新的墨舱结构。 用户取出墨盒时,需 要首先往里推,然后 墨盒会自动弹出。避 免用户直接用力向外 拉的错误操作导致墨 舱内部触点或者 CSIC 芯片损坏。
图二
图三
第20页
2.光栅清洁
(1)将打印机前盖打开。 (2)用无纺布对尘土进行清洁。(参见图一) (3)如果光栅表面有墨滴或其它污物,请用纯净水将清洁棉签沾湿进行擦拭。(参见图二) (4)如光栅出现折损请进行更换。(参见图三)
图二
图三 图一
第21页
3.压纸轮及走纸通道清洁
(1)将打印机前盖打开。 (2)用无纺布沾清水擦拭压纸轮表面。(参见图一) 注:如用清水无法清洁掉污渍,请尝试用酒精进行清洁,清洁干净后用清水擦拭干净。 (3)用无纺布清洁走纸通道上的纸粉。如走纸通道上有墨渍,请用软布沾清水擦拭干净,在用干布擦净水渍。 (参见图二)
第5页
选择地点
第6页
清点物品
*专业版还有分光光度计组件
第7页
安装支架
注意方向标示
第8页
安装纸蓝
要特别注意和以前机型纸 蓝安装的不同之处:方形 和圆形支架。
第9页
去除保护材料
第10页
安装墨盒、充墨
如果语言不是中文: 切换显示语言。 (方法请参见后文)
第11页
装入卷纸
3 1 4
2
装卷纸时的一些注意点 和操作点。
Epson打印机安装和设置指南说明书
Note:• A n Internet connection is required to obtain the product software.• T o print from a Chromebook™, go to/support/chromebookprint (U.S.) or http://epson.ca/support/chromebookprint (Canada) for instructions.Firmware Update Notice: The printer is designed to work only with genuine Epson-branded cartridges. Other brands of ink cartridges and ink supplies are not compatible and, even if described as compatible, may not function properly or at all. Epson periodically providesfirmware updates to address issues of security, performance, minor bug fixes and ensure the printer functions as designed. These updates may affect the functionality of third-party ink. Non-Epson branded or altered Epson cartridges that functioned prior to a firmware update may not continue to function.1 M ake sure the product is NOT CONNECTED to yourcomputer.W indows ®: If you see a Found New Hardware screen, clickCancel and disconnect the USB cable.2 D ownload and run your product’s software package. Forthe latest software, visitXP-4200/support/xp4200 (U.S.) http://epson.ca/support/xp4200 (Canada)XP-4205/support/xp4205 (U.S.) http://epson.ca/support/xp4205 (Canada)3 F ollow the instructions on the computer screen to run thesetup program.4 W hen you see the Select Your Connection screen, selectone of the following and follow the on-screen instructions:•Wireless connectionIn most cases, the software installer automatically attempts to set up your wireless connection. If setup is unsuccessful, you may need to enter your network name (SSID) and password.•Direct USB connectionM ake sure you have a USB cable (not included).Mobile and voice-activated printing• Print directly from your Android™ (v4.4 or later) device*.Simply connect your printer and device to the same network and tap the menu icon to select the print option. • Turn your mobile device into an intuitive, easy-to-useprinting and scanning control center with Epson Smart Panel. Download the app from your mobile device’s app store.• Print remotely with Epson Connect™. See your onlineUser’s Guide for instructions or learn more at /connect (U.S.) or http://epson.ca/connect (Canada).Ensure brilliant results with Epson specialtySee the online User’s Guide for information about loading capacity, available paper types and sizes, and loading envelopes.1 M ake sure the product is done charging the ink. Openthe feeder guard, then raise the paper support and tilt it backwards slightly.3 L4 S5 P6 F ollow the instructions on the LCD screen to select yourpaper settings and to adjust the print quality of yourproduct, if necessary.• Use voice-activated assistants to print a variety of creativeand everyday items from your Epson product. Simply add your product to an Epson Connect account, then link the account to a voice-activated assistant. See/voice (U.S.) or http://epson.ca/voice (Canada) for more information.* M ay require the Epson Print Enabler or Mopria Print Service app fromGoogle Play™.Any problems?Network setup was unsuccessful.• Print a network connection report to identify networkproblems and solutions. See your online User’s Guide for instructions.• M ake sure you select the right network name (SSID).• Restart your router (turn it off and then on), then try toconnect to it again.• T he printer can only connect to a network that supports2.4 GHz connections. If your router offers both 2.4 GHz and 5 GHz connections, make sure the 2.4 GHz connection is enabled.• I f you see a firewall alert message, click Unblock or Allow to let setup continue.• I f your network has security enabled, make sure you enteryour network password (WEP key or WPA passphrase) correctly. Be sure to enter your password in the correct case.There are lines or incorrect colors in my printouts.Run a nozzle check to see if there are any gaps in the printout. Then clean the print head, if necessary. See the online User’s Guide for more information.The product’s screen is dark.Make sure your product is turned on, and press any button to wake it from sleep mode.Setup is unable to find my printer after connecting itwith a USB cable.Make sure your product is turned on and the USB cable is securely connected.Any questions?User’s GuideWindows: Click the icon on your desktop or Apps screen to access the online User’s Guide .Mac: Click the icon in Applications/Epson Software/Guide to access the online User’s Guide .If you don’t have a User’s Guide icon, go to the Epson website, as described below.VideosVisit /support (U.S.) orhttp://epson.ca/support (Canada) and search for your product to view support videos (videos available only in English).EPSON, Claria, and Epson Smart Panel are registered trademarks, EPSON Exceed Your Vision is a registered logomark, and Epson Connect is a trademark of Seiko Epson Corporation.Designed for Excellence is a trademark of Epson America, Inc.Windows is a registered trademark of Microsoft Corporation in the United States and/or other countries.Mac is a trademark of Apple Inc., registered in the U.S. and other countries.Android, Chromebook, and Google Play are trademarks of Google LLC.General Notice: Other product names used herein are for identification purposes only and may be trademarks of their respective owners. Epson disclaims any and all rights in those marks.This information is subject to change without notice.© 2022 Epson America, Inc., 1/22Printed in XXXXXXCPD-61850。
爱普生初级培训资料
关闭伺服 打开伺服
在伺服ON时可以选择 单独释放一个或多个 轴,六轴机械手除外
当机械手出现报 警时单击重置复
位报警
22
四、RC+ 7.0软件操作
4.1 点位示教
工具→机器人管理器 →步进示教 或单击工具栏 图示
图标后,选择“步进示教”页面。如下
模式说明:
默认:在当前的局部坐标系、工具坐标系、机械手属性、ECP坐标系上,向X、Y、Z轴的方向微动动作。 如果是SCARA型机械手,也可以向U方向微动。如果是垂直6轴型机械手,则可以向U方向(倾斜)、V方 向(仰卧)、W方向(偏转)微动。 工具 : 向工具定义的坐标系的方向微动移动。 Local: 向定义的局部坐标系的方向微动移动。 关节 : 各机械手的关节单独微动移动。不是直角坐标型的机械手使用Joint模式时,显示单独的微动 按钮。 ECP : 在用当前的外部控制点定义的坐标系上,微动动作。
1)单击“项目”,选择“打开”,打开下图图所示窗口
选择文件存储目录
单击“打开”打开 一个项目
微动按钮
输入点标签(可省略)
选择要示教的点位
单击“示教”进入右 图画面
单击“确定” 25
四、RC+ 7.0软件操作
3) 保存点文件
在“机器人管理器”界面里单击“点数据”,单击“保存”。或者在工具栏单击图 标“ ”也可保存点文件。
单击此图标保存 所有文件
单击“保存” 26
四、RC+ 7.0软件操作
(2)设置新增以太网连接名称及IP地址 ,控制器出厂默认控制器IP设置如右下图所示 设置好IP后单击应用,如果控制器IP忘记了,可以先用USB线连接控制器然后在 “设置”|控制器|configuration里可以查看控制器IP,电脑IP的前三位要与控制 器的前三位相同,例如“192.168.0.10”。设置好IP地址后单击“连接”连接控 制器 。
Epson 投影仪安装指南与连接方法说明书
Quick SetupBefore using the projector, make sure you read the safety instructions in the online User’s Guide .Note: Your product may differ from the illustrations on this sheet, but the instructions are the same.Note: Not all products are available in all regions.ContentsMake sure your projector box included all of these parts:Installation optionsYou can install your projector in the following ways:•M ounted on a wall or ceiling using the direct mount (included) • Mounted on a lighting track using the optional lighting track mount: ELPMB66W (White)/ELPMB66B (Black)• Mounted on a table or floor using the optional floor stand: ELPMB55W (White)/ELPMB55B (Black)Note: To purchase optional mounts or other accessories, see “Optional accessories.” For more information about the mounts, see the Installation Manual that came with the mount or the online User’s Guide .Connect the projectorChoose from the following connections. See the sections below or the online User’s Guide for details.Note: For information about connecting sensors or other external devices, see the online User’s Guide .Wired networkConnect the projector to your network using an Ethernet cable. See “Setting upa wired connection” for more information.Computer or video deviceConnect one end of an HDMI cable to the projector’s HDMI port and the otherend to an HDMI port on your computer or video device.External speakersConnect one end of a 3.5 mm stereo mini-jack audio cable to the projector’s Audio Outport and the other end to your powered external speakers.Install the batteries as shown (two AA batteries).and offto the HDMI portAccess projector menusDisplay a test patternSD cardChange image overlay shape and colorNavigate projector menusAccess playlists you assigned to each of the numeric buttons (1 to 9)Adjust projector focus Control projector volumeSwitch to spotlight modeDisplay a playlist on SD cardFor more information on using the remote control, see the online User’s Guide .Turn on your equipmentNote: Your connection method may vary depending on your setup.1C onnect your computer, video equipment, or insert an SD card.2Make sure the power cord is connected and plugged into anelectrical outlet.3 P ress the power button on the projector or remote control. The Statuslight flashes blue and then stays on.Note: To shut down the projector, press the power button twice.4 I f you don’t see an image, press one of the input source buttons on theremote control to select the image source.N ote:5 Icontrol.6 Tlanguage, press theExtended and press . Select yourlanguage and press . Press the Menu button to exit the menu system.Setting up a wirelessconnectionFollow these steps to set up the projector for a wireless network connection.Note: For more information about using the projector on a network, see theonline User’s Guide.1 P ress the Menu button on the remote control, select the Network menu,then press .2 S elect On as the Wireless LAN Powersetting.3 S elect Network Configuration and press .4 S elect the Basic menu and press.5 S elect the basic options as necessary and press .6 S elect the Wireless LAN menu and press .7 S elect one of the following as the Connection Mode setting:•Quick for a direct connection to a computer, tablet, or smartphone.•A dvanced to connect your projector to a wireless router or accesspoint.8 S elect any other settings on the Wireless LAN menu as necessary. See theonline User’s Guide for details.9 W hen you are finished, select Complete and press , then pressagain to save your settings.10 P ress the Menu button to exit the menu system.Install the optional softwareDownload and install optional software to perform various tasks wirelessly, suchas uploading content, monitoring or controlling your projector, and projectingfrom multiple computers.You can download the optional software and its manuals from the Epsonwebsite, as described in “Where to get help.”Setting up a wiredconnectionFollow these steps to set up the projector for a wired network connection.Note: For more information about using the projector on a network, see theonline User’s Guide.1 P ress the Menu button on the remote control, select the Network menu,then press .2 S elect Network Configuration and press .3 S elect the Basic menu and press .4 S elect the basic options as necessary and press .5S elect the Wired LAN menu and press.6 C hoose IP Settings and press .7If your network assigns addresses automatically, make sure the DHCP setting is on. If not, make sure DHCP is off and enter the projector’s IP Address , Subnet Mask , and Gateway Address , as needed. Then press Esc .8 To prevent the IP address from appearing on the network standby screen, set the IP Address Display setting to Off .9When you are finished, select Complete and press , then pressagain to save your settings.10 P ress the Menu button to exit the menu system.Using web remoteYou can use a standard web browser to control the projector through thenetwork. A virtual remote control on your computer screen lets you perform many of the same functions as you can with the physical remote control.1Open your web browser and enter the IP address of the projector you want to monitor in the browser’s address bar.If you’re not sure what the IP address of the projector is, turn the projector on and select Net. Info. - Wired LAN or Net. Info. -Wireless LAN from the Network menu to display the IP address of the projector. (Do not enter the leading zeroes.)2E nter EPSONWEB as the user name and admin as the default password, then click OK . The Epson ®Web Control menu opens.3 S elect Remote . If you see a login screen, enter EPSONREMOTE as the user name and guest as the password.4Use the on-screen buttons to operate the projector, as you would usingthe remote control.Select image sourceAdjust volume Add overlay effect to imageTurn off pictureand soundSelect a savedplaylistUsing the Epson iProjection appYou can project wirelessly from a mobile device (iOS, Android TM , or Chromebook TM ) using the Epson iProjection™ app and a QR code.1S can the following QR code to download and install the Epson iProjection app.2 If you connected the projector to a network wirelessly, make sure to connect your mobile device to the same network.3 P ress the Menubutton on the remote control, select the Network menu, and select Display the QR Code to display a QR code.4S tart Epson iProjection on your mobile device.5U se the QR code reader feature to read the QR code displayed.6F ollow the app instructions to connect your device to the projector. For more information on setting up and using this app, visit/iprojection (U.S.) or www.epson.ca/iprojection (Canada), or /iprojection (Caribbean).Managing contentYou can manage content from your computer using the Epson ProjectorContent Manager software, or over the network using a web browser (Epson Web Control) or the Epson iProjection app.Note: An SD card is required for managing content.Epson Projector Content ManagerWeb Browser/ Epson iProjectionCreate and edit playlists and apply effects and filters √√Create custom filters √Create and edit timetable√Save project on an SD card √Convert video files √Upload video and picture files over a network √√Control projector over a network√Using the Content Manager softwareThe Epson Projector Content Manager software allows you to add images and movies to playlists and save them directly to an SD card. You can easily project your playlist content by inserting the SD card into your projector’s card slot. Youcan also save your project to an SD card inserted in a networked projector.Note:from your product’s support page (see “Where to get help”). For moreinformation, see the online Epson Projector Content Manager Operation Guide or the online User’s Guide .TroubleshootingIf you see a blank screen or the No signal message after turning on your computer or video device, check the following:•M ake sure the Status light on the projector is blue and not flashing.•M ake sure all necessary cables are securely connected, or that the SD cardis inserted correctly, and the power is on for the projector and connected video sources.•P ress one of the source buttons (Spotlight, HDMI, LAN, or SD) on the remote control to switch to the correct image source, if necessary.•P ress the A/V Mute button on the remote control to see if the image was temporarily turned off.•M ake sure the image being projected is not completely black (only when projecting computer images).•F or images projected with Windows® Media Center, reduce the screen size from full screen mode.•F or images projected from applications using Microsoft® DirectX®, turn off DirectX functions.•I f you’re using a Windows laptop, press the function key on your keyboard that lets you display on an external monitor. It may be labeled CRT/LCD orhave an icon such as . You may have to hold down the Fn key while pressing it (such as Fn + F7). Wait a moment for the display to appear.O n Windows 7 or later, hold down the Windows key and press P at thesame time, then click Duplicate.•I f you’re using a Mac laptop, open System Preferences and select Displays. Click the Arrangement tab and select the Mirror Displayscheckbox.RegistrationRegister today to get product updates and exclusive offers. You can register online at /webreg.Where to get helpManualsFor more information about using the projector, see the online manuals. You can view or download the manuals from the Epson website, as described below. Internet support servicesVisit /support (U.S.) or www.epson.ca/support (Canada) and search for your product to download software and utilities, view manuals, get FAQs and troubleshooting advice, or contact Epson.Telephone supportTo use the Epson PrivateLine® Support service, call (800) 637-7661. This serviceis available for the duration of your warranty period. You may also speak with a support specialist by calling (562) 276-4394 (U.S.) or (905) 709-3839 (Canada). Support hours are 6 am to 8 pm, Pacific Time, Monday through Friday, and7 am to 4 pm, Pacific Time, Saturday. Days and hours of support are subject to change without notice. Toll or long distance charges may apply. Optional accessoriesFor a list of optional accessories, see the online User’s Guide.You can purchase screens or other accessories from an Epson authorized reseller. To find the nearest reseller, call 800-GO-EPSON (800-463-7766). Or you can purchase online at (U.S. sales) orwww.epsonstore.ca (Canadian sales).EPSON and LightScene are registered trademarks, EPSON Exceed Your Vision is a registered logomark, and Epson iProjection is a trademark of Seiko Epson Corporation.PrivateLine is a registered trademark of Epson America, Inc.Windows is a registered trademark of Microsoft Corporation in the United States and/or other countries.Mac is a trademark of Apple Inc., registered in the U.S. and other countries.Android and Chromebook are trademarks of Google Inc.General Notice: Other product names used herein are for identification purposes only and may be trademarks of their respective owners. Epson disclaims any and all rights in those marks.This information is subject to change without notice.© 2020 Epson America, Inc., 10/20CPD-60188。
爱普生注意事项客户学习内容
客户学习内容1.地电安装.以及注意事项。
2.水箱位置,水箱通电前加水,通电后水循环在补水,以及注意事项。
3.开关识别。
4.电源线,吸风电机电源线,USB线连接。
5.墨水安装,墨囊安装,喷头安装,排线安装【线在第一次安装时喷车板上的排线先不要插等把墨水抽下后在关机插线,防止线插错烧喷头。
】以及注意事项。
6.电脑配置要求。
7.如何安装驱动,安装锐彩学习。
8.如何添加打印机,打印机连接不上打印机如何解决。
9.打印机驱动里的按键学习。
墨站参数更改,清洗参数更改,和白墨选项选择。
10.X轴校正,Y轴校正,垂直校正,双喷头之间距离校正,双向校正,基准步进校正。
学习如何调整方法和各个校正配合顺序。
11.锐彩里面的按键学习。
打印机设置【添加打印机】,画布设置,设置里的白墨效果,误差补偿校正,打印时精度选择,曲线选择,端口选择,墨量调节。
12.锐彩里打印方法;1.PIN打印效果2.布局打印效果3.白墨打印效果。
13.双向打印上下是定位时。
下限位定位学习使用。
14.墨站物理调整学习吸墨对位。
15.Z轴出现问题怎么解决1.点上下按键上下不动。
2.机头上下只能朝一个方向跑。
3.Z轴皮带松紧调节。
16.Y轴出现问题怎么解决1.点前后按键前后不动。
2.机头前后只能朝一个方向跑。
3.Y轴皮带松紧调节。
17.X轴出现问题怎么解决1.点左右按键左右不动。
2.机头左右只能朝一个方向跑。
3.X轴皮带松紧调节.4.双向打印位置每次都有变化。
18.机器日常维护保养注意事项与学习。
(防锈与润滑)客户确认签字:。