搓盖机说明书教材
自动(半自动)搓丝机操作规程范本

操作规程编号:LX-FS-A30015自动(半自动)搓丝机操作规程范本In The Daily Work Environment, The Operation Standards Are Restricted, And Relevant Personnel Are Required To Abide By The Corresponding Procedures And Codes Of Conduct, So That The Overall BehaviorCan Reach The Specified Standards编写:_________________________审批:_________________________时间:________年_____月_____日A4打印/ 新修订/ 完整/ 内容可编辑自动(半自动)搓丝机操作规程范本使用说明:本操作规程资料适用于日常工作环境中对既定操作标准、规范进行约束,并要求相关人员共同遵守对应的办事规程与行动准则,使整体行为或活动达到或超越规定的标准。
资料内容可按真实状况进行条款调整,套用时请仔细阅读。
适用机型:A251(Z25-6)A253AA255(Z25-20)、A253Ж,91938。
一、认真执行《锻压设备通用操作规程》有关规定。
二、认真执行下述有关补充规定:(一)、工作前检查搓丝板、夹具应完好无崩损,安装正确,紧固牢靠。
(二)工作中认真做到:1、料斗内不得混入切屑和脏物。
加料不得过多。
2、如遇螺栓被卡在搓丝板间发生焖车时,只准用人工盘动飞轮来消除,不准开动设备。
请在该处输入组织/单位名称Please Enter The Name Of Organization / Organization Here。
搓盖机说明书

Joyar上海卓洋SSP说明书目录一、工作原理及特点 (1)二、主要技术参数 (1)三、机器结构 (2)四、安装与调试 (3)1、机架底脚调节 (3)2、主机上下位置调节 (3)3、同步带夹紧调节 (3)4、旋盖搓轮夹紧调节 (4)5、瓶盖喷嘴导向装置调整 (5)五、安全及维护保养 (6)1、机械部分 (6)2、电气部分 (8)六、常见故障及排除 (9)1、机械部分 (19)七、易损件及外购件明细 (10)八、电气原理图 (10)工作原理及特点套上盖子的瓶体连续进入旋盖机后,由双层立式同步带夹持向前。
瓶盖先后经三对同向旋转的聚氨酯搓轮后被逐步搓紧。
本机可以根据客户的瓶型,适当调节夹瓶同步带高度和宽度、搓轮的高度和宽度, 来达到理想的旋盖速度和稳定效果。
而且调节部位均有目视控制的标尺或刻度。
瓶型或盖时无须备件,只需稍作调整即可满足生产要求。
主要技术参数适用螺纹盖直径:适用瓶体直径:适用瓶体高度:传送带线速:搓轮旋盖线速:生产能力:搓轮扭矩:电源:总功率:外形尺寸(LxWxH): 10 ~ 100mm10 ~ 150mm30 ~ 350mm0 ~ 16 m/min0 ~ 18 m/min80~150bot/mi n1~5N.m220V~240V/50Hz~60Hz1Kw1000x1000x1700mm更新三、机器结构半自动芯轴式旋盖机结构图如下(图一)。
机器主要由机架、操作箱、双夹同步带、搓轮装置、升降装置、电器箱等组成。
整个框架全部为304不锈钢。
图一旋盖机结构图四、安装与调试1机架底脚调节主要用于调节整体的高度及水平与生产线相协调。
2、主机上下位置调节主机与流水线输送带之间相对距离的调整靠升降螺杆。
方式有手动升降和自动升降。
位于调节处设有升降刻度尺。
(图二)当采用手动升降时,可通过手摇轻松升降;当采用自动升降时,只要按下控制开关即可。
而且在电机驱动状态下,分别有上下安全限位开关控制主机。
图二升降刻度尺位置3、同步带夹紧调节为适应不同的瓶径、瓶高,同步带之间距离可进行调整。
旋盖机中文说明书
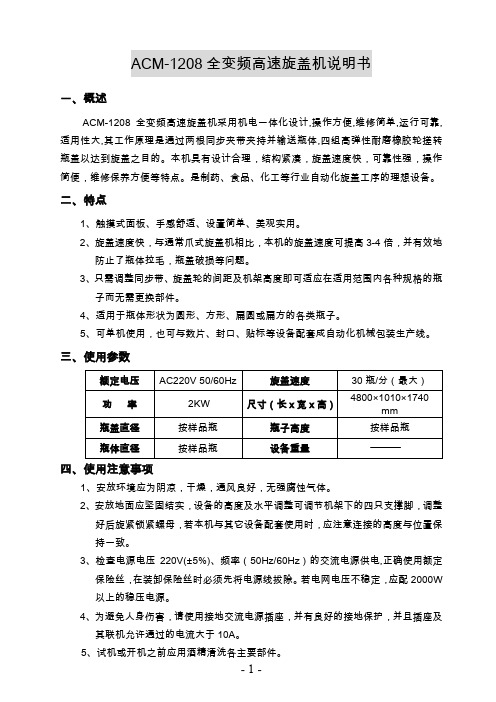
ACM-1208全变频高速旋盖机说明书一、概述ACM-1208全变频高速旋盖机采用机电一体化设计,操作方便,维修简单,运行可靠,适用性大,其工作原理是通过两根同步夹带夹持并输送瓶体,四组高弹性耐磨橡胶轮搓转瓶盖以达到旋盖之目的。
本机具有设计合理,结构紧凑,旋盖速度快,可靠性强,操作简便,维修保养方便等特点。
是制药、食品、化工等行业自动化旋盖工序的理想设备。
二、特点1、触摸式面板、手感舒适、设置简单、美观实用。
2、旋盖速度快,与通常爪式旋盖机相比,本机的旋盖速度可提高3-4倍,并有效地防止了瓶体拉毛,瓶盖破损等问题。
3、只需调整同步带、旋盖轮的间距及机架高度即可适应在适用范围内各种规格的瓶子而无需更换部件。
4、适用于瓶体形状为圆形、方形、扁圆或扁方的各类瓶子。
5、可单机使用,也可与数片、封口、贴标等设备配套成自动化机械包装生产线。
三、使用参数四、使用注意事项1、安放环境应为阴凉,干燥,通风良好,无强腐蚀气体。
2、安放地面应坚固结实,设备的高度及水平调整可调节机架下的四只支撑脚,调整好后旋紧锁紧螺母,若本机与其它设备配套使用时,应注意连接的高度与位置保持一致。
3、检查电源电压220V(±5%)、频率(50Hz/60Hz)的交流电源供电,正确使用额定保险丝,在装卸保险丝时必须先将电源线拔除。
若电网电压不稳定,应配2000W 以上的稳压电源。
4、为避免人身伤害,请使用接地交流电源插座,并有良好的接地保护,并且插座及其联机允许通过的电流大于10A。
5、试机或开机之前应用酒精清洗各主要部件。
6、送盖器、旋盖头、导轨要经常保持清洁;各防尘罩有机玻璃应该保持透明、无灰尘;各光电触头面应该保持清洁,清洗时用干燥棉花清洗,避免光电头有尘而失灵。
7、凡转动的部件要定期加润滑油,如发现有磨损或打烂等现象,按情况进行修理或更换。
8、本机在使用过程中应随时注意工作状态,如有异常应及时排除修复。
9、在旋盖工作中,不可用手触摸旋盖轮、同步带以防人身伤害。
Hein-Werner 手动搓液机说明书

Shop PressOperating Instructions & Parts ManualSFA Companies10939 N. Pomona Ave. Kansas City, MO 64153******************************************This is the safety alert symbol. It is used to alert you to potential personal injury hazards. Obey all safety messages that follow this symbol to avoid possible injury or death.Model Number Capacity HW93300,(hand operated pump) HW93301 (air operated pump) HW93302,(electric pump) HW93305,(double acting, hand operated pump)HW93306,(double acting, electric pump)SAFETY AND GENERAL INFORMATIONSave these instructions. For your safety, read and understand the information contained within. The owner and operator shall have an understanding of this product and safe operating procedures before attempting to use this product. Instructions and safety information shall be conveyed in operator’s native language before use of this product is authorized. Make certain that the operator thoroughly understands the inherent dangers associated with the use and misuse of this product. If any doubt exists as to the safe and proper use of the product as outlined in this manual, remove from service immediately.Inspect before each use. Do not use if broken, bent, cracked or otherwise damaged parts are noted. If any component of this product has been or suspected to have been subjected to a shock load (a load applied suddenly, unexpectedly upon it), discontinue use until checked out by qualified personnel such as an Authorized Service Center. Owners and operators of this equipment shall be aware that the use and subsequent repair of this equipment may require special training and knowledge. It is recommended that an annual inspection be done by qualified personnel and that any missing or damaged parts, decals, warning/safety labels or signs be replaced with factory authorized replacement parts only. Any component of this Equipment that appears to be damaged in any way, is worn or operates abnormally shall be removed from service immediately until such time as it can be repaired/replaced. Labels and Instruction Manuals are available from manufacturer.PRODUCT DESCRIPTIONHein-Werner Shop presses are designed for automotive, truck, implement, fleet, and industrial repair shops where pressing, bending, straightening, forming is required. Each press includes a cylinder and a pump. A winch assembly provides a safe and efficient way to raise and lower the bed frame, and a pressure gauge which provides for monitoring the applied press force. Typical applications include installation and removal of alternator and power steering pump bearings, axle bearings, transmission bearings, seal, driveshaft bearings and u-joints and others.WARNING: Wear personal protective gear when operating this equipment.WARNING: Avoid damaging hydraulic hose. Do not allow hose to kink, twist, curl, crush, cut or bend so tightlythat fluid flow within the hose is blocked or reduced. Periodically inspect the hose for wear. To reduce the risk of personal injury and/or property damage, ensure rated working pressure of each pressurized attachment is equal to or greater than rated working pressure of pump.Figure 1 - Typical Shop Press ComponentsSPECIFICATIONSPress Model Rated Capacity (tons)Pump Model/TypePress Bed Depth (front to back)Press Bed Width (side to side)Press Size(H” x W” x L”)Min. Work Height (in)Max. WorkHeight(in)HW9330025P100011-1/2”29-3/4”71 x 44 x 305-1/247-1/2HW93301PA1500HW93302PE0501T HW93305P2301M HW93306PEM0501TCylindersCylinderModel Rated Capacity (ton)Effective Area (in 2) Oil Volume(in 3)Stroke(in)Outer Dia.(in)Ram Dia. (in)Saddle Dia.(in)Collar ThreadCollar ThreadLength (in)H2506 255.1430.5363.352.24 1.973-5/16”-12 UNC 1.93HD250630.531.771.500.98Manual Pumps (Hand Pumps)Hand Pump Model Usable Oil Volume (in 3)Pressure Rating (psi)Oil Displacement (in 3)Oil Outlet PortThreadWeight (lbs)1st Stage 2nd Stage 1st Stage 2nd Stage P100061.020010,0000.810.143/8”-18 NPTF13.2P2301M128.032.3Arbor Plates with press)NOTICE: The power retract feature of the HW93305 and HW93306 Shop Presses is not intended to be used underload. Never pull or raise a workpiece with the power retract feature.ASSEMBLY1. Adjust bed frame to lowest position and slacken winch cable.2. Install the winch assembly to the press using 3 bolts, washers and nuts. Attach wire ropes to press bed.3. Secure cylinder to the cylinder adapter plate, and mount the adapter plate to upper cross member using 4 bolts and washers.NOTICE: The cylinder comes with carrying handles, loosen Allen head socket screw to remove the handles.4. Attach base sections to upright channels with 4 bolts and nuts.5. Attach lower cross member to upright channels with 4 bolts and nuts.7. Connect pressure gauge and hydraulic hose to gauge adapter, then connect gauge adapter to pump.8. For Models HW93305 and HW93306 only: Attach second hose to Port B on Control Valve. Attach second coupler to free hose end. Connect coupler to bottom port on Cylinder.NOTICE: Use thread tape or compound on all connections.9. Place the pump on the pump bracket and connect the other end of hydraulic hose to cylinder.CAUTION: Before disassembly, adjust bed frame to lowest position.OPERATIONBefore Use1. Inspect before each use. Do not use if bent, broken or cracked components are noted. Check for and tighten any loose assemblies. Replace worn or damaged parts and assemblies with Hein-Werner authorized replacement parts only.2. Verify that the product and the application are compatible, if in doubt contact Hein-Werner Technical Service (816) 891-6390.3. Before using this product, read the operator’s manual completely and familiarize yourself thoroughly with the product, its components and recognize the potential hazards associated with its use.Air PumpsAir Pump ModelUsable Oil Volume (in 3)Pressure Rating(psi)Oil Output Flow Rate(in 3/min)Input Air Pressure Range (psi)Weight (lbs)No Load Load PA150091.510,0006611110 - 17518.1Electric PumpsElectric Pump Model ReservoirCapacity(gal)Pressure Rating (psi)Oil Output Flow Rate (in 3/min)ValveType Motor Size (hp)Current Draw (A)MotorVoltage(V)Weight(lbs)1st Stage 2nd Stage 1st Stage 2nd StagePE0501T135010,000293183-way, 3-pos 0.59115/12560PEM0501T4-way,3-posWARNING: Projectile hazard! Ensure that workpiece is centerloaded and secure. Reduce risk of flying debris by carefully following all operating instructions. Know your press and hazards associated with its use.WARNING: Risk of serious eye injury from projected or blown debris. Wear safety goggles when workingwith or around press.CAUTION: Hose material or seals must not come in contact with corrosive materials such as battery acid, creosote-impregnated objects and wet paint. Never paint a coupler or hose. Do not subject hose to sharp objects or heavy impact.Refer to cylinder and pump manual for detailed operating instruction .1. Insert the support pins to desired height, then lower the bed frame using the winch until the cable is slack and the bed frame is resting fully on the support pins.2. Place arbor plates on the bed frame (optional).3. Place workpiece on bed frame, using every precaution necessary to ensure your safety and prevent property damage.4. Operating the pump:a) For Models HW93300, HW93305 (manual): Close the release valve by turning it clockwise, and pump the handle to extend the cylinder ram. To retract, simply open the release valve of pump.b) For Model HW93301 (air): Connect to suitable air supply, press on the foot pedal to extend the cylinder ram. To retract, simply press the release valve by stepping on the raised, stirrup shaped portion of the foot pedal.c) For Models HW93302, HW93306 (electric): Engage ON/OFF switch to start electric pump and let idle for several minutes before operating cylinder. Use control knob to extend cylinder ram.NOTICE: Never operate pump with hose disconnected from cylinder. Operation in this condition causes hoses to pressurize, increasing burst hazard. To protect cylinder, do not operate pump after ram is fully extended.NOTICE: The power retract feature of the HW93305 and HW93306 Shop Presses is not intended to be used under load. Never pull or raise a workpiece with the power retract feature.5. Apply load to workpiece. Do not overload.6. Stabilize workpiece to prevent it from falling from the bed once load is removed.7. Once cylinder has fully retracted, remove workpiece.MAINTENANCERefer to cylinder and pump manuals for maintenance and instructions for adding/changing hydraulic fluid . For best results, change fluid once per year. Use only premium hydraulic oil or equivalent for manual and air pumps, premium hydraulic oil or equivalent for electric pump is recommended.LubricationA periodic coating of light lubricating oil to pivot points and hinges will help to prevent rust and assure assemblies move freely.StorageDepressurize the hydraulic system, disconnect the hydraulic hose and lower the bed frame to lowest position.Disconnect both hoses on the HW93305 and HW93306.TROUBLESHOOTINGA system failure may or may not be the result of a pump malfunction. The following information is intended to be used as an aid in determining if a problem exists. Contact a Hein-Werner authorized service center for repair.Symptom Possible Causes Corrective ActionErratic cylinder action • External leak• Internal hydraulic leak• Follow pump instructions forbleeding air• Tighten all connections• Contact Service CenterPump or cylinder fails to maintain pressure • Overload condition• External leak• Internal hydraulic leak• Cylinder seals leaking• Pump or valve malfunctioning• Remedy overload condition• Tighten all connections• Contact Service Center• Contact Service Center• Check pump operating instructionsCylinder extends partially • Hydraulic oil level too low in pump• Load is above the capacity of system• Cylinder is sticking or binding• Fill and bleed the system• Match the capacity to application• Contact Service CenterCylinder moves slower than normal • Loose connection or coupler• Restricted hydraulic line or fitting• Pump not working correctly• Cylinder seals leaking• Tighten connection or coupler• Clean and replace if damaged• Check pump operating instructions• Replace cylinderCylinder leaks hydraulic fluid • Worn or damaged seals• Linkage binding• Loose couplers• Malfunctioning coupler• Contact Service Center• Lubricate all moving parts• Tighten couplers• Depressurize pump and hose, removeapplication, install new couplerCylinder will not retract or retracts slower than normal • Weak or broken retraction spring,Cylinder damaged internally• Pump reservoir too full• Contact Service Center• Contact Service Center• Drain hydraulic fluid to correct levelMotor will not start (Model HW93302 and HW93306)• No power/incorrect voltage• Damaged power cord• Tripped circuit breaker• Loose or faulty wiring• Check power supply and voltage• Contact Customer Service• Ensure breaker is adequate size• Contact Customer ServiceMotor cuts out (Model HW 93302 and HW93306)• Extension cord too long• Faulty motor• Overheated motor trips breaker• Replace with shorter cord• Replace or repair motor• Allow motor to cool, reset circuit breakerReplacement Parts List for 25 Ton PressesItemPart No. for ModelDescription Qty HW93300HW93305HW93301HW93302HW933061N/A Frame w/Winch and Pump Bracket1 2N/A Bed Frame1 3300-002-003Support Pin2 4300-002-004Base2 5300-002-005Lower Cross Member1 6300-002-006Winch1 7300-002-007Pulley3 8300-002-008Cable2 9300-002-009300-002-011N/A Pump Bracket1 10300-002-012Cylinder Adapter Plate1 11H2506HD2506H2506HD2506Cylinder, 25 ton1 12CH38M Coupler, 3/8” male1* 13CS3838CS3838C Hydraulic Hose, 3/8” ID1* 14GD2514Gauge, 2.5”, 10,000 psi, dry1 15CF3814Gauge Adapter1 16AP25Arbor Plates1 17P1000P2301M PA1500PE0501T PEM0501T Pump1 18300-002-016N/A Pump Mounting Hardware Kit1 19300-002-017Hardware Kit1 20HW93300-M0OIPM1 21HW93300-L1 HW93305-L1HW93301-L1HW93302-L1HW93306-L1Label Kit1SFA Companies10939 N. Pomona Ave. Kansas City, MO 64153816-891-6390******************************************TWO YEAR LIMITED WARRANTYFor a period of two (2) years from date of purchase, SFA Companies will repair or replace, at its option, without charge, any of its products which fails due to a defect in material or workmanship under normal usage. This limited warranty is a consumer's exclusive remedy.Performance of any obligation under this warranty may be obtained by returning the warranted product, freight prepaid, to SFA Companies Warranty Service Department, 10939 N. Pomona Ave., Kansas City, MO 64153.Except where such limitations and exclusions are specifically prohibited by applicable law:(1) THE CONSUMER'S SOLE AND EXCLUSIVE REMEDY SHALL BE THE REPAIR OR REPLACEMENT OF DEFECTIVE PRODUCTS AS DESCRIBED ABOVE(2) SFA COMPANIES SHALL NOT BE LIABLE FOR ANY CONSEQUENTIAL OR INCIDENTAL DAMAGE OR LOSS WHATSOEVER.(3) ANY IMPLIED WARRANTIES, INCLUDING WITHOUT LIMITATION THE IMPLIED WARRANTIES OF MERCHANTABILITY AND FITNESS FOR A PARTICULAR PURPOSE, SHALL BE LIMITED TO TWO YEARS, OTHERWISE THE REPAIR, REPLACEMENT OR REFUND AS PROVIDED UNDER THIS EXPRESS LIMITED WARRANTY IS THE EXCLUSIVE REMEDY OF THE CONSUMER, AND IS PROVIDED IN LIEU OF ALL OTHER WARRANTIES, EXPRESS OR IMPLIED.(4) ANY MODIFICATION, ALTERATION, ABUSE, UNAUTHORIZED SERVICE OR ORNAMENTAL DESIGN VOIDS THIS WARRANTY AND IS NOT COVERED BY THIS WARRANTY.Some states do not allow limitations on how long an implied warranty lasts, so the above limitation may not apply to you. Some states do not allow the exclusion or limitation of incidental or consequential damages, so the above limitation or exclusion may not apply to you. This warranty gives you specific legal rights, and you may also haveother rights which vary from state to state.。
搓灰机操作规程
搓灰机操作规程搓灰机是一种用于去除建筑材料表面的浮灰或污垢的工具,通常用于地面清洁和准备工作。
以下是搓灰机的操作规程,以确保安全和顺利的使用。
一、安全注意事项1. 整装式搓灰机包括电源线,需要接地插头。
2. 搓灰机使用时必须戴手套、口罩、安全带等必要的防护用品。
3. 使用前,检查搓灰机的电源线和开关是否完好无损。
4. 在清理地面之前,将地面上的障碍物、尖锐的物品、电缆线、电路等物品全部清除。
5. 避免搓灰机的碰撞或颠簸,以避免设备损坏或人员受伤。
6. 操作过程中,严禁将手或其他身体部位伸入搓灰机内部。
7. 操作时不要在机器逆向操作,以免损坏设备或造成人员伤害。
8. 在使用搓灰机时,工作区域内必须有消防设施和卫生间。
二、操作流程1. 准备工作:将搓灰机放置在地面上,将电源线插入接地插头,打开电源开关。
2. 准备工具:安装搓灰机,并检查搓灰机的清洁设备是否完整。
3. 量取水量:确保搓灰机的清洁设备中的水量合适,并根据清洁目标选择清洁剂。
4. 清洗地面:将搓灰机靠近要清洁的地面表面,同时按下电源开关,用适量的压力清洗地面。
5. 调整机器速度:根据地面材料的不同,可以适当调整机器的清洁速度和清洗压力,以确保清洗效果和安全性。
6. 定时计划:根据清洁工作的需要,可以制定定时计划,确保每日清洁任务的完成。
7. 清理维护:操作结束后,必须对搓灰机进行清洁和维护,排除设备故障和保证后续工作的顺利进行。
三、常见故障及处理方法1. 电源故障:检查电源线和插头是否正常,插头是否与插座接触到位,是否有短路。
2. 机器碰撞:检查是否有障碍物或物品阻碍机器的前进,如有则清除。
3. 声音过响:检查轴承是否损坏或是否需要更换清洗设备内的滤网或滤芯。
4. 模具损坏:检查是否有损坏或更换设备,并进行维修或更换。
搓灰机的使用需要操作人员严格遵守操作规程,保证设备的正常操作和人员的安全。
旋盖机说明书

摘要回转式旋盖机适用于带螺纹的盖与瓶的旋盖,市场上现有的回转式旋盖机大多数是半自动的包装机,瓶盖的疏理大多用人来完成,生产效率不是很高,而且加大了劳动强度,再生产时有一定危险,本设计为自动理盖而且是多工位旋盖。
本文介绍了题目的研究背景和意义,论述了旋盖机在国内外的发展状况,介绍了本次设计研究的内容及方法。
本次设计的重点是包装机的总体设计方案、包装过程的旋盖、输送方式和定位方法,在此基础上进行了运动与结构的设计。
本次设计采用的包装方法是回转式的,是通过圆柱凸轮的轮廓线来实现旋盖头的上下往复运动的,通过行星轮系传递转矩的;而且在满足包装机械原理的条件下,充分考虑了整机的布局和经济性,同时该机还有结构简单、造价低、无污染、噪声小和人及功能合理的特点。
关键词:旋盖机;旋盖;输送。
AbstractRotary Capping Machine for the threaded cap and the bottle of screw cap, as the existing rotary capping machines are mostly semi-automatic packaging machine, bottle of Reorganizing the employer to complete most of the production efficiency is not very high and increased labor intensity, have a certain risk of reproduction, the design for the automatic management is a multi-position cap and screw cap.This article describes the background and significance of the research topics discussed Capper development at home and abroad, introduces the design of this study the content and methods. The packaging machine is designed to focus the overall design scheme, the packaging process of screwing conveyance methods and positioning methods, in this based on the movement and structure design. The designof the packaging used is rotary, through cylindrical cam contour to achieve capping head up and down reciprocating motion through the planetary gear transmission torque; and packaging machinery to meet the conditions of principle, give full consideration to the machine layout and the economy, while machine is also simple, low cost, no pollution, noise and human and functional characteristics of reasonable.Keywords: Capping Machine; capping; delivery.目录摘要 (I)Abstract (II)目录 (III)第1章绪论 (1)1.1设计题目背景 (1)1.2研究意义 (1)1.3国内外相关情况 (1)1.4选题意义 (2)第2章总体方案设计 (3)2.1设计任务分析 (3)2.1.1设计参数 (3)2.1.2工艺路线 (3)2.2功能分析 (3)2.2.1总功能确定 (3)2.2.2各功能分解 (3)2.2.3功能结构确定 (3)2.3功能求解 (4)2.3.1分功能原理解 (4)2.3.2系统方案求解 (4)2.4 方案评价 (5)2.5系统方案原理图 (5)2.5.1各执行构件方案简图 (5)2.5.2画总体方案简图 (7)第3章执行系统设计计算 (8)3.1行星轮系的设计计算 (8)3.2旋盖头的设计计算 (9)3.3圆柱凸轮及行星轮的设计计算 (9)3.4输送链设计计算 (9)第4章传动系统设计计算 (11)4.1动力机的选择 (11)4.2传动比分配 (11)4.3各轴转速、功率及转矩的设计计算 (11)4.4传动零件的设计计算 (12)4.4.1圆锥齿轮传动设计计算 (12)4.4.2带传动设计计算 (16)4.4.3链传动设计计算 (18)4.4.4轴的设计计算 (19)4.4.5轴的强度校核 (24)4.4.6轴承寿命计算 (25)第5章回转式旋盖机的安装、维护和安全 (28)第6章结论 (29)参考文献 (30)致谢 (32)附录Ⅰ英文原文 (33)附录Ⅱ中文译文 (37)第1章绪论1.1设计题目背景旋盖机是自动灌装生产线的主要设备之一,用于玻璃瓶或PET瓶的螺纹盖封口。
旋盖机操作

一.操作前安装及检查:1.检查电路接线是否正确完好,设备是否有效接地。
设备上所有开关是否处于关闭状态。
2.检查气路连接是否正确完好,供气设施是否正常工作。
3.检查机械运动部件是否有杂物干扰,有则清除。
4.检查整机是否水平,不水平则调节水平。
二.旋盖机控制面板操作说明1、电源开关控制整个旋盖机的总电源,打开后,旋盖机整机供电。
电源指示灯是显示设备的供电情况,当红灯亮时,说明设备已经通电至电源开关,此时打开控制面板上的电源开关给设备供电,此时绿灯亮,红灯熄灭。
2、输送电机开关控制输送带的运行、停止,输送电机调速控制输送带的运行速度。
3、分瓶电机开关控制分瓶电机的运行、停止,分瓶电机调速控制分瓶的运行速度。
4、夹瓶点动开关是夹瓶电机Ⅰ、Ⅱ的点动开关,在调试时使用。
5、夹瓶电机调速Ⅰ控制夹瓶电机Ⅰ的运行速度。
该速度需配合旋盖输送机和挂盖效果使用。
6、夹瓶电机开关控制夹瓶电机Ⅰ、Ⅱ的运行、停止,夹瓶电机调速Ⅱ控制夹瓶电机Ⅱ的运行速度。
该速度需与夹瓶电机Ⅰ的运行速度同步并配合旋盖输送机和挂盖效果使用。
7、旋盖电机开关控制旋盖电机的运行、停止,该速度需配合旋盖调节手轮和旋盖效果调节。
如果旋盖过紧或过松,则需调整旋盖调节手轮的松紧。
三.操作说明1)供上气源,打开“气源滑阀开关”,调整油水油水分离器的压力调节旋钮至0.6mp。
(顺时针方向越调越大,反之越小)(注意:调整油水油水分离器压力调节旋钮时需向上拔起调节旋钮,调整完成后压下调节旋钮)2)供上电源(AC220 50HZ),再控制面板的电源开关,供电完成。
3)放瓶盖到理盖机料斗内。
(注:瓶盖不宜过少,过少会影响理盖速度)4)调整输送机护栏宽度,松开护栏的紧固手轮(见下图),调整护栏宽度刚好能让瓶子通过,再把紧固手轮旋紧即可。
注意保证护栏的水平和平行。
5)放1个空瓶在旋盖机输送机上,调整升降机构调到合适的高度,使瓶子能够顺畅挂盖;调整夹瓶输送机宽度,旋转抱瓶调节手轮,使瓶子加紧。
旋盖机的使用说明

旋盖机的使用说明旋盖机是一种常见的包装设备,用于在瓶、罐等容器上安装盖子。
以下是旋盖机的使用说明。
1. 准备工作在使用旋盖机之前,需要做好以下准备工作:•确认旋盖机的电源及气源是否接通。
•加入或更换合适的盖子,确保盖子与容器口相匹配。
•将容器放置于旋盖机工作台上,并根据容器大小调整夹持器的位置。
2. 操作步骤以下是使用旋盖机的操作步骤:1.按下旋盖机启动按钮,设备开始工作。
2.将准备好的容器放置于夹持器中,调整夹持器的位置,使容器与夹持器相对平行,并且夹持器能够紧紧夹住容器。
3.将准备好的盖子放置在盖子供料器上,并调整盖子供料器的位置,以便盖子能够顺利地滑入旋盖头。
4.确保盖子在旋盖头上正确对接,并且盖子表面与容器口相互吻合。
5.按下旋盖机的旋盖按钮,旋盖头开始旋转,盖子逐渐被旋转到容器口的合适位置。
6.等待旋盖机旋转盖子完成后,松开夹持器,取走已封好的容器。
3. 注意事项在使用旋盖机时,需要注意以下事项:•确保旋盖机启动前已安装好合适的盖子。
•确认旋盖机工作台的安全防护装置是否完好,以避免工作过程中的安全问题。
•避免使用过大或过小的容器,以免影响旋盖机的稳定性和封口质量。
•在使用旋盖机时,避免手指碰触旋盖头等旋转部件,以免造成伤害。
•在旋盖机工作过程中,及时对盖子供料器进行补充,以保证工作的连续性和效率。
4. 维护保养对于旋盖机,日常维护保养也是非常重要的,可以从以下几个方面着手:•定期清洗旋盖机,以保证设备表面清洁无积尘和异物。
•检查旋盖机的气源和电源是否正常。
•清洗旋盖头,以保证其良好的封口效果。
•定期检查旋盖机的夹持器、传送带等零部件是否松动、磨损或者需要润滑保养。
•进行定期保养和维修,以延长旋盖机的使用寿命和维护其稳定性。
总之,旋盖机的正确使用和维护不仅可以提高生产效率和产品质量,也可以延长设备的使用寿命,为企业带来更多的经济效益。
- 1、下载文档前请自行甄别文档内容的完整性,平台不提供额外的编辑、内容补充、找答案等附加服务。
- 2、"仅部分预览"的文档,不可在线预览部分如存在完整性等问题,可反馈申请退款(可完整预览的文档不适用该条件!)。
- 3、如文档侵犯您的权益,请联系客服反馈,我们会尽快为您处理(人工客服工作时间:9:00-18:30)。
Joyar 上海卓洋SSP说明书
目录
一、工作原理及特点 (1)
二、主要技术参数 (1)
三、机器结构 (2)
四、安装与调试 (3)
1、机架底脚调节 (3)
2、主机上下位置调节 (3)
3、同步带夹紧调节 (3)
4、旋盖搓轮夹紧调节 (4)
5、瓶盖喷嘴导向装置调整 (5)
五、安全及维护保养 (6)
1、机械部分 (6)
2、电气部分 (8)
六、常见故障及排除 (9)
1、机械部分 (19)
七、易损件及外购件明细 (10)
八、电气原理图 (10)
一、工作原理及特点
套上盖子的瓶体连续进入旋盖机后,由双层立式同步带夹持向前。
瓶盖先后经三对同向旋转的聚氨酯搓轮后被逐步搓紧。
本机可以根据客户的瓶型,适当调节夹瓶同步带高度和宽度、搓轮的高度和宽度,来达到理想的旋盖速度和稳定效果。
而且调节部位均有目视控制的标尺或刻度。
更新瓶型或盖时无须备件,只需稍作调整即可满足生产要求。
二、主要技术参数
适用螺纹盖直径:10 ~ 100mm
适用瓶体直径:10 ~ 150mm
适用瓶体高度:30 ~ 350mm
传送带线速:0 ~ 16 m/min
搓轮旋盖线速:0 ~ 18 m/min
生产能力:80~150bot/min
搓轮扭矩:1~5N.m
电源:220V~240V/50Hz~60Hz
总功率:1Kw
外形尺寸(LxWxH):1000x1000x1700mm
三、机器结构
半自动芯轴式旋盖机结构图如下(图一)。
机器主要由机架、操作箱、双夹同步带、搓轮装置、升降装置、电器箱等组成。
整个框架全部为304不锈钢。
图一旋盖机结构图
四、安装与调试
1、机架底脚调节
主要用于调节整体的高度及水平与生产线相协调。
2、主机上下位置调节
主机与流水线输送带之间相对距离的调整靠升降螺杆。
方式有手动升降和自动升降。
位于调节处设有升降刻度尺。
(图二)当采用手动升降时,可通过手摇轻松升降;当采用自动升降时,只要按下控制开关即可。
而且在电机驱动状态下,分别有上下安全限位开关控制主机。
图二升降刻度尺位置
3、同步带夹紧调节
为适应不同的瓶径、瓶高,同步带之间距离可进行调整。
如图三所示,转动手柄,由调节丝杆带动两组活动螺母块在刻度光轴上前后移动。
当手柄转一圈,活动螺母块移动2mm。
另外调节瓶肩瓶口手柄和上下层同步带手柄可以分别调节搓盖轮与瓶肩的相对距离(根据瓶口与瓶肩的相对距离而定)和上下层夹瓶传送带的距离(根据瓶的高度而定),从而达到所需要求。
传送带速度调节是通过调节变频器的频率高低来完成无级调速,并且变频器值显示在操作界面上。
图三同步带组件
4、旋盖搓轮夹紧调节
六个旋盖搓轮由六个电机分别单独驱动,采用变频器无级调速,带数值显示。
搓轮夹紧调节具体方法(图四):转动手柄,通过调节丝杆带动中心调整螺母进而带动搓轮进行间距调节,计数器用来显示连续变化的数值。
图四搓盖轮组图
5、瓶盖喷嘴导向装置调整(图五)
喷嘴导向装置能满足不同高度瓶子导向快速调节。
当更换瓶子后,重新调整调节手柄,导杆沿着直线轴承上下滑动,从而带动压条移动,实现高度调节。
图五喷嘴导向装置
五、安全及维护保养
1、机械部分
1)皮带正常使用寿命一般为半年,如(图六)所示,当机器运转时调节手柄,通过张紧支板使皮带张紧到成一条直线。
当需要更换皮带时先将锁紧螺栓松开,张紧板拆下,皮带拉到最松程度时将其从摩擦轮上脱离出来,进而便可从下夹板上拿出皮带。
图六皮带调节部位
2)定期检查搓盖轮,磨损后更换。
更换步骤如下(图七):
首先将端盖部位螺栓拆下,这样聚氨酯搓轮等组件就可从搓盖轮轴上拿下
来,再拆卸压盖上四个固定螺栓,便可更换搓轮了。
图七搓轮调节部位
3)润滑部位图(图八)
下图所示为本机需润滑部位。
润滑脂采用美孚油MP2#,润滑周期一般为3~6个月。
图八润滑部位图
4)安全隔离装置
在机器两侧及前、后侧安装有无色透明防护罩,将电机、搓轮等人手容易碰到部位隔离开,安装拆卸很方便。
2、电气部分
1)急停按钮
当遇到紧急情况时,按下急停键,所有电机都将停止工作。
2)升、降按钮
当升降螺杆采用电机自动上升或下降时,点动升、降按钮即可。
3)机器使用前机器外壳必须有良好的接地。
六、常见故障及原因
1、机械部分
七、易损件及外购件明细
八、电气原理图(附图十)。