E26热敏打印机开发手册
热敏打印机指令集

热敏打印机指令集目录字符说明: (3)LF打印并走纸一行 (3)ESC SP n设定字符右边间隔 (3)ESC !n选择打印模式 (4)ESC $ nL nH设置绝对打印位置 (4)ESC * m nL nH d1......DK选择位图打印模式. (5)ESC - n打开/关闭下划线模式 (7)ESC 2设置标准行距命令 (7)ESC 3 n设置行距命令 (7)ESC @初始化打印机 (7)ESC E n打开/关闭加重模式 (8)ESC J n打印并走纸 (8)ESC V n打开/关闭顺时针旋转90°模式 (8)ESC a n选择排列方式 (9)ESC d n打印并走纸n行 (9)ESC { n打开/关闭颠倒打印模式 (9)ESC m半切纸(屏蔽) (10)ESC i全切纸(屏蔽) (10)ESC j n退纸n点行 (10)ESC \ nL nH设置相对打印位置 (11)ESC & y c1 c2[x1 d1...(y*x1)]...[xk d1...d(y*xk)] 定义用户自定义西文字符. (11)ESC ?n删除用户自定义西文 (12)ESC % n选择/取消使用用户自定义字符 (13)ESC v纸状态返回 (13)ESC p m n1 n2开钱箱 (13)GS FF走纸到黑标位置 (14)GS !n选择字符大小 (14)GS B n打开/关闭黑白相反打印模式 (15)GS L nL nH选择左边空白 (15)GS T n设打印位置到打印行起始 (16)①GS V m ②GS V m n选择切模式和切纸(屏蔽) (16)GS W nL nH设打印区域宽度 (17)GS v 0 nL nH xL xH yL Yh d1......dk打印光栅位图 (18)GS I n传送打印机ID (19)GS r n返回状态 (20)GS * x y d1...d(x*y*8) 自定义下载位图. (20)GS / m打印下载位图 (21)GS h n选择条码高度 (22)GS H n 选择可识别字符的打印位置 (22)GS w n 选择条码宽度 (23)①GS k m d1...dk②GS k m n d1...dn打印条码 (23)FS !n设置中文打印模式 (24)FS &设置中文字符模式 (24)FS - n打开/关闭下划线模式 (25)FS .撤销中文模式 (25)FS S n1 n2左边和右边的字符间隔 (25)FS W n打开/关闭字符四倍模式 (26)FS q n x y d1......dk下载位图到打印机.. (26)FS p n打印下载位图 (27)FS V n旋转打印命令 (27)FS 2 c1 c2 d1...dk定义用户自定义中文字符 (28)DLE EOT n返回实时状态 (28)DLE ENQ n实时请求打印机 (30)字符说明:打印机采用的中文字符为GB2312简体汉字表,西文字符编码采用ASCII码。
思普瑞特 SP-L36热敏打印机 使用说明书
SP-L36热敏打印机使用说明书VER0.06北京思普瑞特科技发展有限公司目录注意事项 (1)安全注意事项 (1)使用注意事项 (1)存放注意事项 (2)第一章打印机外观及型号 (3)1.1外观 (3)1.2型号 (3)第二章性能特点 (3)2.1打印性能 (3)2.2物理参数 (4)2.3环境参数 (4)2.4其他性能 (4)第三章使用方法 (5)3.1使用前的准备 (5)3.1.1电池安装 (5)3.1.2打印纸卷安装 (6)3.1.2打印纸卷取下 (6)3.1.3其它 (7)3.2基本功能使用 (7)3.2.1开机 (8)3.2.2关机 (8)3.2.3自检测 (8)3.2.4走纸(手动进纸) (8)3.2.5十六进制打印 (9)3.2.6打印机参数设置 (9)3.2.7充电 (10)3.2.8进入程序升级模式 (10)3.3打印机参数设置 (11)3.4打印机标签传感器标定 (11)3.5打印机恢复默认配置 (12)3.6打印机连接及打印 (12)3.6.1USB连接 (12)3.6.2蓝牙连接 (13)3.6.3wifi连接 (14)3.7蜂鸣器说明 (14)3.8液晶显示说明 (14)第四章其他信息 (17)4.1指令编程手册 (17)4.2预印刷黑标说明 (17)4.3标签纸说明 (18)附录A (19)附录B (21)注意事项在使用打印机之前,请仔细阅读本章内容!安全注意事项本打印机只能使用本公司提供的专用电池和电源适配器,否则可能引起产品损坏,电池漏液、起火甚至爆炸。
不要将电池投入火中,不要将电池短路、拆散或加热,否则可能导致电池漏液、起火甚至爆炸。
如果长时间不使用打印机,务必将电池从打印机中取出,否则可能导致电池漏液。
电池中的液体具有腐蚀性,如果操作不慎导致电池漏液并将液体粘到皮肤或衣物上,请立即用清水洗掉,如不慎进入眼睛内,请立即用大量清水彻底冲洗眼睛并去看医生。
打印时或刚打印结束时不要开启纸仓盖,用手或身体的任何部位接触打印机芯,以免过高的温度导致烫伤。
操作手册热敏打印机 C-56 E 热敏打印机 C-56说明书

Operator Manual Thermal Printer C-56EReleaseChanges© 2005 - 2018 by HENGSTLERThis document is protected by copyright by HENGSTLER GmbH.This document may not be changed, altered, duplicated or reproduced in any manner, or provided or transmitted to any third persons or organizations, without the prior written approval of HENGSTLER.We reserve the right to make technical changes, modifications or improvements without prior notice.Hengstler and the Hengstler logo are registered trademarks of Hengstler GmbH. Other brand and product names used herein are trademarks or registered trademarks of their respective companies. HENGSTLER GmbHUhlandstr. 4978554 Aldingen / GermanyTel. +49 (0) 7424-89 0Fax +49 (0) 7424-89 500eMail:******************ContentsR ELEASE (2)C HANGES (2)1.0Introduction (4)1.1A DDITIONAL L ITERATURE (4)2.0Important Information and Safety Instructions (5)2.1G ENERAL I NFORMATION (5)2.2S YSTEM-S PECIFIC S AFETY I NSTRUCTIONS AND S YMBOLS (5)2.3P RINTER I NSTALLATION (6)3.0Layout and Function (7)3.1S TRUCTURE OF THE C-56T HERMAL P RINTER (7)3.2F UNCTIONS OF THE P RINTER (8)4.0Operation (10)4.1S TART UP OF THE S YSTEM (10)4.2L OADING OF P APER (10)5.0Troubleshooting (11)5.1C LEARING P APER J AMS (12)5.2R EPLACEMENT OF C OMPONENTS (13)6.0Technical Data (14)6.1G ENERAL D ATA (14)6.2C ONFIGURATION OF THE I NTERFACES (15)6.3P APER S PECIFICATIONS (16)6.4D ATA SPECIFIC TO P RINTING (16)6.5O RDER N UMBERS FOR S PARE M ODULES: (16)1.0IntroductionThank you for selecting the Hengstler C-56 printer! We are proud of this feature-rich product, which was designed using all our expertise and experience, and we are confident that you will be pleased with the advanced features and outstanding performance.This Operator Manual is designed to help you with the proper installation, connection to your host computer system and start-up of the C-56 thermal printer system. All necessary details will be further explained in the following sections. Please read this manual carefully before starting up the thermal printer. If you have any further questions, please do not hesitate to contact our head office or one of our branch offices.The thermal printer does not require any servicing and is intended primarily for printing documents and receipts, at a printing speed up to 220 mm/sec for the 24 VDC version, and up to 160 mm/sec for the 12 VDC version, when powered by an appropriate power supply and when printing on endless thermal paper with paper weight ranging from 50 to 60 g/m2. The paper width may vary from 58 to 60 mm (2.28" to 2.36"). While documents may be any length greater than 120 mm, most documents will fall in the range of 120 to 297 mm.The horizontal and vertical print density is 203 dpi so that graphics, such as logos etc. can be printed with good quality.The printer mechanism has been designed in particular for application in self-service gasoline pumps in service stations, in terminals and vending applications. The modular design enables the main components to be replaced in less than 2 minutes. The controller integrated in the printer mechanism controls all printing functions and is provided with an USB 1.1 port for the host computer. Driver software is available that supports the Windows XP/7/8/10 and Linux operating systems. In addition, the printer can also be activated directly in ASCII mode through ESC/FS sequences; a detailed description of the different sequences is contained in the Emulation Manual.1.1 Additional LiteratureC-56 Emulation Manual D 684 017Paper Specification (English) Paper Specification (German) D 684 012 D 684 010Dimensional Drawing D 684 048 etc; see the C-56 download area at www.hengstler.de2.0 Important Information and Safety Instructions2.1 General InformationThe company Hengstler GmbH will not accept any liability for direct or consequential damages arising due to improper use of the thermal printer and, in particular, due to non-compliance with this operating manual or to improper handling and maintenance. The supply of technical documentation does not imply any authorization by Hengstler GmbH to make additions, repairs or modifications.This documentation may not be copied, nor shall its contents be disclosed or used commercially unless this has otherwise been explicitly agreed. The user is responsible for proper handling and installation of the printer. The printer should only be shipped in its original packing.2.2 System-Specific Safety Instructions and SymbolsHengstler GmbH will not accept any liability for the safe operation of the C-56 thermal printer unless Hengstler original products are used exclusively and the following instructions and recommendations are heeded.General warning for cases where the user or service personnel may be in danger.General notes and hints for operating the system safely.2.3 Printer InstallationThe C-56 printer uses electrically conductive housing materials which help to eliminate electrostatic charging during printing. In order to protect the printer from damages caused by externally applied charges, e.g. when electrostatically charged customers grab the receipt at the printer chute, the printer must be grounded. The mou nting holes of the printer’s base unit can be utilized for this where a ground wire with lug may be inserted in one of the two screw points.If the printer is mounted in an electrically conductive and already grounded panel, additional wiring can be omitted if sufficient electrical contact is ensured through the mounting points.3.0 Layout and FunctionAll modules of the C-56 thermal printer mechanism are delivered in operating condition. After connecting the printer to a USB 1.1 or 2.0 port on the host system (PC) and to a properly rated 24 VDC or 12 VDC power supply3.1 Structure of the C-56 Thermal PrinterFig.1Thermal printer, front view left handThe C-56 Thermal Printer is composed of three main units: thermal printer with integrated Controller, basic unit with paper tray and two hinge pins, and an eject chute supported by the basic unit. These hinge pins secure the printer mechanism on the basic unit. If both hinge pins are retracted in part, the printer mechanism can be re -moved. If only one hinge pin is retracted, the printer mechanism can be pivoted around the remaining hinge pin. The Eject Chute is provided with guides that engage in the basic unit firmly and with high dimensional accuracy. The paper roll lies in the paper tray loosely. The sensitive side of the thermal paper must be outside or beUSB or RS232 Interface,DC power connector on controller boardThermal printer mechanismHinge pinThermal paper rollMounting holesEject chute Base unit with paper trayOptional Paper Pre-End Sensor connectionPrinthead up lever3.2 Functions of the PrinterThe printhead of the C-56 printer mechanism has a horizontal resolution of 203 dpi (dots per inch). Thus, the 448 dots allow printing of lines with a maximum width of 56 mm. The stepper motor affects the paper feed by means of a platen that is rotated via gearing. The transmission ratio of this gearing has been selected in such a way that the vertical dot resolution is also 203 dpi; this corresponds to a paper movement of 0.125 mm. All functions of the printer mechanism are controlled by the integrated Controller.Fig. 2 Diagram of paper transportThe paper is inserted into the printer through the upper and lower paper guides and led over the platen. As soon as the reflective LED sensor L1a in the upper guide detects the front paper edge, 'automatic paper insertion' will start and the paper is transported until its front edge can be seized in the eject chute. The LED L2 signals thatAs an alternative, the reflective LED sensor L1b may be installed instead of the sensor L1a. It will detect the paper edges and recognize position identification marks (Black Marks) on the back side of the paper. The ejected paper is cut when the user pulls it from the printer, thereby tearing it straight over the cutter. The shape of the triangle cutter knife provides for a clean cut. The further paper transport will be carried out by program control.Optional reflective LED sensor L3 detects the presence of paper in the eject chute. The status of L3 can determined via the Query command and is reported as part of the C-56 status bytes. See the C-56 Emulation Manual D 684 017 for details on querying this sensor and the format of the response.Optional reflective LED sensor L4 is located on the left outside of the paper reservoir and detects when the diameter of the paper roll decreases below a fixed dimension, indicating that paper is low. This is a hardware alternative to the default paper low system, which requires thermal paper with black marks at the end of the paper roll. The status of L4 can determined via the Query command and is reported as part of the C-56 status bytes. See the C-56 Emulation Manual D 684 017 for details on querying this sensor and the format of the response.Fig. 2a C-56 with Hardware Paper Low Sensor4.0 OperationOnce the C-56 thermal printer is connected to the power supply and the host's interface port, and the driver (if needed) is installed, the printer is ready for use.4.1 Start up of the SystemFig. 3 Connections of the thermal printer to the system1. The connection to power supply is to be doneexclusively by means of the supplied cable. Make sure that the power supply is alwaysswitched off before the connector is plugged in or removed. The locking tab of the connector should always be directed towards the paper insert side.2. Connect the a) mini - USB port of the printermechanism with a USB – interface, or b) micro - RS232 port with a RS232 interface of your PC, using the supplied USB / RS232 cable. On USB, Windows will then automaticallyrecognize the new connected device and install the appropriate driver software.3. Install the driver software on the host system (PC).Please, consider the coordination of the drivers with the operating systems and respect the current instructions supplied together with the drivers.4.2 Loading of PaperFig. 4 Loading of the paper roll1. Pull the protective sheathing from the paper rolland cut the paper end at right angles to the direction of feed as far as possible. Truncated, lacerated or folded paper edges can produce a paper jam during automatic insertion. Also perforations of the paper web or rounded edgesare not acceptable.2. Lay the paper roll into the paper tray as shown inthe illustration. The thermal sensitive paper surface must be situated outside or on top.3. Insert the paper into the printer mechanism. Assoon as the sensor in the paper guide detects paper, the controller starts the automatic paper insertion.4. Cut off the paper appearing in the eject chute bypulling it straight out.Mini - USBLocking tab Connector Power SupplyMicro – RS232Be sure to use the supplied cable tie to secure the RS-232 cable and avoid possible damage to this connector.5.0 TroubleshootingThe paper path in the printer mechanism is almost straight so that proper paper feed and guiding will prevent paper jams (see also Fig. 2). The following malfunctions if any will be recognized and signaled by the integrated controller:5.1 Clearing Paper JamsIn order to clear a paper jam, detach the document that is already present in the eject chute and retract the remaining paper manually. Paper scraps remaining in the area between the print mechanism and eject chute can be removed after the printer is tilted open.Fig. 5 Open paper path for removing paper In case there is still paper between the printhead and the platen, remove the friction between head and platen by pressing down the lever and then pull the paper back by hand.Never actuate this lever during the printingoperation or else the printhead will overheat.Fig. 6 Tilt the printer mechanism open for paper removal If a partly printed document remains in the printer mechanism, e.g. in the event of a paper end signal due to a tear, and it does not appear in the eject chute, the printer mechanism will have to be tilted open and the document be taken out by hand. Note that additional care must be taken concerning wire routing if the optional chute sensor or hardware paper-low sensor are installed.1.2.3.4.Push to lift printheadDrivepinionPartlyprintedpaperLED L2Hinge pin5.2 Replacement of ComponentsThe C-56 thermal printer does not require any servicing. It has been designed such that its main modules represented in the illustration below can be replaced also by the operational staff after short briefing, within less than 2 minutes. The modules do not require any adjustment. Note that additional care must be taken concerning wire routing if the optional chute sensor or hardware paper-low sensor are installed.Fig. 7 Modular structure of the C-56 thermal printer with 4 main componentsThe eject chute is pushed into the guiding supports on the basic unit and cannot be removed when the printer mechanism is installed. It represents the only access to the printer for the customer. The hinge pins are inserted into the collars onto the basic unit in the sense illustrated above and then are pushed against the tilt position. Only in this position, the printer mechanism can be placed onto the basic unit, and when the hinge pins are snapped into the operating position, the printer will be locked on the basic unit. The two holes on the front of the basic unit serve for installing the C-56 thermal printer in vending applications etc.6.0 Technical Data 6.1 General DataEMC: EN55022 - EmissionWarning! The C-56 thermal printer is a class "A" appliance.It can produce radio interference in residential areas so that the user may be forcedto take adequate remedial measures.EN55024 - EMS ImmunityElectrostatic discharges and burst effects may cause short printing interruptions.But the automatic recovery function will restore the original state of the thermalprinting mechanism.Additional action regarding lightning and overvoltage protection will be needed, ifcables and wires are installed outside of a building.However, this standard can be met only if original units, components, and cablesare applied and the installation instructions are respected.When operating the printer from a DC building power supply, or when the DCpower cable exceeds 3 meters in length, appropriate EMI filters must be used.External interference caused by ESD or EMI can temporarily cause corruptedprinting or data loss.6.2 Configuration of the InterfacesNote: +5V is only connected in special versions6.3 Paper SpecificationsRecommended Paper Quality: Thermal papers 50 to 60 g/m2;thermosensitive surface on outside; see Paper Specification D 684 012Converting: Paper roll Roll width: 58 to 60 mm (2.28" to 2.36")Roll diameter: up to 100 mm (4")Typical: 75 mm (3") or 100 mm (4")The paper pre-end mark is to be printed on the coated paper side. For further dataregarding the printing of pre-end marks or 'Black Marks' please refer to the PaperSpecifications D 684 012.6.4 Data specific to Printing6.5 Order Numbers for Spare ModulesThermal Printer mechanism RS232 E2684001 Thermal Printer mechanism USB E2684002 Paper tray (contains 10 pieces) E2684009 Eject chute standard (contains 10 pieces) E2684005 Eject chute short (contains 10 pieces) E1684019 Hinge pin (contains 10 pieces) E2684012 DC power supply cable E1684009 USB Data Cable 0684102 RS232 Data Cable 0684103。
PLG微型热敏打印机开发手册V1.3
PLG微型热敏打印机开发手册V1.3目录第一章概述----------------------------------------------------------------------------------------1第二章通讯接口-----------------------------------------------------------------------------------22.1RS-232接口--------------------------------------------------------------------------------22.2红外接口-----------------------------------------------------------------------------------3第三章指令说明------------------------------------------------------------------------------------43.1打印控制指令-----------------------------------------------------------------------------------53.1.1ESC@------------------------------------------------------------------------------------53.1.2LF---------------------------------------------------------------------------------------53.1.3CR---------------------------------------------------------------------------------------53.1.4FF---------------------------------------------------------------------------------------53.1.5ESC J n----------------------------------------------------------------------------------63.1.6ESC d n----------------------------------------------------------------------------------6 3.2字符参数设置指令-------------------------------------------------------------------------------63.2.1ESC!N----------------------------------------------------------------------------------63.2.2ESC M n----------------------------------------------------------------------------------73.2.3GS!n-----------------------------------------------------------------------------------73.2.4ESC-n----------------------------------------------------------------------------------83.2.5ESC E n----------------------------------------------------------------------------------83.2.6ESC G n----------------------------------------------------------------------------------83.2.7GS B n-----------------------------------------------------------------------------------8 3.3打印排版设置指令-------------------------------------------------------------------------------93.3.1ESC$nL nH------------------------------------------------------------------------------93.3.2ESC2------------------------------------------------------------------------------------93.3.3ESC3n----------------------------------------------------------------------------------93.3.4ESC\nL nH------------------------------------------------------------------------------93.3.5ESC SP n--------------------------------------------------------------------------------10 3.4图形打印指令----------------------------------------------------------------------------------103.4.1ESC*m nL nH d1…dk--------------------------------------------------------------------103.4.2GS'------------------------------------------------------------------------------------11 3.5条形码打印命令--------------------------------------------------------------------------------123.5.1GS k------------------------------------------------------------------------------------123.5.2GS h n----------------------------------------------------------------------------------123.5.3GS w n----------------------------------------------------------------------------------123.5.4GS H n----------------------------------------------------------------------------------133.5.5GS f n----------------------------------------------------------------------------------13 3.6汉字打印指令----------------------------------------------------------------------------------133.6.1FS&------------------------------------------------------------------------------------143.6.2FS.------------------------------------------------------------------------------------14附录----------------------------------------------------------------------------------------------15 A英文字符集-----------------------------------------------------------------------------15 B预印刷黑标说明-------------------------------------------------------------------------15第一章概述PLG微型热敏打印机是一款便携式热敏打印机,使用可充电电池供电,可带机充电,使用RS-232接口和IrDA红外接口,可用于各种仪器仪表、手持设备的数据打印。
上海盒马科技有限公司打印机开发者文档说明书

修改:整理理faq
修改:整理理faq
修改:更更新资源链接和介绍
增加:标签功能介绍
增加:AIDL接口口文文件更更新
增加:faq新增打印特殊符号的说明; 修改:标签功能仅用用于V2pro机型;
撰写人人 徐赟庭 徐赟庭
徐赟庭
徐赟庭
徐赟庭 徐赟庭 徐赟庭 徐赟庭 徐赟庭 Darren Darren Darren Darren 田田昆⻰龙 田田昆⻰龙 田田昆⻰龙 田田昆⻰龙 田田昆⻰龙 田田昆⻰龙 田田昆⻰龙
-1-
上海海商米米科技有限公司打印机开发者文文档 -2-
上海海商米米科技有限公司打印机开发者文文档
目目录
文文档更更新说明 ............................................................................................1
组件版本
更更新内容
原始版本
增加:打印图片片的规格说明 增加:有无无打印机硬件查询接口口说明
增加:aidl切刀刀接口口 增加:aidl 开钱柜接口口 增加:aidl 获取切刀刀次数接口口 增加:aidl 获取钱柜打开次数接口口
增加:aidl带反馈的事物打印接口口 增加:callback 事物打印结果反馈 修改:条码格式说明
文档更新说明
上海海商米米科技有限公司打印机开发者文文档
更更新日日期
2017/03/01
2017/03/15
2017/03/22
2017/03/29 2017/06/15 2017/07/26 2017/08/02 2017/08/03 2018/05/23 2018/06/01 2018/06/12 2018/06/29 2018/09/12 2019/02/25 2019/10/08 2019/11/12 2019/12/11 2020/08/18 2020/09/09
便携热敏打印机API参考手册
便携热敏打印机API参考⼿册
炜煌便携热敏打印机API参考⼿册Page 1 of 5
炜煌便携热敏打印机API参考⼿册
版本控制信息
⽬录
版本控制信息 (2)
⽬录 (3)
第1章概述 (4)
1.1 简述 (4)
第2章打印命令 (4)
2.1 PrintPDF417 (4)
附录 (5)
2.2 打印ASCII字符集 (5)
第1章概述
1.1简述
第2章打印命令
2.1PrintPDF417
该函数的功能是将待打印的⽂本按照⼀定的格式转化成打印机识别的PDF417条码数据格式1。
void PrintPDF417( unsigned char *data,
int *DataLen,
char *text,
int errorLevel,
int codeColumns);
【参数】
*data
[out]转化后的待发送的数据,因确保data指向⾜够多的内存空间。
*DataLen
[out]data的长度
*text
[in]待转化的⽂本数据
errorLevel
[in]校验等级(0~8)
codeColumns
[in]条码数据码字的列数2(1~5)
1PDF417条码数据格式详见《便携热敏打印机开发⼿册》
2注意:打印机⽀持条码的宽度受打印纸宽度的影响,应确保条码宽度在打印机可⽀持宽度范围内。
附录2.2打印ASCII字符集。
热敏打印机 MCP300 开发手册
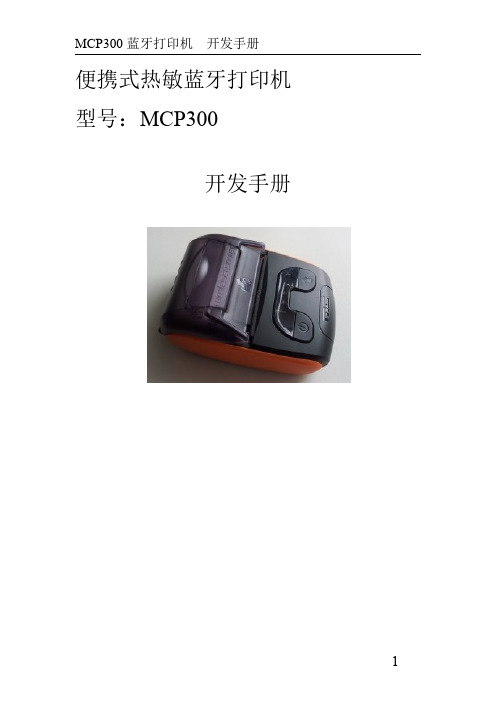
便携式热敏蓝牙打印机型号:MCP300开发手册目录第一章简介 (3)第二章使用 (3)打印测试 (3)指示灯指示 (3)第三章打印命令集 (3)1、打印命令一览表 (3)2、打印命令详解 (5)2.1打印命令 (5)2.2行间距设置命令 (6)2.3字符设置命令 (7)2.4图形打印命令 (10)2.5按键控制命令 (13)2.6初始化命令 (13)2.7状态传输命令 (13)2.8条码打印命令 (14)2.9控制板参数命令 (16)附录1:代码页 (18)附录B:国际字符集 (19)第一章简介MCP300系列列打印机是专门设计的蓝牙打印机,具有如下特点:打印控制板内置GB18030中文字库,彻底免除生僻字的苦恼。
打印速度快,噪声低工作电压范围宽5.0~9.0V机械尺寸小,便于用户安装第二章使用打印测试上电后,按开关键后,按进纸键,打印机将打印一张测试页。
指示灯指示上电后,指示灯将亮灭2次,间隔1秒,表示启动正常,随后指示灯如下显示:闪1次:自检正常。
闪2次:未检测到打印机。
闪3次:打印机缺纸。
闪5次:打印机芯的加热片过热。
闪10次:未检测到中文字库芯片。
第三章打印命令集1、打印命令一览表命令速查命令说明打印命令LF打印并换行HT跳到下一个TAB位置FF打印缓冲区数据ESC FF打印缓冲区数据ESC J n打印缓冲区数据并走纸n点行ESC d n打印缓冲区数据并走纸n行ESC=n设置打印在线、离线格式设置命令ESC2设置行间距为32点ESC3n设置行间距为n点行ESC a n设置对齐方式,左对齐,右对齐,居中对齐GS L nL nH设置左边距ESC$设置页的左边距字符设置命令ESC!n设置打印字符格式GS!n设置取消字体加宽加高ESC E n设置取消字体加粗ESC SP n设置字符间距ESC SO设置字符倍宽打印ESC DC4取消字符倍宽打印ESC{n设置/取消字符上下倒置GS B n设置/取消字符反白打印ESC-n设置下划线的点高度ESC%n设置/取消用户自定义字符ESC&设定用户自定义字符ESC?取消用户自定义字符ESC R n选择国际字符集ESC t n选择字符代码页图形设置命令ESC*打印一点行图形GS*下装点图设置GS/打印下装点图GS v打印指定宽度高度位图DC2*位图打印DC2V打印MSB位图DC2v打印LSB位图初始化命令ESC@打印机初始化状态传输命令ESC v n向主机传送打印机状态ESC u n向主机传送周边设置状态GS a n允许/禁止状态自动上传条码设置命令GS H选择HRI打印方式GS h设置条码高度GS x设置条码打印左边距GS w设置条码横向宽度GS k打印条码控制板参数命令ESC7n1n2设置打印参数ESC8设置睡眠参数DC2#n设置打印浓度DC2T打印测试页说明:黑标相关命令并不是所有控制板都支持。
嵌入式热敏打印机开发手册

3.1 串行接口(SN)机型详解................................................................................................................................. 4 3.1.1 数据接口..................................................................................................................................................... 4 3.1.2 串口数据发送方法..................................................................................................................................... 5 3.1.3 波特率选择位............................................................................................................................................. 6
- 1、下载文档前请自行甄别文档内容的完整性,平台不提供额外的编辑、内容补充、找答案等附加服务。
- 2、"仅部分预览"的文档,不可在线预览部分如存在完整性等问题,可反馈申请退款(可完整预览的文档不适用该条件!)。
- 3、如文档侵犯您的权益,请联系客服反馈,我们会尽快为您处理(人工客服工作时间:9:00-18:30)。
第 2 章 打印指令........................................................................................................................6
2.1 【打印并换行】 ............................................................................................................................... 6 2.2 【打印并回车】 ............................................................................................................................... 6 2.3 【设置字符右间距】 ....................................................................................................................... 6 2.4 【设置打印模式】 ........................................................................................................................... 6 2.5 【选择位图模式】 ........................................................................................................................... 7 2.6 【添加/消除下划线】...................................................................................................................... 8 2.7 【设置默认行间距】 ....................................................................................................................... 8 2.8 【设置行间距】 ............................................................................................................................... 8 2.9 【打印及初始化】 ........................................................................................................................... 8 2.10 【打印并进纸】 ............................................................................................................................ 8 2.11 【选择字库】 ................................................................................................................................. 9 2.12 【选择对齐方式】 ......................................................................................................................... 9 2.13 【打印并走纸 n 行】 ..................................................................................................................... 9 2.14 【设置/消除颠倒打印方式】 ...................................................................................................... 10 2.15 【打印 NV 位图】 ........................................................................................................................ 10 2.16 【下载 NV 位图】 ........................................................................................................................ 11