testo270煎炸油品质检测仪和testo-265食用油品质检测仪价格
testo_食用油品质检测仪操作说明
testo 食用油品质检测仪操作说明testo 食用油品质检测仪操作说明一、仪器的标定/校准操作步骤为确保仪器的高测量精度,首先要对仪器做定期的标定/校准(建议每月1次)。
准备标定/校准:1、在标定/校准前先清洗探头注:应使用弱性的清洁剂,标准的清水或者肥皂水清洗;应用软纸巾轻轻的清洗探头,或者在清水中冲洗;应用软纸巾小心擦干探头。
2、水浴加热标定油瓶注:在室温中进行标定(约20~25℃);在约50℃下进行校准。
标定/校准:1、打开仪器,在屏幕自测同时按下Hold键和下键约3s;2、在配置模式中一直按Hold键到屏幕显示CAL;3、使用上键或下键打开标定/校准功能,按Hold键确认;4、将探头侵入标定油中,注意浸入深度要适中,且探头要与容器壁及容器底部离开1cm以上;5、按下Hold键开始标定/校准,此过程中要在油中搅动探头,以便获得更快更准确的读数;6、测量结束后,对比显示屏中的值和标定油瓶标签上的参考值。
若差值>1%,需要进行校准:使用上键或下键来设置TPM值,使之与标定油瓶标签上的值相同;若差值<1%,则不需要进行校准;7、继续按Hold键,标定/校准结束,回到测量模式。
二、样品TPM值检测操作步骤标定/校准后,就可用来进行对样品的检测了。
执行测量:1、打开仪器,仪器进行自测后,进入测量模式,此时屏幕显示000,且LED 灯亮成绿色;2、将探头浸入油中,注意浸入深度(油温的允许范围为40~200℃);3、当温度不变时,测量就结束了,若自动保持功能激活时,仪器会自动结束测量,并有警报声发出,记录TPM值及温度值,再次按下Hold键,仪器回到测量模式;4、长按Hold键关闭仪器,清洗探头并小心擦干。
注意:1、在测量中应关掉感应电煎锅,因为电磁场会影响测量结果;2、应把容器中的油炸物移出并等待5分钟后再进行测量;3、每一次测量前或者下一次连续测量前清洗探头;4、尽量避免让探头碰触金属物,如:煎炸篮,锅壁,因为这些东西都可能影响测量结果,与金属物的最小距离应为每一边至少1cm;5、煎炸油中油温不均匀可能导致测量误差,应在测量时用仪器搅动煎炸油,使之尽量温度均匀;6、煎炸油中不能含水,含水可能导致结果的不准确,若怀疑煎炸油中含水导致测量结果的不可信,可等待5分钟后重复测量,如果度数变低说明油中含水,此时可再等5分钟再次重复测量,直到度数稳定,说明油中已无水。
食用油品质检测仪说明书.
感谢您购买CSY-SDC食用油品质检测仪,首次使用前请先阅读一下操作提示:亲爱的用户:为了保证仪器的高测量精度,我们建议您对仪器做定期的标定。
对于CSY-SDC的标定,您可以有以下选择:1 遵照标准的深芬仪器公司的标准(精度+/-2 %TPM:通过订货号您能够从深芬仪器标定部门获得标定服务,在此标定过程中,我们会对您的CSY-SDC仪器在精密实验室中进行2 点校准(于约5%和约27% TPM点。
此外,您还有以下选择在任何时候自行检查您的CSY-SDC:2 通过在煎炸油中使用简单测试功能(精度+/- 3%TPM:对于一个不需要校准的简单测试功能,我们建议您在启用新仪器时先对油温150 到180℃的未煎炸过的油中先做下测量;您需要进行多次测量,并留意各自的读数。
这些读数的平均值将会成为您今后测量的参考值。
以后在校准仪器时,可以在未煎炸过的油温150 到180 ℃的油中测量,并用之前的平均值做为参考校准。
请注意,当更换其他类型的油或者更改油的供应商时,上述的参考值将需要重新确定。
您的参考值为:________________________目录1 安全和环境.............................. ............. ............. ............. ............. ............. . (31.1. 关于此文件......................... ..................... ..................... ..................... (31.2. 安全需知........................ .............. .............. .............. .............. .............. .. (31.3. 环境保护.......................... ..................... ..................... ..................... (32 详细规格............................... ............................... ............................... . (32.1. 使用................................. ........................... ........................... ........................... .32.2. 技术参数......... ..................... ........................... ........................... .. (43 产品描述.............................. ..... ........................... ........................... . (43.1. 概述............................... ... ..... ........................... ........................... (43.2. 显示符号........................... ..... ........................... ........................... (63.3. 基本附件........................... ..... ........................... ........................... (94 初始操作.............................. . ..... ........................... ........................... .. (94.1. 试运行............................ .. . ..... ........................... ........................... . (94.2. 仪器的功能介绍...................... . ........................... ........................... (94. 2 . 1 . 开/关仪器................... . ..... ........................... ........................... . (94.2.2.LED警报. ................... . ..... ........................... ............................. .. (104.2.3.电池容量........................ . . ..... ........................... ........................... (104.2.4. 读数手动保持功能................. . ........................... ........................... (104.2.5. 读数自动保持功能................ . . ........................... ........................... ......... . (104.2.6. 自动关闭功能.............. .. . ..... ........................... ........................... .. (104.2.7. 设置TPM 极限值....................... ....................... ....................... .. (104.2.8.锁定/ 解锁T P M 极限值....................... ....................... ........ (114.2.9. 仪器的配置....................... ....................... ....................... ....................... . (124.2.10. 锁定/解锁配置模式... ................... ... ................... ... ................... ... (155 测量.................. ... .................. ... .................. ... .................. ... .................. ... . (155. 1 . 测量知识.......... ... ................ .......... ... ................ .......... ... ................ .......... .15 5.2. 执行测量.......... ... ............ .......... ... ............ .......... ... ............ .......... ... .. (165.3. 仪器功能自测...... .......... ... ........ ...... .......... ... ........ ...... .......... ... ........ ...... ..176 仪器的维护..... ... ........ ...... ..... ... ........ ...... ......... ..... ... ........ ...... ......... ..... ... ..18 6.1. 更换电池.......................... .......................... .......................... .......................... ..18 6 . 2 . 清洗探头...................... ...................... ...................... ...................... (186. 3 . 清洗外壳...................... ...................... ...................... ...................... . (186.4. 标定/校准仪器.................... ........... .................... ........... .................... ........... ..187 常见问题和回答................ ........... ...... ................ ........... ...... ................ (181 安全和环境1.1. 关于此文件使用> 请在使用本产品前仔细阅读本文件并保证您已熟悉本产品的使用,尤其注意安全指导和警告提示预防在使用过程中造成伤害和对仪器的损坏。
食用油极性物质及电导率测定
实验步骤:
1、食用油极性物质测定(testo)
实验名称
食用油极性物质及电导率测定
指导教师
李天骄
授课对象
12食品
实验地点
食品分析实验室
实验目的:了解食用油极性物质和电导率的测定方法。
实验原理:煎炸油中总极性物质的含量(即%TPM)可作为衡量油脂品质的一个好指标,因此,许多国家将食用油煎炸过程中总极性物质含量在24%~30%作为法定界限。我国对煎炸油脂安全性极为重视,早在1986年颁布第一部食用植物油煎炸卫生标准;1996年进行第一次修改和补充;2003年进行第二次修改,为GB7102.1-2003,其中规定极性组分含量≤27%。
在煎炸过程中,煎炸油长时间处于高温、与氧气接触导致煎炸油中的甘油三酯发生氧化反应,产生氧化产物,醛、酮、酸以及烃类,同时,煎炸食品带入体系的水在高温催化下,导致煎炸油中的甘油三酯水解,产生游离脂肪酸等。另外,多双键脂肪酸的分子容易聚合,聚合有两种形式即热聚合和氧化聚合。这些氧化、水解、聚合等反应产物,即为煎炸油中的极性物质,在煎炸过程中煎炸油的极性物质含量随煎炸时间而增加,同时煎炸油中对健康有害的成分含量增加,导致基因突变、染色体突变从而诱发癌症如乳腺癌、结肠癌等。
五问:问商家的进货渠道,必要时索要进货发票或查看当地食品卫生监督部门的抽样检查报告。
附:地沟油的感官鉴定
一看:看透明度,看色泽。颜色发暗,比较混浊,且有沉淀物,低温易凝固的可能是地沟油。检测窍门一是给冰棍上倒上一点油,油很快凝固并附着在冰棍上,则很可能是地沟油做成的。窍门二是玻璃上倒上一点油,如果油流的很慢,则可能有问题。
实验室食品检测仪器设备的常用种类
实验室食品检测仪器设备的常用种类
食品检测仪器设备的种类
1)食品安全快速检测仪:各类现场、快速、多组分检测仪器设备、车辆,试剂盒、试剂等;
2)金属、非金属元素及异物检测设备;
3)转基因食品及食品成分检测仪器设备;
4)食品包装检测设备;
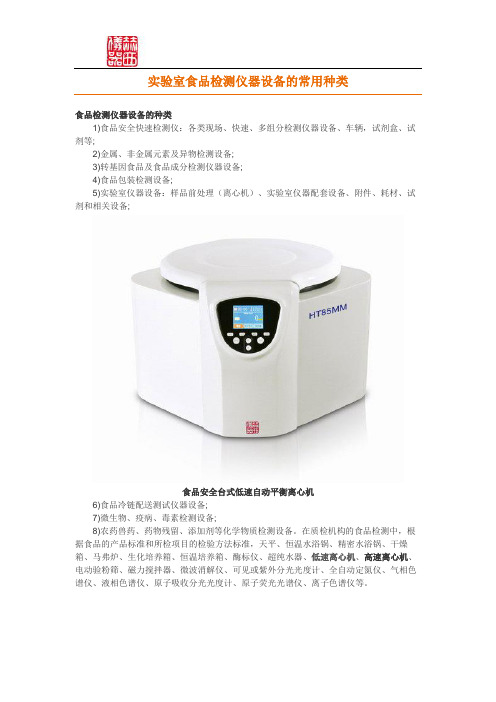
5)实验室仪器设备:样品前处理(离心机)、实验室仪器配套设备、附件、耗材、试剂和相关设备;
食品安全台式低速自动平衡离心机
6)食品冷链配送测试仪器设备;
7)微生物、疫病、毒素检测设备;
8)农药兽药、药物残留、添加剂等化学物质检测设备。
在质检机构的食品检测中,根据食品的产品标准和所检项目的检验方法标准,天平、恒温水浴锅、精密水浴锅、干燥箱、马弗炉、生化培养箱、恒温培养箱、酶标仪、超纯水器、低速离心机、高速离心机、电动验粉筛、磁力搅拌器、微波消解仪、可见或紫外分光光度计、全自动定氮仪、气相色谱仪、液相色谱仪、原子吸收分光光度计、原子荧光光谱仪、离子色谱仪等。
附:
食品安全系列离心机广泛适用于样品量少、步骤多、离心力大、温度要求不高的实验。
如:食品、药品和其它科研单位、学校实验室离心机对样品的分离。
食品安全台式低速自动平衡离心机特性:
1.整机设计符合人机工程学,流线型设计,全钢结构,不锈钢离心腔,安全美观实用。
2. TFT真彩4.3寸屏,触摸按键双控系统,智能化控制、简单方便地操作、触摸面板,同时显示设定参数和运行参数。
3.无刷变频电机驱动,运行宁静,清洁。
4.设有离心力显示专用键。
5.采用静音机电一体化电机门锁。
6.可车载。
7.可存储20个用户使用程序。
泰莱推出X-PAND'R 683
16 食品安全导刊 2010年3月刊可达每分钟1500罐(cpm)。
其中InspireX R50S 400 AFD能够检测各种不同尺寸的罐头内的污染物,InspireX R50SB 200适用于较小的金属罐检测,通常最大为400克(或14盎司)。
奇华顿推出更具“原汁原味”的鸡肉香精本刊讯(供稿 赵爽)近日,世界领先的香精香料生产商奇华顿公司通过深入开展Taste Essentials T M 鸡肉风味研究项目,开发出更多风味独特的鸡肉香精,帮助食品生产商制造出更为符合消费者喜好的产品。
奇华顿种类繁多的鸡肉香精包含一系列能够满足客户和消费者需求的高性能配料,具有贴近原味、味道浓郁、含钠量低、无过敏原、纯天然等特征。
新原料的使用使鸡肉香精更加接近原汁原味,口感“浓郁”,恰到好处的捕捉了鸡肉的鲜美。
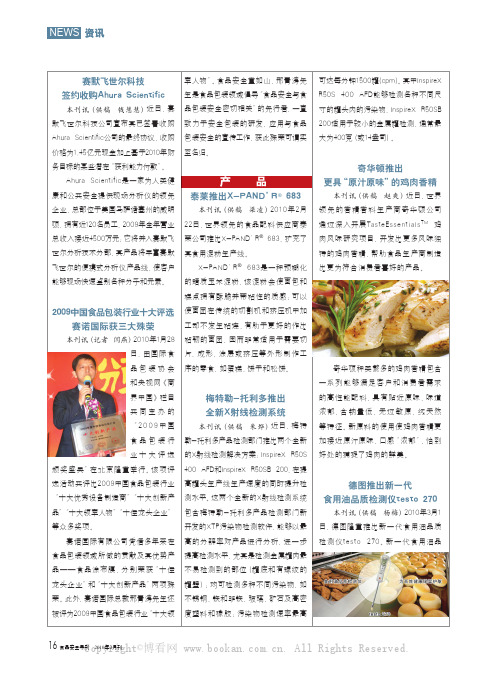
德图推出新一代食用油品质检测仪testo 270本刊讯(供稿 杨梅)2010年3月1日,德图隆重推出新一代食用油品质检测仪testo 270。
新一代食用油品军人物”。
食品安全重如山,邢青涛先生是食品包装领域倡导“食品安全与食品包装安全密切相关”的先行者,一直致力于安全包装的研发、应用与食品包装安全的宣传工作,获此殊荣可谓实至名归。
泰莱推出X-PAND’R ® 683本刊讯(供稿 梁凌)2010年2月22日,世界领先的食品配料供应商泰莱公司推出X-PAND’R ® 683,扩充了其食用淀粉生产线。
X-PAND’R ® 683是一种预糊化的蜡质玉米淀粉,该淀粉会使面包和糕点拥有酥脆并带粘性的质感;可以使面团在传统的切割机和挤压机中加工却不发生粘连,有助于更好的作出粘韧的面团,因而非常适用于需要切片、成形、涂层或挤压等外形制作工序的零食,如蛋糕、饼干和松饼。
梅特勒-托利多推出全新X射线检测系统本刊讯(供稿 朱烨)近日,梅特勒-托利多产品检测部门推出两个全新的X射线检测解决方案:InspireX R50S 400 AFD和InspireX R50SB 200,在提高罐头生产线生产速度的同时提升检测水平。
testo 270 ·食用油品质检测仪 - 食品与饮水安全快速检测网

5
环境保护
2.2. 2.3.
安全需知
> 请遵照使用目的和技术数据所指定的参数正确的使用此仪器,请 勿使用暴力。
> 请勿在有可能损坏仪器外壳,电源或者导线的场合使用此仪器。 > 测量的对象或者环境也有可能造成危害:请于测量前留意测量环
5 初始操作 ..................................................................................................12 5.1. 试运行............................................................................................12 5.2. 仪器的功能介绍 .............................................................................14
Testo产品说明书
testo 476Preface2ForewordDear Testo customer,Congratulations on choosing a Testo product. We hope that you will enjoy many years of using the product and that it will help you in your work.If problems should occur which you cannot rectify yourself, please consult our service department or your dealer. We will endeavour to provide fast and competent assistance to save you long periods out of operation.CopyrightThis documentation is subject to the copyright of Testo AG. Reproduction and employment contrary to the justified interests of Testo AG are prohibited without the prior, writ-ten consent of the company.We reserve the right to modify technical details from the descriptions, specifications and illustrations contained in this documentation.Testo AGPostfach 11 4079849 LenzkirchGermanyGeneral Information3This instruction manual contains important information about the features and use of the instrument. Please read this document carefully and familiarise yourself with the operation of the instrument before putting it to use. Always keep this manual close at hand in order to look up necessary information.Standards/TestsThe conformity certificate confirms that this product fulfills the guidelines in accordan-ce with 2004/108/EEC.Contents4Preface (2)General Information (2)Contents (4)1.Basic safety instructions (5)2.Intended use (6)3.Delivery range (6)4.Overview (7)5.Power supply (8)5.1Mains unit Setup (8)5.2Charge the battery (9)5.3Battery management (10)6.Operation (10)7.Error messages (11)8.External triggering (11)9.Replacing the flash tube (12)10.Application information (13)10.1Slowing down motion (13)10.2Apparent direction of movement (14)10.3.Harmonics (14)10.4Determing an object’s true RPM (15)11.Maintenance (18)12.Accessories/Spare parts (18)13.Technical data (19)1. Basic safety instructions52. Intended use6You can use the testo 476in a variety of industrial, laborato-ry, R&D and academic environments.Most commonly, the testo 476is used to make objects which are moving at high speeds appear to be moving in slow motion. When this occurs, you can then safely and easily analyse their motion, check for proper registration, determine sources of unwanted vibration, etc.Also, you can use the testo 476to apparently “freeze” an object’s movement. Without making contact, you can accurately measure the object’s rotational speed or recipro-cation rate.Unlike other portable stroboscopes, the testo 476 (XENON-)stroboscope takes only one hand to operate. Typical applications include use with:-High speed assembly lines, conveyor systems, bottling operations, etc.-Printing presses and cloth looms-Motors, fans, pumps and turbines-Calibration and inspection equipment-Monitoring laboratory & research applications4. Overview7On/OffFlash Adjustment Knob adjusts the flash rate. Thespeed with which the flash rate changes is controlled by how quickly the knob is rotated:Quick rotation =flash rate changes in largeincrements.Slow rotation =flash rate changes in smallincrements.LCD display shows flash rate (flashes per minute =FPM).Low Bat indicator will light up when the battery needs charging.Power supply socket (incl. battery charging)The External Trigger Jack is used when employing an external sensor to control the flash rate.EXT illuminates when External Trigger Jack is plugged. Lanyard can be looped on a belt or used as a wrist strap.Front Bezel Screw is removed in order to replace the flash tube.Underside:Close-up of LCD:85.1 Mains unit SetupWhen first using the mains unit, select the appropriate plugconnector for use in the AC power outlet (several stylesprovided). Align the holes in the rear side of the plug con-nector ( ) with the pins in the receptacle in the mains unitbody ( ) and push. When properly seated, you will hear aclick and the plug connector will not move. The charger isnow ready for use.Change the Plug ConnectorTo remove the connector from the mains unit, slide theswitch on the mains unit ( ) up and the connector will popout. To insert a different plug connector follow the procedu-res described in Battery Charger Setup.5.2 Charge the batteryCharge the battery before first use or when the “LOW BAT“indicator appears on the LCD.NOTE:When the “LOW BAT” indicator is shown, the testo476hasapproximately 6 minutes of operating time remaining. Whenthe “LOW BAT” indicator flashes on and off, the battery isempty and the testo476will automatically switch off.Before first use, you must set up the battery charger. Referto 5.1 Battery Charger Setup.1Insert the barrel plug end of the mains unit into thepower supply socket on the testo476.Plug the mains unit into a mains socket.2The red light on the mains unit will illuminate continuous-ly while the battery is charging.-The instrument will recharge in about five hours.9107. Error messagesE1:Front bezel is not fastened correctly. If the E1 messa-ge appears, the instrument must be switched off.Remove the front bezel screw, reseat the reflectorand tighten the front bezel screw ( ).Underside: EXT illuminates when External Trigger Jack is plugged.10.1 Slowing down motionAs discussed, the primary use of the Pocket-Strobe is to slow down or “freeze” the apparent motion of moving objects. This allows you to analyse their run-time per-formances safely and easily.To make an object appear to move in slow motion, you need to strobe it at a rate slightly above or slightly below its actual speed (or any harmonic of its speed as discussed below). Simply use the COARSE/FINE ADJUSTMENT knob until you achieve the desired apparent movement. Helpful Hints:The speed at which the object appears to move can be determined by subtracting the flash rate from the object’s actual rate.Example:If an object is rotating at 1,000 RPM and you strobe it at a rate of 1,005 flashes per minute (FPM), the object will appear to be moving at a rate of 5 RPM.Speed=Actual Rate - Flash Rate=1,000 PRM - 1,005 PRM=5 RPM10. Application information10.2 Apparent direction of movementThe direction (clockwise vs. counterclockwise or forwardvs. backward) at which the object appears to move isdetermined by the flash rate, the object’s actual direction ofmovement and the orientation of the stroboscopic beam tothe object.Example:Assume you wish to visibly slow down the movement of afan which is rotating clockwise at 1,000 RPM.Case 1:If you stand in front of it and strobe it at a rate of1,005 flashes per minute (FPM), the object will appear tobe moving at a rate of 5 RPM in a counterclockwise direc-tion.Case 2:If you stand in front of it and strobe it at a rate of995 FPM, it will appear to move at a rate of 5 RPM in aclockwise direction.Case 3:If you stand behind it and strobe it at a rate of1,005 FPM, it will appear to move in a clockwise directionat a rate of 5 RPM.Case 4:If you stand behind it and strobe it at a rate of995 FPM, it will appear to move in a counterclockwisedirection at a rate of 5 RPM.10.3. HarmonicsIf you continuously increase the flash rate while strobing anobject, it may appear to freeze, slow down, speed up, goforward, freeze again, go backwards, form multiple images,etc. These images appear at mathematically determinedmultiples or harmonics of the object’s actual speed.Example:Assume you wish to slow the motion of the fan used in thelast example, but you want it to be brighter.Technique: Starting from 1,000 FPM, slowly increase theflash rate. At 1,500 FPM the image will appear to freezeagain. Continue to increase the rate.10. Application information The image will appear to freeze again at 3,000 FPM. At this rate, the fan appears to be very bright. You can now use the FINE ADJUSTMENT knob to vary the rate above and below 3,000 to make the fan appear to move both clok-kwise and counterclockwise.Helpful Hints:-Harmonic images appear at both whole number multi-ples as well as fractional intervals of the object’s actual rate.For example, a fan rotating at 1,000 RPM will appear to be frozen at the whole number multiples of 2,000 (2x), 3,000 (3x), 4,000 (4x) etc., as well as at thefractional rates of 500 (1/2x), 750 (3/4x) and 1,500(11/2x), etc.-Some of the harmonic images are “singular” in appea-rance while others are “multiple”. This becomes impor-tant if you want to determine the objects actual rate as discussed in chapter 10.4 Determing an object’s trueRPM.10.4 Determing an object’s true RPMThe Pocket-Strobe can be used as a digital tachometer to determine the true RPM and/or the reciprocation rate of an object. This is done by visually “freezing” the object’s movement and then reading the LCD display. As with all stroboscopes, it is important to verify that this frozen image is not a harmonic of the object’s actual rate.Helpful Hints:-Knowing the approximate rate of the object in advance gives you a useful starting point.-If the object has a uniform shape, like a multi-blade fan or motor shaft, you must give it an identifying mark(using paint or reflective tape or equivalent) in order to differentiate its orientation.- A single image always appears if the rotational speed set on the instrument matches the rotational speed of the object or if an integer divisor (1/2, 1/3, ...) of theobject speed has been set on the instrument.10. Application informationExample 1 (mark needed):This example shows why identifying marks are important.Suppose you want to determine the true RPM of this fan.The only thing you know is that its speed is less than 3,500RPM. If you slowly decrease the flash rate starting from3,500 FPM, the following “frozen” images appear:No.: 1 2 3 4ImageRate: 3,300 2,200 1,6501,320No.: 5 6 7 8ImageRate: 1100825 733.3 550FlashWhat is the actual rate of the fan? Images 1, 3, 5, 6 and 8are all “frozen,” so the rate could be taken as 3,300, 1,650,1,100, 825 and 550. Which is correct?In order to determine the fan’s actual speed, a mark isadded to one of the blades and the test is run again.No.: 1 2 3 4ImageRate: 3,300 2,200 1,6501,320No.: 5 6 7 8ImageRate: 1,100825 733.3 550Flash10. Application information Using the orientation mark, it is now clear that the images appearing at 3,300, 1,650 and 825 RPM are multiple-image harmonics. In each of these cases, three identifica-tion marks appear. On the other hand, a singular image appears at 1,100 and again at 550.The first single image with only one reflection mark appearsif 1.100 rpm has been set on the instrument, another oneat 550. Please remember, a single image always appears ifthe rotational speed set on the instrument matches the rotational speed of the object or if an integer divisor (1/2,1/3, ...) of the object speed has been set on the instru-ment. The true rotational speed therefore is 1.100 rpm. Ifthe instrument is set to 550 rpm, only every second rotor revolution will be flashed.Example 2 (no mark needed):This example illustrates how the actual speed of an objectcan be determined without the use of an orientation mark -provided that the object has a suitable shape.Assume that the speed of this cam is known only to beless than 7,000 RPM. Because it has a unique shape, itdoes not need an identifying mark. As the flash rate islowered from 7,000, the following harmonic images appear: No.: 1 2 3 4 ImageRate: 6,000 4,000 3,0001,500 FlashThe harmonic images at 6,000 and 4,000 RPM are not sin-gular, but double and quadruple. A singular image does appear at 3,000 and again at 1,500 RPM. 3.000 rpm is the actual rotational speed.11. MaintenanceDue to the high voltage contained within the testo 476, theuser should not attempt to repair the device (exception:Replacing the flash tube, see p.12).If your testo476needs repair, please contact the nearestTesto service point.Clean the external surfaces with a dry, lint free cloth only.Do not allow any liquids to enter into the instrument.13. Technical data。
testo_食用油品质检测仪操作说明
testo 食用油品质检测仪操作说明testo 食用油品质检测仪操作说明一、仪器的标定/校准操作步骤为确保仪器的高测量精度,首先要对仪器做定期的标定/校准(建议每月1次)。
准备标定/校准:1、在标定/校准前先清洗探头注:应使用弱性的清洁剂,标准的清水或者肥皂水清洗;应用软纸巾轻轻的清洗探头,或者在清水中冲洗;应用软纸巾小心擦干探头。
2、水浴加热标定油瓶注:在室温中进行标定(约20~25℃);在约50℃下进行校准。
标定/校准:1、打开仪器,在屏幕自测同时按下Hold键和下键约3s;2、在配置模式中一直按Hold键到屏幕显示CAL;3、使用上键或下键打开标定/校准功能,按Hold键确认;4、将探头侵入标定油中,注意浸入深度要适中,且探头要与容器壁及容器底部离开1cm以上;5、按下Hold键开始标定/校准,此过程中要在油中搅动探头,以便获得更快更准确的读数;6、测量结束后,对比显示屏中的值和标定油瓶标签上的参考值。
若差值>1%,需要进行校准:使用上键或下键来设置TPM值,使之与标定油瓶标签上的值相同;若差值<1%,则不需要进行校准;7、继续按Hold键,标定/校准结束,回到测量模式。
二、样品TPM值检测操作步骤标定/校准后,就可用来进行对样品的检测了。
执行测量:1、打开仪器,仪器进行自测后,进入测量模式,此时屏幕显示000,且LED 灯亮成绿色;2、将探头浸入油中,注意浸入深度(油温的允许范围为40~200℃);3、当温度不变时,测量就结束了,若自动保持功能激活时,仪器会自动结束测量,并有警报声发出,记录TPM值及温度值,再次按下Hold键,仪器回到测量模式;4、长按Hold键关闭仪器,清洗探头并小心擦干。
注意:1、在测量中应关掉感应电煎锅,因为电磁场会影响测量结果;2、应把容器中的油炸物移出并等待5分钟后再进行测量;3、每一次测量前或者下一次连续测量前清洗探头;4、尽量避免让探头碰触金属物,如:煎炸篮,锅壁,因为这些东西都可能影响测量结果,与金属物的最小距离应为每一边至少1cm;5、煎炸油中油温不均匀可能导致测量误差,应在测量时用仪器搅动煎炸油,使之尽量温度均匀;6、煎炸油中不能含水,含水可能导致结果的不准确,若怀疑煎炸油中含水导致测量结果的不可信,可等待5分钟后重复测量,如果度数变低说明油中含水,此时可再等5分钟再次重复测量,直到度数稳定,说明油中已无水。
【精品】食品安全检测中心仪器设备清单
2.背景校正:塞曼或氘空心阴极灯扣背景;
3.灯位:8灯位,全自动切换,可同时点亮两个灯(一个灯预热);
4.波长范围:185~900nm;
*5.光学系统:大面积平面光栅,光栅刻线数:≥1800条/mm
6.检测器:光电倍增管;
7.火焰部分检出限:Cu0.001mg/L;
4.5基线漂移:在230nm处1×10⁻⁴AU/h;
5.荧光检测器
5.1光源:150W氙灯;
5.2检测灵敏度:水拉曼峰S/N≥800;
5.3波长重现性:±0.2nm;
6.色谱工作站:Windows XP或win7操作环境;全32位软件,控制仪器数据采集、数据处理、报告编辑等。
1
3
原子吸收分光光度计
火焰石墨炉一体化主机1台,80位以上自动进样器,冷却水循环装置1套,无油静音空压机1台,空气干燥过滤器1套,AS、Hg、Pb、Cd、Cr、Cu、Fe、Mn、Zn、K元素灯各1个,原装石墨管20支,进样毛细管、针护套2套,2ml聚酯样品杯500瓶1套(带减压阀),仪器正常工作二年所需的易耗品、备品、备件1套。计算机、打印机各1台。
3.3全电子流量设定范围:0~970kpa;
氢火焰检测器(FID):最低检出限<1.8pgC/s(正十二烷);
*5.电子捕获检测器(ECD):最低检测限<6fg/ml(γ-666);
6.火焰光度检测器(FPD或PFPD)
6.1最高使用温度:350℃以上;
*6.2最低检测限:<60fgP/sec(三丁基磷酸酯),<3.0pgS/sec(十二烷硫醇);
1.可双通道同时测定:As、Hg,As、Se,As、Sb;
2.≥100位极坐标式自动进样器;
OS-270食用油品质检测仪-海能仪器
食用油脂是人们摄取能量和营养的重要来源,是加工食品的重要原料。 油 炸食品以其特有风味广受消费者喜欢。 用于煎炸的食用油在高温煎炸过程中发 生一系列的物理、 化学变化, 这些变化会生成对身体健康有害的物质。 目前, 煎 炸食用油的传统检测方法多为化学方法, 这些方法必须在实验室内由专业人员 操作, 费时费力, 化学试剂的使用可能会伤害检测人员健康, 且化学废剂污染了 环境。 OS-270 是一种快速, 安全, 高效食用油品质检测仪, 能够快速检测食用油 中的极性化合物组分含量。 本产品能够在油温较高的环境下使用,适用于各种 煎炸的食用油品质检验。 在 《GB7102.1-2003 食用植物油煎炸过程中的卫生标准》 中规定煎炸油的 极性组分含量不超过 27%。
T P M 分辨率 温度传感器 T P M 传感器 T P M 响应时间 L E D 状态提示 操作温度 存储温度 显示方式 机壳材质 探头材质 防护等级 电源 2 节AAA型电池 2 0 ℃以下的电池使用寿命 尺寸 重量(带探头保护套)
元素分析
ห้องสมุดไป่ตู้
技术指标
1 0 ~2 0 0 ℃ ± 0 .1 ℃ ± 1℃ 0 ~4 0 % ±2 % ( 4 0℃~ 190℃) 0 .1 % P T C传感器 专利电容传感器 <1 5 s 绿色,橙色,红色 0 ~+5 0 ℃ -2 5 ℃~+70℃ L CD 背光显示屏 ABS 食品级不锈钢 IP 6 5 (七号) 连续使用时间约25小时 (相应的5 00次测量) 3 6 7 m m X 48mmX24mm 165g
技术指标
测量温度 温度分辨率 温度测量精度 T P M (极性化合物组分含量) T P M 测量精度 主要特点与优点
- 1、下载文档前请自行甄别文档内容的完整性,平台不提供额外的编辑、内容补充、找答案等附加服务。
- 2、"仅部分预览"的文档,不可在线预览部分如存在完整性等问题,可反馈申请退款(可完整预览的文档不适用该条件!)。
- 3、如文档侵犯您的权益,请联系客服反馈,我们会尽快为您处理(人工客服工作时间:9:00-18:30)。
产品名称:食用油酸价快速检测仪食用油类检测仪器产品型号:SQ-110SFSQ-110SF食用油酸价快速检测仪商品描述SQ-110SF食用油酸价快速检测仪仪器特点:*采用国标方法(GB/T5009.37-2003)*检测时间3分钟*一次性专用试剂盒*可现场定量检测出食用油的酸价技术指标:*测定下限:0.1 mg KOH/g*测定范围:0.0-30.0 mg KOH/g*测量精度:±5%配置:*微量滴液器1台*样品前处理器具1套*试剂一套(50次)
标题:JT-SJ10SYY食用油品质检测仪和testo-265食用油品质检测仪ு நூலகம்:
产品名称:食用油类检测仪器、猪油丙二醛快速测定仪产品型号:CH-3000SCH-3000S猪油丙二醛快速测定仪商品描述CH-3000S猪油丙二醛快速测定仪仪器特点:*国标改良法(GB/T5009.181-2003)*检测时间45分钟*大屏幕液晶中文显示,人机交互式操作*单片机智能控制,具有通讯、联机、帮助、测量、设置、记录、保存和数据统计处理功能*专用样品前处理设备和一次性试剂盒*可现场定量检测出猪油中丙二醛的含量技术指标:*测定下限:0.02mg/100g*测定范围:0.00-1.00mg/100g*测量精度:±2%配置:*主机1台* GDYQ-707S食品检测·快速恒温水浴锅1台* GDYQ-708SA便携式恒温加热·制冷仪1台* GDYQ-709S食品检测·快速搅拌提取仪1台*电子台秤1台*移液器1套*样品前处理器具1套*微机接口和数据处理软件1套*试剂一套(50次)
标题:食用油品质分析仪和食用油品质快速检测仪价格库号:JX118235价格:搜【润联网】查询主要技术参数:
机台名称:食用油品质检测仪型号:JT-SJ10SYY食用油品质检测仪应用领域食用油品质检测仪可以快速定量检测食用油过氧化值、酸价等理化指标,适用于食品生产企业、农业生产基地、农贸市场、质量监督、卫生防疫等部门对食品安全进行监测。本系列产品有10通道食用油品质检测仪、24通道食用油品质检测仪、48通道食用油品质检测仪和96通道食用油品质检测仪。食用油品质检测仪技术参数1、重复性:±0.1%(A);2、稳定性:光电漂移(A)±0.003(3分钟)3、吸光度准确度:±2.0%;4、稳定性:≤0.003A/3min5、线性误差:±1.0%;6、尺寸:360X300X125(mm);7、配套试剂:100次8、用1cm比色皿检测,可以同时测试多个样品,每个样品由程序控制分别独立工作,不会互相干扰。食用油品质检测仪特点1、仪器预留其他项目检测程序和端口,根据日后需求可方便的自主增加检测项目。日后可升级为检测,水产品,肉制品,面制品的综合类型仪器。2、十通道光路系统,
testo270煎炸油品质检测仪和testo-265食用油品质检测仪价格
标题:德图testo270食用油品质检测仪和食用油检测仪TT-10SYY参数库号:JX097947价格:搜【润联网】查询主要技术参数:
仪器特点:光源系统⑴采用全固态冷光源既作光源又作单色器,与传统分光系统相比,结构简单,具有更高的稳定性、抗震、抗潮性能。⑵光源/单色器、比色槽、传感器一体化,无可动部件,增加了仪器的稳定性、可靠性。⑶采用脉冲供电方式,光源使用寿命可达10万小时。数据处理及显示系统⑴仪器具有内置工作曲线,无需配置标准溶液,只需要用配套试剂进行零点校正后,即可实现面粉中溴酸钾的快速定量测定⑵大屏幕中文显示,具有测量、设置、记录、保存、打印和数据统计处理功能。技术指标:光源:超高亮发光二极管波长:538nm测定下限:5.0mg/kg测定范围:0.0~100.0 mg/kg精度:±10%仪器配置:样品前处理器具1套试剂1套(50次)
标题:煎炸油品质检测仪和食用油品质快速检测仪价格库号:JX097953价格:搜【润联网】查询主要技术参数:
适用于各种可以食用的植物油、动物油中油脂酸价的测定。*采用国标方法(GB/T5009.37-2003)*检测速度10分钟*一次性专用试剂盒技术指标:测定下限:0.1 mg KOH/g*测定范围:0.0-30.0 mg KOH/g*测量精度:5%仪器配置:*微量滴液器1台*样品前处理器具1套*试剂一套(50次)
标题:TPM食品油检测仪和专用大豆油品质检测仪价格库号:JX097952价格:搜【润联网】查询主要技术参数:
仪器特点:光源系统⑴采用全固态冷光源既作光源又作单色器,与传统分光系统相比,结构简单,具有更高的稳定性、抗震、抗潮性能。⑵光源/单色器、比色槽、传感器一体化,无可动部件,增加了仪器的稳定性、可靠性。⑶采用脉冲供电方式,光源使用寿命可达10万小时。数据处理及显示系统⑴仪器具有内置工作曲线,无需配置标准溶液,只需要用配套试剂进行零点校正后,即可实现面粉中溴酸钾的快速定量测定⑵大屏幕中文显示,具有测量、设置、记录、保存、打印和数据统计处理功能。技术参数:型号GDYQ-110SU测定下限:5.0mg/kg(取2.0g面粉样品时)测定范围:0.0~100.0 mg/kg测量精度:±10%波长:538nm光源:超高亮发光二极管仪器配置:样品前处理器具1套;试剂1套(50次)
标题:LBT-701M专用大豆油品质检测仪和食用油检测仪TT-10SYY价格库号:JX097956价格:搜【润联网】查询主要技术参数:
产品名称:食用油类检测仪器、植物油过氧化值快速测定仪产品编号:1998产品型号:CH-2000SCH-2000S植物油过氧化值快速测定仪商品描述CH-2000S植物油过氧化值快速测定仪仪器特点:*国标改良法(GB/T5009.37-2003)*检测时间5分钟*大屏幕液晶中文显示,人机交互式操作*单片机智能控制,具有通讯、联机、帮助、测量、设置、记录、保存和数据统计处理功能*专用样品前处理设备和一次性试剂盒*可现场定量检测出食用植物油过氧化值含量技术指标:*测定下限:0.3mmoL/kg*测定范围:0.0-11.0 mmoL /kg*测量精度:±2%配置:*主机1台*电子台秤1台*移液器1套*样品前处理器具1套*微机接口和数据处理软件1套*试剂一套(50次)