Fortebio Octet BLI 蛋白生物素标记应用指南
Octet BLI大分子结合动力学检测实验设计-Non-Small Molecule Kinetics

Kinetics Assay:概述:Octet系统可检测生物分子间相互作用,其中RED系列检测分子量下限可达150Da,而QK系列则可检测5kDa以上分子。
检测样品为分子量150 Da~1000 Da的小分子以及小于5kDa的分子,采用RED系列实现;分子量大于5kDa时,RED系列及QK系列均可满足要求。
该SOP默认待测样品为大分子,为其动力学检测提供通用标准化流程,针对具体分子及特殊情况,可能需要进一步考虑更多细节及优化。
考量及建议:1.采用Octet系统检测大分子时,应当根据样品特性综合考虑,以选择适当sensor(例如,SA sensor可loading生物素化的蛋白、抗体、化合物、核酸等以检测与之相互作用的大分子样品,而AHC sensor可直接loading人抗后检测与之相互作用的分子);所使用sensor批次相同。
如用户对于sensor选择有任何疑问,请随时与ForteBio应用科学家联系。
2.蛋白或抗体生物素化操作请参阅ForteBio技术说明书。
化合物及核酸、糖类分子生物素化一般需合成实现。
核酸及糖类分子生物素化也可依据Pierce试剂盒操作实现。
3.Assay buffer没有特定要求,便于样品的稳定保存即可;值得注意的是,由于ForteBio大多通过氨基生物素化实现欧联,因此需生物素化样品的buffer不可为含Tris等氨基的缓冲液。
客户可根据需要采用Pierce相关试剂盒实现羧基端生物素化。
4.设置protocol时,一般需要1根sensor loading后在检测buffer中检测基线,作为空白对照。
5.用于loding的生物素化蛋白浓度可采用20ug-50ug/ml。
6.建议对样品进行两轮筛选。
例如,第1轮宽泛筛选,浓度为100,10,1,0.1uM,确定样品大概Kd范围;第2轮更精细筛选:30,10,3.3,1.1uM,获取高度可信的Kd。
(注意:所用浓度仅用于发挥导向性作用,实际浓度取决于初筛所获得Kd)。
Fortebio Octet BLI 实验设计及数据获取-小分子动力学

Small Molecule Kinetics Assay:概述:Octet可检测分子量为150 Da~1000 Da的小分子与蛋白间相互作用。
该SOP的目的在于为小分子动力学检测提供通用标准化流程,针对具体分子及特殊情况,可能需要进一步考虑更多细节及优化。
此外,该SOP假定所有使用者已经过ForteBio应用科学家上机培训,如若不然,请在培训完成后参考该SOP。
考量及建议:1.检测小分子时,应当使用SSA sensor(Cat# 18-0008 and 18-0009),该sensor是ForteBio公司目前唯一具备检测小分子灵敏度的传感器。
2.用于与小分子结合的蛋白或抗体必须先进行生物素化。
请参阅ForteBio技术说明书。
3.建议assay buffer为PBS+0.1%BSA+0.02%TW20+5%DMSO(如果为水溶性小分子,则无需加DMSO等有机溶剂);4.设置protocol时,须设置两组SSA sensor,运行中第1组为实际检测用sensor,第2组为生物胞素(biocytin)封闭后、用作阴性对照的sensor。
5.检测sensor与对照sensor间运行步骤数以及各步运行时间必须一致——任何偏差将导致数据无法分析。
6.用于loding的生物素化蛋白浓度建议采用50ug/ml。
如蛋白很小或容易产生空间位阻,可能需要进行定量。
如蛋白较宝贵,其用量可以更低,但随后的结合效率可能会有所折扣(17kDa的蛋白在推荐浓度下3min后可产生2nm的shift)。
蛋白生物素化7.如果需要有机溶剂溶解小分子,稀释样品时DMSO最终浓度建议保持在5%以内(例如:溶于100%DMSO中20mM的样品,按照1:20溶于PBS后其浓度为1mM,DMSO为5%)。
8.建议对样品进行两轮筛选。
例如,第1轮宽泛筛选,浓度为100,10,1,0.1uM,确定样品大概Kd范围;第2轮更精细筛选:30,10,3.3,1.1uM(或者2被剃度稀释)获取高度可信的Kd。
Fortebio Octet定量简明指南

Octet 定量简明指南Octet定量简明指南(一步法浓度测定)一步法:用现有的传感器,比如proA,proG,proL 检测IgG 等物质,通过分析物的结合速率来对其进行浓度测定。
1实验准备样品板,greiner PN655209,200ul 一孔加入缓冲液和样品等预湿板,greinier PN655209,200ul 一孔加入预湿缓冲液样品板传感器盘预湿板底盘将预湿板放到蓝色的底盘中(A1 位置卡住),然后将传感器放到预湿孔相应的位置的绿色盘(传感器盘)上,然后将绿色盘插入到蓝色盘上。
然后按照下图将传感器盘(凹面朝内)和样品板(A1 位置右上角)放入仪器中,关好仪器门。
注意:样品板一定要紧贴在shaker 上!!加样注意点:1)预湿缓冲液,复性缓冲液,reference 以及标准品稀释液都应该用分析物同样的缓冲液或者基质,所有缓冲液以及样品的体积不得少于200ul。
2)将样品稀释到检测范围中,比如1-500ug/ml,稀释液为fortebio 公司的sample diluent 缓冲液。
配方为0.02%tween20,0.1%BSA,PBS,如果自配,不能保证其质量。
3)标准品不需要每个实验都做,如果分析物和实验条件一致(比如实验时间和缓冲液),可以调用以前的标准曲线,但是传感器必须是同一个批次4)建议每次实验加入数个阳性对照,比如100ug/ml,设定可接受范围为90-110ug/ml。
作为实验有效性的判定依据。
比如某次实验检测结果为80ug/ml,则说明该次实验结果不可信。
5)再生缓冲液一般在pH1.5-2.0 的10mM 甘氨酸缓冲液2程序设定打开仪器门前必须确定仪器在ready 状态(请检查instrument status 窗口)。
打开操作软件前请确认仪器门关闭,在桌面上点击,在wizard 中点击basic quantitation with regeneration然后点击2.1样品板和程序设定:在plate definition 中根据样品的实际加样位置设置样品板Step1:选中需要设置的孔,选中方式可以为1)拖鼠标选择某个区域2)单击3)按ctrl 连击4)按shift 选择某个连续区段5)右击clear data 去除点击以下图标,选择样品的种类。
Octet BLI 小分子结合动力学检测实验设计Small Molecule Kinetics

Small Molecule Kinetics Assay:概述:Octet RED系列可检测分子量为150 Da~1000 Da的小分子与蛋白间相互作用。
该SOP的目的在于为小分子动力学检测提供通用标准化流程,针对具体分子及特殊情况,可能需要进一步考虑更多细节及优化。
此外,该SOP假定所有使用者已经过ForteBio应用科学家上机培训,如若不然,请在培训完成后参考该SOP。
考量及建议:1.采用RED系列检测小分子时,应当使用SSA sensor(Cat# 18-0008 and 18-0009),该sensor是ForteBio公司目前唯一具备检测小分子灵敏度的传感器。
2.用于与小分子结合的蛋白或抗体必须生物素化。
请参阅ForteBio技术说明书。
3.建议assay buffer为PBS+5%DMSO;4.设置protocol时,须设置两组SSA sensor,运行中第1组为实际检测用sensor,第2组为生物胞素(biocytin)封闭后、用作阴性对照的sensor。
5.至关重要的是,检测sensor与对照sensor间运行步骤数以及各步运行时间必须一致-任何偏差将导致所得数据无法于Octet RED软件上分析。
6.用于loding的生物素化蛋白浓度建议采用50ug/ml。
如蛋白很小或容易产生空间位阻,可能需要进行定量。
如蛋白较宝贵,其用量可以更低,但随后的结合效率可能会有所折扣(17kDa的蛋白在推荐浓度下3min后可产生2nm的shift)。
7.稀释样品,DMSO最终浓度为5%(例如:溶于100%DMSO中20mM的样品,按照1:20溶于PBS后其浓度为1mM,DMSO为5%)。
8.建议对样品进行两轮筛选。
例如,第1轮宽泛筛选,浓度为100,10,1,0.1uM,确定样品大概Kd范围;第2轮更精细筛选:30,10,3.3,1.1uM,获取高度可信的Kd。
(注意:所用浓度仅用于发挥导向性作用,实际浓度取决于初筛所获得Kd)。
Fortebio Octet 生物膜干涉技术(BLI)常见问题解答-第二版

生物膜干涉技术(BLI) 常见问题解答(第二版)目录缩写说明 (2)动力学相关术语 (2)传感器和仪器相关术语 (2)生化相关术语 (3)1 实验基本常识 (3)1.1如何自学 (3)1.2关于动力学 (3)1.3关于耗材与样品要求 (5)1.4关于生物膜干涉技术 (7)1.5软件与硬件性能参数 (8)1.6关于应用 (11)1.7关于基本操作 (11)2 动力学实验设计与操作 (15)2.1 关于固化和传感器的选择 (15)2.2 关于结合和解离 (19)2.3 关于传感器再生 (20)2.4 小分子检测 (21)2.5 动力学实验操作 (23)2.6 动力学实验数据处理 (29)2.7实验常见问题(动力学部分) (39)3 定量实验设计与操作 (44)3.1定量实验设计 (44)3.2 定量实验操作 (46)3.3定量实验数据处理 (48)3.4实验常见问题(定量部分) (51)4 仪器维护与硬件问题 (51)5 联系我们 (55)缩写说明动力学相关术语k on或k a:结合速率常数,单位M-1s-1k off或者k d:解离速率常数,单位s-1K D:亲和力常数(解离平衡常数),单位Mk obs:表观结合常数[C]:分析物浓度Ligand:配体,即固化在传感器上的物质Analyte:分析物,即与固化物质结合的物质R max:理论上分析物结合信号的最大值,即所有ligand均被analyte结合后所获得的信号Req:分析物结合达到平衡时的信号值Initial slope:起始斜率BLI:生物膜干涉技术Baseline:平衡步骤Association:结合步骤Dissociation:解离步骤Loading:固化步骤传感器和仪器相关术语SA:链霉亲和素传感器SSA:超级链霉亲和素传感器APS:氨基丙基硅烷传感器AR2G:氨基偶联传感器AHC:抗人免疫球蛋白Fc段传感器AHQ:人免疫球蛋白定量传感器AMQ:鼠免疫球蛋白定量传感器AMC:抗鼠免疫球蛋白Fc段传感器NTA:镍离子传感器anti-His:抗组氨酸标签传感器anti-GST:抗GST标签传感器Capture类传感器:除去SA,SAX,SSA,AR2G,APS外的传感器Octet:Octet家族仪器,包含Octet RED,RED96,QK,QKe,QK384,RED384,HTX,K2RED系列仪器:RED,RED96,RED384,K2QK系列仪器:QK,QKe,QK384生化相关术语EDC:1-(3-二甲基氨丙基) -3-乙基-碳化二亚胺NHS:N-羟基琥珀酰亚胺HRP:辣根过氧化物酶DAB:二氨基联苯胺,一种HRP的底物,在HRP催化后可以生成金属沉淀EMSA:电泳迁移率实验,用来研究DNA和蛋白的结合Epitope binning:表位分析His-tag:组氨酸标签Co-IP:免疫共沉淀PBS:磷酸盐缓冲液BSA:牛血清白蛋白hIgG:人免疫球蛋白mIgG:鼠免疫球蛋白1:1反应:一份的ligand与一份的analyte形成一份的产物,即两者只有一个结合位点2:1反应:Ligand上有2个可以和analyte的结合位点,并且两者独立1:2反应:Analyte上有2个可以和ligand结合的位点,并且两者独立1 实验基本常识1.2关于动力学1.2.1 k on, k off, K D值各代表什么意义?生物分子间的相互作用一般视为可逆反应。
生物素标记蛋白操作方法
抗体生物素标记操作方法一般每个抗体可以标记3-5个生物素,标记时,生物素与抗体的比率受抗体浓度影响,对于10 mg/ml 的抗体溶液来说,生物素应超过蛋白12倍(摩尔数),对于2 mg/ml 的抗体溶液应超过20倍,生物素也可以直接以粉末的形式加入蛋白溶液中。
蛋白样品不得含有叠氮钠、BSA、甘氨酸、Tris或其他任何有自由氨基的添加物。
一、试剂和器材:1、标记反应溶液:0.1M pH 7.2 PBS(0.15M sodium chloride)NaCl 8.77 g ;Na2HPO4·12H2O 32.3g ;NaH2PO4·2H2O 4.5g;加双蒸水 900mL左右,用HCl/NaOH 调pH至 7.2,最后定容为 1000mL2、 10mM NHS-dPEG4-Biotin配方:称取0.56mg NHS-dPEG4-Biotin(分子量为587),溶解于95 µl 超纯水中,临用前配置,不可储存,立刻使用。
NHS-PEG4-Biotin容易潮解,开瓶前平衡至室温。
也可以配置200 nmol/L 储备液:20mg NHS-dPEG4-Biotin溶解于170µl DMSO中,-20℃稳定几个月。
由于NHS-PEG4-Biotin昂贵,而且使用量少,不能保存,配制时,直接将NHS-PEG4-Biotin放入1.5ml EP管中,以实际称量的NHS-PEG4-Biotin按比率加入超纯水。
3、超滤管⑴、Millipore超滤管[0.5ml 10KD]:截留分子量10KD,残留体积200µl,蛋白回收率95%,7500×g(允许的最大离心力14000×g)离心10min。
⑵、Millipore超滤管[0.5ml 50KD]:截留分子量50KD,残留体积80µl,蛋白回收率94%,7500×g(允许的最大离心力14000×g)离心5 min。
Fortebio生物分子相互作用检测平台-中文版

- 两个板位可独立使用96-plate或 384plate
Octet 系统与工作站联用
• Automated door and plate stage • Works with articulated arm and
track-style robotic systems • Plate stage presents the biosensor
/wiki/Interference
Biolayer Interferometry(BLI)技术的原理
改变膜厚度对干涉光的影响
100% 0
Wavelength
Relative Intensity
Biolayer Interferometry(BLI)技术的原理
实时无标记生物分子相互作用检测平台
Fortebio Octet 检测平台
ForteBio Octet QK、Qke、RED平台内部
Fortebio Octet 384全自动检测平台
• 使用96或384不同的微孔板类型 • 通量更高,样品消耗更少; • 384 tilted well 使用384微孔板,反应体系更小;
tray, sample and reagent plates for robot • Octet software has automation hooks enabled to interact with robot software
Octet 检测平台型号差异
Molecular Weight Range
Octet Solution
ForteBio Inc.—艾瑞生物技术(上海)有限公司
• 公司的历史:
• 2004年成立,在美国加州Menlo Park, 英国London, 和中国 • 上海建有生产和技术中心
Octet RED384 CMI Getting Started Guide to Biolaye
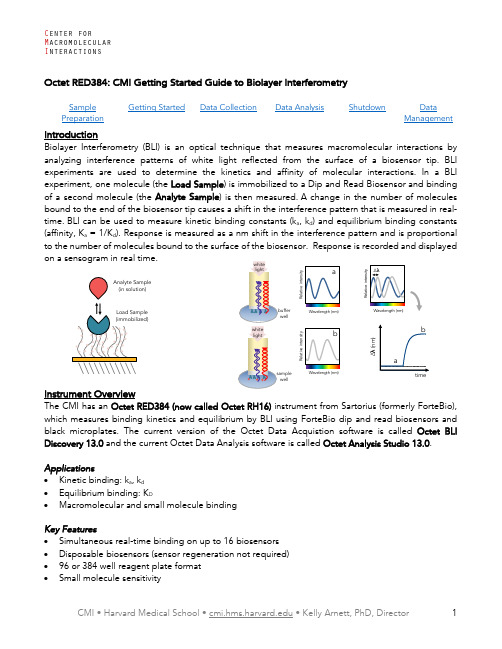
Data CollectionData AnalysisShutdownData Managementoptical technique that measures macromolecular interactions by white light reflected from the surface of a biosensor tip. BLI the kinetics and affinity of molecular interactions. In a BLI ) is immobilized to a Dip and Read Biosensor and binding ) is then measured. A change in the number of molecules a , k d ) and equilibrium binding constantsof the Octet Data Acquistion software is called Octet BLI Octet Analysis Studio 13.0.welllight welllight• ForteBio Biosensors.o See table below for popular sensor types and part numbers. Go to the Sartorius/ForteBiowebsite: https:///en/products/protein-analysis/octet-bli-detection/biosensors-chips-kits , for additional sensor types, including Anti-Mouse IgG Fc, Anti-Human Fab, Anti-GST, and biosensors recommended for quantitation.• At least two black microplates per experiment (one for soaking sensors and at least one forsamples and reagents).o Only Greiner Bio-One brand, black microplates or ForteBio plates are recommended (seetable below).• An empty biosensor tray to use as a working tray. • Pipettes (recommended). OCTET Black MicroplatesPart NumberGreiner Bio-One 96-well black flat-bottom PP, 200 µL 655209 (VWR 82050-784) Greiner Bio-One 384-well black flat-bottom PP, 80-120 µL 781209 (VWR 82051-318) ForteBio 384-well black tilted-bottom PP, 60 µL18-5080Sample PreparationAssay Buffers• Many buffers are compatible with BLI. It’s usually a good idea to start with a buffer system in whichyour proteins are well behaved.• Addition of 0.05% Tween 20 (or other surfactant) is usually required to prevent non-specificbinding, which is a frequent problem in BLI experiments.o Try detergent concentrations above the CMC, typically in the range of 0.02-0.1%.• The sample used for the association phase should be in a buffer identically matched to that usedfor the baseline and dissociation phase.o Buffer match is especially important when a buffer component has a high refractive index,such as DMSO. Immobilized load sample should also be in the same buffer, if possible.• 0.1% BSA can also be used to minimize non-specific binding.o ForteBio sells a detergent-based Kinetic Buffer (PBS + 0.02 % Tween20, 0.1 % BSA, 0.05 %sodium azide) that you might consider.o NOTE: BSA is not universally beneficial and can sometimes increase non-specific binding.Popular ForteBio Dip and Read Biosensors for Kinetics Part Number Streptavidin (SA) biosensors 18-5019 (96/tray) High Precision Streptavidin (SAX) biosensors 18-5117 High Precision Streptavidin (SAX2) biosensors 18-5136 Super-Streptavidin (SSA) biosensors (for small molecules) 18-5057 anti-His (HIS1K) biosensors 18-5120 Ni-NTA (NTA) biosensors 18-5101 Anti-Human IgG Fc biosensors 18-5010•All BLI experiments are setup with one molecule fixed to the biosensor surface (the Load Sample) and a second molecule in solution (the Analyte Sample).•Concentration should be accurately measuredo Errors in Load concentration can affect signal intensityo Errors in the Analyte concentration will directly translate to errors in the K D•Protein aggregates will interfere with BLI.o Filter or centrifuge samples before use.o Assess protein heterogeneity via light scattering.o Purify protein samples with soluble aggregates by size-exclusion chromatography. •Recommended concentration ranges:o Load Sample (immobilized) 10-50 µg/ml (~µM range)o Analyte 0.01 – 100 X K D (0.1 – 10 X K D)•Sample and Reagent plate well volumeo96-well 200 µlo384-well 80 – 120 µlo384-well tilted bottom 60 µlGetting StartedAn Octet experiment involves multiple steps in which ForteBio Dip and Read Biosensor are moved between wells in microplates containing buffers, reagents and samples. The instrument can hold up to 96 sensors (one tray) for use in experiments with multiple assays, each using up to 16 sensors. Reagents and samples are placed in 96- or 384-well black microplates. Plate 1 is used in all experiments and can hold any/all sample or reagent types. Plate 2 is an optional reagent plate that cannot hold analytes use in the association phase.timeReagent sequenceResourcesAdditional resources are available at the instrument, including Data Collection and Data Analysis software manuals.Experimental Design Tips•Do not overload the immobilized molecule.•The same well containing buffer should be used for the baseline and dissociation phase, assuming inter-step correction is performed.•For small molecule work, use Super-Streptavidin sensors and quench with biocytin (biotinyl-lysine at 10 µg/mL).•Use reference subtraction (there are several types).o Reference sample well has immobilized load sample and no analyte during association.o Reference sensor is a sensor to which no load sample is immobilized and is matched for analyte concentration.o Double Reference uses both reference well and reference sensor.•Experiments should be less than 3 hr (10 % volume loss ~ 3.5 hours at 30 ˚C).Data CollectionStartup1.Book time on the PPMS calendar before you start.2.Login to the computer using your PPMS credentials (eCommons ID and password).3.The instrument should generally be left powered on at all times.a.If it is not powered on, the power supply is on the shelf above the instrument.4.Design you experiment in the Data Acquisition software before setting up your sample and reagentplates.5.Open the instrument door with the Present Stage button in the software (green eject button). DoNOT pull on the thing that looks like a handle.Experimental Data Collection1.Start the Octet BLI Discovery Software (formerly Data Acquisition Software). The current version willbe on the Desktop (older versions are also usable and found in “older versions” folder).a.Wait for initialization.b.Select New Kinetics Experiment in the Experiment Wizard, or open a method file.c.The Experiment Wizard has 5 sections tabs to guide you through experimental setup.2.Plate Definition:a.Select data acquisition mode. Read Head: 16 channel or 8 channel.i)16 channel mode uses up to 16 sensors and moves in 2 column increments.ii)8 channel mode uses up to 8 sensors and can move in 1 column increments.b.To modify plate format, select Modify Plate:i)Choose either 96-well or 384-well format for Plate 1 and Plate 2CMI Getting Started Guide C enter forM acromolecular I nteractionsSelect a well or wells to define (shift-click to select all wells in column on 96-well or alternating wells on 384-well plate).c. Right-click to pull up Sample Type Menu and choose type for the selected wells.i) Select "Set Well Data" from the Sample Type Menu to add information or fill in the PlateData tables.ii) A molar concentration for the samples is required for fitting. iii) Required Reagent Types(1) Buffer (baseline before load) (2) Load Sample (load)(3) Mock Load Buffer (for reference sensor load step) (4) Buffer (baseline before association and dissociation)(5) Sample (association phase), use a range of concentrations, include 0 for reference sample iv) Optional Reagent Types(1) Quench (e.g. biocytin for blocking)(2) Regeneration solutions (for sensor reuse or serial data collection)v) Include a zero concentration of analyte (a reference sample well) to correct for a drift in thebaseline(1) Several sensor types have significant drift. (2) A reference sample well is required for NTA. vi) Test non-specific binding with Reference Sensors d. Fill your reagent plate(s) according to the plate map. 3. Assay Definition:a. Plate 1 and Plate 2 show plate layouts (step back to Plate Definition to modify).b. Create a list of steps in the Step Data List.i) Sample steps (s):(1) Baseline 120 (60 – 300) (2) Loading 120 (120 – 600) (3) (Quench) 60 (30 – 120) optional quench (eg. Biocytin on SA or SSA) (4) Association 300 (60 – 600) (5) Dissociation 600 (60 – 600+) ii) Shake speed 1,000 RPM.c. Create an assay (a group of ordered steps with plate information).i) Select a column from a plate and select a step in Step Data List. ii) Double-click or click Add… to add a step to Assay Step List. iii) Select the sensor type for the assay. iv) Typical assay order:(1) Baseline (2) Loading (3) Baseline (4) Association (5) Dissocation d. To create a new Assays, click New Assay or select all steps in Assay 1 and click replicate. Modifythe sample column as needed.A group of “Baseline – Assocation – Dissocation” steps are required for recognition as a binding assay and can be overlayedfor kinetic analysis. Don’t forget the baseline before association.CMI Getting Started GuideC enter forM acromolecular I nteractions 4. Sensor Assignment:a. This step tells you where to put sensors in the Sensor Tray.i) You should always check the box marked Replace sensors in tray after use . This will returnsensors to the tray after your experiment (and prevent them from clogging the instrument, as there is a design flaw in the sensor discard shoot).ii) Plate 1 (and 2) indicate wells that each sensor group will enter in an assay. iii) Sensor type should match those from the Assay Definition.b. Fill a sensor tray with sensors in the marked positions and place a 96-well plate underneath withsoaking buffer (usually running buffer) in the wells with sensors.5. Review Experiment:a. Click the arrow to review each assay step in your experiment. 6. Run Experiment:a. Assign a location for your data (choose your folder inside your lab folder).b. Enter the experiment run name (avoid using the default name Experiment_1).c. Set the Run Settings:i) Check all boxes except for “Present Stage at end of experiment” which should be uncheckedunless you will be present at the end of your experiment.ii) Set experiment delay for soaking and equilibration time (10 min). iii) Set temperature (30 ˚C minimum). d. Advanced Settings:i) Set Sensor Offset: 4 mm for standard well volumes (see table below for other offsets). ii) Set Acquisition Rate: Standard Kinetics (5Hz, avg by 20). e. Save method file if using later. f. Start Run by pressing Go button. 7. During Run:a. Watch data collection in real-time.b. Avoid skipping or extending steps, especially if performing an experiment with a second assay(such as a reference assay). Only assays with identical number of steps and duration of steps can be merged for subtractions or comparison.c. When data collection is complete, close the Data Acquisition software and go to Data Analysis.Table of Recommended sensor offsets by well volume (from Octet User Manual)CMI Getting Started GuideC enter forM acromolecular I nteractionsData AnalysisOverviewThe current version of Octet Data Analysis software is called Octet Analysis Studio 13.0. The legacy software, Data Analysis and Data Analysis HT, is still available for use in the “older versions” folder.Data Analysis Studio features:• Data from multiple plates and/or experiments can be combined into one analysis. • More flexible reference subtraction options are available for kinetic analysis. • Customizable report format.• Export Results as a single file (this was not available older Data Analysis HT versions).Data Analysis Protocols1. Open the Octet Analysis Studio Software.2. Select Data:a. Click Explore in the Icon Bar to view data folders.b. Drag an Octet data folder to the Experiment Builder.i) More than one data file can be combined into one analysis by dragging additional files intothe Overlay section (must have the same number of steps and step lengths). ii) Octet data can also be Appended to the beginning or end of a data set.(1) To combine data with different step sizes.(2) For experiments with steps performed in different files (such as immobilization andassociation performed as different experiments).3. Process Data:a. Click Preprocess from the Operations Section of the Icon Bar.b. Assign Reference Sensors (sensors to which no ligand is immobilized).i) Go to the Reference Sensor Tab.ii) Click on column number or drag to select the reference sensors. iii) Right click on selection.iv) Set Sensor Type to Reference Sensor (sensor icon will change to diamond). v) Right click on plate.vi) Go to Subtract Reference and choose subtraction method.(1) In Rows (selects a reference from the same row as the sample).vii) Scroll down to see multiple plates and repeat the subtraction for each plate.viii) Check the table at the bottom to see the sensor subtraction formula used for each sensor. c. Assign Reference Samples (samples with zero concentration of analyte).i) Go to Reference Sample Tab.ii) Click (or CTRL-click) to select well(s) for reference samples (zero concentration). iii) Right click on selection.iv) Set Reference to Reference Sample Wells. v) Right click on plate.vi) Go to Subtract Reference and choose subtraction method.vii) In columns (selects a reference well from the same column as the samples).CMI Getting Started GuideC enter forM acromolecular I nteractionsviii) Scroll down to see multiple plates and repeat for each plate. ix) Check the table to see the well subtraction formula for each sensor. d. Data Corrections:i) Go to Data Correction Tab.ii) Align the Y axis to the average of baseline step (default is the last 5 seconds of the baseline). iii) Inter-step correction.(1) This step corrects for system artifacts (optical artifacts from buffer mismatch, etc.). (2) Choose a step to align (try dissociation first).(3) The baseline before association and dissociation steps must be performed from the samewell of a sample plate.(4) Should not be performed with very fast on-rates as kinetic data may be lost.iv) Noise Filtering (Savitsky-Golay Filtering, smoothing function) is recommended but optional. e. Export Processed data by clicking on Processed Data in Export Section of the Icon Bar to exportdata in a csv format for graphing in other programs.4. Kinetic Analysis:a. Fitting Parameters:i) Click on Kinetics in the Operations section of the Icon Bar. ii) Choose Steps to Analyze: Association and Dissociation. iii) Choose Model: 1:1.iv) Select Global Fitting (full).v) Group by Sample ID (or other grouping scheme) when performing a parallel experiment. vi) Group by Sensor if all concentrations are measured on the same sensor (a serial experiment). b. Examine Fitted curves.c. Steady-State Analysis (Equilibrium Fit).i) Check to include or uncheck to exclude data from the table.ii) In Steady-state dialog, choose Response as the mode of analysis (when kinetic data reachessteady-state at each concentration).iii) Choose Region of Analysis by defining Average from X to X (time interval).(1) This should be a region of the association curve that has reached equilibrium (or steady-state).(2) Default is a five sec window, five seconds from the end of the association phase.(3) For viewing, go to the graph window in the bottom right corner and select the steady-state tab.d. Save the Excel Report (for a summary of the analysis) or create a custom reporte. Export Results as a single file or multiple files for re-graphing and/or analysis in 3rd party software.f. Processing parameters are autosaved in the HTSettings.efrdi) To restart with default/no settings, you may delete the HTSettings file and reopen. ii) Save As to save processing parameters in Extended ForteBio File format (*.efrd). iii) Click on Open Workspace from the Icon Bar to reopen saved processed data.CMI Getting Started GuideC enter forM acromolecular I nteractionsShutdown 1. Remove sensor tray and reagent plates from the instrument. 2. Close the Octet door.3. Discard used biosensors with tips.4. Return borrowed empty sensor trays to the drawer under the instrument.5. Clean up in and around the instrument.6. Close the control and analysis software.7. Logoff from PPMS!Data ManagementTechnology Biolayer Interferometry InstrumentOctet RH16 (Octet Red 384) Recommended Repository Generalist RepositoryData Collection SoftwareCurrent Version Octet BLI Discovery, Version 13.0 Data Files (Type, ~size) experiment folder (contents below) 5 MB/experiment data file .frd 80 KB/measurement method file .fmf 35-45 KB/experiment plate definitions .jpg 30-90 KB/plate assay image .jpg 30-90 KB/experiment preprocessed data.xslx 200 KB/experimentData Analysis SoftwareCurrent Version Octet Analysis Studio, Version 13.0Data Files (Type, ~size) HT SettingsReadable Exports results table .xslx 5-10 KBexport report.xslxBook time and Report Problems through the PPMS system: https:///hms-cmi• rates are based on booked and real time usageContact ***************.edu with questions.last edited: 2023-05-12。
- 1、下载文档前请自行甄别文档内容的完整性,平台不提供额外的编辑、内容补充、找答案等附加服务。
- 2、"仅部分预览"的文档,不可在线预览部分如存在完整性等问题,可反馈申请退款(可完整预览的文档不适用该条件!)。
- 3、如文档侵犯您的权益,请联系客服反馈,我们会尽快为您处理(人工客服工作时间:9:00-18:30)。
蛋白的生物素标记操作指南
(Octet分子互作仪器测定专用)
概述
链霉亲和素与生物素之间的相互作用是目前已知强度最高的非共价作用,并且二者的结合稳定性好,专一性强,不受试剂浓度,pH环境,抑或蛋白变性剂等有机溶剂影响。
因此,链霉亲和素与生物素快速,稳定和不可逆非共价的结合被广泛应用于研究生物分子间的相互作用。
Octet平台的链霉亲和素(SA/SAX/SSA)生物传感器已被开发用于蛋白定量和动力学,结合在SA//SAX/SSA传感器上的第一个蛋白质必须进行生物素化标记。
为方便利用Octet平台上的SA/SAX/SSA传感器进行动力学和定量分析,特制订本指南为利用生物素化试剂标记目标蛋白提供指导。
生物素试剂的选择
Biotin为例。
生物素化试剂建议购买小包装,使用DMSO溶解配制成10 mM母液保存于-20℃备用。
产品货号:21312的NHS-PEG12-Biotin为例:10 mM母液的配制案例=(生物素化试剂质量1mg)÷(生物素分子量941 Da)×100=0.106 mL,1 mg生物素化试剂溶于0.106 mL DMSO中即为10 mM母液。
氨基偶联生物素化试剂反应示意图
实验试剂和耗材
1)缓冲液:DMSO,1×PBS,PBST(PBS+0.02% tween20)
2)掌上离心机,一台
3)生物素标记试剂EZ-Link NHS-PEG12-Biotin (Thermo,货号:21312) 1 mg,
加入0.106 mL的DMSO配置成10 mM母液
4)PD Min iTrap™ G-25 Desalting Column用于脱盐,蛋白样品体积0.1-0.5 mL,
(GE, 货号:28-9180-07 )。
5)Zeba desalting spin columns脱盐柱:
a)蛋白样品体积30-130 uL,使用0.5 mL脱盐柱(Thermo, 货号:89882)
b)蛋白样品体积200-700 uL,使用2 mL脱盐柱(Thermo, 货号:89889)
c)蛋白样品体积600-2000 uL,使用5 mL脱盐柱(Thermo, 货号:89891)
6)透析装置:Slide-A-Lyzer™ Dialysis Cassettes(Thermo,具体型号根据目标蛋
白样品体积以及目标蛋白的分子量进行选择。
建议选择截留分子小于目标蛋白分子量的3倍,如蛋白分子量为90kDa,透析装置选择截留分子量选择小于30kDa)。
4,5,6任选一,4,5比较快,但是蛋白损失大。
5可能残留生物素去除不干净,导致蛋白固化量不够。
6蛋白损失相对小,但是时间长。
推荐4为首选。
7)待生物素标记的目标蛋白(要求至少10 ug,浓度大于100 ug/mL)。
生物素标记注意事项
1.如采用氨基偶联生物素化试剂,确保蛋白样品中(包括缓冲液)无载体蛋白(如
BSA),不得含有其他任何带有氨基的物质(如Tris)
如果有,必须通过脱盐或者透析方式去除。
2.如采用其他基团偶联生物素化试剂,样品中(包括缓冲液)除目标蛋白外不得
含有其他任何带有相同基团的的物质(如采用巯基生物素化试剂,则样品中不得含有DTT)。
3.如果要生物素化比较小的物质,请注意脱盐柱或者透析袋的截留分子量。
比如生物素化一个4KDa的多肽,用7KDa的截留分子量的透析袋或者脱盐柱就无法对生物素化试剂和多肽就行有效分离。
实验步骤
1.准备生物素化试剂:将NHS-PEG12-Biotin配制成浓度为10 mM的母液。
2.生物素化比例的选择:建议使用偶联生物素:蛋白的摩尔比(MCR)为1:1,
如果蛋白浓度小于0.5 mg/mL或分子量大于100KDa时,推荐采用生物素:蛋白为3:1(MCR=3)的比例。
3.生物素化试剂使用量的计算:
×MCR×蛋白体积所需10 mM 生物素化试剂的体积(uL)=蛋白浓度(mg/mL)
蛋白分子量(kDa)
(uL)X 0.1。
注意每一项的单位。
蛋白的反应体积以后续脱盐柱上柱体积为准,一般为100ul。
4.生物素化试剂所需体积根据样品反应的MCR以及样品体积进行计算:参见
案例①与案例②。
案例①:1 mL浓度为1mg/mL的IgG(150 kDa)采用MCR为1:1比例所需生物素的体积=(1mg/ml÷150KDa)×1×1000ul×0.1=0.67 uL。
案例②:0.1 mL浓度为0.5 mg/mL的蛋白(50 kDa)采用MCR为5:1比例所需生物素的体积=(0.5mg/ml÷50KDa)×5×100ul×0.1=0.50 uL。
注:如果加样体积在0.1 uL以下,建议先将10mM生物素化试剂母液稀释10倍再取相应量的生物素化试剂。
5.将计算好体积的蛋白与生物素化试剂混合均匀。
6.室温反应30 min或4℃孵育1h。
7.采用脱盐柱或透析的方式去除游离的生物素。
7.1 (推荐方法)采用脱盐柱PD MiniTrap™ G-25 Desalting Column去除游
离的生物素,采用重力脱盐方式。
a)PD MiniTrap™ G-25 Desalting Column预处理,将重力柱固定于试管架
上,去掉保护盖,使用至少10mL PBS平衡脱盐柱,弃流穿。
PBS可以更换成蛋白最佳的缓冲液,比如一些膜蛋白中需要有一定浓度
的去污剂,需要用这种缓冲液来清洗脱盐柱。
下同。
b)将0.1 mL生物素化后的蛋白样品加入到脱盐柱中,待样品完全进入脱盐
柱中,再加入0.4mL PBS,弃流穿。
如果是0.2mL样品,则用0.3ml PBS流穿,以此类推。
c)加入0.4 mL PBS洗脱标记后的蛋白,收集。
7.2采用Zeba desalting spin columns(0.5 mL)去除游离的生物素(不建议制备小
分子相互作用的蛋白时使用,如果采用此方法制备小分子相互作用的蛋白,发现固化量< 4nm时,换7.1或7.3的方法脱盐)。
a)Zeba desalting spin columns预处理,去掉保护盖,将脱盐柱置于1.5。