
ET-1000智能通讯管理机配套软件-用户手册
矿产资源开发利用方案编写内容要求及审查大纲
矿产资源开发利用方案编写内容要求及《矿产资源开发利用方案》审查大纲一、概述
㈠矿区位置、隶属关系和企业性质。
如为改扩建矿山, 应说明矿山现状、
特点及存在的主要问题。
㈡编制依据
(1简述项目前期工作进展情况及与有关方面对项目的意向性协议情况。
(2 列出开发利用方案编制所依据的主要基础性资料的名称。
如经储量管理部门认定的矿区地质勘探报告、选矿试验报告、加工利用试验报告、工程地质初评资料、矿区水文资料和供水资料等。
对改、扩建矿山应有生产实际资料, 如矿山总平面现状图、矿床开拓系统图、采场现状图和主要采选设备清单等。
二、矿产品需求现状和预测
㈠该矿产在国内需求情况和市场供应情况
1、矿产品现状及加工利用趋向。
2、国内近、远期的需求量及主要销向预测。
㈡产品价格分析
1、国内矿产品价格现状。
2、矿产品价格稳定性及变化趋势。
三、矿产资源概况
㈠矿区总体概况
1、矿区总体规划情况。
2、矿区矿产资源概况。
3、该设计与矿区总体开发的关系。
㈡该设计项目的资源概况
1、矿床地质及构造特征。
2、矿床开采技术条件及水文地质条件。
智能Wi-Fi插座HS100与HS110用户手册说明书
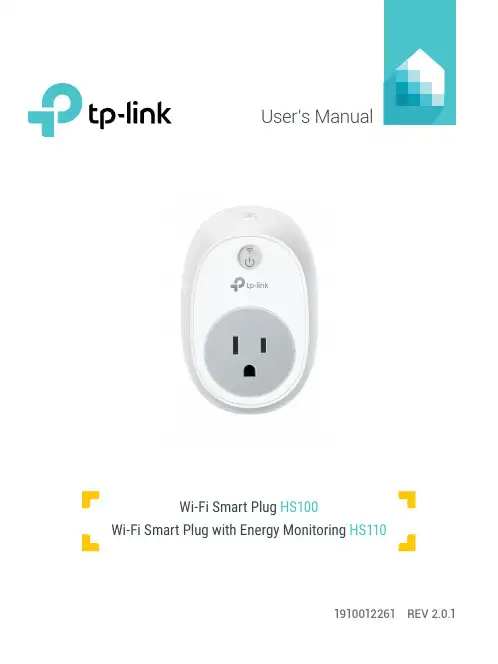
User’s Manual1910012261 REV 2.0.1Wi-Fi Smart Plug HS100Wi-Fi Smart Plug with Energy MonitoringHS110Copyright & TrademarksSpecifications are subject to change without notice. TP-Link is a registered trademark of TP-Link Technologies Co., Ltd. Other brands and product names are trademarks or registered trademarks of their respective holders.No part of the specifications may be reproduced in any form or by any means or used to make any derivative such as translation, transformation, or adaptation without permission from TP-Link Technologies Co., Ltd.© 2017 TP-Link. All rights reserved.CONTENTS4 Chapter 1. Introduction4 1.1 Product Overview4 1.2 Main Features5 1.3 Panel Layout7 Chapter 2. Quick Start8 Troubleshooting8 Frequently Asked Questions8 SupportChapter 1. Introduction1.1 Product OverviewWhat This Product DoesThe Wi-Fi Smart Plugs make it easy to control your lights or household electronic devices anywhere in the world with the TP-Link Kasa app on your smartphones or tablets.Schedule and Away ModeWith the Kasa’s Schedule and Away Mode, you can automate your lights or plugged-in appliances to turn on and off according to specific schedules, to simulate occupancy when you’re away from home. In addition, the countdown timer enhances safety by automatically switching off the running household appliances after a preset time.Compatible with Amazon EchoYou can pair the Smart Plugs with Amazon Echo for voice control. Compatible with Android, iOSThe free Kasa app lets you run them from any Android (5.0 and higher) or iOS (iOS 8 and higher) smartphone.Energy Conservation (for HS110 only)You can efficiently conserve energy and save money while using the Smart Plugs to control your space heaters and fans. The Smart Plug tracks your device’s power consumption in real-time, and has weekly and monthly summaries.1.2 Main Features•Control devices connected to the Smart Plug wherever you have Internet using the free Kasa app on yoursmartphone.•Schedule the Smart Plug to automatically power electronics on and off as needed, like setting lights to come on at dusk or turn off at sunrise.•Analyze your plugged-in device’s real-time and historical power* Image may differ from actual product due to different regional power specifications. Here we use the U.S. version as an example.Sta-tus Description(Settings /Press this button for 5 seconds or until the Wi-Fi LED blinks amber and green to initiate the app-config process.Press and hold for 10 seconds or until the Wi-Fi LED blinks amber rapidly to factory reset.Chapter 2. Quick Start1. Download Kasa for Mobile from the App Store or Google Play.ORscan QRcode2. Connect your mobile device to a 2.4GHz Wi-Fi network. Note: The Smart Plug only supports 2.4GHz networks.3. Launch Kasa and follow the app instructions to connect theSmart Plug to your network.TroubleshootingFrequently Asked Questions1. What devices can I control with the Smart Plug?You can control lights, electronics and small appliances such ashumidifiers, air purifiers, portable heaters and fans.2. What should I do when I can’t control the connected device?• Check that the connected device is switched to ON.• Make sure your mobile device and the Smart Plug are on the same Wi-Fi network.• Enable Remote Control to control the connected device from outside your home.3. What should I do when the Wi-Fi LED is lit red?A red LED light indicates no network connection.• Check your network connectivity.• Relocate the Smart Plug. Avoid placing the Smart Plug near potential sources of radio signal interference.• Repeat the app configuring process.• Factory reset the Smart Plug and try to add it again.4. How do I pair the Smart Plug with Amazon Echo?Visit /en/faq-944.html or within the Kasa Help section for pairing instructions.Support• Specifications can be found on the product page at • Our Technical Support and troubleshooting information can be found at /support.FCC StatementThis equipment has been tested and found to comply with the limits for a Class B digital device, pursuant to part 15 of the FCC Rules. These limits are designed to provide reasonable protection against harmful interference in a residential installation. This equipment generates, uses and can radiate radio frequency energy and, if not installed and used in accordance with the instructions, may cause harmful interference to radio communications. However, there is no guarantee that interference will not occur in a particular installation. If this equipment does cause harmful interference to radio or television reception, which can be determined by turning the equipment off and on, the user is encouraged to try to correct the interference by one or more of the following measures:• Reorient or relocate the receiving antenna.• Increase the separation between the equipment and receiver.• Connect the equipment into an outlet on a circuit different from that to which the receiver is connected.• Consult the dealer or an experienced radio / TV technician for help.This device complies with part 15 of the FCC Rules. Operation is subject to the following two conditions:1) This device may not cause harmful interference.2) This device must accept any interference received, including interference that may causeundesired operation.Any changes or modifications not expressly approved by the party responsible for compliance could void the user’s authority to operate the equipment.Note: The manufacturer is not responsible for any radio or TV interference caused by unauthorized modifications to this equipment. Such modifications could void the user’s authority to operate the equipment.FCC RF Radiation Exposure StatementThis equipment complies with FCC RF radiation exposure limits set forth for an uncontrolled environment. This device and its antenna must not be co-located or operating in conjunction with any other antenna or transmitter.“To comply with FCC RF exposure compliance requirements, this grant is applicable to only Mobile Configurations. The antennas used for this transmitter must be installed to provide a separation distance of at least 20 cm from all persons and must not be co-located or operating in conjunction with any other antenna or transmitter.”CE Mark WarningThis is a class B product. In a domestic environment, this product may cause radio interference, in which case the user may be required to take adequate measures.OPERATING FREQUENCY(the maximum transmitted power)2412MHz—2472MHz(20dBm)No restrictions exist in the use of radio frequencies or frequency bands in all EU member states and EFTA countries.EU declaration of conformityTP-Link hereby declares that the device is in compliance with the essential requirements and other relevant provisions of directives 2014/53/EU, 2009/125/EC and 2011/65/EU.The original EU declaration of conformity may be found at /en/ce.RF Exposure InformationThis device meets the EU requirements (2014/53/EU Article 3.1a) on the limitation of exposure of the general public to electromagnetic fields by way of health protection.The device complies with RF specifications when the device used at 20 cm from your body. Canadian Compliance StatementThis device complies with Industry Canada license-exempt RSSs. Operation is subject to the following two conditions:1) This device may not cause interference, and2) This device must accept any interference, including interference that may cause undesiredoperation of the device.Le présent appareil est conforme aux CNR d’Industrie Canada applicables aux appareils radio exempts de licence. L’exploitation est autorisée aux deux conditions suivantes :1) l’appareil ne doit pas produire de brouillage;2) l’utilisateur de l’appareil doit accepter tout brouillage radioélectrique subi, meme si lebrouillage est susceptible d’en compromettre le fonctionnement.Radiation Exposure StatementThis equipment complies with IC radiation exposure limits set forth for an uncontrolled environment. This equipment should be installed and operated with minimum distance 20cm between the radiator and your body.Déclaration d’exposition aux radiationsCet équipement est conforme aux limites d’exposition aux rayonnements IC établies pour un environnement non contrôlé. Cet équipement doit être installé et utilisé avec un minimum de 20 cm de distance entre la source de rayonnement et votre corps.Industry Canada StatementCAN ICES-3 (B)/NMB-3(B)Korea Warning Statements당해 무선설비는 운용중 전파혼신 가능성이 있음.NCC Notice注意! 依據 低功率電波輻射性電機管理辦法第十二條 經型式認證合格之低功率射頻電機,非經許可,公司、商號或使用者均不得擅自變更頻率、加大功率或變更原設計之特性或功能。
山特产品速查手册说明书

山特产品速查手册SANTAK PRODUCT QUICK REFERENCE 全面保护用心为安全目录Contents后备式UPSTG-E1000/500, TG1000/500, ET1100/550, K500/K1000 PRO, MT500/1000 PRO, TG-BOX 600/850在线式UPS城堡系列塔式C1-3K, 城堡系列塔式C6-10K, 城堡系列机架式C1-3kVA Rack,城堡系列机架式C6-10kVA Rack, 城堡系列3C3 Pro (20-200kVA),城堡系列3C3 Pro ISO (15 -100kVA)灵霄系列灵霄系列 PT 3000 (1-20kVA)模块式UPSARRAY 3A3 Pro 系列 (15kVA~150kVA), ARRAY 3A3 PT 系列 (25kVA~200kVA), ARRAY 3A3 PT 系列 (60kVA~600kVA)蓄电池山特城堡系列蓄电池, G系列胶体蓄电池, ARRAY系列蓄电池, 山特SBC-A电池柜微模块灵聚2.0微模块产品系列精密空调城堡 (SCC) 系列机房专用空调(5-20kW), 城堡 (SCC) 系列机房专用空调(25-50kW)配电机柜配电单元 (PDU)机柜S系列机柜3-11 12-22 23-26 27-30 31-35 36-3940 41-45472 | 山特产品速查手册山特后备式TG-E系列UPS⸺美观时尚的“设备守护神”。
TG-E500/1000 UPS功能强大,集智慧、安全、可靠于一身,提升消费者在产品品质、观感、质感方面的使用体验。
这款UPS针对中国市场电力环境优化设计,内置MCU控制单元,使用环保的ABS塑料,做工精美,有效的解决常见的电力问题:市电断电、电压下陷、浪涌。
TG-E500/1000小身段,大能量,守护个人和办公电脑、商务设备等硬件设备和数据的安全。
注:TG-E500/1000仅通过电商平台销售,购买请访问京东和天猫的授权旗舰店、专卖店。
Danfoss ET1000 Crimp机操作手册说明书
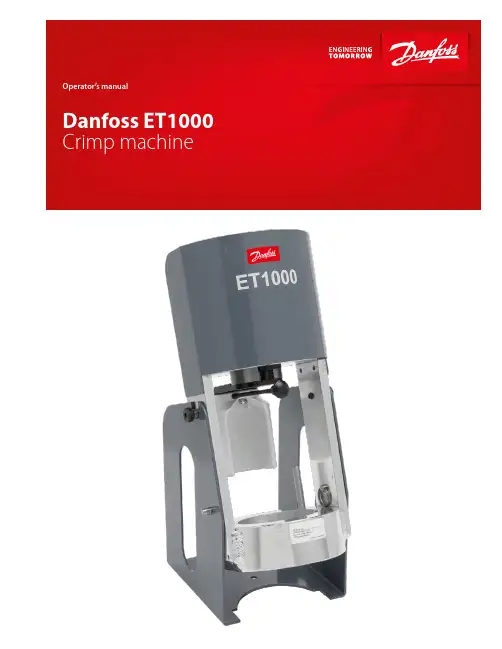
Danfoss ET1000 Crimp machine operator’s manual2 | © Danfoss ET1000 Crimp machine operator’s manual | 2022.06.AQ418954799548en-000101Table of contentsSafety instructionsET1000 Crimp machineSection Page Safety instructions2 Specifications and accessories3Specifications, accessories & pumps 3Setup and assembly3 Crimping procedures4 Mainte nance5 Crimp machine components6Read and understand the operator’s manual before attempting to operate anyequipment.fittings should only be assembled using Danfoss approved assem-bly equipment. Do not use any combinations of Danfoss’s hose, Danfoss hose fittings, or Dan-foss assembly equipment with hose, hose fittings, or assembly equipment supplied by another manufacturer.Danfoss hereby disclaims any obligation or liability (including incidental and consequential damages) arising from breach of contract, warranty, or tort(under negligence or strict liability theories) should Danfoss hose, Danfoss hose fittings, or Danfoss assembly equipment be used with any hose, hose fittings, or assembly equipment supplied by another manufacturer, or in the event that product instructions for each specified hose assembly are not followed. (Reference SAE J1273 – Recommended practicefor hydraulic hose assemblies).WARNINGcesses and product instructions and limitations could lead topremature hose assembly failures, resulting in property damage, serious injury, or death.Danfoss fitting tolerances are engineering to match Danfoss’s hose tolerances. The combina-tion or use of Danfoss’s hose and hose fittings supplier by another manufacturer may result in the production of unreliable and/or unsafe hose assemblies and is neither recommended nor autho-rized by Danfoss. Safety Instructions1. P REVENT UNAUTHORIZED OPERATION. Do not permit anyone to operate this equip-ment unless they have read and thoroughly understand this manual.2. W EAR SAFETY GLASSES.3. A VOID PINCH POINTS. Do not rest your hand on the crimp ring. Keep your hands clear of all moving parts. Do not allow anyone, other than the oper-ator, close to the equipment while it is in operation.4. M AINTAIN DIES WITH CARE. Dies used in the ET1000 crimp machine are sintered pow-dered metal, offering the best combination of strength and wear resistance for long life. Sintered powdered metal dies are generally brittle and care should be taken to avoid any sharp impact. Never strike a die with a hardened instru-ment.5. U SE ONLY SPECIFIED Danfoss PRODUCTS. Make hose assem-blies using only Danfoss hose and fittings specified for this assembly equipment.6. V ERIFY CORRECT CRIMPDIAMETERS. Check and verify correct crimp diameters of all fittings after crimping. Do not put any hose assemblies into service if the crimp diameters do not meet Danfoss crimp specifications.7. M ake sure all dies are com-pletely in place, the spacer ring rests against the place-ment pins, and the pusher is pulled forward into the detent position before crimping.8. D O NOT OVER PRESSURIZE. Do not exceed the 10,000 psi hydraulic pressure supplied to the machine. NOTE: Allcomponents used to connect the pump and crimp cylinder must meet the criteria set forth in the Material Handling Institute Specification #IJ100 for hydraulic jacking applica-tions.9. D IE CHANGE. DO NOT INSERT/REMOVE DIES WHILE THE POWER IS ON OR MACHINE IS IN OPERATION.10. S ECURE THE EQUIPMENT TO A STABLE WORK SURFACE. Prior to operation, secure the crimp machine to a stable work sur-face to prevent the equipment from tipping.11. U NPLUG THE POWER SUPPLY WHEN NOT IN USE.12. K EEP WORK AREA CLEAN. Cluttered areas and benches invite accidentsDanfoss ET1000 Crimp machine operator’s manualAQ418954799548en-000101© Danfoss ET1000 Crimp machine operator’s manual | 2022.06. | 3Specifications and accessoriesET1000 Crimp machine and accessoriesNOTE:Your new crimp machinehas been calibrated and filled with hydraulic oil in the factory. Do not remove any plugs or caps untilnecessary. Excess air in the hydraulic system may cause erratic cylinder movement during retraction. Refer to the Setup and Assembly section for instructions on removing air from the hydraulic system.SpecificationsCrimper Dimensions:22” tall x 16” width x 14” deep Weight: 70 lbs. (machine & stand only)Pump Requirements:• Reservoir Capacity: 36 cu. in (590 cc)• Pressure Rating: 10,000 psi (690 bar)• The air/hydraulic pump requires a minimum of 100psi to operate at maxi- mum efficiency.Hose Production Capacity:Crimps up to -16 in braided and spi-ral hydraulic hose with core tooling and up to -20 in braided hose using non-core, specialty tooling.Accessories• Bench mount bracket (Part # ET1000C -0001)• Truck/wall mount bracket (Part # ET1000C -0021)• 1.5 oz. tube high efficiency PTFE grease ( Part # T-400-G)• 16 oz. can high efficiency PTFE grease (Part # FF91455)• Handle kit includes 2 easy grip handles with mounting hardware(Part # ET1187C -0028)• Portability kit includes 2 easy grip handles with mounting hardware, longerhose assembly, and FF series quick disconnect couplings(Part # ET1187C -0029)Available pump options:• Hand pump kit (Part #ET1000PK-001)• Air/hydraulic pump kit (Part #ET1000PK-002)• 110v electric pump kit (Part #ET1000PK-003)• 12v DC electric pump kit (Part #ET1000PK-004)Note: These pump kits include the pump, connecting hose assembly, and all of the adapters necessary to connect the pump to the ET1000 crimp machine.1. Y our new ET1000 crimpmachine comes disassembled for ease of shipment. Before use, the machine must beassembled to the base with the supplied quick release pins. Pins should be installed from the inside of the machine to avoid any contact between the pins and tooling during the crimping process (See Figure A).2. R emove the plug from the top cylinder port and install the –06 size ORB,90 degree adapter using 23-24 ft. lbs. assembly torque. Orient the adapter so that it points to the rear of the crimp machine, away from the operator.3. I nstall the pump connecting hose assembly to the cylinder adapter with the –06 size 37 degree swivel nut fittings using 18-20 ft. lbs. assembly torque.4. D o not exceed an 8” minimum bend radius of the pump con-necting hose when attaching the hose to the pump and cylinder.5. I f using your own pump, make sure it has the requirements list-ed in the Specifications section above.6. P lace the pump on the work surface to either side of the crimp machine. Install the 90 degree adapter to the pump pressure port (Male NPTF threads should be tightened following the hex-marking procedure of 2 to 3 turns past hand tight).7. R emove excess air from the hydraulic system. This can be accomplished by placing the pump at a higher level than the cylinder and cycling the machine approximately five times.8. S ecure the machine frame to a stable work surface using lag screws or other suitable fasten-ers.Setup and AssemblyHand pumpAir/hydraulic pump 110v electric pump 12v DC electricpumpFigure ADanfoss ET1000 Crimp machine operator’s manual4 | © Danfoss ET1000 Crimp machine operator’s manual | 2022.06.AQ418954799548en-000101Operating instructionsET1000Crimping proceduresDescription of componentsET1000Die Ring AdapterSplit Collet AssemblySpacer RingsStep 1:Slide the pusher to the back position.Using the PowerSource crimp spec tool, select the proper collet assembly and spacer ring.Lubricate the inside cone of the die ring and external surfaces of the collet assembly with a high-ef-ficiency PTFE based lubricant.Insert the collet assembly into the base die ring.Step 3:Place the spacer ring in the appro-priate position on top of the collet assembly (either flat-side up or flat-side down as referenced in the PowerSource crimp spec tool).Step 1A:If using smaller collets, which require an additional adapter ring, lubricate the inside cone of the base die ring and the outside cone of the die ring adapter plate.Place the die ring adapter plate into the base die ring.Step 4:Pull the pusher forward into the detent holding position with the pusher positioning handleStep 2:Insert the hose assembly through the bottom of the base die ring and between the twocollet assembly halves. Align the fitting with the top of the collet halves.Step 5:Begin crimping by actuating the pump. When the spacer ring bottoms out against the base die ring, the crimping is complete.Danfoss ET1000 Crimp machine operator’s manualAQ418954799548en-000101© Danfoss ET1000 Crimp machine operator’s manual | 2022.06. | 5MaintenanceMaintenance IntervalsMachine maintenance proceduresCollet Assembly & Die Ring Adapter Plate Lubrication:Every 30 crimps = Re-lubricate sliding surfaces of dies Every 250 crimps = Remove old grease and re-lubricateBase Die Ring & Die Ring Adapter Plate Maintenance:Every 250 crimps = Remove old grease and re-lubricate Every 1,000 crimps = Remove old grease,inspect for wear or damage and relubricate if okay.1. S liding surfaces must be kept free of dirt and other abrasive materials.2. A ll exposed black metal surfac-es should be coated occasion-ally with a light film of oil to prevent corrosion.3. S ome fitting/hose combina-tions require full pump reser-voir capacity to complete the crimp cycle. The oil level in the fluid reservoir of the hydraulic pump should be checked peri-odically and refilled as required with the pump manufacturer’s hydraulic oil as needed.NOTE: Completely retractthe cylinder when checking theoil level.Nominal crimp diameter Crimping procedures (cont.)Measuring crimp diameters should be a part of the normal hose assembly procedure. To ensure a proper crimp diameter, follow these steps:1. M easure the diameter in the middle of the crimped portion of the hose end. Place the caliper in a position to al-low for a measurement across the pressed (flat) portion of the crimp.2. R epeat step 1 for each of the remaining sides for a total of four measurements.3. A verage the four measure-ments and compare this average to the target crimp diameter shown in the Power Source crimp spec tool and ensure it falls within tolerance.Danfoss ET1000 Crimp machine operator’s manual6 | © Danfoss ET1000 Crimp machine operator’s manual | 2022.06.AQ418954799548en-000101Crimp machine componentsItem Part No.Description Qty 1ET1000C-0001Base 112ET1000C-0002Die Ring 13ET1000C-0003Cylinder Cap 14140-05691T Ring Seal 15ET1000C-0004Piston 16ET1000C-0005 5 in. Spring 17140-15962 3 1/2 in. Spring 28T-460-SP Slide Plate 19140-06924Flange Slide Plate 110140-06925Bushing Slide Plate 211ET1000C-0006Pusher 112140-06602Detent Screw 113140-15984-01Flat Head Cap Screw 214140-15984-03Flat Head Cap Screw2Item Part No.Description Qty 15120-70188-41Split Roll Pin 217140-05687Spring Retainer 118140-15984Flat Head Cap Screw 219140-05695Slide Pull Rod 120140-05694Slide Pull Knob 121T-400-G Lubricant 127E-EQCR-TE006-E Lubricator Decal 128FF2138-06S Plug Assembly 129ET1187C-0014Shoulder Screw 230ET1000C-0020Shroud 131FF91569Cap Screw 432ET1187C-0012Quick Release Pin 2331000DANFOSSDECALET1000 Name Decal1Danfoss ET1000 Crimp machine operator’s manualAQ418954799548en-000101© Danfoss ET1000 Crimp machine operator’s manual | 2022.06. | 78 | © Danfoss ET1000 Crimp machine operator’s manual | 2022.06.AQ418954799548en-000101Danfoss can accept no responsibility for possible errors in catalogs, brochures, and other printed material. Danfoss reserves the right to alter its products without notice. This also applies to products already on order provided that such alterations can be made without subsequent changes being necessary in specifications already agreed. All trademarks in this material are the property of the respective companies.Danfoss and the Danfoss logotype are trademarks of Danfoss A/S. All rights reserved.About Danfoss Power Solutions FCDanfoss hoses, fittings, and tooling provide the ultimate fluid conveyance solutions for a variety of equipment and applications around the world. We proudly engineer to support a sustainable future for tomorrow.To learn more please visit: /en/about-danfoss/our-businesses/power-solutionsDanfoss Power Solutions 14615 Lone Oak RoadEden Prairie, MN 55344, USA Phone: 952-937-9800Danfoss Power Solutions (US) Company 2800 East 13th Street Ames, IA 50010, USA Phone: +1 515-239-6000Danfoss Power Solutions GmbH & Co.OHG Krokamp 35D-2439 Neumünster, Germany Phone: +49 4321 871 0Danfoss Power Solutions ApS Nordborgveg 81DK-6430 Nordborg, Denmark Phone: +45 7488 2222Danfoss Power Solutions Trade (Shanghai) Co. Ltd.Building #22, No 1000 Jin Hai Rd Jin Qiao, Pudong New District Shanghai, China 201206Phone: +86 21 3418 5200w。
惠威有源演艺音箱 ET1000 说明书

(ET1000)HiVi 惠威.美国11630 Goldring Road,Arcadia,CA 91006,USA Tel:+1 626 930 0606 Fax:+1 626 930 0609HiVi 惠威.中国珠海惠威科技有限公司广东省珠海市联港工业区大林山片区东成路南1号电话:0756-******* 传真:0756-*******、6268052客户服务热线:400-090-9199HiVi Acoustics, Inc.因设计变更等原因,所示资料可能与实物不符,恕不另行通知。
in conformity with product itself. We reserve the right of no prior notice before change.惠威有源演艺音箱产品说明书重要安全注意事项和符号说明小心触电,非拥有相关资质的人员请勿擅自开盖维修。
该标记标示危险的带电端子,当将外接电线连接到这种端子时,必须由“受过专业培训的操作人员”进行连接,或使用可进行安全连接的特制引线或电线。
主箱背板回声音量调节旋钮混响音量调节旋钮总音量调节旋钮感谢阁下选购惠威高品质专业音频有源演艺系列产品。
ET系列有源DSP卡拉OK音箱是惠威专业音响全新推出的一款专业有源二分频全频后导向音箱,其中两只低音单元,由锥形纸盆和高密度阻尼泡沫棉折环构成,大大延长单元的使用寿命,四只高音单元,高频清透明亮,提供更广阔的声音范围,拥有性能优越的单元设计。
ET系列卡拉OK音箱功能齐全,APP控制和遥控控制,内置蓝牙、无线话筒和效果器,FM收音、乐器输入等功能和接口。
适用于专业、家庭、会议及院校等多个应用场景,搭配一台点歌机即可完成一整套的KTV系统。
智能化、操控高效,是不可多得的高性能、高稳定性、高可靠性的优质产品。
其声音清晰、透明,音质同Hi-Fi产品媲美。
产品采用了传统的模拟电流和模拟功放电路,听感舒适,人声突出,音乐细腻。
temi1000通信说明书

TEMI1000 SERIES通讯说明书1. 安全指示(注意)事项 (1)2. 通信规格 (3)3. 通信设定 (4)4. 通信配线 (5)5. 通信命令 (7)6. MODBUS 协议 (18)7. D-REGISTER 说明 (24)▪D-REGISTER 表 (50)TEMI1500 是采用半双工 (Half-Duplex) 方式的 RS232C 或 RS485 通信接口。
选择 RS232C 通信时,可以与 PC 等上位通信设备1:1通信,选择 RS485 通信时,最多可以与31台的 TEMI1500 上位通信设备连接使用。
█通信设定相关参数■工厂出库时关于通信的参数基本值在 TEMI1500 中可以选择并适用 RS232C 或 RS485 通信接口。
▶在[图 1]中利用螺丝刀(-)分离通信部的 COVER。
▶在[图 2]中利用short pin 设定通信。
▶通信设定时利用 (其他工具等)socket 插入所需的通信的 pinheader。
☞在 pinheader 中插入 socket 完成后必须确定。
一字螺丝刀显示部通信部盖[图 1] TEMI1500 显示部Short PinPin Header[图 2] TEMI1500 通信设定TEMI1500 与上位通信设备之间的配线根据 TEMI1500 的通信设定 (RS232C/RS485) 而不同,内容如下。
█ COM2 端口的模块连接器 Pin Mapping█ COM2 端口的模块连接器 Pin 说明652 1 RTX+ RTX- RS232C█RS232C 通信的 TEMI1500 6 Pin 连接器连接█RS485 通信的 TEMI1500 6 Pin 连接器连接☞SLAVE 侧 (TEMI1500) 最多可以进行31台多点 (Multidrop) 连接。
☞在通信道两端的 TEMI1500 或者 MASTER 侧 (PC, PLC 等) 上必须连接终端电阻 (200Ω 1/4W)。
SmartLogger1000用户手册说明书

方式一: SmartLogger1000 LCD屏(全量文件)
1. 在系统缺省界面,按“ ”键,进入系统主菜单界面。 2. 选择“ ”,按“ ”键,登录用户。 • 因为权限限制,“用户名”请选择:“高级用户”或“特殊用户” ,初始密码为“000001”。 • 首次上电,请使用初始密码,并尽快修改密码,建议定期更新密码,修改密码后请记牢密码,以保证
说明
POWER
DC IN 12V,1A
12V DC电源输入。
FE COM1~COM3
WAN COM1~COM3
连接以太网交换机、路由器、电脑等 设备。
支持3路RS485,连接逆变器、环境 监测仪等设备。
8. 合上远端箱变给智能子阵控制器供电的分路开关,再合上智能子阵控制器输入微型断路器AC INPUT和智能子阵控制器(带PID模块)的微型断路器PID INPUT。
1
2 部件更换
所有线缆请通过走线槽部署,部署完成后及时关闭走线槽。
场景一:汇流箱内更换场景
1. 断开汇流箱与上下级设备间的开关。 2. 拆除SmartLogger1000下方的4G路由器,线缆做好标记。
3. 拆除SmartLogger1000连接的线缆,并做好标记。 4. 拆除SmartLogger1000背板4颗螺钉,取下SmartLogger1000。
SmartLogger1000端 口
SmartLogger3000对应端 口
说明
10. 4G路由器按原样装回。
11. 拆除JX03接线端子处原安装的电源线,安装备件电源线(编码为04152379)。电源线通过 JX03接线端子,三根线缆分别连接至SmartLogger3000的电源接口、路由器的电源接口,未 使用的另一根线缆需要绑扎好并做好绝缘处理。
通信管理机用户手册
目录1.概述PowerSA-C104t通信管理机是为满足工业自动化需求所设计,具有体积小、低耗电、无风扇、宽温运行、高抗干扰性等特性,是一款真正的工业级产品。
该设备广泛应用于电力系统、石油、化工、水处理、工厂自动化、交通等工业控制领域。
PowerSA-C104t通信管理机应用于采集智能设备分散、监视采集数据量少的小型规模的监控系统中,可实现实时数据的综合处理功能、通信管理、数据网关、数据转发、规约转换、前置处理等各种角色等功能,可以作为功能子站、间隔层,通过层层级联实现数据的分类别、分方向传送。
主要特点采用嵌入式实时操作系统Linux为平台;采用高性能高可靠性嵌入式低功耗硬件平台,使产品的稳定性和宽温运行得到可靠保证;高品质的工业级元件,高水准的电气设计,高密度集成的电路结构,使装置拥有优异的电气隔离和电磁屏蔽表现,极大提高了装置的抗干扰性能与可靠性保障;与智能采集装置、继电保护具有相同等级的EMC;内置丰富规约库IEC 870-5-101、102、103、104, CDT、MODBUS SPABUS SC1801 COURIER DL645 及国内外各主要电力厂家各设备通讯规约,根据现场需求进行特殊规约的开发;单个串口通过RS485总线方式连接多台IED设备;装置的工作电源输入电压为交直流85~264V,可广泛适用于各种供电环境;宽温运行:运行温度-25℃~70℃导轨安装方式,造型美观,组屏方便;主要功能1)PowerSA-C104t通信处理机的可满足不同的应用功能;可以为不同的后台SCADA系统、电力保护装置、各种智能设备、不同的管理系统等提供包含以太网、标准RS232、标准RS485等不同通信接口的综合数据通信处理功能,2)具有USB接口,可直接连接打印机,实时打印相关报警信息等,可作为实时报警打印服务处理中心,弥补了国外保护不具备打印的功能。
(该功能仅PowerSA-C104tp具有)3)实现通信管理、数据网关、数据转发、规约转换、前置处理等各种角色;可以按需组合成分布网络、分层级联灵活通信处理方案。
宇电 AIBUS 通讯协议说明说明书
宇电AIBUS及MODBUS通讯协议说明(V8.0)AIBUS是厦门宇电自动化科技有限公司为AI系列显示控制仪表开发的通讯协议,能用简单的指令实现全面的功能,其特点是写参数的同时亦可完成读功能,因此写参数时不破坏读的循环周期时间,加上指令长度较少,因此具有比MODBUS更快的速率(尤其是有写入指令时,MODBUS的写入指令不能同时完成读下位机数据的功能,会破坏读指令的周期,延长了读的循环周期),AIBUS协议具有组建大规模过程控制系统能力。
AIBUS采用了16位的求和校正码,下位机运算快速且通讯可靠,支持9600和19200等不同波特率,在19200波特率下,上位机访问一台AI-7/8系列高性能仪表的平均时间仅20mS,访问AI-5系列仪表的平均时间为40mS。
仪表允许在一个RS485通讯接口上连接多达80台仪表(为保证通讯可靠,仪表数量大于60台时需要加一个RS485中继器)。
AI系列仪表可以用PC、触摸屏及PLC作为上位机,其软件资源丰富,发展速度极快。
基与PC的上位机软件广泛采用WINDOWS作为操作环境,不仅操作直观方便,而且功能强大。
最新的工业平板触摸屏式PC的应用,更为工业自动化带来新的界面。
这使得采用仪表+上位机结构的测控系统价格大大低于传统DCS系统,而性能及可靠性也具备比传统DCS系统更优越的潜力。
宇电AI-5系列仪表写入寿命可达100万次,而AI-7/8系列仪表则允许连续写参数,如写给定值或输出值,写入寿命高达10亿次,可利用上位机将仪表组成复杂调节系统。
一、接口规格AI系列仪表使用异步串行通讯接口,接口电平符合RS232C或RS485标准中的规定。
数据格式为1个起始位,8位数据,无校验位,1个或2个停止位。
通讯传输数据的波特率可调为4800~19200 bit/S,通常用9600 bit/S,单一通讯口所连接仪表数量大于40台或需要更快刷新率时,推荐用19200bit/S,当通讯距离很长或通讯不可靠常中断时,可选4800bit/S。
虹军 C.B250M-K 纪念版 V20 虹军 C.B250M-ET 纪念版 V20 用户手册说明书
虹军C.B250M-K纪念版V20 虹军C.B250M-ET纪念版V20虹军C.B250M-K纪念版V20/虹军C.B250M-ET纪念版V20目录第一章 简介 (1)1-1主板特色 (1)1-2主板规格 (1)1-3主板布局图 (3)第二章 硬件安装 (4)2-1基本硬件安装 (4)2-2跳线设置 (7)2-3连接器和引脚连接头 (7)2-4背板接口介绍 (12)第三章 驱动程序安装说明 (13)第四章 BIOS设置 (14)4-1进入BIOS主界面 (14)4-2 BIOS主界面 (16)4-3系统信息(Main) (17)4-4高级BIOS设置(Advanced) (18)4-5 芯片组设置(Chipset) (21)4-6超频设置(C.Oclock) (22)4-7安全设置(Security) (24)4-8启动设置(Boot) (25)4-9退出设置(Exit) (26)根据中华人民共和国信息产业部发布的《电子信息产品污染控制管理办法》所展开的 SJ/T11364-2006 标准要求, 本产品污染控制标识以及有毒有害物质或元素标识说明如下:产品有毒有害物质或元素标识:产品中有毒有害物质或元素的名称及含量部件名称有毒有害物质或元素铅(Pb) 汞(Hg) 镉(Cd) 六价铬(Cr(VI)) 多溴联苯(PBB)多溴二苯醚(PBDE)PCB板 × ○ ○ ○ ○ ○结构件 ○ ○ ○ ○ ○ ○芯片 ○ ○ ○ ○ ○ ○连接器 ○ ○ ○ ○ ○ ○被动电子元器件○ ○ ○ ○ ○ ○焊接金属 ○ ○ ○ ○ ○ ○线材 × ○ ○ ○ ○ ○助焊剂,散热膏,标签以及其他耗材○ ○ ○ ○ ○ ○○:表示该有毒有害物质在该部件所有均质材料中的含量均在SJ/T11363-2006标准规定的限量要求以下。
×:表示该有毒有害物质至少在该部件的某一均质材料中的含量超出SJ/T11363-2006 标准规定的限量要求。
通讯管理机使用手册
通讯管理机使用手册通讯管理机使用手册目录1.产品概述1.1 产品介绍1.2 主要功能1.3 技术规格2.基本操作2.1 系统启动与关闭2.2 界面及功能介绍2.3 按键操作说明3.通讯设置3.1 网络配置3.2 通讯协议设置3.3 数据传输配置4.通讯功能4.1 通信管理4.2 短信功能4.3 方式功能4.4 邮件功能5.安全设置5.1 用户权限管理5.2 密码设置5.3 安全日志管理6.故障排除6.1 常见问题及解决方法6.2 联系客服1.产品概述1.1 产品介绍通讯管理机是一种多功能综合设备,可以用于数据传输,短信通信,方式通信和邮件通信等功能。
本手册将详细介绍通讯管理机的使用方法和技术规格。
1.2 主要功能通讯管理机具有以下主要功能:- 数据传输功能:可通过串口或网络与其他设备进行数据传输。
- 短信通信功能:可发送和接收短信。
- 方式通信功能:可拨打方式和接听方式。
- 邮件通信功能:可发送和接收邮件。
1.3 技术规格通讯管理机的技术规格如下:- 处理器:- 存储容量:- 支持网络:- 支持通讯协议:2.基本操作2.1 系统启动与关闭- 系统启动:按下电源按钮,等待系统启动完成。
- 系统关闭:在操作界面选择关机选项,等待系统关闭提示后,按下电源按钮关闭设备。
2.2 界面及功能介绍通讯管理机界面包含以下主要元素:- 主菜单:显示在屏幕上方,包含各项功能选项。
- 侧边栏:显示在屏幕左侧,可以切换不同的界面。
- 内容区域:显示当前界面的详细内容和操作选项。
2.3 按键操作说明通讯管理机的按键操作如下:- 方向键:用于在界面中移动光标。
- 确认键:用于确认选项或执行操作。
- 返回键:用于返回上一级菜单或取消操作。
- 数字键:用于输入数字或字符。
3.通讯设置3.1 网络配置在通讯管理机中设置网络配置,包括以下内容:- IP地质:设置通讯管理机的IP地质。
- 子网掩码:设置子网掩码以确定网络范围。
- 网关地质:设置网络的网关地质。