
JBL PRX500标准扩声系统设计说明
目录第一章、前言 (3)第二章、设计内容 (4)第三章、方案设计特点 (5)第四章、设计理念 (6)第五章、系统规划 (7)1、厅一功能分析 (7)2、厅二功能分析 (7)3、厅三功能分析 (8)4、厅四功能分析 (8)第六章、扩声系统设计说明 (9)1、设计依据 (9)2、设计指标 (9)3、扩声形式 (10)4、扩声声场设计 (10)4.1、扬声器的选用 (11)4.2、扬声器的布局 (14)5、扩声系统的构成设计 (25)5.1、音源 (25)5.2、调音台 (25)5.3、处理设备 (25)5.4、功放 (25)5.5、扬声器 (26)第七章、相关专业配合要求 (27)1、供电要求 (27)1.1、扩声系统供电要求 (27)2、控制室要求 (27)附录1:声场模拟分析报告 (29)第一章、前言(项目介绍)第二章、设计内容根据认真消化图纸以及对整个项目的规模定位及功能需求,确定本次方案的主要设计内容如下:厅一扩声系统:包括礼堂的观众厅扩声系统,舞台返送监听系统、控制室监听系统以及预留录音接口和向室外电视实况转播的音频信号的传输线路及相应的接口。
厅二扩声系统包括礼堂的观众厅扩声系统,舞台返送监听系统、控制室监听系统以及预留录音接口和向室外电视实况转播的音频信号的传输线路及相应的接口。
厅三扩声系统包括会议室的观众厅扩声系统,舞台返送监听系统,以及控制室监听系统。
厅三扩声系统包括会议室的观众厅扩声系统,舞台返送监听系统,以及控制室监听系统。
第三章、方案设计特点根据使用要求,综合各方面的经验提出本次设计方案,其具备以下功能特点:1.从观众的主观听觉享受、操作者灵活使用和业主维护管理方便的三个角度出发,提出人性化的设计理念;2.通过预设的接口可以方便地进行系统扩展、现场广播电视转播和录音录像的连接;3.必要的冗余备份设计,满足对系统可靠性的要求;4.所选用的主要设备均为国际著名的主流品牌产品,在业界具有极高的认同度;5.系统构成简单,操作界面灵活友好,即使非专业人员也能操作自如。
第四章、设计理念通过对相关图纸的认真消化和国内外相关工程扩声系统布局方案的详细分析,结合功能定位与使用范围,访问类似厅堂的管理者及操作人员,汲取了大量他们在实际运营管理及系统操作过程中的问题与经验,我们确定了以下基本设计理念:第一、实现高清晰度、高保真、高质量的声音重放和还原是本次扩声系统设计的核心目标。
本次设计的厅堂都是以会议(演出)为主,兼顾多功能的需要。
扩声系统的主要作用是保证整个听音区具有良好的语言清晰度、合适的响度,以及宽频带的还原性以适应更多样化的使用功能。
这也是我们此次设计所追求的最终目标。
在本设计中,我方充分使用最新声学领域中的新产品与新技术,以充分体现现代科技带给人们的听觉享受。
第二、数字化扩声系统的应用让系统管理和控制变得更“精确”与“简单”,彰显“人性化”设计。
数字技术彻底改变了21世纪人类的生活。
以前传统的模拟音频设备配置名目繁多,功能各异,给系统的管理和操作人员带来了极大的不便,在本设计中,我们合理地选择一些数字音频设备,在满足设计要求的前提下,使管理者和操作者的工作更简单可靠。
因此,坚持“人性化”设计是我们的基本设计理念。
第三、采用国际上认同度高的知名主流产品,提高设备的认同度与利用率。
在满足观众对设备还音品质、管理操作者对系统的操控要求的同时,在设备选型方面关注并选择了国际上认同度高的主流产品品牌,做好设备选型这一关键工作,以保证设计理念通过设备性能和最终效果得到完美体现。
这项工作也直接影响到上述厅堂建成后在国际会议和文化交流中设备的利用率,这是非常重要的一环。
第五章、系统规划1、厅一功能分析根据与业主的充分沟通,我们对厅一作以下定位:厅一的使用功能:满足大、中型政府会议的需要;满足大、中型文艺演出,音乐会的需要满足电视转播及现场录音的需要等。
具体来说,大礼堂中扩声系统的主要作用有:✓改进语言清晰度和音乐明晰度;✓扩展动态范围(声源功率不足时);✓在会议休息时重放伴奏音乐;✓可将部分节目信号存储和预设程序以简化技术操作;✓可对现场节目进行拾音、记录以及为广播、电视转播及节目制作提供现场音频信号。
2、厅二功能分析根据与业主的充分沟通,我们作以下定位:使用功能:满足重要政府会议的需要;满足电视转播及现场录音的需要等。
具体来说,小礼堂中扩声系统的主要作用有:✓改进语言清晰度和音乐明晰度;✓扩展动态范围(声源功率不足时);✓在会议休息时时重放伴奏音乐;✓可将部分节目信号存储和预设程序以简化技术操作;可对现场节目进行拾音、记录以及为广播、电视转播及节目制作提供现场音频信号。
3、厅三功能分析我们对多功能厅作以下定位:多功能厅的使用功能:满足中、小型政府会议的需要;4、厅四功能分析我们对会议厅作以下定位:会议厅的使用功能:满足日常会议的需要;第六章、扩声系统设计说明1、设计依据1、业主提供的建筑平面图2、相关的国际和国家标准JGJ57-2000《剧场建筑设计规范》JGJ58-88《电影院建筑设计规范》GB50371-2006《厅堂扩声系统设计规范》GB 4959-95 《厅堂扩声特性测量方法》GB/T 14476-93 《客观评价厅堂语言可懂度的“RASTI”法》GB/T14197-93《声系统设备互联的优选配接值》GBJ76-84《厅堂混响时间测量规范》JGJ/T16-92《民用建筑电气设计规范》WH/T18-2003《演出场所扩声系统的声学特性指标》2、设计指标根据多功能用途使用要求的厅堂,扩声系统的声学特性指标按优于国标《厅堂扩声系统设计规范》(GB50371-2006)中多用途类扩声系统一级指标设计主观听音:语言清晰、音质良好、无声缺陷、声像一致性好。
对于使用要求为纯会议类型的厅堂的指标按优于国标《厅堂扩声系统设计规范》(GB50371-2006)中会议类扩声系统一级指标设计主观听音:语言清晰、音质良好、声场均匀,无明显声缺陷。
3、扩声形式多功能厅堂中主要满足会议扩声的需要,同时还要兼顾文艺演出需求,所以我们采用集中式的扩声方式在舞台两侧及声桥中央各设计安装一组扩声扬声器,实现三声道扩声,可以较好地解决人声和音乐兼容放音的问题。
多功能使用的厅堂除了会议还可以作为多功能活动娱乐中心,因此采用左右立体声主扩声音箱加超低音箱的扩声形式。
会议为主的厅堂主要满足会议需求,采用左右主音箱加辅助音箱的扩声形式,并配置两只返听音箱。
4、扩声声场设计扩声声场设计决定了观众、表演艺术(演员)和技术人员(调音师)通过扬声器所能接收到的信息可以达到什么程度,是听感形成的关键。
其中包括建声环境、扩声形式的选择、扬声器系统的选型以及相关的设计分析与计算工作。
随着国民经济的发展、家庭Hi-Fi的普及与录音技术的进步,使广大听众的相对听觉鉴赏力也迅速提高,在这期间,人的听觉生理及心理特性研究成果的应用也带动了多功能厅堂扩声系统设计理论的不断发展。
近年来在国外出现了“扩声系统优化设计”的理论,并在许多厅堂中得到应用并取得了良好的效果。
所谓“优化设计”,主要指的是在常规的声压级、均匀度、清晰度等设计目标外,更加关注相干声源的声干涉问题,以及更宽频带的指向性控制问题。
如何有效解决扬声器阵列本身的干涉以及合成声场中的声干涉问题,这也是直接影响音乐明晰度的主要因素。
对扬声器频率及相位响应的优化,对声系统的高精度调试、校准等技术的应用,可以有效地提高扩声系统的还原性能,从而进一步改善听闻效果,这些扩声声场设计理论与方法是大量的工程应用实践与实验室实证相结合的成果。
本次设计中给予了充分的应用。
4.1、扬声器的选用由于电子技术的发展,声系统中电子设备的频率响应与相位响应上的处理已达到很高水平,扬声器的选用是决定扩声系统品质的最重要因素。
礼堂是举行会议的场所,在扬声器的选择上既要保证声音的清晰度,也要考虑其在国际会议交流中品牌的美誉度和认同度。
我们在扬声器选用时,结合采用的扩声形式,根据扬声器的客观指标(频响,指向特性、功率等),以及国际上业界对各品牌扬声器的主观评价,最终选择美国JBL PRX500数字有源一体化扬声器作为本次设计的主扩声扬声器。
作为国际上最负盛名的专业扬声器系统生产厂家,JBL的名称大家早已耳熟能详。
诞生于1928年的JBL音响,一出声便已一鸣惊人,当时好莱坞华纳剧院上映的第一部有声电影《爵士歌手》所选的音响器材就是由JBL创始人詹姆斯.布洛.蓝辛来设计的,要知道只有最好的音响才配得上华纳剧院。
JBL曾为世界各地的政府机构提供优质而性能稳定的音响设备。
大部分的政府机构礼堂都有一个共通的情况,空旷,房间的形状不规则。
这都是扩声系统最怕遇到的场地。
JBL除了能克服这些困难外,还能满足各种要求,如多种方式的演播、广播。
JBL曾参与设计和开发了无数个国家重要文化及政治机构的音响工程,如中国北京的人民大会堂,耶路撒冷的以色列国会等。
JBL扬声器在国际上享有极高的声誉,以其音质好、音色表现准确、工作稳定可靠荣获多项大奖,是世界上大多数著名剧院和艺术中心的指定品牌。
例如哥本哈根的丹麦皇家剧院,中国国家大剧院,上海东方艺术中心等。
JBL能够被对音质要求最高的艺术殿堂长期选用,与其对音质不断追求完美的设计理念是分不开的。
随着数字技术的不断发展,数字化扩声系统凭借其强大的使用功能、灵活的操作方式和信号传输、监控等方面特性,渐渐被越来越多的使用者所接受。
近年来,JBL 积极发展数字有源一体化扬声器,配合HiQnet 系统的使用。
JBL 的数字有源一体化扬声器并不是简单的将功放安装在扬声器上,而是包含了Harman Pro 最新的技术DrivePack ,它融合了最先进的Crown 数字功放、BSS/dbx 数字处理器。
JBL PRX500系列有源一体化扬声器就是在JBL 工程系列扬声器的基础上以这一理念开发的。
作为近年来世界范围内政府机构礼堂、剧院、艺术中心等高音质扩声场所应用最多选用的扬声器,JBL 有源一体化扬声器与其它普通有源扬声器的区别如下表所示:JBL PRX500系列的核心技术优势有:1、拥有专利技术的高品质JBL 钕磁体驱动单元;JBL拥有超过60年的专业换能技术和扬声器系统经验。
PRX500系列低音单元采用了JBL最新的双音圈差分驱动专利技术(Differential Drive®),扩展频响特性,低失真,以及更轻的重量。
很轻的铝盒架作为整体散热,音圈的强度更低,更显著减少了功率压缩。
高音单元采用JBL最新钕磁钢压缩驱动器,高频处理采用新颖的1.5″环状聚合物震膜的压缩驱动器,比其他类似的钛合金震膜的压缩驱动器获得更低的失真。
减轻重量和减小体积。
分立的相位插塞和流线型的子弹头插塞的声学特性可无缝地过渡到波导传输,结果是清澈透明的高音和精确的声音覆盖。
500系列话筒前置放大器502快速入门指南说明书

500 SERIES MICROPHONE PREAMPLIFIER 502 500 Series Modular Midas Microphone Preamplifier with Classic XL4 FiltersV 1.0带有此标志的终端设备具有强大的电流, 存在触电危险。
仅限使用带有 1/4'' TS 或扭锁式插头的高品质专业扬声器线。
所有的安装或调整均须由合格的专业人员进行。
此标志提醒您,产品内存在未绝缘的危险电压, 有 触电危险。
此标志提醒您查阅所附的重要的使用及维修说明。
请阅读有关手册。
小心为避免触电危险, 请勿打开机顶盖 (或背面挡板)。
设备内没有可供用户维修使用的部件。
请将维修事项交由合格的专业人员进行。
小心为避免着火或触电危险, 请勿将此设备置于雨淋或潮湿中。
此设备也不可受液体滴溅, 盛有液体的容器也不可置于其上, 如花瓶等。
小心维修说明仅是给合格的专业维修人员使用的。
为 避免触电危险, 除了使用说明书提到的以外, 请勿进行任何其它维修。
所有维修均须由合格的专业人员进行。
1. 请阅读这些说明。
2. 请妥善保存这些说明。
3. 请注意所有的警示。
4. 请遵守所有的说明。
5. 请勿在靠近水的地方使用本产品。
6. 请用干布清洁本产品。
7. 请勿堵塞通风口。
安装本产品时请遵照厂家的说明。
8. 请勿将本产品安装在热源附近, 如 暖气片, 炉子或其它产生热量的设备 ( 包括功放器)。
9. 请勿移除极性插头或接地插头的安全装置。
接地插头是由两个插塞接点及一个接地头构成。
若随货提供的插头不适合您的插座, 请找电工更换一个合适的插座。
10. 妥善保护电源线, 使其不被践踏或刺破, 尤其注意电源插头、多用途插座及设备连接处。
11. 请只使用厂家指定的附属设备和配 件。
12. 请只使用厂家指定的或随货销售的手推车, 架子, 三 角架, 支架和桌子。
若使用手推车来搬运设备, 请注意安全放置设备, 以 避免手推车和设备倾倒而受伤。
JBL PRX400 音响系统用户指南说明书
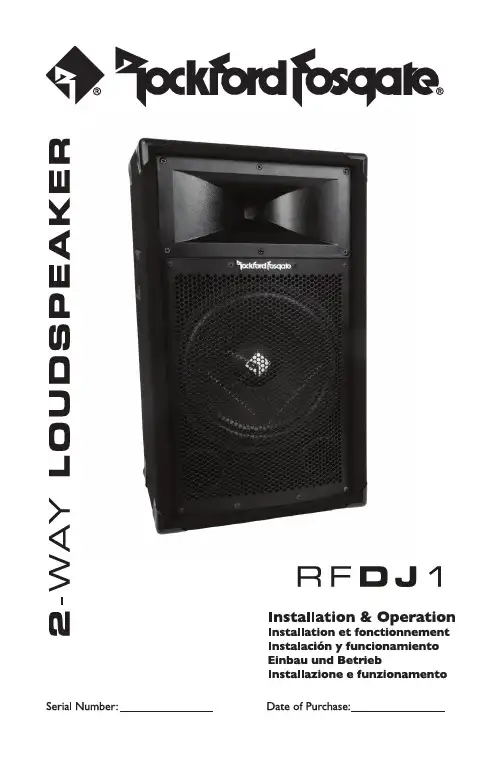
S afetyCAUTION: Before installation, turn-off any part of the audio system to Arrayprevent damage to the speaker or system components.f eatureSHorn Loaded Compression Driver• 1" Titanium diaphragm• Horn loading provides off axis response and midrange vocal clarity• Overload protection circuitry• Field replaceable12" Passive Speaker• High efficiency, low distortion design• High output with minimal power requirementsHigh Output Enclosure• Bass reflex design• Large volume for better low frequency response• Integrated ergonomically designed handles• Interlocking corners allow stacking of multiple cabinets• Dual Input- 5-way binding posts- 1/4” phono jack• Heavy gauge steel mesh grille• Industry standard 1-3/8” pole socketI nStallatIonS pecIfIcatIonSFEA TURE VALUESPEAKER CONFIGURATION ........ 2-Way Passive LoudspeakerDRIVER DIAMETER.............................1" Compression Driver / 12" Woofer POWER HANDLING ........................ 150 Watts RMS / 300 Watts MAX IMPEDANCE ........................................ 4ΩDESIGN .................................................2nd Order Vented (Ported)FREQUENCY RESPONSE .................33Hz - 22kHzSENSITIVITY .......................................... 92dBENCLOSURE MATERIAL................... 18mm (0.71")STAND RECEPTACLE.........................1.375" (35mm)DIMENSIONS....................................... (H) 24.8" x (W) 14.37" x (D) 12.59" 630mm x 365mm x 320mmWEIGHT (ea).........................................41 Lbs. (18.59kg)WARRANTY ..........................................1 YearAmplifier/T unerFor stereo amplifier/tuners, youcan connect a stereo pair of speak-ers to the LEFT and RIGHT out-puts. Connect the amplifier (+) tothe speaker (+) and the amplifier(-) to the speaker (-). For properstereo imaging, connect the LEFToutput to the LEFT speaker andthe RIGHT output to the RIGHTspeaker.Example SpeakerStand SetupRFDJ1 shownwith optionalspeaker stands.Stands notincluded.Rockford Corporation offers a limited warranty on Rockford Fosgate products on the following terms:Length of Warranty• Loudspeakers – 1 Y ear (receipt required).• Any Factory Refurbished Product – 90 days (receipt required)What is CoveredThis warranty applies only to Rockford Fosgate products sold to consumers by Authorized Rock-ford Fosgate Dealers in the United States of America or its possessions. Product purchased by consumers from an Authorized Rockford Fosgate Dealer in another country are covered only by that country’s Distributor and not by Rockford Corporation.Who is CoveredThis warranty covers only the original purchaser of Rockford product purchased from an Autho-rized Rockford Fosgate Dealer in the United States. In order to receive service, the purchaser must provide Rockford with a copy of the receipt stating the customer name, dealer name, product purchased and date of purchase. Products found to be defective during the warranty period will be repaired or replaced (with a product deemed to be equivalent) at Rockford’s discretion.What is Not Covered1. Damage caused by accident, abuse, improper operations, water, theft, shipping2. Any cost or expense related to the removal or reinstallation of product3. Service performed by anyone other than Rockford or an Authorized Rockford Fosgate Service Center4. Any product which has had the serial number defaced, altered, or removed5. Subsequent damage to other components6. Any product purchased outside the U.S.7. Any product not purchased from an Authorized Rockford Fosgate DealerLimit on Implied WarrantiesAny implied warranties including warranties of fitness for use and merchantability are limited in du-ration to the period of the express warranty set forth above. Some states do not allow limitations on the length of an implied warranty, so this limitation may not apply. No person is authorized to assume for Rockford Fosgate any other liability in connection with the sale of the product.How to Obtain ServiceContact the Authorized Rockford Fosgate Dealer you purchased this product from. If you need further assistance, call 1-800-669-9899 for Rockford Customer Service.Y ou must obtain an RA# (Return Authorization number) to return any product to Rockford Fosgate.Y ou are responsible for shipment of product to Rockford.EU WarrantyThis product meets the current EU warranty requirements, see your Authorized dealer for details.l ImIted W arranty S tatementRockford Fosgate600 South Rockford DriveT empe, Arizona 85281 U.S.A.In U.S.A., (480) 967-3565 - Customer Service 1-800-669-9899© 2010 Rockford Corporation. All rights reserved.Rockford Fosgate® and the Rockford Fosgate® “Diamond R” areregistered trademarks of Rockford Corporation.01/2010 E.W .R.1230-56250-02Printed in China。
JBL PRX415M 高功率两路扬声器系统说明书
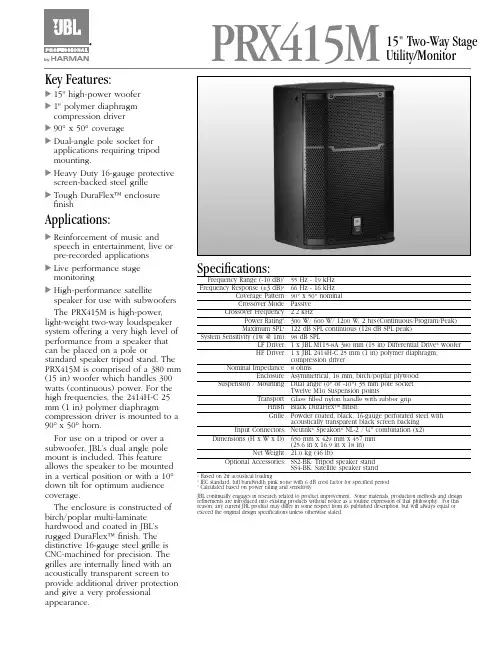
PRX415MKey Features:᭤15" high-power woofer᭤1" polymer diaphragmcompression driver᭤90° x 50° coverage᭤Dual-angle pole socket forapplications requiring tripodmounting.᭤Heavy Duty 16-gauge protectivescreen-backed steel grille᭤Tough DuraFlex™ enclosurefinishApplications:᭤Reinforcement of music andspeech in entertainment, live orpre-recorded applications᭤Live performance stage monitoring᭤High-performance satellite speaker for use with subwoofers The PRX415M is high-power, light-weight two-way loudspeaker system offering a very high level of performance from a speaker that can be placed on a pole or standard speaker tripod stand. The PRX415M is comprised of a 380 mm (15 in) woofer which handles 300 watts (continuous) power. For the high frequencies, the 2414H-C 25 mm (1 in) polymer diaphragm compression driver is mounted to a 90°x 50° horn.For use on a tripod or over a subwoofer, JBL’s dual angle pole mount is included. This feature allows the speaker to be mounted in a vertical position or with a 10°down tilt for optimum audience coverage.The enclosure is constructed of birch/poplar multi-laminate hardwood and coated in JBL’s rugged DuraFlex™ finish. The distinctive 16-gauge steel grille is CNC-machined for precision. The grilles are internally lined with an acoustically transparent screen to provide additional driver protection and give a very professional appearance. Specifications:Frequency Range (-10 dB)1:55 Hz - 19 kHzFrequency Response (±3 dB)1:66 Hz - 16 kHzCoverage Pattern:90° x 50° nominalCrossover Mode:PassiveCrossover Frequency: 2.2 kHzPower Rating2: 300 W/ 600 W/ 1200 W, 2 hrs(Continuous/Program/Peak)Maximum SPL3:122 dB SPL continuous (128 dB SPL peak)System Sensitivity (1w @ 1m):98 dB SPLLF Driver: 1 x JBL M115-8A 380 mm (15 in) Differential Drive®wooferHF Driver: 1 x JBL 2414H-C 25 mm (1 in) polymer diaphragm,compression driverNominal Impedance:8 ohmsEnclosure:Asymmetrical, 18 mm, birch/poplar plywoodSuspension / Mounting:Dual angle (0° or -10°) 35 mm pole socketTwelve M10 Suspension pointsTransport:Glass filled nylon handle with rubber gripFinish:Black DuraFlex™ finishGrille:Powder coated, black, 16-gauge perforated steel withacoustically transparent black screen backing.Input Connectors: Neutrik®Speakon®NL-2 / ¼" combination (x2) Dimensions (H x W x D):650 mm x 429 mm x 457 mm(25.6 in x 16.9 in x 18 in)Net Weight:21.0 kg (46 lb)Optional Accessories: SS2-BK: Tripod speaker standSS4-BK: Satellite speaker standBased on 2acoustical loading.IEC standard, full bandwidth pink noise with 6 dB crest factor for specified periodCalculated based on power rating and sensitivityJBL continually engages in research related to product improvement. Some materials, production methods and designrefinements are introduced into existing products without notice as a routine expression of that philosophy. For this reason, any current JBL product may differ in some respect from its published description, but will always equal orexceed the original design specifications unless otherwise stated.15" Two-Way StageUtility/Monitor᭤PRX415M 15" High-Power, Two-Way Speaker Dimensions in mm (in)Frequency (Hz)S P L (d B )Beamwidth:Frequency Response:Block Diagram:Directivity Index:2010010001000020000Frequency (Hz)01020110100D i r e c t i v i t yI n d e x (D I), d BD i r e c t i v i t y Fa c t o r (Q )SS PRX415CRP 10/12JBL Professional8500 Balboa Boulevard, P.O. Box 2200Northridge, California 91329 U.S.A.© Copyright 2012 JBL Professional。
JBL Cinema 500 六部分家庭影音扬声器系统快速指南说明书

4X1X4X4X8X 1XINCLUDED ITEMS3X15 ft (4.5m)2X30 ft (9.0m)THANK YOU FOR CHOOSING THIS JBL ® PRODUCTThe Cinema 500 is a complete six-piece home theater speaker system that includes four identical, two-way, video-shielded satellite speakers, a dedicated, voice-matched, video-shielded center speaker with dual midrange drivers an 8-inch (203mm), 150-watt powered subwoofer and all of the cables you need to connect all of the speakers to your audio/video receiver or preamp/processor and ampli fier.We're con fident that this JBL system will provide every note of enjoyment that you expect – and that when you think aboutpurchasing additional audio equipment for your home, car or of fice, you will once again choose JBL products.This quick-start guide contains all the information you need to set up, connect and adjust your new speaker system. For more in-depth information, go to our Web site: .CINEMA 500Home theater speaker systemQUICK-START GUIDE2On/Standby LED: When the Power-On Mode Switch is in the “Auto” position, this LED indicates whether the subwoofer is in the On or Standby state:When the LED glows green, the subwoofer is turned on.• • When the LED glows red, the subwoofer is in the Standby mode.When the Power Switch is set to “Off,” the LED will not light up, no matter what setting the Power-On Mode Switch is in.Crossover Control: This control determines the highest frequency at which the subwoofer reproduces sounds. The higher you set the Crossover Control, the higher in frequency the subwoofer will operate and the more its bass will “overlap” that of the satellite speakers. This adjustment helps achieve a smooth transition of bass frequencies between the subwoofer and the satellites for a variety of different rooms and subwoofer locations.NOTE: The Crossover Control functions only when you are using the Line-Level In L/R Connectors. The Line-Level In LFE Connector bypasses the subwoofer’s built-in crossover and Crossover Control. Phase Switch: This switch determines whether the subwooferdriver’s piston-like action moves in and out in phase with the satellite speakers. If the subwoofer were to play out of phase with the satellite speakers, the sound waves from the satellites could partially cancel out the sound waves from the subwoofer, reducing bass performance and sonic impact. This phenomenon depends in part on the placement of all the speakers relative to each other in the room.Power-On Mode Switch: When this switch is set in the “Auto” position and the Power Switch is set to “On,” the subwoofer will automatically turn itself on when it receives an audio signal and will enter the Standby mode when it has gone without receiving an audio signal for 20 minutes. When this switch is set in the “On” position, the subwoofer will remain on whether or not it is receiving an audio signal.Subwoofer Level Control: Use this control to adjust the subwoofer’s volume. Turn the knob clockwise to increase the volume; turn the knob counterclockwise to decrease the volume.Line-Level In LFE Connector: This input bypasses the subwoofer’s internal crossover circuitry, so use it only with a receiver or processor subwoofer output that has been low-pass filtered. If your receiver or processor does not have a dedicated subwoofer output that is low-pass filtered, use the subwoofer’s Line-Level In L/R Connectors (see below) instead.Use the supplied mono RCA cable (purple connectors) to connect the Line-Level In LFE Connector to the dedicated subwoofer output of a receiver or preamp/processor.Line-Level In L/R Connectors: These inputs pass through the subwoofer’s built-in crossover. Use them if your receiver or preamp/processor does not have a dedicated subwoofer output that is low-pass filtered.Power Switch: Set this switch in the “On” position to turn the subwoofer on. The subwoofer will then be in On or Standby mode, depending on the setting of the Power-On Mode Switch.Power Cord: After you have made and verified all subwoofer and speaker connections described in this manual, plug the power cord into an active, unswitched electrical outlet for proper operation of the subwoofer. DO NOT plug this cord into the accessory outlets found on some audio components.SUBWOOFER REAR-PANEL CONTROLS AND CONNECTIONSSubwoofer Level ControlCrossover Control On/StandbyLED Phase Switch Power-On Mode Switch Line-Level In LFE Connector Line-Level In L/R Connectors Power Switch Power Cord3 PLACING THE SPEAKERSFRONT LEFT AND RIGHT SPEAKERSCENTER SPEAKERSURROUND SPEAKERS AND SUBWOOFER4SPEAKER MOUNTING OPTIONSSHELF-MOUNTING Satellites:Center:3.WALL-MOUNTINGIMPORTANT SAFETY NOTE: The customer is solely responsible for proper selection and installation of mounting hardware not included with the speakers. JBL disclaims any liability for the selection and installation of mounting hardware.Be sure to follow these installation instructions carefully. If you have any questions or doubts about your ability to wall-mount the speakers correctly, consult with your authorized JBL dealer or custom installer.Satellite(195.5mm)Center1. D ecide on locations for the speakers according to the recommendations in Placing the Speakers , on page 3.2. S elect wall-hanging hardware that is appropriate for the construction and materials of your walls. The Cinema 500 front, center and surround speakers weigh3.25 lb (1.47kg) each. Be sure to use hardware that can support their weight.3. I nstall the wall-hanging hardware on the walls. Make sure that the hardware is driven into studs and not into drywall or plaster. If the hardware must be mounted in drywall or plaster, you are responsible for selecting and using wall anchors that are appropriate for the construction and materials of your walls.4. Hang the speakers on the wall-mount hardware.5IMPORTANT: Make sure the ( + ) and ( – ) bare wires do not touch each other or the other terminal. Touching wires can cause a short circuit that can damage your receiver or amplifier.Connect the speakers to the proper amplifier channels:Front LeftFront Right6OPERATING THE SUBWOOFERTURNING THE SUBWOOFER ON AND OFFSet the subwoofer’s Power Switch to the “On” position.I f the subwoofer’s Power-On Mode Switch is set to “Auto,” the •subwoofer will automatically turn itself on when it receives an audio signal, and it will go into Standby mode after it has received noaudio signal for 20 minutes. The subwoofer’s LED will glow green when the subwoofer is on and will glow red when the subwoofer is in Standby.I f the Power-On Mode Switch is set to “On,” the subwoofer will •remain on at all times. The subwoofer’s LED will glow green.If you will not be using the subwoofer for an extended period – for instance, if you’re going on vacation – set the Power Switch to the “Off” position.SUBWOOFER ADJUSTMENTS: CROSSOVER CONTROL NOTE: The Crossover Control functions onlywhen you are using the Line-Level In L/RConnectors. The Line-Level In LFE Connectorbypasses the subwoofer’s built-in crossover andthe Crossover Control.The Crossover Control adjusts the subwoofer’sbuilt-in crossover between 50Hz and 200Hz.The higher you set the Crossover Control, thehigher in frequency the subwoofer will operateand the more its bass will “overlap” that of thesatellite speakers. This adjustment helps achievea smooth transition of bass frequencies between the subwoofer and the satellites for a variety of different rooms and subwoofer locations. To set the Crossover Control, listen for the smoothness of the bass.If the bass seems too strong at certain frequencies, try a lower Crossover Control setting. If the bass seems too weak at certain frequencies, try a higher Crossover Control setting.SUBWOOFER ADJUSTMENTS: VOLUMEUse the Subwoofer Level Control to set thesubwoofer’s volume. Turn the knob clockwiseto increase the subwoofer’s volume; turn theknob counterclockwise to decrease the volume.Once you have balanced the subwoofer’svolume with that of the other speakers in yoursystem, you shouldn’t have to change it.Notes on Setting Subwoofer Volume:s Sometimes the ideal subwoofer volumesetting for music is too loud for films, whilethe ideal setting for films is too quiet formusic. When setting the subwoofer volume, listen to both music and films with strong bass content and find a “middle ground”volume level that works for both.I f your subwoofer always seems too loud or too quiet, you may •want to place it in a different location. Placing the subwoofer in a corner will always tend to increase its bass output, while placing it away from any walls or corners will always tend to lessen its bass output.SUBWOOFER ADJUSTMENTS: PHASEThe Phase Switch determines whetherthe subwoofer driver’s piston-likeaction moves in and out in phase withthe satellite speakers. If the subwooferwere to play out of phase with thesatellite speakers, the sound wavesfrom the satellites could partially cancelout the waves from the subwoofer,reducing bass performance and sonic impact. This phenomenon depends in part on the placement of all the speakers relative to each other in the room.Although in most cases you should leave the Phase Switch in the “Normal” position, there is no absolutely correct setting for the Phase Switch. When the subwoofer is properly in phase with the satellite speakers, the sound will be clearer and have maximum impact, and percussive sounds like drums, piano and plucked strings will sound more lifelike. The best way to set the Phase Switch is to listen to music that you know well and to set the switch in the position thatgives drums and other percussive sounds maximum impact. CROSSOVER50(Hz)2007SPECIFICATIONSCINEMA 500 SYSTEMFrequency response:32Hz – 20kHz (–6dB)CINEMA 500 CENTER SPEAKERLow-frequency transducer:Two 3" (75mm) PolyPlas cones, video-shieldedHigh-frequency transducer:1" (25mm) titanium-laminate dome, video-shielded Recommended power handling:100 watts Nominal impedance:8 ohms Sensitivity (2.83V/1m):89dB Crossover frequency: 3.7kHz Enclosure type:SealedConnector type:Push-spring terminal Dimensions (H x W x D):4-7/8" x 12" x 3-3/8"(124mm x 305mm x 86mm)Weight:3.2 lb (1.45kg)CINEMA 500 SATELLITE SPEAKERSLow-frequency transducer:Two 3" (75mm) PolyPlas ™ cone, video-shielded High-frequency transducer:1" (25mm) titanium-laminate dome, video-shielded Recommended amplifier power:100 watts Nominal impedance:8 ohms Sensitivity (2.83V/1m):86dB Crossover frequency: 3.7kHz Enclosure type:SealedConnector type:Push-spring terminal Dimensions (H x W x D):11-3/8" x 4-3/4" x 3-3/8" (289mm x 121mm x 86mm)Weight:3.2 lb (1.45kg)SUB140P SUBWOOFERLow-frequency transducer:8" (200mm) cone (down-firing)Enclosure type:Ported (down-firing)Amplifier power:150 wattsFrequency response:32Hz – 150Hz (–6dB)Audio controls:Volume level, phase, crossover frequency Connections:LFE input, left and right RCA line-level inputsPower requirement:120V/60Hz, 150W (US);220V – 240V/50Hz, 150W (EU)Power consumption:<1W (8mA@120V) standby; 300w (2.5A@120V) peak Dimensions (W x H x D):19" x 14" x 14"(483mm x 355mm x 355mm)Weight:22 lb (10kg)HARMAN Consumer, Inc.8500 Balboa Boulevard, Northridge, CA 91329 USA© 2010 HARMAN International Industries, Incorporated. All rights reserved.JBL is a trademark of HARMAN International Industries, Incorporated, registered in the United States and/or other countries. PolyPlas is a trademark of HARMAN International Industries, Incorporated.Features, specifications and appearance are subject to change without notice.Part No. 950-0298-001 Rev. A。
(整理)XX国土局多功能厅扩声系统设计说明.

会议厅扩声系设计说明目录第一部分系统工程概述 (2)1.1 工程概述 (2)1.2 工程设计依据 (2)1.3 设备选型原则 (2)1.4 系统优势 (3)1.5 扩声系统达到目标 (3)2.1.4.1专业扩声系统 (5)2.1.4.1.1 厅堂音质设计要求 (5)2.1.4.1.2 音箱的布局和选配 (5)2.1.4.1.3 设备选用介绍 (7)第三部分系统调试、测试 (11)第四部分系统总结 (12)第一部分系统工程概述1.1 工程概述XXXXXX1.2 工程设计依据依据现有的国家标准、规范、并参照国际上通用的规范进行。
基本技术依据的概念,在此为参照和等同。
(包括特性参数要求标准、特性参数测量方法,规范标准、电气设计规范,安全要求等)➢业主对该中心的使用功能➢招标方提供的装修图纸➢广电部标准《厅堂扩声系统设计规范》(GB 50371-2006)➢《厅堂扩声特性测量方法》(GB/T4959-1995)➢《声系统设备互连的优选配接值》(GB14197-93)➢《厅堂混响时间测量规范》(GBJ76-84)➢《客观评价厅堂语言可懂度的RASTI法》(GBJ76-84)➢国际标准《供配电系统设计规范》GB50052-95;➢国家标准《低压配电设计规范》GB5004-95;➢国家标准《民用建筑电器设计规范》JGJ/T16-92;➢《剧院建筑设计规范》 JGJ 57-2000 J67-2001;➢《电气装置安装工程低压电器施工及验收规范》GB 50254-96➢《电气装置安装工程施工及验收规范》GBJ 232-90,92➢《建筑设计规范》 JGJ 57-2000➢以及有关的人身安全、消防法规。
1.3 设备选型原则对于系统设备的选型,我方遵循以下原则:➢可靠性、实用性、易用性、先进性相结合;➢以中、高档次产品为主,以满足该场地的使用档次;➢对于技术含量高的选用原装进口产品,使系统稳定可靠;➢对于国内技术已成熟的产品则选用国产或合资产品,以减少成本;➢选择售后服务好,信誉高的厂家;1.4 系统优势系统除了满足业主的具体功能要求外,还具有以下优势:(1)整体可靠性高在整个系统设计中,均采用科学的计算、合理的同等高档设备的配置,标准的施工工艺要求和完善的测试手段来保证系统的完备性和可靠性。
JBL PRX800W 有源扬声器用户指南

锐声-技术部
1
PRX800W 系列有源扬声器用户指南
PRX800W 有源扬声器用户指南 版本 1.0 中文 12/2016
广州市锐声灯光音响器材有限公司
原版权所有 JBL,译者:陈运勇,未经原作者同意,文档所有部分不能转载,复制,修改,修正。
更多的信息和改进,请联系 Info@ 广州市锐声灯光音响器材有限公司 广东省广州市番禺区番禺大道番山创业中心 1 区 1 号楼 5 楼 电话:020-84700176 020-84881200 传真:020-84821881
锐声-技术部
注意:这个按键同样是用于还原扬声器出
入点”模式之间切换。扬声器默认设
厂预设的。请查看第 10 页的“还原出厂
置是“正常”模式。切换到“接入点”
设置”
模式可以通过路由器从最开始设置
3. FRONT LED 扬声器前置 LED – 这个按
系统,WIFI 连接 LED 会缓慢地闪烁。
钮可以打开/关闭扬声器前置的 LED 指示 更多 WIFI 使用信息,请查看第 9 页“WIFI 设
式并且没有与 WIFI 建立稳定的连接
- 默认(不亮灯)时为 NORMAL,频响
d. 快速地闪烁 – 扬声器在接入点模
是平直的没更改的。
式同时在与已连接设备通讯
b. Main 和 Monitor(PRX812W 和 PRX815W) 13.WIFI 连接按键 – 这个按键用于连接到
- பைடு நூலகம்择“Main”或“Monitor”取决
9. WIFI 连接按键 – 这个按键用于连接到 WIFI 网络,使用 PRX CONNECT 应用进行控
制和设置。这个按键有两种功能 e. 按住后放开 – 使扬声器尝试连接
JBL Bar 5.1 Surround 音响系统说明书
Experience panoramic surround sound.The impressive JBL Bar 5.1 Surround delivers the ultimate home cinematic experience. Bring everything you watch to life with 550 Watts of power and a 10" subwoofer: the driving bass of an action movie, the tension of a thriller or the beauty of a nature documentary. Built-in Chromecast and Airplay 2 lets you stream and manage online content, and Bluetooth means your streamed music sounds great, too. Amazing surround sound comes from JBL MultiBeam™ technology. JBL has powered the world’s movie theatres for more than 75 years. Now you can bring that power home.FeaturesPanoramic surround sound550W output power10" wireless subwooferU ltra HD 4K Pass-through with Dolby Vision™Built-in Chromecast and Airplay 2 Bluetooth®Dolby Digital 5.1HARMAN International Industries, Incorporated8500 Balboa Boulevard, Northridge, CA 91329 USA Features and BenefitsPanoramic surround soundJBL MultiBeam ™ technology brings the ultimate cinematic experience to your home. No extra speakers or wires are needed.550W output powerWith 550 Watts of system output power, experience your movies and music like never before. Immersive, powerful sound to match your viewing pleasure.10" wireless subwooferPunchy, precise bass from a mighty 10" wireless subwoofer brings the action to action movies, and ensures any soundtrack sounds epic.Ultra HD 4K Pass-through with Dolby Vision ™The best 4K video resolution deserves the best sound to go with it. Your TV and the JBL Bar 5.1 Surround are the ultimate power couple.Built-in Chromecast and Airplay 2Built-in WiFi and compatibility with Chromecast and Airplay 2 means you can stream your all favourite online content with amazing sound, with a simple finger tap.Bluetooth ®Not in the mood for a film? No problem. With the JBL Bar 5.1 Surround, you can also enjoy wireless music streaming via Bluetooth from your mobile or tablet.What’s in the box:SoundbarWireless subwooferRemote control with batteriesPower cords (up to 8pcs depending on region SKUs)HDMI cableWall-mount bracket kit with screws Quick start guide Warranty card Safety sheetTechnical Specifications:M odel: Bar 5.1 CNTR (Soundbar Unit), Bar 5.1 SUB (Subwoofer Unit) P ower supply: 100 – 240V AC, ~ 50/60Hz T otal speaker power output (Max. @THD 1%): 550W S oundbar output power (Max. @THD 1%): 5 x 50W S ubwoofer output power (Max. @THD 1%): 300W S oundbar transducer: 5 x racetrack drivers + 2 x 1.25" side-firing tweeters S ubwoofer transducer: 10" O perating temperature: 0°C – 45°C Video H DMI Video input: 1 H DMI Video output (With Audio return channel): 1 H DMI HDCP version: 2.3Audio M ax SPL: 103dB A udio inputs: 1 Optical, Bluetooth, USB (USB playback is available in US version. For other versions, USB is for Service only.)USB U SB port: Type A U SB rating: 5V DC, 0.5A S upporting file format: mp3 M P3 Codec: MPEG 1 Layer 2/3, MPEG 2 Layer 3, MPEG 2.5 Layer 3 M P3 sampling rate: 16kHz – 48kHz M P3 bitrate: 80kbps – 320kbps Wireless B luetooth version: 4.2 B luetooth profile: A2DP V1.2, AVRCP V1.5 B luetooth frequency range: 2402MHz – 2480MHz B luetooth Max. transmitting power: <11dBm (EIRP) M odulation Type: GFSK, π/4 DQPSK, 8DPSK W i-Fi network: IEEE 802.11 a/b/g/n/ac (2.4GHz/5GHz) 2.4G Wi-Fi frequency range: 2412 – 2472MHz(2.4GHz ISM Band, USA 11 Channels, Europe and others 13 Channels) 2.4G Wi-Fi Max. transmitting power: <20dBm M odulation Type: DBPSK, DQPSK, CCK, QPSK, BPSK, 16QAM, 64QAM 5G Wi-Fi frequency range: 5.15 – 5.35GHz, 5.470 – 5.725GHz, 5.725 – 5.825GHz 5G Wi-Fi Max. transmitting power: <22dBm M odulation Type: QPSK, BPSK, 16QAM, 64QAM, 256QAM 5G Wireless frequency range: 5736.35 – 5820.35MHz 5G Max. transmitting power: <9dBm (EIRP) M odulation Type: π/4 DQPSK Dimensions D imensions (W x H x D): 1018 x 58 x 100mm /40.1" x 2.3" x 3.9" (Soundbar); 305 x 440 x 305mm / 12.0" x 17.3" x 12.0" (Subwoofer) W eight: 2.85kg (Soundbar); 10.62kg (Subwoofer)BAR 5.1 SURROUND is in compliance with European Commission Regulation (EC) No 1275/2008 and (EU) No 801/2013.Power consumption O ff mode: N/A N etwork standby: <2.0W T ime to standby: <10 minutes© 2019 HARMAN International Industries, Inc orporated. All rights reserved. JBL is a trademark of HARMAN International Industries, Inc orporated, registered in the United States and/or other c ountries. The Bluetooth ® word mark and logos are registered trademarks owned by Bluetooth SIG, Inc. and any use of suc h marks by HARMAN International Industries, Incorporated is under license. Other trademarks and trade names are those of their respective owners. The terms HDMI, the HDMI logo, and High-Definition Multimedia Interface are trademarks or registered trademarks of HDMI Licensing LLC in the United States and other countries. Dolby, Dolby Audio and the double-D symbol are trademarks of Dolby Laboratories. Features, specifications and appearance are subject to change without notice.。
JBL cinema 500 家庭影院扬声器系统指南说明书
5D E U T S C HLaUTSPReCHeR aUFSTeLLenLINKER UND RECHTER FRONTLAUTSPRECHERCENTERSURROUND-LAUTSPRECHER UND SUBWOOFERLinker Front-LautsprecherTVCenterRechter Front-LautsprecherSubwooferLinker Surround-LautsprecherRechter Surround-LautsprecherRechter Surround-LautsprecherLinker Surround-Lautsprecher1,5 - 1,8 mLinker Frontlaut-sprecherRechter Frontlaut- sprecherTVCenterTV0 - 0,6 mLinker Front-LautsprecherRechter Front-Lautsprecher6mOnTaGemÖGLiCHKeiTenAUFSTELLUNG MITTELS REGAL-STATIV Satelliten:Center:1.3.2.WiCHTiGeR SiCHeRHeiTSHinWeiS: Wird zusätzliches Befestigungsmaterial nötig, ist der Kunde selbst für dessen Auswahl und korrekte Installation verantwortlich. Der Hersteller verweigert jegliche Verantwortung für den korrekten Zusammenbau und die Befestigung der Lautsprecher.Bitte folgen Sie den Anweisungen in dieser Bedienungsanleitung. Sollten Sie Zweifel hegen, ob Sie die Lautsprecher korrekt und sicher an die Wand befestigen können, wenden Sie sich bitte an Ihren Fachhändler.Satelliten49 mm55 mm195.5 mmCenter1. S uchen Sie nach passenden Aufstellungsorten für Ihre Lautsprecher – konsultieren Sie hierzu das Kapitel Lautsprecher aufstellen auf Seite 5.2. W ählen Sie für Ihre Wände geeignetes Befestigungsmaterial. Die Front- und Surround-Lautsprecher der Cinema 500 Serie wiegen 1,45 kg; der Cinema 500 Center bringt 1,47 kg auf die Waage. Bitte suchen Sie Befestigungsmaterial aus, das dieses Gewicht tragen kann.3. I nstallieren Sie die Wandhalterungen. Stellen Sie bitte sicher, dass die Halterungen sicher an Holzbalken befestigt werden. Für die montage auf Ziegel-, Gipskarton- oder Betonwände benötigen Sie geeignete Dübel.4. Hängen Sie nun die Lautsprecher in die Wandhalterungen ein.WANDMONTAGE7D E U T S C HLaUTSPReCHeR anSCHLieSSenaCHTUnG: Schalten Sie ihren Receiver bzw. Verstärker vollständig aus oder trennen Sie ihn vom Stromnetz BeVOR Sie mit der Verkabelung beginnen.WiCHTiG: a chten Sie bitte darauf, dass die positiven und negativen Leitungen weder sich noch andere Kabel anderer anschlussterminalsberühren (Kurzschluss).2.1.3.Die farblich markierte Ader an die "+"-Klemme anschließenLautsprecher mit dem Receiver verbinden:SPEAKER OUTPUTDie "+"-Klemme am Lautsprecher mit der "+"-Klemme am Verstärker verbinden:Die Lautsprecher mit den entsprechenden Lautsprecherterminals am Verstärker verkabeln:Linker Front-LautsprecherCenterKabel mit weißer MarkierungKabel mit grüner MarkierungKabel mit blauer MarkierungKabel mit grauer MarkierungKabel mit roter MarkierungLinker Surround-LautsprecherRechter Front-LautsprecherRechter Surround-LautsprecherReceiver oder VerstärkerLautsprecherDie farblichmarkierte Ader an die "+"-Klemme anschließenVerstärkerDie farblich markierte Ader an die "+"-Klemmeanschließen9D E U T S C HnORmaLBeTRieB DeS SUBWOOFeRSSUBWOOFER EIN- UND AUSSCHALTENStellen Sie den Netzschalter auf der Rückseite des Subwoofers auf …On“.Haben Sie den Power-On-Mode-Schalter auf …Auto" gestellt, schaltet •sich der Subwoofer automatisch vollständig ein sobald am Eingang ein Tonsignal erkannt wird. Empfängt er 20 Minuten lang kein Signal, schaltet er wieder in den Standby-Modus. Ist der Subwoofer aktiviert, leuchtet die Betriebsanzeige grün; leuchtet die LED rot, befindet sich der Subwoofer im Standby-Modus.Steht der Power-Schalter auf …On“ bleibt der Subwoofer ständig aktiviert. • Steht der Power-Schalter auf "On" bleibt der Subwoofer ständig aktiviert, und die LED leuchtet grün.Verwenden Sie den Subwoofer über einen längeren Zeitraum nicht (zum Beispiel während der Sommerferien), sollten Sie den Power-Schalter auf …Off“ stellen und ihn damit vollständig ausschalten.SUBWOOFER-BEDIENELEMENTE: CROSSOVER-REGLER:HINWEIS: Der Crossover-Regler wirkt nur, wenn das Signal über die Line-Level In L/R-Eingänge empfangen wird. Das am Line-Level In LFE-Anschluss anliegende Signal durchläuft weder den Crossover-Regler noch die eingebaute Frequenzweiche.Mit dem Crossover-Regler können Sie die obere Grenzfrequenz des Subwoofers im Bereich zwischen 50 und 200 Hz justieren. Je höher Sie die obere Grenzfrequenz einstellen, desto größer ist der mitden Satelliten-Lautsprechern überlappende Frequenzbereich. Auf diese Weise sorgen Sie selbst in Wohnräumen mit schwierigen akustischen Eigenschaften und unabhängig vom Aufstellungsort des Subwoofers für einen gleichmäßigen Frequenzübergang zwischen den Satelliten-Boxen und dem Bass-Lautsprecher.Achten Sie auf eine gleichmäßige Basswiedergabe in Ihrem Hörraum. Werden bestimmte Basstöne überbetont, sollten Sie eine niedrigere obere Grenzfrequenz ausprobieren. Wirken bestimmte Basstöne schwach, können Sie das Klangbild mit einer höheren oberen Grenzfrequenz verbessern.SUBWOOFER-BEDIENELEMENTE: SUBWOOFER LEVELMit diesem Regler können Sie die Lautstärke des Subwoofers justieren. Drehen Sie den Regler im Uhrzeigersinn, um die Lautstärke zu erhöhen. Drehen Sie ihn gegen den Uhrzeigesinn, um die Lautstärke zu mindern. Haben Sie einmal eine ausgeglichene Lautstärke zwischen Satelliten und Subwoofer gefunden, sollten Sie diese Einstellung nicht mehr verändern.Hinweise zur korrekten einstellung der Subwoofer-Lautstärke:Manchmal ist die ideale Lautstärke für Musik zu laut für die Wiedergabe •von Filmen und umgekehrt. Deswegen sollten Sie für die Einstellung der Subwoofer-Lautstärke bassbetonte Filme und Musikstücke verwenden – wählen Sie einen Durchschnittswert, der zu beiden Inhalten passt. Klingt Ihr Subwoofer ständig zu laut oder zu leise, wählen Sie bitte einen •anderen Aufstellort. Rücken Sie den Subwoofer näher in eine Zimmerecke, wird die Bass-Wiedergabe verstärkt. Vergrößern Sie den Abstand zur nächsten Wand, wird der Bass schwächer.SUBWOOFER-BEDIENELEMENTE: PHASE Dieser Schalter legt fest, ob sich die Bassmembran des Subwoofers und die Membranen der Satelliten-Lautsprecher synchron oder gegenläufig bewegen. Bewegen sich die Membranen nicht synchron, löschen sich einige Bassfrequenzen des Subwoofers oder der Satelliten gegenseitig auf, wodurchBassleistung und Dynamik sinken. Dieser Effekt hängt überwiegendermaßen vom Aufstellungsort der Lautsprecher im Raum ab.In den meisten Fällen können Sie den Phasen-Schalter auf …Normal“ belassen – eine wirklich …richtige“ Einstellung gibt es dennoch nicht. Spielen Subwoofer und Satelliten in Phase, bleibt das Klangbild klar und packend – dynamische Instrumente wie Schlagzeug oder Klavier klingen besonders naturgetreu. Am besten gehen Sie wie folgt vor, um die Phase Ihres Subwoofers korrekt einzustellen: Legen Sie Musik auf, die Sie sehr gut kennen. Stellen Sie den Phasenschalter so ein, dass Schlagzeug und Bass lauter klingen. Korigieren Sie anschließend evtl. die Lautstärke mit dem Subwoofer-Level-Regler mit höchster Dynamik wiedergegeben werden.© 2010 HARMAN International Industries, Incorporated. Alle Rechte vorbehalten.JBL ist eine Marke von HARMAN International Industries, Incorporated, eingetragen in den Vereinigten Staaten und/oder anderen Ländern. PolyPlas ist eine Marke von Harman International Industries, Incorporated.Teile-Nr. 950-0296-001, Rev.: AHARMAN Consumer, Inc.8500 Balboa Boulevard, Northridge, CA 91329 USA HARMAN Deutschland GmbH Hünderstraße 1 D-74080 HeilbronnD E U T S C HTeCHniSCHe DaTenCinema 500 SystemFrequenzbereich:Cinema 500 SatellitenBass-Chassis:Zwei Chassis mit 75 mm großen PolyPlas™-Membranen, magnetisch abgeschirmtHochtöner:25-mm-Hochtonkalotte aus Titan-Verbundmaterial, magnetisch abgeschirmt Belastbarkeit:100 Watt Nennimpedanz:8 Ohm Wirkungsgrad (2,83 V/1 m):89 dB Übergabefrequenz:3,7 kHz Gehäusetyp:geschlossen Anschlussterminals:Federkontaktklemme Maße (H x B x T):289 x 121 x 86 mm Gewicht:1,45 kgCinema 500 CenterBass-Chassis:Zwei 75-mm-PolyPlas-Membranen, magnetisch abgeschirmtHochtöner:25-mm-Hochtonkalotte aus Titan-Verbundmaterial, magnetisch abgeschirmt Belastbarkeit:100 Watt Nennimpedanz:8 Ohm Wirkungsgrad (2,83 V/1 m):89 dB Übergabefrequenz:3,7 kHz Gehäusetyp:geschlossen Anschlussterminals:Federkontaktklemme Maße (H x B x T):124 x 305 x 86 mm Gewicht:1,47 kgSUB140P SubwooferBass-Chassis:Ein nach unten abstrahlendes Chassis mit 200 mm großer Membran, magnetisch abgeschirmt Gehäusetyp:Nach unten abstrahlendes Gehäuse mit Bassreflexöffnung Verstärkerleistung:150 Watt Frequenzbereich:32 – 200 Hz (–6dB)Bedienelemente:Lautstärkeregler, Phasenschalter, Regler für die obere GrenzfrequenzAnschlüsse:LFE-Eingang, Linker und Rechter Line-Level-Anschluss (Cinch)Betriebsspannung:120 V/60 Hz, 150 W (US); 220 V – 240 V/50 Hz, 150 W (EU)Stromaufnahme:<1 W (8 mA bei 120 V) Standby; 300 W (2,5 A bei 120 V) maximal Maße (H x B x T):483 x 355 x 355 mm Gewicht:10 kgAlle Leistungsmerkmale und Spezifikationen sowie das mechanische Design können sich ohne vorherige Ankündigung ändern.32 Hz – 20 kHz (–6dB)。
JBL 影院音频系统所有者手册说明书
2READ FIRST! Important Safety Precautions!1.Read these instructions.2.Keep these instructions.3.Heed all warnings.4.Follow all instructions.5.Do not use this apparatus near water.6.Clean only with a dry cloth.7.Do not block any ventilation openings. Install in accordance with the manufacturer’s instructions.8.Do not install near any heat sources such as radiators, heat registers, stoves or other apparatus (including amplifiers) that produce heat.9.Do not defeat the safety purpose of the polarized or grounding-type plug.A polarized plug has two blades with one wider than the other.A grounding-type plug has two blades and a third grounding prong. The wide blade or the third prong are provided for your safety. If the provided plug does not fit into your outlet, consult an electrician for replacement of the obsolete outlet.10.Protect the power cord from being walked on or pinched, particularly at plugs, convenience receptacles and the point where they exit from the apparatus.11.Only use attachments/accessories specified by the e only with the cart, stand,tripod, bracket or table specified by the manufacturer or sold with thecaution when moving the cart/ apparatus combination to avoid injury from tip-over.13.Unplug this apparatus during lightning storms or when unused for long periods of time.14.Refer all servicing to qualified service personnel. Servicing is required when the apparatus has been damaged in any way, such as power-supply cord or plug isdamaged, liquid has been spilled or objects have fallen into theapparatus, the apparatus has been exposed to rain or moisture, does not operate normally, or has been dropped.15.Do not use attachments not recommended by the product manufacturer, as they may cause hazards.16.This product should be operated only from the type of power source indicated on the marking label. If you are not sure of the type of power supply to your home, consult your product dealer or local power company. For products intended to operate from battery power or other sources, refer to the operating instructions.17.If an outside antenna or cable system is connected to the product, be sure the antenna or cable system is grounded so as to provide some protection against voltage surges and built-up static charges. Article 810 of the National Electrical Code,ANSI/NFPA 70, provides information with regard to proper grounding of the mast and supporting structure,grounding of the lead-in wire to an antenna discharge unit, size of grounding conductors, location of antennadischarge unit, connection to grounding electrodes, and requirements for the grounding electrode. See Figure A.18.An outside antenna system should not be located in the vicinity of overhead power lines or other electric light or power circuits, or where it can fall into such power lines or circuits. When installing an outside antenna system, extreme care should be taken to keep from touching such power lines or circuits,as contact with them might be fatal.19.Do not overload wall outlets,extension cords, or integralconvenience receptacles, as this can result in a risk of fire or electric shock.20.Never push objects of any kind into this product through openings, as they may touch dangerous voltage points or short-out parts, which could result in a fire or electric shock.Never spill liquid of any kind on the product.21.The apparatus shall not be exposed to dripping or splashing, and no objects filled with liquids,such as vases, shall be placed on the apparatus.22.Do not attempt to service this product yourself, as opening or removing covers may expose you to dangerous voltage or other hazards.Refer all servicing to qualified service personnel.23.When replacement parts are required, be sure the service technician has used replacement parts specified by the manufacturer or that have the same characteristics as the original part. Unauthorized substitutions may result in fire,electric shock or other hazards.24.Upon completion of any service or repairs to this product, ask the service technician to perform safety checks to determine that the product is in proper operating condition.25.The product should be mounted to a wall or ceiling only asrecommended by the manufacturer.THANK YOU FOR CHOOSING JBLFor more than 60years, JBL has been involved in every aspect of music and film recording and reproduction, from live performances to the provide every note ofenjoyment that you expect –and that when you think aboutpurchasing additional audioequipment for your home, carWeb site at .It enables us to keep youposted on our latest advance-ments, and helps us to betterunderstand our customers4SPEAKER PLACEMENTSUBWOOFERSURROUND SPEAKERSFRONTSPEAKERSThe front speakers should be placed the same distance from each other as they are from the listening position.The CSB5 speakers should be placed at about the same height from the floor as the listeners’ ears will be, or they may be angled toward the listeners.The center channel speaker should be placed slightly behind the front left and right speakers, and no more than 2 feet (0.6m) above or below the tweeters of the left and right speakers. It is often convenient to set the center speaker on top of thetelevision set, as shown in the drawing.The JBL Cinema Soundspeaker system may be used in 5.1-, 6.1- or 7.1-channel applications. In 5.1-channel applications, two of thesurround speakers should be placed slightly behind the listening position and, ideally,should face each other and be at a level higher than the listeners’ ears. If that is not possible, they may be placed against a wall behind the listening position, facingforward. In 6.1-channel appli-cations, two of the surround speakers should be placed in the side positions, and asingle surround back speaker should be placed against the wall behind the listening position. In 7.1-channelapplications, place two of the surround speakers in the side positions, and place the two surround back speakers against the rear wall.In Dolby ®Digital and DTS ®systems, it is best to aim all of the speakers (except the subwoofer) toward thelistening position at or slightly above about ear-level height.In systems where only analog surround processing (such as Dolby Pro Logic ®II) isavailable, it may be preferable to aim the speakers straight out from the wall to obtain a more diffuse sound.The low-frequency material reproduced by the subwoofer is mostly omnidirectional, and this speaker may be placed in a convenient location in the room. However, bass reproduction will be maximized when the subwoofer is placed in acorner along the same wall as the front speakers.Experiment with subwoofer placement by temporarily placing the subwoofer in the listening position and moving around the room until the bass reproduction is best. Place the subwoofer in that location.CENTER CHANNEL SPEAKER† Single surround back speaker may be used with 6.1 receivers and processors.Alternate placement for surround speakers when only 5.1 channels are used; required placement for surround back speakers in 7.1-channel systems.5The CSC55 center channel and the CSB5 are designed to be mounted on the wall. There are two (2) fixed-mount wall brackets provided for the CSC55, and one for the CSB5.Each speaker bracket will require up to three 1-1/2" #10wood screws; each screw should be fastened to a wall stud.If a wall stud is unavailable,install an anchor appropriate for a 1-1/2" #10 screw.NOTE: The customer is responsible for the correct selection and use of mounting hardware (available through hardware stores) to ensure the proper and safe wall-mounting of the speakers.Step ing the included mounting template (CSC55only) or the bracket back plate (CSB5 only), mark thepositions on the wall where you would like to place the mounting screws.Step 2.Attach the back plate(s) of the bracket to the wall using three screws (not included).Step 3.Attach the frontplate(s) (with the two holes) of the bracket(s) to the CSC55 or CSB5, using the provided screws.Step 4.Slide the CSC55 or CSB5 speaker with attached bracket front plate(s) onto the back plate(s) of the bracket(s).Once positioned properly, the speaker should slide down slightly and become secure.To remove the speaker from the wall, simply slide the speaker up.WALL-MOUNTING THE CSC55AND CSB56CONNECTION TIPSSPEAKER CONNECTIONSSeparate and strip the ends of the speaker wire as shown.Speakers and electronics terminals have corresponding (+) and (–) terminals. Most manufacturers of speakers and electronics, including JBL, use red to denote the (+)terminal and black to denote the (–) terminal.The (+) lead of the speaker wire is noted with a stripe. It is important to connect both speakers identically:(+) on the speaker to (+) on the amplifier and (–) on the speaker to (–) on the amplifier.Wiring “out of phase” results in thin sound, weak bass and a poor stereo image.With the advent of multichan-nel surround sound systems,connecting all of the speakers in your system with the correct polarity remains equally important in order to preserve the proper ambience and directionality of theprogram material.insert each wire into its corresponding hole in the base. Then tighten down the terminals.CSB5,CSC55To use the binding-post speaker terminals, unscrew the colored collar until the pass-through hole in the center post is visible under the collar. Insert the bare end of the wire through this hole;then screw the collar down until the connection is tight.The hole in the center of each collar is intended for use with banana-type connectors. To comply with European CE certification,these holes are blocked with plastic inserts at the point of manufacture.To use banana-type connectors requires the removal of the inserts.The hole in the center of each collar is intended for use with banana-type connectors. To comply with European CE certification,these holes are blocked with plastic inserts at the point of manufacture.To use banana-type connectors requires the removal of the inserts.DOLBY PRO LOGIC®(NON-DIGITAL) – LINE LEVELUse this installation method for Dolby Pro Logic applications (not Dolby Digital, DTS or other digital processing), where the receiver/processor is equipped with a subwoofer output, or a volumecontrolled preamp (line-) level output:Use RCA-type interconnectsto connect the line-levelsubwoofer outputs on yourreceiver or amplifier to theline-level inputs on thesubwoofer. IMPORTANT: Donot use the LFE input on thesubwoofer with DolbyPro Logic processors.NOTE: If your receiver oramplifier has only onesubwoofer output jack, thenyou will need to use aY-connector (not included).Plug the male end of theY-connector into your receiveror amplifier’s subwooferoutput jack, and connect eachof the two female ends toseparate RCA-typeinterconnects. Finally, plug theRCA-type interconnects intothe line-level inputs on thesubwoofer.Connect each speaker tothe corresponding speakerterminals on your receiveror amplifier.Make sure your receiver orprocessor is correctlyconfigured to indicate that thesubwoofer is “On.”Use this installation method for Dolby Digital, DTS or other digital surround processors: Use the line-level input jack marked “LFE” for the Low-Frequency Effects channel.Connect this jack to the LFEoutput or subwoofer outputon your receiver or amplifier.Connect each speaker tothe corresponding speakerterminals on your receiveror amplifier.Make sure that you haveconfigured your surroundsound processor for “Sub-woofer On.” Also configureyour receiver for 5.1-, 6.1-or 7.1-channel operation asappropriate. The front left,front right, center and rearspeakers should all be setto “Small.” If your receiverallows you to set the cross-over frequency between thesubwoofer and the mainspeakers, select 100Hz orthe setting that is the closestfrequency below it.DOLBY®DIGITAL OR DTS®(OR OTHER DIGITAL SURROUND MODE) CONNECTION7SUBWOOFER OPERATIONPress the Master Power switch (marked “Power” a) to the On position to use the subwoofer. The CSS10 subwoofer will automatically turn on or go into standby (sleep) mode as described below. When your receiver or amplifier is off, or is not sending program materialto the subwoofer, the subwoofer will be in standby mode (the LED on the front of the CSS10 will be red). When the subwoofer senses an audio signal, it will automatically turn on (the LED will be green). If the subwoofer does not sense a signal after approximately 20 minutes, it will automatically go into standby mode.If you will be away from home for an extended period of time,or if the subwoofer will not beused, switch the MasterPower switch a to the Offposition by pressing it until itpops out.VOLUMEVolume may be adjusted using the Subwoofer Level control b, as shown.The Phase control determineswhether the subwoofer’spistonlike action moves in andout in phase with the mainspeakers or opposite the mainspeakers. There is no corrector incorrect setting. Properphase adjustment depends onseveral variables, such assubwoofer placement andlistener position. Adjust thePhase switch c to maximizebass output at the listeningposition.Remember, every system,room and listener is different.There are no right or wrongsettings; this switch offers theadded flexibility to adjust yoursubwoofer for optimumperformance for your specificlistening conditions withouthaving to move your speakers.If at some time in the futureyou happen to rearrange yourlistening room and move yourspeakers, you shouldexperiment with the phaseswitch in both positions, andleave it in the position thatmaximizes bass performance.8If there is no sound from any of the speakers:• Check that receiver/amplifier is on and a source is playing.• Check that the powered subwoofer is plugged in and is turned on (Power switch a pushed in).• Check all wires and connections between receiver/ amplifier and speakers. Make sure all wires are connected. Make sure none of the speaker wires are frayed, cut or punctured, or touching each other.• Review proper operation of your receiver/amplifier.If there is no sound coming from one speaker:• Check the “Balance” control on your receiver/amplifier.• Check all wires and connections between receiver/ amplifier and speakers. Make sure all wires are connected. Make sure none of the speaker wires are frayed, cut or punctured, or touching each other.• In Dolby Digital or DTS modes, make sure that the receiver/ amplifier is configured so that the speaker in question is enabled.• Turn off all electronics and switch the speaker in question with one of the other speakers that is working correctly. Turn everything back on, and determine whether the problem has followed the speaker or has remained in the same channel. If the problem is in the same channel, the source of the problem is most likely with your receiver or amplifier, and you should consult the owner’s manual for that product for further information. If the problem has followed the speaker, consult your dealer for further assistance or, if that is not possible, visit .If there is no sound from thecenter speaker:• Check all wires andconnections between receiver/amplifier and speaker. Makesure all wires are connected.Make sure none of the speakerwires are frayed, cut orpunctured, or touching eachother.• If your receiver/processor isset in Dolby Pro Logic mode,make sure the center speaker isnot in phantom mode.• If your receiver/processor isset in one of the Dolby Digital orDTS modes, make sure thereceiver/processor isconfigured so that the centerspeaker is enabled.If the system plays at lowvolumes but shuts off asvolume is increased:• Check all wires andconnections between receiver/processor and speakers. Makesure all wires are connected.Make sure none of the speakerwires are frayed, cut orpunctured, or touching eachother.• If more than one pair of mainspeakers is being used, checkthe minimum impedancerequirements of your receiver/amplifier.If there is low (or no) bassoutput:• Make sure the connections tothe left and right “SpeakerInputs” have the correctpolarity (+ and –).• Make sure the subwoofer isplugged into an active electricaloutlet and is turned on (Powerswitch a pushed in).• In Dolby Digital or DTS modes,make sure your receiver/processor is configured so thatthe subwoofer and LFE outputare enabled.• Switch the Phase switch c tothe opposite position, and selectthe position that results in themost pleasing bass response.If there is no sound fromthe surround speakers:• Check all wires andconnections between receiver/processor and speakers. Makesure all wires are connected.Make sure none of the speakerwires are frayed, cut orpunctured, or touching eachother.• Review proper operation ofyour receiver/amplifier and itssurround sound features.• Make sure the movie orTV show you are watchingis recorded in a surround soundmode. If it is not, check to seewhether your receiver/processor has other surroundmodes you may use.• In Dolby Digital or DTS modes,make sure your receiver/processor is configured so thatthe surround speakers areenabled. When five satellitesare in use, remember toconfigure your receiver orprocessor for 6.1-channeloperation, and when sixsatellites are in use, configureyour receiver or processor for7.1 channels.• Review the operation of yourDVD player and the jacket ofyour DVD to make sure that theDVD features the desired DolbyDigital or DTS mode, and thatyou have properly selected thatmode using both the DVDplayer’s menu and the DVDdisc‘s menu.TROUBLESHOOTING9SYSTEMFrequency Response 27Hz – 30kHz (–6dB)CST55Maximum Recommended Amplifier Power150 Watts*Power Handling50W Continuous/300W Peak Frequency Response55Hz – 30kHz (–6dB) Nominal Impedance8 OhmsSensitivity90dB @ 1 Watt/1 meterTweeter One 3/4" (19mm) titanium-laminate dome, video-shieldedWoofers Dual 130mm (5")transducers with PolyPlas™ cones, neodymium magnets and HeatScape™ motor structure, video-shielded Dimensions (H x W x D)(including wall-mount bracket and grille)1168 x 286 x 286mm (46" x 11-1/4" x 11-1/4") Weight7.7kg (17 lb)CSB5Maximum Recommended Amplifier Power125 Watts*Power Handling40W continuous/300W peak Frequency Response60Hz – 30kHz (–6dB) Nominal Impedance8 OhmsSensitivity88dB @ 1 watt/1 meterTweeter 3/4" (19mm) Titanium-laminate dome, video-shieldedWoofer5" (130mm)Transducer with PolyPlas™cone, neodymium magnet and HeatScape™ motor structure, video-shieldedDimensions (H x W x D) (including base and grille) 363 x 155 x 116mm (14-5/16" x 6-1/8" x 4-9/16") Weight2.3kg (5 lb)Dimensions (H x W x D)(without base and with wall-mount bracket and grille)338 x 155 x 130mm (13-5/16" x 6-1/8" x 5-1/8") Weight2kg (4.5 lb) CSC55Maximum Recommended Amplifier Power150 Watts*Power Handling50W Continuous/300W Peak Frequency Response55Hz – 30kHz (–6dB) Nominal Impedance8 OhmsSensitivity90dB @ 1 watt/1 meterTweeter One 19mm (3/4")titanium-laminate dome, video-shieldedWoofers Dual 130mm (5")transducers with PolyPlas™ cones, neodymium magnets and HeatScape™ motor structure, video-shielded Dimensions (H x W x D)(including wall-mount bracket and grille)159 x 667 x 108mm (6-1/4" x 26-1/4" x 4-1/4") Weight4.5kg (10 lb)CSS10Amplifier Power150 Watts RMSFrequency Response27Hz – Low-pass crossover setting at signal sourceLow-Frequency Driver250mm (10")cone and HeatScape™motor structure, video-shieldedInput LFE preamp levelDimensions (H x W x D)(including feet)464 x 337 x 406mm (18-1/4" x 13-1/4" x 16") Weight19.5kg (43 lb)SPECIFICATIONSAll features and specifications are subject to changewithout notice.Dolby and Pro Logic are registered trademarks of DolbyLaboratories.DTS is a registered trademark of DTS, Inc.*The maximum recommended amplifier power ratingwill ensure proper system headroom to allow foroccasional peaks.We do not recommend sustained operation at thesemaximum power levels.CSB5, CSC55 and CST55CSS10 (230V only)。
JBL PRX800 Series 音响系统技术规格说明书
I SERIESPoint Source 600IP6-1152/64MEDIUM POWER 15-INCH TWO-WAY 60° x 40° INSTALLATION LOUDSPEAKERCommunity strives to improve its products on a continual basis. Specifications are therefore subject to change without notice.*Rated continuous maximum input voltage at passive loudspeaker input may be higher than for directly connected transducers due to losses in the passive crossover. Voltages applied to the transducer terminals through the passive crossover shall always be the same or lower than the rated continuous voltagefor each device.FEATURES• Long excursion ferrite LF driver with FEA-optimized motor and symmetric movement suspension • 3-inch voice coil, 1.4” exit HF driver; hybrid titanium/polyimide diaphragm on low compression phase plug • Lightweight and compact with deep LF extension• Large rotatable waveguide with individually voiced crossover, single amp / biamp selectable • Innovative low profile modular bracket systems create elegant arrays with simplified installationAPPLICATIONSMAIN PA (Small to Medium Size Venues)Houses of Worship · Auditoriums · Restaurants Meeting Rooms · Theaters · Corporate A/V Systems DISTRIBUTED OR FILL (Larger Size Venues)Arenas · Stadiums · Night Clubs · TheatersThemed Entertainment · Larger Houses of WorshipDESCRIPTIONI SERIES Point Source 600 loudspeakers provide excellent acoustic performance, modular flexibility and elegant aesthetics for modern performance venues. Designed to support the goals of systems integrators and consultants both acoustically and mechanically, I SERIES includes a wide variety of arrayable, rotatable coverage patterns and a comprehensive selection of modular bracket systems that accelerate system design and system commissioning.FEA-optimized ferrite motors, mechanically mirrored suspension and advanced cooling system combine to provide linear performance with minimal power compression. The custom long-excursion LF driver delivers deep bass response and a detailed midrange at maximum SPL levels. The HF driver delivers excellent sound quality from a hybrid diaphragm of deep drawn titanium and resonance-absorbing polyimide, coupled to a patented low compression, low resonance phase plug for very low distortion performance with abundant headroom.The rotatable 13-inch (330mm) HF waveguide provides well-defined coverage and a smooth off-axis response that enhances arrayability. Individually voiced crossovers produce proper beamwidth matching transitions and identical sonic signatures, permitting horn patterns to be mixed throughout an installation. Additionally, user selectable single-amp or biamp operating modes expand application flexibility.I SERIESPoint Source 600IP6-1152/64MEDIUM POWER 15-INCH TWO-WAY60° x 40° INSTALLATION LOUDSPEAKERI SERIES Point Source 600IP6-1152/64MEDIUM POWER 15-INCH TWO-WAY 60° x 40° INSTALLATION LOUDSPEAKERHORIZONTAL POLAR DATA (30dB Scale, 6dB per major division)VERTICAL POLAR DATA (30dB Scale, 6dB per major division)-6— 100 Hz — 125 Hz — 160 Hz — 200 Hz-90° right 45°135°90° left-45°-135°0°front180°back — 250 Hz — 315 Hz — 400 Hz — 500 Hz— 630 Hz — 800 Hz — 1000 Hz — 1250 Hz-90° right 45°135°90° left-45°-135°0°front 180°back-90° right 45°135°90° left-45°-135°0°front180°back — 10000 Hz — 12500 Hz — 16000 Hz-90° right45°135°90° left-45°-135°0°front180°back — 4000 Hz — 5000 Hz — 6300 Hz — 8000 Hz-90° right45°135°90° left-45°-135°0°front 180°back — 1600 Hz — 2000 Hz — 2500 Hz — 3150 Hz-90° right45°135°90° left-45°-135°0°front 180°back -6— 100 Hz — 125 Hz — 160 Hz — 200 Hz-90° down 45°135°90° up-45°-135°0°front180°back — 250 Hz — 315 Hz — 400 Hz — 500 Hz— 630 Hz — 800 Hz — 1000 Hz — 1250 Hz-90° down 45°135°90° up-45°-135°0°front 180°back-90° down 45°135°90° up-45°-135°0°front180°back — 10000 Hz — 12500 Hz — 16000 Hz-90° down45°135°90° up-45°-135°0°front180°back — 4000 Hz — 5000 Hz — 6300 Hz — 8000 Hz-90° down45°135°90° up-45°-135°0°front 180°back — 1600 Hz — 2000 Hz — 2500 Hz — 3150 Hz-90° down45°135°90° up-45°-135°0°front 180°backI SERIES Point Source 600IP6-1152/64MEDIUM POWER 15-INCH TWO-WAY60° x 40° INSTALLATION LOUDSPEAKERCommunity Professional Loudspeakers333 East Fifth Street, Chester, PA 19013-4511 USA Phone (610) 876-3400 • Fax (610) •*********************CAUTION: Installation of loudspeaker s should only be performed by trained and qualified personnel. It is strongly r ecommended that a licensed and cer tified pr ofessional structural engineer approve the mounting design.IP6-1152/64 [07JUN2016]I SERIESPoint Source 600IP6-1152/64MEDIUM POWER 15-INCH TWO-WAY 60° x 40° INSTALLATION LOUDSPEAKERNOTESTwo-way single ampTwo-way biampTwo-way input panel1. PERFORMANCE SPECIFICATIONS All measurements are taken indoor using a time-windowed and processed signal to eliminate room effects, approximating ananechoic environment, a distance of 6.0 m. All acoustic specifications are rounded to the nearest whole number. An external DSP with settings provided by Community Professional Loudspeakers is required to achieve the specified performance; further performance gains can be realized using Community’s dSPEC226 loudspeaker processor with FIR power response optimization.2. OPERATING RANGE The frequency range in which the on-axis processed response remains within 10dB of the average SPL.3. CONTINUOUS POWER HANDLING Maximum continuous input voltage (and the equivalent power rating, in watts, at the stated nominal impedance) that the system can withstand, without damage, for a period of 2 hours using an EIA-426-B defined spectrum; with recommended signal processing and protection filters. 4. NOMINAL SENSITIVITY Averaged SPL over the operating range with an input voltage that would produce 1 Watt at the nominal impedance and the averaged SPL over the operating range with a fixed input voltage of 2.83V, respectively; swept sine wave axial measurements with no external processing applied in whole space, except where indicated.5. NOMINAL MAXIMUM SPL Calculated based on nominal / peak power handling, respectively, and nominal sensitivity; exclusive of power compression.6. EQUALIZED SENSITIVITY The respective SPL levels produced when an EIA-426-B signal is applied to the equalized loudspeaker system at a level which produces a total power of 1 Watt , in sum, to the loudspeaker subsections and also at a level which produces a total voltage, in sum, of 2.83V to the loudspeaker subsections, respectively; each referenced to a distance of 1 meter.7. EQUALIZED MAXIMUM SPL The SPL produced when an EIA-426-B signal is applied to the equalized loudspeaker system, at a level which drives at least one subsection to its rated continuous input voltage limit, referenced to a distance of 1 meter. The peak SPL represents the 2:1 (6dB) crest factor of the EIA-426-B test signal.8. AXIAL PROCESSED RESPONSE The on-axis variation in acoustic output level with frequency of the complete loudspeaker system with recommended signal processing applied. 1/6 octave Gaussian smoothing applied.9. AXIAL SENSITIVITY The on-axis variation in acoustic output level with frequency for a 1 Watt swept sine wave, referenced to 1 meter with no signal processing. 1/6 octave Gaussian smoothing applied.10. HORIZONTAL / VERTICAL OFF-AXIS RESPONSES The loudspeaker’s magnitude response at various angles off-axis, with recommended signal processing applied in the operating mode which utilizes the largest number of individually amplified pass bands. 1/6 octave Gaussian smoothing applied.11. DIRECTIVITY INDEX The ratio of the on-axis SPLsquared to the mean squared SPL at the same distance for all points within the measurement sphere for each given frequency; expressed in dB. 1/6 octave Gaussian smoothing applied.12. BEAMWIDTH The angle between the -6dB points in the polar response of the loudspeaker when driven in the operating mode which utilizes the largest number of individually amplified pass bands. 1/6 octave Gaussian smoothing applied.Data presented on this spec sheet represents a selection of the basic performance specifications for the model. These specifications are intended to allow the user to perform a fair, straightforward evaluation and comparison with other loudspeaker spec sheets. For a detailed analysis of this loudspeaker’s performance, please download the GLL file and/or the CLF file from our website: .。