
使用ssh-keygen设置ssh无密码登录
使用ssh-keygen设置ssh无密码登录
使用ssh-keygen设置ssh无密码登录
也知道这个东西,大家都会,就当是谁忘了的时候,做个提醒的吧。
ssh 是一个专为远程登录会话和其他网络服务提供安全性的协议。
默认状态下ssh链接是需要密码认证的,可以通过添加系统认证(即公钥-私钥)的修改,修改后系统间切换可以避免密码输入和ssh认证。
以下将创建过程简单介绍下。
一、用ssh-keygen创建公钥
haifeng@haifeng-EX38-DS4:/$ ssh-keygen -t rsa
Generating public/private rsa key pair.
Enter file in which to save the key (/home/haifeng/.ssh/id_rsa):
Enter passphrase (empty for no passphrase):
Enter same passphrase again:
Your identification has been saved in /home/haifeng/.ssh/id_rsa.
Your public key has been saved in /home/haifeng/.ssh/id_rsa.pub.
The key fingerprint is:
7b:75:98:eb:fd:13:ce:0f:c4:cf:2c:65:cc:73:70:53 haifeng@haifeng-EX38-DS4
The key's randomart image is:
+--[ RSA 2048]----+
| E|
| .|
| ...|
| + =.|
| S + +.*|
| . . + Bo|
| . . . = =|
| . . . * |
| . ..=|
+-----------------+
##输入后,会提示创建.ssh/id_rsa、id_rsa.pub的文件,其中第一个为密钥,第二个为公钥。
过程中会要求输入密码,为了ssh访问过程无须密码,可以直接回车 。
2.查看钥匙。
[root@localhost .ssh]# ls ~/.ssh/
id_rsa id_rsa.pub known_hosts
###可以发现 ssh目录下的两枚钥匙。
3.将公钥复制到被管理机器上面
[root@localhost .ssh]# scp id_rsa.pub root@192.168.36.194:~/.ssh/authorized_keys
root@192.168.36.194's password:
id_rsa.pub 100% 408 0.4KB/s 00:00
4.访问
# ssh 192.168.36.194
The authenticity of host '<Game2> (<192.168.36.194>)' can't be established.
RSA key fingerprint is 34:b9:92:06:53:e6:91:4d:47:92:73:57:78:6a:5d:09.
Are you sure you want to continue connecting (yes/no)?yes
Warning: Permanently added '<Game2> (<192.168.36.194>' (RSA) to the list of known hosts.
这是因为首次访问后,ssh会在.ssh/known_hosts中保存各个认证过的主机信息:
192.168.36.194 ssh-rsa
AAAAB3NzaC1yc2EAAAABIwAAAQEAppStzIRxeFn0e737z7KO1tdm6CJUoLapaaoBDZqHy0Z11cUAmpg02dbrqwU7TBY9lDFwWQcry+W8X8qk1CoPdzu8YcMC pw5425mai0/RxkB/RPZ1putL2DQrRBMRTU1m5meLOYRXYlnU5E+YElCgH+ZJ8EXiurOzDvw6vi7pASi9wMQuJosFyNmv5E9/8ULgaKg3LtvP+0O1wPxrHOBD wVq2u9Oi7T2pX8deBEnOI4uG4CGXn/p0ml+uuS4DO3Up2VjqoRtqtuzWExnTyAGS/wQNnN3mera1ERya3FomEVHJRV5K2zJRkgSF8WfETXzQ2rAliOsW/YLT GF8vVvjo5w==
5.再次访问,ssh登录发现可以不用密码登录。
[root@localhost .ssh]# ssh 192.168.36.194
Last login: Fri Apr 22 00:56:45 2011 from 192.168.18.44
[root@Game2 ~]#。
HadoopSSH免密码登录以及失败解决方案
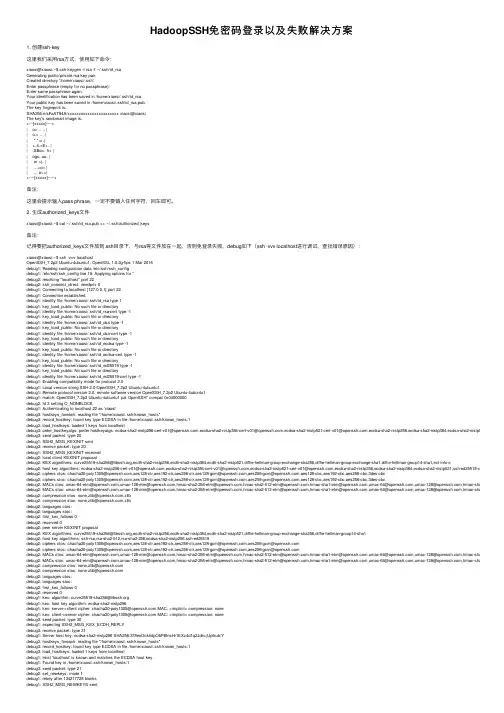
HadoopSSH免密码登录以及失败解决⽅案1. 创建ssh-key这⾥我们采⽤rsa⽅式,使⽤如下命令:xiaosi@xiaosi:~$ ssh-keygen -t rsa -f ~/.ssh/id_rsaGenerating public/private rsa key pair.Created directory '/home/xiaosi/.ssh'.Enter passphrase (empty for no passphrase):Enter same passphrase again:Your identification has been saved in /home/xiaosi/.ssh/id_rsa.Your public key has been saved in /home/xiaosi/.ssh/id_rsa.pub.The key fingerprint is:SHA256:n/sFaAT94A/xxxxxxxxxxxxxxxxxxxxxxx xiaosi@xiaosiThe key's randomart image is:+---[xxxxx]----+| o= .. .. || o.= .. .|| *.* o .|| +.4.=E+..|| .SBo=. h+ || ogo..oo. || or +j..|| ...+o=.|| ... o=+|+----[xxxxx]-----+备注:这⾥会提⽰输⼊pass phrase,⼀定不要输⼊任何字符,回车即可。
2. ⽣成authorized_keys⽂件xiaosi@xiaosi:~$ cat ~/.ssh/id_rsa.pub >> ~/.ssh/authorized_keys备注:记得要把authorized_keys⽂件放到.ssh⽬录下,与rsa等⽂件放在⼀起,否则免登录失败,debug如下(ssh -vvv localhost进⾏调试,查找错误原因):xiaosi@xiaosi:~$ ssh -vvv localhostOpenSSH_7.2p2 Ubuntu-4ubuntu1, OpenSSL 1.0.2g-fips 1 Mar 2016debug1: Reading configuration data /etc/ssh/ssh_configdebug1: /etc/ssh/ssh_config line 19: Applying options for *debug2: resolving "localhost" port 22debug2: ssh_connect_direct: needpriv 0debug1: Connecting to localhost [127.0.0.1] port 22.debug1: Connection established.debug1: identity file /home/xiaosi/.ssh/id_rsa type 1debug1: key_load_public: No such file or directorydebug1: identity file /home/xiaosi/.ssh/id_rsa-cert type -1debug1: key_load_public: No such file or directorydebug1: identity file /home/xiaosi/.ssh/id_dsa type -1debug1: key_load_public: No such file or directorydebug1: identity file /home/xiaosi/.ssh/id_dsa-cert type -1debug1: key_load_public: No such file or directorydebug1: identity file /home/xiaosi/.ssh/id_ecdsa type -1debug1: key_load_public: No such file or directorydebug1: identity file /home/xiaosi/.ssh/id_ecdsa-cert type -1debug1: key_load_public: No such file or directorydebug1: identity file /home/xiaosi/.ssh/id_ed25519 type -1debug1: key_load_public: No such file or directorydebug1: identity file /home/xiaosi/.ssh/id_ed25519-cert type -1debug1: Enabling compatibility mode for protocol 2.0debug1: Local version string SSH-2.0-OpenSSH_7.2p2 Ubuntu-4ubuntu1debug1: Remote protocol version 2.0, remote software version OpenSSH_7.2p2 Ubuntu-4ubuntu1debug1: match: OpenSSH_7.2p2 Ubuntu-4ubuntu1 pat OpenSSH* compat 0x04000000debug2: fd 3 setting O_NONBLOCKdebug1: Authenticating to localhost:22 as 'xiaosi'debug3: hostkeys_foreach: reading file "/home/xiaosi/.ssh/known_hosts"debug3: record_hostkey: found key type ECDSA in file /home/xiaosi/.ssh/known_hosts:1debug3: load_hostkeys: loaded 1 keys from localhostdebug3: order_hostkeyalgs: prefer hostkeyalgs: ecdsa-sha2-nistp256-cert-v01@,ecdsa-sha2-nistp384-cert-v01@,ecdsa-sha2-nistp521-cert-v01@,ecdsa-sha2-nistp256,ecdsa-sha2-nistp384,ecdsa-sha2-nistp521debug3: send packet: type 20debug1: SSH2_MSG_KEXINIT sentdebug3: receive packet: type 20debug1: SSH2_MSG_KEXINIT receiveddebug2: local client KEXINIT proposaldebug2: KEX algorithms: curve25519-sha256@,ecdh-sha2-nistp256,ecdh-sha2-nistp384,ecdh-sha2-nistp521,diffie-hellman-group-exchange-sha256,diffie-hellman-group-exchange-sha1,diffie-hellman-group14-sha1,ext-info-cdebug2: host key algorithms: ecdsa-sha2-nistp256-cert-v01@,ecdsa-sha2-nistp384-cert-v01@,ecdsa-sha2-nistp521-cert-v01@,ecdsa-sha2-nistp256,ecdsa-sha2-nistp384,ecdsa-sha2-nistp521,ssh-ed25519-cert-v01@open debug2: ciphers ctos: chacha20-poly1305@,aes128-ctr,aes192-ctr,aes256-ctr,aes128-gcm@,aes256-gcm@,aes128-cbc,aes192-cbc,aes256-cbc,3des-cbcdebug2: ciphers stoc: chacha20-poly1305@,aes128-ctr,aes192-ctr,aes256-ctr,aes128-gcm@,aes256-gcm@,aes128-cbc,aes192-cbc,aes256-cbc,3des-cbcdebug2: MACs ctos: umac-64-etm@,umac-128-etm@,hmac-sha2-256-etm@,hmac-sha2-512-etm@,hmac-sha1-etm@,umac-64@,umac-128@,hmac-sha2-256,hmac-debug2: MACs stoc: umac-64-etm@,umac-128-etm@,hmac-sha2-256-etm@,hmac-sha2-512-etm@,hmac-sha1-etm@,umac-64@,umac-128@,hmac-sha2-256,hmac-debug2: compression ctos: none,zlib@,zlibdebug2: compression stoc: none,zlib@,zlibdebug2: languages ctos:debug2: languages stoc:debug2: first_kex_follows 0debug2: reserved 0debug2: peer server KEXINIT proposaldebug2: KEX algorithms: curve25519-sha256@,ecdh-sha2-nistp256,ecdh-sha2-nistp384,ecdh-sha2-nistp521,diffie-hellman-group-exchange-sha256,diffie-hellman-group14-sha1debug2: host key algorithms: ssh-rsa,rsa-sha2-512,rsa-sha2-256,ecdsa-sha2-nistp256,ssh-ed25519debug2: ciphers ctos: chacha20-poly1305@,aes128-ctr,aes192-ctr,aes256-ctr,aes128-gcm@,aes256-gcm@debug2: ciphers stoc: chacha20-poly1305@,aes128-ctr,aes192-ctr,aes256-ctr,aes128-gcm@,aes256-gcm@debug2: MACs ctos: umac-64-etm@,umac-128-etm@,hmac-sha2-256-etm@,hmac-sha2-512-etm@,hmac-sha1-etm@,umac-64@,umac-128@,hmac-sha2-256,hmac-debug2: MACs stoc: umac-64-etm@,umac-128-etm@,hmac-sha2-256-etm@,hmac-sha2-512-etm@,hmac-sha1-etm@,umac-64@,umac-128@,hmac-sha2-256,hmac-debug2: compression ctos: none,zlib@debug2: compression stoc: none,zlib@debug2: languages ctos:debug2: languages stoc:debug2: first_kex_follows 0debug2: reserved 0debug1: kex: algorithm: curve25519-sha256@debug1: kex: host key algorithm: ecdsa-sha2-nistp256debug1: kex: server->client cipher: chacha20-poly1305@ MAC: <implicit> compression: nonedebug1: kex: client->server cipher: chacha20-poly1305@ MAC: <implicit> compression: nonedebug3: send packet: type 30debug1: expecting SSH2_MSG_KEX_ECDH_REPLYdebug3: receive packet: type 31debug1: Server host key: ecdsa-sha2-nistp256 SHA256:378enl3ckhdpObP8fnsHr1EXz4d1q2Jde+jUplkub/Ydebug3: hostkeys_foreach: reading file "/home/xiaosi/.ssh/known_hosts"debug3: record_hostkey: found key type ECDSA in file /home/xiaosi/.ssh/known_hosts:1debug3: load_hostkeys: loaded 1 keys from localhostdebug1: Host 'localhost' is known and matches the ECDSA host key.debug1: Found key in /home/xiaosi/.ssh/known_hosts:1debug3: send packet: type 21debug2: set_newkeys: mode 1debug1: rekey after 134217728 blocksdebug1: SSH2_MSG_NEWKEYS sentdebug1: expecting SSH2_MSG_NEWKEYSdebug3: receive packet: type 21debug2: set_newkeys: mode 0debug1: rekey after 134217728 blocksdebug1: SSH2_MSG_NEWKEYS receiveddebug2: key: /home/xiaosi/.ssh/id_rsa (0x5602df5e80c0)debug2: key: /home/xiaosi/.ssh/id_dsa ((nil))debug2: key: /home/xiaosi/.ssh/id_ecdsa ((nil))debug2: key: /home/xiaosi/.ssh/id_ed25519 ((nil))debug3: send packet: type 5debug3: receive packet: type 7debug1: SSH2_MSG_EXT_INFO receiveddebug1: kex_input_ext_info: server-sig-algs=<rsa-sha2-256,rsa-sha2-512>debug3: receive packet: type 6debug2: service_accept: ssh-userauthdebug1: SSH2_MSG_SERVICE_ACCEPT receiveddebug3: send packet: type 50debug3: receive packet: type 51debug1: Authentications that can continue: publickey,passworddebug3: start over, passed a different list publickey,passworddebug3: preferred gssapi-keyex,gssapi-with-mic,publickey,keyboard-interactive,passworddebug3: authmethod_lookup publickeydebug3: remaining preferred: keyboard-interactive,passworddebug3: authmethod_is_enabled publickeydebug1: Next authentication method: publickeydebug1: Offering RSA public key: /home/xiaosi/.ssh/id_rsadebug3: send_pubkey_testdebug3: send packet: type 50debug2: we sent a publickey packet, wait for replydebug3: receive packet: type 51debug1: Authentications that can continue: publickey,passworddebug1: Trying private key: /home/xiaosi/.ssh/id_dsadebug3: no such identity: /home/xiaosi/.ssh/id_dsa: No such file or directorydebug1: Trying private key: /home/xiaosi/.ssh/id_ecdsadebug3: no such identity: /home/xiaosi/.ssh/id_ecdsa: No such file or directorydebug1: Trying private key: /home/xiaosi/.ssh/id_ed25519debug3: no such identity: /home/xiaosi/.ssh/id_ed25519: No such file or directorydebug2: we did not send a packet, disable methoddebug3: authmethod_lookup passworddebug3: remaining preferred: ,passworddebug3: authmethod_is_enabled passworddebug1: Next authentication method: passwordxiaosi@localhost's password:3. 验证xiaosi@xiaosi:~$ ssh localhostThe authenticity of host 'localhost (127.0.0.1)' can't be established.ECDSA key fingerprint is SHA256:378enl3ckhdpObP8fnsHr1EXz4d1q2Jde+jUplkub/Y.Are you sure you want to continue connecting (yes/no)? yesWarning: Permanently added 'localhost' (ECDSA) to the list of known hosts.sign_and_send_pubkey: signing failed: agent refused operationxiaosi@localhost's password:4. authorized_keys权限我们可以看到还是让我输⼊密码,很⼤可能是authorized_keys⽂件权限的问题,我们给该⽂件赋予⼀定权限:xiaosi@xiaosi:~$ chmod 600 ~/.ssh/authorized_keys再次验证:xiaosi@xiaosi:~$ ssh localhostWelcome to Ubuntu 16.04 LTS (GNU/Linux 4.4.0-24-generic x86_64)* Documentation: https:///0 个可升级软件包。
Linux配置SSH免密登录“ssh-keygen”的基本用法

Linux配置SSH免密登录“ssh-keygen”的基本⽤法⽬录1 什么是SSH2 配置SSH免密登录2.1 安装必需的软件2.2 ssh-keygen创建公钥-私钥对2.3 ssh-copy-id把A的公钥发送给B2.4 在A服务器上免密登录B服务器3 扩展说明3.2 ⽂件权限3.3 ⽂件的编辑和查看1 什么是SSH引⽤百度百科的说明:SSH 为 Secure Shell的缩写,由 IETF 的⽹络⼩组(Network Working Group)所制定;它是建⽴在应⽤层基础上的安全协议。
SSH 是⽬前较可靠,专为远程登录会话和其他⽹络服务提供安全性的协议。
利⽤ SSH 协议可以有效防⽌远程管理过程中的信息泄露问题。
SSH最初是UNIX系统上的⼀个程序,后来⼜迅速扩展到其他操作平台。
为了在不同平台/⽹络主机之间的通信安全, 很多时候我们都要通过ssh进⾏认证. ssh认证⽅式主要有2种:①基于⼝令的安全认证: 每次登录的时候都要输⼊⽤户名和密码, 由于要在⽹络上传输密码, 可能存在中间⼈攻击的风险;②基于密钥的安全认证: 配置完成后就可以实现免密登录, 这种⽅式更加安全 —— 不需要在⽹络上传递⼝令, 只需要传输⼀次公钥. 常见的git的ssh⽅式就是通过公钥进⾏认证的.2 配置SSH免密登录说明: 这⾥演⽰所⽤的服务器操作系统是Cent OS 7. 我们的⽬标是:A服务器(172.16.22.131) 能免密登录 B服务器 (172.16.22.132).注意: ssh连接是单向的, A能免密登录B, 并不能同时实现B能免密登录A.2.1 安装必需的软件在操作之前, 先确保所需要的软件已经正常安装.这⾥我们需要安装ssh-keygen和ssh-copy-id, 安装⽅式如下:# 安装ssh-keygen, 需要确保服务器可以联⽹. 博主这⾥已经安装完成, 所以没有做任何事.[root@localhost ~]# yum install -y ssh-keygenLoaded plugins: fastestmirror, langpacksbase | 3.6 kB 00:00:00epel | 3.6 kB 00:00:00extras | 2.9 kB 00:00:00updates | 2.9 kB 00:00:00Loading mirror speeds from cached hostfileNo package ssh-keygen available.Error: Nothing to do# 安装ssh-copy-id[root@localhost ~]# yum install -y ssh-copy-idLoaded plugins: fastestmirror, langpacksLoading mirror speeds from cached hostfileNo package ssh-copy-id available.Error: Nothing to do2.2 ssh-keygen创建公钥-私钥对(1) 在指定⽬录下⽣成rsa密钥, 并指定注释为“shoufeng”, 实现⽰例:[root@localhost ~]# ssh-keygen -t rsa -f ~/.ssh/id_rsa -C "shoufeng"# ~密钥类型 ~密钥⽂件路径及名称 ~ 备注信息Generating public/private rsa key pair.Enter passphrase (empty for no passphrase): # 输⼊密码, 若不输⼊则直接回车Enter same passphrase again: # 再次确认密码, 若不输⼊则直接回车Your identification has been saved in /root/.ssh/id_rsa.Your public key has been saved in /root/.ssh/id_rsa.pub.The key fingerprint is:9a:e3:94:b9:69:c8:e9:68:4b:dc:fa:43:25:7f:53:f1 shoufengThe key's randomart image is:+--[ RSA 2048]----+| || . || o || . . . E || + S. || . .. .=o || oo.oB. . || ..o=o.+ || .++oo+ |+-----------------+注意: 密钥的⽂件名称必须是id_xxx, 这⾥的xxx就是-t参数指定的密钥类型. ⽐如密钥类型是rsa, 那么密钥⽂件名就必须是id_rsa.(2) ssh-keygen常⽤参数说明:-t: 密钥类型, 可以选择 dsa | ecdsa | ed25519 | rsa;-f: 密钥⽬录位置, 默认为当前⽤户home路径下的.ssh隐藏⽬录, 也就是~/.ssh/, 同时默认密钥⽂件名以id_rsa开头. 如果是root⽤户, 则在/root/.ssh/id_rsa, 若为其他⽤户, 则在/home/username/.ssh/id_rsa; -C: 指定此密钥的备注信息, 需要配置多个免密登录时, 建议携带;-N: 指定此密钥对的密码, 如果指定此参数, 则命令执⾏过程中就不会出现交互确认密码的信息了.举例说明: 同时指定⽬录位置、密码、注释信息, 就不需要输⼊回车键即可完成创建:ssh-keygen -t rsa -f ~/.ssh/id_rsa -N shoufeng -C shoufeng(3) 前往~/.ssh/⽬录下查看⽣成的⽂件:# ⽣成的⽂件以test_rsa开头, test_rsa是私钥, test_rsa.pub是公钥:[root@localhost .ssh]# lstest_rsa test_rsa.pub# 通过cat命令查看公钥⽂件:[root@localhost .ssh]# cat id_rsa.pubssh-rsa AAAAB3NzaC1yc2EAAAADAQABAAABAQC2JpLMqgeg9jB9ZztOCw0WMS8hdVpFxthqG1vOQTOji/cp0+8RUZl3P6NtzqfHbs0iTcY0ypIJGgx4eXyipfLvilV2bSxRINCVV73VnydVYl5gLHsrgOx+372Wovlanq7Mxq06qAONjuRD0c64xqdJFKb1Ov# 可以看到最后有⼀个注释内容shoufeng2.3 ssh-copy-id把A的公钥发送给B默认⽤法是: ssh-copy-id root@172.16.22.132, ssh-copy-id命令连接远程服务器时的默认端⼝是22, 当然可以指定⽂件、远程主机的IP、⽤户和端⼝:# 指定要拷贝的本地⽂件、远程主机的IP+⽤户名+端⼝号:[root@localhost .ssh]# ssh-copy-id -i ~/.ssh/id_rsa.pub -p 22 root@172.16.22.132/usr/bin/ssh-copy-id: INFO: attempting to log in with the new key(s), to filter out any that are already installed/usr/bin/ssh-copy-id: INFO: 1 key(s) remain to be installed -- if you are prompted now it is to install the new keysroot@172.16.22.132's password: # 输⼊密码后, 将拷贝公钥Number of key(s) added: 1Now try logging into the machine, with: "ssh -p '22' 'root@172.16.22.132'"and check to make sure that only the key(s) you wanted were added.2.4 在A服务器上免密登录B服务器[root@localhost .ssh]# ssh root@172.16.22.132Last login: Fri Jun 14 08:46:04 2019 from 192.168.34.16 # 登录成功3 扩展说明3.1 其他⽅式发送公钥⽂件上述2.3步骤是通过ssh-copy-id⼯具发送公钥⽂件的, 当然我们也可以通过其他⽅式实现:(1) 将A的公钥⽂件发给B:通过scp命令将A服务器的公钥⽂件发送到B服务器的⽤户⽬录下, 因为还没有配置成功免密登录, 所以期间需要输⼊B服务器对应⽤户的密码:[root@localhost .ssh]# scp id_rsa.pub root@172.16.22.132:/root/.sshroot@172.16.22.132's password:id_rsa.pub 100% 390 0.4KB/s 00:00(2) 在B上创建authorized_keys⽂件:[root@localhost .ssh]# cd /root/.ssh/[root@localhost .ssh]# lsid_rsa.pub# 通过A服务器的公钥⽣成"authorized_keys"⽂件:[root@localhost .ssh]# cat id_rsa.pub >> authorized_keys[root@localhost .ssh]# cat authorized_keysssh-rsa AAAAB3NzaC1yc2EAAAADAQABAAABAQC2JpLMqgeg9jB9ZztOCw0WMS8hdVpFxthqG1vOQTOji/cp0+8RUZl3P6NtzqfHbs0iTcY0ypIJGgx4eXyipfLvilV2bSxRINCVV73VnydVYl5gLHsrgOx+372Wovlanq7Mxq06qAONjuRD0c64xqdJFKb1OvS/nyKaOr9注意: 上述重定向时使⽤>>进⾏追加, 不要⽤>, 那会清空原有内容.3.2 ⽂件权限为了让私钥⽂件和公钥⽂件能够在认证中起作⽤, 需要确保权限的正确性:①对于.ssh⽬录以及其内部的公钥、私钥⽂件, 当前⽤户⾄少要有执⾏权限, 其他⽤户最多只能有执⾏权限.②不要图省事设置成777权限: 太⼤的权限不安全, ⽽且数字签名也不⽀持这种权限策略.③对普通⽤户, 建议设置成600权限: chmod 600 authorized_keys id_rsa id_rsa.pub;④对root⽤户, 建议设置成644权限: chmod 644 authorized_keys id_rsa id_rsa.pub.3.3 ⽂件的编辑和查看在Liunx环境下, 如果要查看、复制私钥、公钥, 以及authorized_keys等⽂件, 不要使⽤vim等编辑器打开, 因为它会产⽣不必要的回车;应该通过cat、more、less等查看命令把内容打印到终端上, 再作查看、复制等操作.总结以上所述是⼩编给⼤家介绍的Linux 配置SSH免密登录 “ssh-keygen”的基本⽤法 ,希望对⼤家有所帮助,如果⼤家有任何疑问请给我留⾔,⼩编会及时回复⼤家的。
在windows中安装OpenSSH,无密码登录,永远不断线

在windows中安装OpenSSH,⽆密码登录,永远不断线假定host1是本地主机,host2是远程主机。
由于种种原因,这两台主机之间⽆法连通。
但是,另外还有⼀台host3,可以同时连通前⾯两台主机。
因此,很⾃然的想法就是,通过host3,将host1连上host2。
我们在host1执⾏下⾯的命令:"本地端⼝:⽬标主机:⽬标主机端⼝"$ ssh -L 2121:host2:21 host3监听本地2121端⼝,当访问本地2121端⼝时,数据将通过host3 转发到host2 的21 端⼝。
$ ssh -N -L 0.0.0.0:80:localhost:80 pi@host3监听本地80端⼝,当访问本地80 端⼝时会转发到host3的80端⼝,这⾥的localhost是指的是host3的“本地”另⼀个例⼦是通过host3的端⼝转发,ssh登录host2。
$ ssh -L 9001:host2:22 host3这时,只要ssh登录本机的9001端⼝,就相当于登录host2了。
-p参数表⽰指定登录端。
$ ssh -p 9001 localhost还是接着看上⾯那个例⼦,host1与host2之间⽆法连通,必须借助host3转发。
但是,特殊情况出现了,host3是⼀台内⽹机器,它可以连接外⽹的host1,但是反过来就不⾏,外⽹的host1连不上内⽹的host3。
这时,"本地端⼝转发"就不能⽤了,怎么办?解决办法是,既然host3可以连host1,那么就从host3上建⽴与host1的SSH连接,然后在host1上使⽤这条连接就可以了。
我们在host3执⾏下⾯的命令:$ ssh -R 2121:host2:21 host1 R参数也是接受三个值,分别是"远程主机端⼝:⽬标主机:⽬标主机端⼝"。
这条命令的意思,就是让host1监听它⾃⼰的2121端⼝,然后将所有数据经由host3,转发到host2的21端⼝。
ssh免密原理

ssh免密原理SSH是一种非常流行的安全网络协议,它可以被用来远程控制应用程序和系统,而SSH免密登录则是利用公钥和私钥的加密机制来实现SSH的自动登录。
在本文中,我们将详细介绍SSH免密登录的实现原理。
1. 密码验证与公钥验证在SSH登录过程中,普通的登录方式是使用密码进行验证。
但是,SSH也支持使用公钥验证机制进行认证。
公钥验证机制基于对称加密算法和非对称加密算法,安全性较高,因此它被越来越多地使用。
2. 加密通信原理SSH在传输数据时使用加密通道,任何在传输过程中的第三方都无法通过普通的方式来读取数据。
SSH使用对称加密算法和非对称加密算法来保证数据的安全性。
对称加密算法使用相同的密钥进行加密和解密,而非对称加密算法则使用一对密钥来进行加密和解密。
公钥被传输到目标计算机,私钥保存在本地计算机中。
当客户端进行SSH连接请求时,服务端会把公钥传输到客户端中,然后客户端使用公钥进行加密通讯的过程。
3. 公钥和私钥生成方法SSH免密码登录需要使用公钥和私钥。
公钥可以随意传递,但是私钥一定要保持机密。
在Linux系统中,可以使用OpenSSH可以生成公钥和私钥。
使用以下命令即可生成:ssh-keygen -t rsa在生成的公钥和私钥文件中,私钥文件必须被设置为只读,其权限建议设置为600。
公钥可以复制到其他需要使用的计算机中。
4. 配置SSH免密登录使用公钥和私钥之后,需要将公钥文件复制到目标计算机的.ssh目录下的authorized_keys文件中,这样只有在持有此公钥的计算机才能进行SSH免密登录。
需要注意的是,当前用户在目标计算机上必须存在,并且在.ssh目录下必须存在authorized_keys文件。
如果不存在该文件,可以手动创建该文件。
5. 实现SSH免密登录通过以上的步骤,就可以实现SSH免密登录了。
当SSH客户端通过用户名和密码进行验证之后,服务器将对客户端提供的公钥进行验证,如果公钥与目标计算机上的authorized_keys文件中的公钥一致,则客户端将被授予服务。
ssh public key使用方法

ssh public key使用方法SSH Public Key 使用方法什么是 SSH Public Key?SSH(Secure Shell)公钥是一种密码学协议,用于在计算机之间进行加密通信和身份验证。
它由一对密钥组成,包括公钥和私钥。
公钥用于加密数据,私钥用于解密数据和进行身份验证。
为什么使用 SSH Public Key?SSH Public Key 提供了更加安全和便捷的远程访问方式。
它可以替代传统的密码方式,避免密码被盗取或破解的风险。
使用 SSHPublic Key 还可以实现无需密码即可登录远程服务器,提高工作效率。
生成 SSH Public Key以下是生成 SSH Public Key 的方法:1.打开终端或命令提示符;2.运行以下命令来生成 SSH 密钥对:ssh-keygen -t rsa -b 40963.程序会要求你输入保存密钥对的文件名和密码。
默认情况下,保存在~/.ssh目录下,文件名为id_rsa;4.密钥对生成后,可以使用以下命令来查看公钥内容:cat ~/.ssh/id_使用 SSH Public Key 连接到远程服务器使用 SSH Public Key 连接到远程服务器需要以下步骤:1.将公钥文件(默认为id_)中的内容复制到远程服务器的~/.ssh/authorized_keys文件中;2.在本地终端或命令提示符中运行以下命令连接到远程服务器:ssh -i ~/.ssh/id_rsa user@remote_server_ip注意将user替换为远程服务器的用户名,remote_server_ip 替换为远程服务器的 IP 地址或域名。
其他 SSH Public Key 相关操作以下是一些其他常见的 SSH Public Key 相关操作:•将公钥添加到多个远程服务器:可以将公钥文件复制到其他远程服务器的~/.ssh/authorized_keys文件中;•生成不同类型的密钥对:可以使用-t参数来指定密钥类型,如ssh-keygen -t ecdsa -b 521;•更改密钥对的密码:可以使用以下命令来更改密钥对的密码:ssh-keygen -p -f ~/.ssh/id_rsa总结通过使用 SSH Public Key,我们可以提高远程访问的安全性和便捷性。
linux 免密登录方法

linux 免密登录方法Linux是一种常用的操作系统,它具有高度的灵活性和安全性。
在Linux中,免密登录是一个非常常见的需求,它可以提高用户的使用效率并简化操作流程。
本文将介绍几种实现Linux免密登录的方法,帮助用户轻松实现免密登录。
一、使用公钥认证实现免密登录公钥认证是一种基于非对称加密的身份认证方式,它通过生成一对密钥,即公钥和私钥,来实现身份认证。
在Linux中,使用公钥认证可以实现免密登录。
具体步骤如下:1. 生成密钥对需要在客户端上生成密钥对。
可以使用以下命令生成密钥对:```$ ssh-keygen```按照提示输入密钥保存路径和密码,即可生成密钥对。
2. 复制公钥到服务器生成密钥对后,需要将公钥复制到服务器上。
可以使用以下命令将公钥复制到服务器上:```$ ssh-copy-id username@server_ip其中,username是服务器上的用户名,server_ip是服务器的IP 地址。
3. 免密登录完成以上步骤后,就可以实现免密登录了。
可以使用以下命令测试免密登录:```$ ssh username@server_ip```如果成功登录服务器而不需要输入密码,则表示免密登录已经成功实现。
二、使用密钥管理工具实现免密登录除了使用公钥认证,还可以使用一些密钥管理工具来实现免密登录。
这些工具可以帮助用户管理密钥,并自动完成密钥的复制和配置。
以下是几个常用的密钥管理工具:1. ssh-copy-idssh-copy-id是一个用于将公钥复制到服务器的工具。
可以使用以下命令将公钥复制到服务器上:```$ ssh-copy-id username@server_ip其中,username是服务器上的用户名,server_ip是服务器的IP 地址。
2. keychainkeychain是一个用于管理密钥的工具,它可以自动加载和管理密钥。
可以使用以下命令安装keychain:```$ sudo apt-get install keychain```安装完成后,可以使用以下命令将密钥添加到keychain中:```$ keychain ~/.ssh/id_rsa```然后,每次登录服务器时,keychain会自动加载密钥,实现免密登录。
hadoop配置ssh无密码登录
出于安全性考虑,将这个授权key文件赋予600权限:3.将这个包含了所有互信机器认证key的认证文件,分发到各个机器中去4.验证互信,各节点执行下面命令,能不输入密码显示时间,配置成功5.配置完互信,在各节点上配置(1)/etc/ssh/sshd_config:RSAAuthentication yesPubkeyAuthentication yes(2)/etc/hosts127.0.0.1 localhost localhost.localdomain localhost4 localhost4.localdomain4 ::1 localhost localhost.localdomain localhost6 localhost6.localdomain6 172.16.81.131 master172.16.81.132 slave1172.16.81.133 slave2(3)把master的known_hosts复制到slave:scp known_hosts hadoop@172.16.81.132:~/.ssh/scp known_hosts hadoop@172.16.81.133:~/.ssh/(4)权限设置:chmod go-w ~/chmod 755 ~/.sshchmod 600 ~/.ssh/authorized_keys各节点用root登录重启ssh:/etc/init.d/sshd restart完毕注意事项:上面做完,maste登录到slave1和slave2,还是要输入密码,最后,没办法,把master机上的id_rsa.pub的内容直接复制到slave1和slave2的authorized_keys的第一行,重启ssh,得到解决。
下面是另一种方法:Ø创建或者修改密钥目录权限假设本机的IP为“172.16.81.129”,配置免登录的操作步骤如下:1. 以hadoop用户登录各服务器。
ssh-copy-id的使用方法
ssh-copy-id的使⽤⽅法服务器时常需要配置⽆密码的登录⽅式,最⼀般的设置⽅式如下:# ssh-keygen# cat ~/.ssh/id_rsa.pub | ssh user@server "cat - >> ~/.ssh/authorized_keys"其实这⽅法已经很简单了,不过我总记不清如何正确拼写authorized_keys这个⽂件名。
还好Linux系统⾥缺省都包含⼀个名为ssh-copy-id的⼯具:# type ssh-copy-idssh-copy-id is /usr/bin/ssh-copy-id你⽤cat或者more命令看⼀下就知道ssh-copy-id本⾝其实就是⼀个shell脚本,⽤法很简单:# ssh-copy-id -i ~/.ssh/id_rsa.pub user@server再也不⽤记如何拼写authorized_keys这个⽂件名了,是不是很爽,可惜别⾼兴太早了,ssh-copy-id有⼀个很要命的问题,那就是缺省它仅仅⽀持SSH运⾏在22端⼝的情况,不过实际上出于安全的需要,我们往往都会更改服务器的SSH端⼝,⽐如说改成10022端⼝,这时候你运⾏ssh-copy-id就会报错了,直接修改ssh-copy-id脚本当然可以修正这个问题,但是那样显得太⽣硬了,实际上还有更好的办法:# vi ~/.ssh/config加上内容:Host serverHostname ipPort 10022你也可以单独只加⼊Port⼀⾏配置,那样就是⼀个全局配置,保存后再运⾏ssh-copy-id命令就不会报错了。
补充:经⽹友提⽰,如果端⼝不是22,不修改config⽂件,按如下⽅式也可以:ssh-copy-id -i ~/.ssh/id_rsa.pub "-p 10022 user@server"。
ssh 密钥登录 参数
ssh 密钥登录参数
SSH 密钥登录参数是指,在通过 SSH 协议进行远程登录时,需要使用 SSH 密钥来进行身份验证,而不是输入用户名和密码。
为了实现 SSH 密钥登录,需要进行如下配置:
1. 生成 SSH 密钥:在本地计算机上使用 ssh-keygen 命令生成SSH 密钥对,即公钥和私钥。
2. 将公钥上传至远程服务器:将生成的公钥上传至需要登录的远程服务器上,一般是将公钥内容复制到远程服务器上
的 .ssh/authorized_keys 文件中。
3. 修改 SSH 配置文件:在远程服务器上,打开
/etc/ssh/sshd_config 配置文件,将参数 PubkeyAuthentication 和AuthorizedKeysFile 分别设置为 yes 和 .ssh/authorized_keys。
4. 重启 SSH 服务:在远程服务器上,使用 service sshd restart 命令重启 SSH 服务,使修改的配置生效。
配置完成后,即可使用 SSH 密钥登录远程服务器,不需要输入用户名和密码进行身份验证。
SSH命令及使用说明
SSH命令及使用说明SSH(Secure Shell)是一种网络协议,用于在不安全的网络中建立安全的连接。
它提供了加密的通信通道,使得远程登录、远程执行命令、远程传输文件等操作变得安全可靠。
1. sshssh命令用于建立SSH连接,语法如下:``````-options:可选参数,包括-p指定端口号、-i指定私钥文件等。
-hostname:必选参数,指定远程主机的IP地址或域名。
2. ssh-keygenssh-keygen命令用于生成SSH密钥对,包括私钥和公钥。
私钥保存在本地,公钥发送到远程主机,用于进行身份认证。
语法如下:```ssh-keygen [options] [keyfile]```-options:可选参数,包括-t指定密钥类型、-b指定密钥长度、-f 指定密钥文件名等。
-keyfile:可选参数,指定密钥文件的名称。
3. ssh-copy-idssh-copy-id命令用于将本地公钥复制到远程主机的授权文件中,以实现免密登录。
语法如下:``````-options:可选参数,包括-p指定端口号、-i指定私钥文件等。
-hostname:必选参数,指定远程主机的IP地址或域名。
4. ssh-agentssh-agent命令用于管理身份验证代理,可以将私钥添加到代理中,使得无需每次输入密码即可使用私钥进行身份认证。
语法如下:``````-options:可选参数,包括-a指定代理的套接字文件、-c创建一个登录shell、-k关闭代理等。
5. scpscp命令用于在本地主机和远程主机之间进行文件传输。
语法如下:```scp [options] [source] [destination]```-options:可选参数,包括-r递归复制目录、-P指定端口号等。
-source:必选参数,指定源文件或目录。
-destination:必选参数,指定目标文件或目录。
6. sftpsftp命令用于在本地主机和远程主机之间进行安全文件传输。