
Spring+Hibernate+Struts2整合文档
Spring+Hibernate+Struts2整合文档文章分类:Java编程一、 Spring+Hibernate整合:Spring整合Hibernate,是做了一个很大的调整的,因为spring可以把管理Hibernate的工作都做了,以前的hibernate.cfg.xml文件都去掉了,而将这些内容都交给了spring来管理了。
1、 applicationContext.xml文件中应该配置如下内容:Xml代码1.//配置数据连接类2.<bean id="dataSource"3.class="mons.dbcp.BasicDataSource">4.<property name="driverClassName"5.value="org.gjt.mm.mysql.Driver">6.</property>7.<property name="url"value="jdbc:mysql://localhost:3306/test"></property>8.<property name="username"value="root"></property>9.</bean>10.//配置session工厂类11.<bean id="sessionFactory"12. class="org.springframework.orm.hibernate3.LocalSessionFactoryBean">13. <property name="dataSource">14. <ref bean="dataSource"/>15. </property>16. <property name="hibernateProperties">17. <props>18. <prop key="hibernate.dialect">19. org.hibernate.dialect.MySQLDialect20. </prop>21. <prop key="hibernate.show_sql">true</prop>22. </props>23. </property>24. <property name="mappingResources">25. <value>com/hejianjiao/vo/Person.hbm.xml</value>26. </property>27.</bean>2、可以使用spring中的HibernateDAOSupport与HibernateTemplate类来进行数据持久化操作:A、HibernateDAOSupport类中定义了对session、sessionFactory的操作方法与getHibernateTemplate方法来获得一个HibernateTemplate实例;B、HibernateTemplate类中定义了对数据持久化的各种封装的方法,我们可以用它来对数据进行操作。
因此在使用时,我们可以继承HibernateDAOSupport类,然后实例化HibernateTemplate类来进行数据持久化。
二、 Spring+Struts2整合:1、spring配置在web.xml文件中的上下文监听器:Xml代码1.<context-param>2.<param-name>contextConfigLocation</param-name>3.<param-value>/WEB-INF/applicationContext*.xml</param-value>4.</context-param>5.6.<listener>7.<listener-class>org.springframwork.web.content.ContextLoaderListener</listener-class>8.</listener>2、struts2配置在web.xml文件中的过滤器:Xml代码1.<filter>2.<filter-name>struts2</filter-name>3.<filter-class>org.apache.struts2.dispatcher.FilterDispatcher</filter-class>4.</filter>5.6.<filter-mapping>7.<filter-name>struts2</filter-name>8.<url-patter>/*</url-patter>9.</filter-mapping>3、设置struts.xml文件,就可以使用spring的IOC来管理struts的Action:Xml代码1.<constent name="struts.objectFactory"value="spring"/>4、第三步设置后,以后在struts.xml 文件中配置一个action时,它的class 就不是一个类了,而是在applicationContext.xml文件中定义过的类的ID,在struts.xml文件中就只需要引用定义好的类的id 就可以了。
然后特别要注意的一个问题:action是一个请求就是一个action对象,而在spring中则不是的,它是自动分配类的实例的,是使用的单态模式来生产类的实例的,不符合action,因此在applicationContext.xml文件中定义每个action 时,都要在类后加上:Xml代码1.scope="prototype"属性三、三者组合开发:一般在组合开发时,没有什么难的,只要把上面两步做好就可以是三个组合开发了。
[img][/img][img][/img]上图则是对于进行组合开发时,一般使用的系统架构:1、先从最底层开发,先开发POJO类,和Hibernate映射文件。
它相当于系统的数据库层。
2、再开发DAO层,它是对于数据进行持久化的一层,专门处理各种数据增、删、改、查的功能。
并且使用DAO工厂模式,以保证和上层没有任何的联系,并且可以方便于类与接口的扩展。
3、第三是开发manager层,它相当于软件的业务逻辑层,即专门处理各种业务逻辑。
实现系统的业务处理功能。
并且它隔离事务,使与下层的数据持久和上层的数据操作没有任何的联系。
4、 Action层,也即软件的表示层,处理action的接收与回复。
各action由spring管理。
五、组合开发中的一些问题:1、在组合开发中,常见的一个问题就是session的管理,当我们使用HibernateTemplate操作数据库时,可以不对session进行显示的操作,spring 可以自动处理session的打开与关闭。
我们可以在web.xml文件中显示的配置一个session管理的过滤器,它专门帮助我们关闭session:Xml代码1.<filter>2.<filter-name>lazyLoadingFilter</filter-name>3.<filter-class>.springframwork.orm.hibernate3.support.OpenSessionInViewFilter5.</filter-class>6.</filter>7.8.<filter-mapping>9.<filter-name>lazyLoadingFilter</filter-name>10. <url-pattern>*.action</url-pattern>11.</filter-mapping>12.注:它一定要在struts2的过滤器之前。
因为web.xml文件的过滤器执行是有顺序的。
而session一定在前面进行。
它会在所有的action处理完了,页面显示完了,就会自动关闭session。
六、 spring事务处理1、事务的处理也交给了spring来管理,要在applicationContext.xml文件中上配置事务管理类:Xml代码1.//实施事务管理的bean2.<bean id=”transactionManager”3.class=”org.springframwork.orm.hibernate3.HibernateTransactionManager”>4.<property name=”sessionFactory”>5.<ref bean=”sessionFactory”/>6.</property>7.</bean>它是通过sessionFactory来管理,因此在传进来一个sessionFactory来接管事务处理。
2、声明式事务处理:在spring中对事务进行管理时,可以显示地进行事务处理的定义:Xml代码1.//给事务添加的属性2.<tx:advice id=”txAdvice”transaction-manager=”transactionManager”>3.<tx:attributes>4.//propagation表示的是事务的传播特性,使用required时,是当检测到add开头的方法时,就看此时有没有开启的事务,如果有则将方法放进事务中去,如果没有,则新建一个事务。
然后将方法放进去。
5.<tx:method name=”add*”propagation=”REQUIRED”>6.<tx:method name=”delete*”propagation=”REQUIRED”>7.<tx:method name=”update*”propagation=”REQUIRED”>8.//如果检测到其它的方法,则给其只读数据库的属性。
SpringMVC+Spring+Hibernate框架整合原理,作用及使用方法
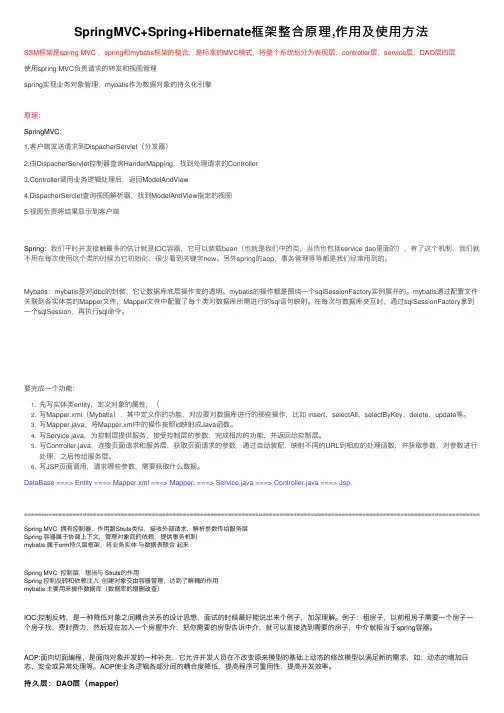
SpringMVC+Spring+Hibernate框架整合原理,作⽤及使⽤⽅法SSM框架是spring MVC ,spring和mybatis框架的整合,是标准的MVC模式,将整个系统划分为表现层,controller层,service层,DAO层四层使⽤spring MVC负责请求的转发和视图管理spring实现业务对象管理,mybatis作为数据对象的持久化引擎原理:SpringMVC:1.客户端发送请求到DispacherServlet(分发器)2.由DispacherServlet控制器查询HanderMapping,找到处理请求的Controller3.Controller调⽤业务逻辑处理后,返回ModelAndView4.DispacherSerclet查询视图解析器,找到ModelAndView指定的视图5.视图负责将结果显⽰到客户端Spring:我们平时开发接触最多的估计就是IOC容器,它可以装载bean(也就是我们中的类,当然也包括service dao⾥⾯的),有了这个机制,我们就不⽤在每次使⽤这个类的时候为它初始化,很少看到关键字new。
另外spring的aop,事务管理等等都是我们经常⽤到的。
Mybatis:mybatis是对jdbc的封装,它让数据库底层操作变的透明。
mybatis的操作都是围绕⼀个sqlSessionFactory实例展开的。
mybatis通过配置⽂件关联到各实体类的Mapper⽂件,Mapper⽂件中配置了每个类对数据库所需进⾏的sql语句映射。
在每次与数据库交互时,通过sqlSessionFactory拿到⼀个sqlSession,再执⾏sql命令。
使⽤⽅法:要完成⼀个功能:1. 先写实体类entity,定义对象的属性,(可以参照数据库中表的字段来设置,数据库的设计应该在所有编码开始之前)。
2. 写Mapper.xml(Mybatis),其中定义你的功能,对应要对数据库进⾏的那些操作,⽐如 insert、selectAll、selectByKey、delete、update等。
Struts2+Spring3+Hibernate4+Maven整合
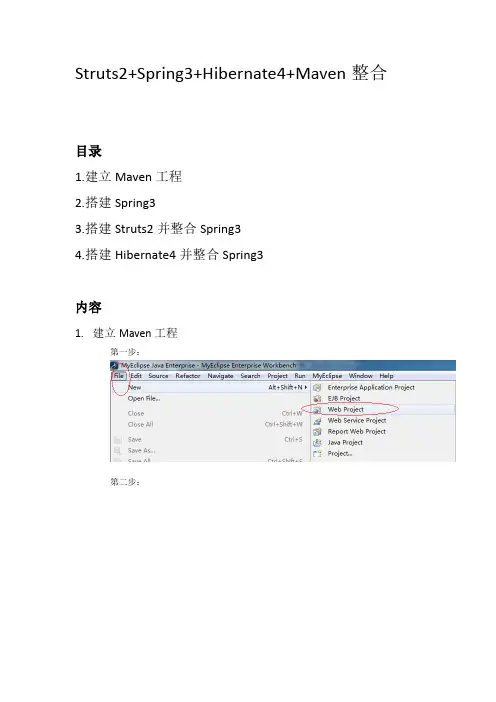
Struts2+Spring3+Hibernate4+Maven整合目录1.建立Maven工程2.搭建Spring33.搭建Struts2并整合Spring34.搭建Hibernate4并整合Spring3内容1.建立Maven工程第一步:第二步:第三步:第四步:注意:这里的JDK要选择默认的,这样别人在使用的时候,如何JDk不一致的话也不会出错,如下图所示:第五步:Maven标准目录src/main/javasrc/main/resourcessrc/test/javasrc/test/resources第六步:发布项目:Maven install清除编译过的项目:Maven cleanOK,Mean 工程创建成功!2. 搭建 Spring3(1)下载Spring3需要的jar包1.spring-core2.spring-context3.spring-jdbc4.spring-beans5.spring-web6.spring-expression7.spring-orm在pom.xml中编写Spring3需要的包,maven会自动下载这些包。
<!-- spring3 --><dependency><groupId>org.springframework</groupId><artifactId>spring-core</artifactId><version>3.1.2.RELEASE</version></dependency><dependency><groupId>org.springframework</groupId><artifactId>spring-context</artifactId><version>3.1.2.RELEASE</version></dependency><dependency><groupId>org.springframework</groupId><artifactId>spring-jdbc</artifactId><version>3.1.2.RELEASE</version></dependency><dependency><groupId>org.springframework</groupId><artifactId>spring-beans</artifactId><version>3.1.2.RELEASE</version></dependency><dependency><groupId>org.springframework</groupId><artifactId>spring-web</artifactId><version>3.1.2.RELEASE</version></dependency><dependency><groupId>org.springframework</groupId><artifactId>spring-expression</artifactId><version>3.1.2.RELEASE</version></dependency><dependency><groupId>org.springframework</groupId><artifactId>spring-orm</artifactId><version>3.1.2.RELEASE</version></dependency>(2)编写Spring配置文件<?xml version="1.0"encoding="UTF-8"?><beans xmlns="/schema/beans" xmlns:xsi="/2001/XMLSchema-instance"xmlns:context="/schema/context"xsi:schemaLocation="/schema/beans/schema/beans/spring-beans-3.0.xsd /schema/context/schema/context/spring-context-3.0.xsd "><!-- 引入属性文件 --><context:property-placeholderlocation="classpath:config.properties"/><!-- 自动扫描dao和service包(自动注入) --><context:component-scan base-package="com.zc.dao,com.zc.service" /></beans>(3)编写测试首先,在src/main/java中创建com.zc.service包,在包中编写一个UserService 接口,代码如下:package com.zc.service;/*** 测试* @author ZC* */public interface UserService {public void test();}然后,在src/main/java中创建com.zc.service.imple包,在包中编写UserServiceImple 实现类,代码如下:package com.zc.service.impl;import org.springframework.stereotype.Service;import erService;@Service("userService")public class UserServiceImpl implements UserService {@Overridepublic void test() {System.out.println("Hello World!");}}注意:@Service("userService")使用junit注解完成service 注入,所以还要在pom.xml中配置junit注解。
三大框架整合及其原理
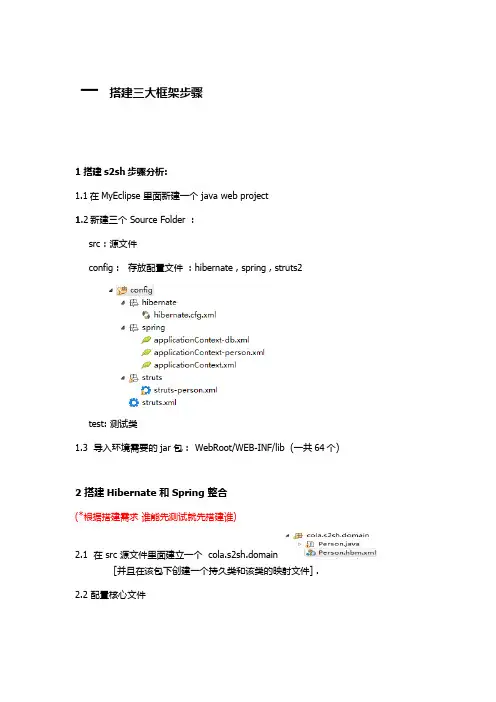
一搭建三大框架步骤1 搭建s2sh步骤分析:1.1在MyEclipse 里面新建一个 java web project1.2新建三个 Source Folder :src : 源文件config : 存放配置文件 : hibernate , spring , struts2test: 测试类1.3 导入环境需要的jar 包 : WebRoot/WEB-INF/lib (一共64个)2 搭建Hibernate 和Spring 整合(*根据搭建需求谁能先测试就先搭建谁)2.1 在 src 源文件里面建立一个 cola.s2sh.domain[并且在该包下创建一个持久类和该类的映射文件] .2.2 配置核心文件在 config 里面建立一个hibernate 文件夹里面创建hibernate.cfg.xml配置文件(里面的内容拷贝就可以)2.3 在spring 文件夹里面创建并且把sessionFactory 交给spring 来管理: [applicationContext-db.xml中引入][<bean id="sessionFactory"class="org.springframework.orm.hibernate3.LocalSessionFactoryBean"> <property name="configLocation"><value>classpath:hibernate/hibernate.cfg.xml</value> </property></bean>]在 applicationContext.xml 中 : 导入<import resource="applicationContext-db.xml"/>2.4 测试sessionFactory[编写SpringUtils 然后继承这个][public class SpringUtils {public static ApplicationContext context;static {context = newClassPathXmlApplicationContext("spring/applicationContext.xml" );}}]2.5 编写 dao .service 的包类和接口;PersonDaoImpl 要继承HibernateDaoSupport[public class PersonDaoImpl extends HibernateDaoSupport implements PersonDao {public void savePerson(Person person) {this.getHibernateTemplate().save(person);}}]2.6 把 dao ,service 放在spring 容器中:[<bean id="personDao"class="cola.s2sh.daoImpl.PersonDaoImpl"> <property name="sessionFactory"><ref bean="sessionFactory"/></property></bean><bean id="personService"class="cola.s2sh.service.impl.PersonServiceImpl"><property name="personDao"><ref bean="personDao"/></property></bean>]2.7 完成 spring 声明式处理 :[<!-- 事务管理 --><bean id="transactionManager"class="org.springframework.orm.hibernate3.HibernateTransactionManager"><property name="sessionFactory"><ref bean="sessionFactory"/></property></bean><tx:advice id="tx"transaction-manager="transactionManager"><tx:attributes><tx:method name="save*"read-only="false"/><tx:method name="update*"read-only="false"/><tx:method name="delete*"read-only="false"/><!--除了上面三种情况以外的情况--><tx:method name="*"read-only="true"/></tx:attributes></tx:advice><aop:config><aop:pointcutexpression="execution(* cola.s2sh.service.impl.*.*(..))"id="perform"/><aop:advisor advice-ref="tx"pointcut-ref="perform"/> </aop:config>]2.8 整合struts 创建 action 类包 ;2.9 把action 放在spring 容器中* 注意在personAction的spring的配置中一定要写一个属性scope="prototype"[<bean id="personAction"class="cola.s2sh.action.PersonAction" scope="prototype"><property name="personService"><ref bean="personService"/></property></bean>]在这个中引入下面3.0 编写struts2中配置文件Struts –person.xml中Struts.xml3.1 编写web .xml文件[<?xml version="1.0"encoding="UTF-8"?><web-app xmlns:xsi="/2001/XMLSchema-instance"xmlns="/xml/ns/javaee"xmlns:web="/xml/ns/javaee/web-app_2_5.xsd"xsi:schemaLocation="/xml/ns/javaee/xml/ns/javaee/web-app_3_0.xsd"id="WebApp_ID"version="3.0"><display-name>cola.s2sh</display-name><listener><listener-class>org.springframework.web.context.ContextLoaderListener</listener-class> </listener><!—将srping放在SrvletContext中进行加载当servlet加载时 spring 也完成加载 --> <context-param><param-name>contextConfigLocation</param-name><param-value>classpath:spring/applicationContext.xml</param-value> </context-param><filter><filter-name>OpenSessionInViewFilter</filter-name><filter-class>org.springframework.orm.hibernate3.support.OpenSessionInViewFilter</filter-class></filter><filter-mapping><filter-name>OpenSessionInViewFilter</filter-name><url-pattern>*.action</url-pattern></filter-mapping><filter><filter-name>struts2</filter-name><filter-class>org.apache.struts2.dispatcher.ng.filter.StrutsPrepareAndExecuteFilter</filter -class></filter><filter-mapping><filter-name>struts2</filter-name><url-pattern>/*</url-pattern></filter-mapping>]二原理分析:一、 Struts 2框架整合Spring步骤1、复制文件。
struts2+spring3+hibernate整合教程

Struts2+Spring3+hibernate3整合(2011年7月末,最新)上次下载了一个教程,上面写着:“献给我亲爱的老婆!”(羡慕不已)。
想了想,我没老婆,难道没什么好写了!不难…献给我暗恋过的每一个女人!(嘿嘿…)如果在你遇到的女生中有一个幽默豁达的女生,不要犹豫,追上去,就娶她了!一,需要的框架包二,建立project,添加相应的.jar文件(重点)1,eclipse中建立dynamic web project,这里是ssh_integrate_0100。
2,src中创建需要的类,这里以一个域模型为user的例子说明。
(现在建立这些类,可以方便我们在搭建时候随时测试!)User.javaIUserDao.javaUserDaoImpl.javaIUserService.javaUserServiceImpl.java3,拷贝spring-framework-3.1.0\dist目录下的所有jar包,注意有一个不是jar的文件,当然拷过去也没事。
4,拷贝spring运行中需要的其他jar文件,主要是mons-logging,可以从spring-framework-3.0.2.RELEASE-dependencies中找到。
ii.Aspectjrt.jar和aspect-waver.jar,可以从spring-framework-2.5.6-with-dependencies/lib/aspectj下面找到(不知道为什么,spring-framework-3.0.2.RELEASE-dependencies中没有aspectjrt的jar包)iii.aopalliance.Jar,apache-dbcp.jar,apache-pool.jar,可以从spring-framework-3.0.2.RELEASE-dependencies中找到。
5,建立beans.xml,这里使用的是annotation和component-scan,这样配置可以大大简化配置,所以是best-practice,其他配置请参考spring文档。
struts2+spring3+mybatis整合
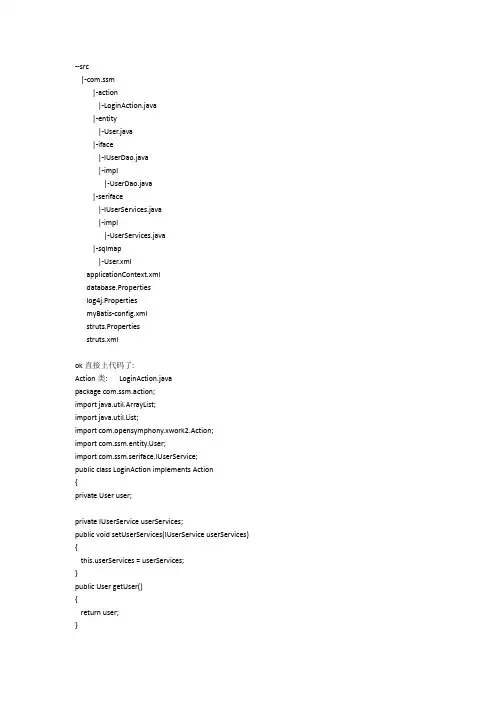
--src|-com.ssm|-action|-LoginAction.java|-entity|-User.java|-iface|-IUserDao.java|-impl|-UserDao.java|-seriface|-IUserServices.java|-impl|-UserServices.java|-sqlmap|-User.xmlapplicationContext.xmldatabase.Propertieslog4j.PropertiesmyBatis-config.xmlstruts.Propertiesstruts.xmlok直接上代码了:Action类: LoginAction.javapackage com.ssm.action;import java.util.ArrayList;import java.util.List;import com.opensymphony.xwork2.Action;import er;import com.ssm.seriface.IUserService;public class LoginAction implements Action{private User user;private IUserService userServices;public void setUserServices(IUserService userServices) {erServices = userServices;}public User getUser(){return user;}public void setUser(User user){er = user;}public String execute() throws Exception{String aaa= getUser().getId()+"";List userList= new ArrayList();userList= userServices.selectUserById(getUser().getId()); if(userList.size()>0){return Action.SUCCESS;}else{return Action.ERROR;}}}实体类User.javapackage com.ssm.entity;import java.io.Serializable;import java.util.Date;public class User implements Serializable{private int id;private String name;private String password;private Date birthday;public User(){}public User(String name, String password, Date birthday) {= name;this.password= password;this.birthday= birthday;}public int getId(){return id;}public void setId(int id){this.id = id;}public String getName(){return name;}public void setName(String name){ = name;}public String getPassword(){return password;}public void setPassword(String password){this.password = password;}public Date getBirthday(){return birthday;}public void setBirthday(Date birthday){this.birthday = birthday;}}IUserDao接口类IUserDao.javapackage com.ssm.iface;import java.util.List;public interface IUserDao{public boolean userVaild(String name, String password);public List selectUserById(int id);}UserDaoImpl实现接口类:UserDaoImpl.javapackage com.ssm.iface.impl;import java.util.List;import org.springframework.orm.ibatis.support.SqlMapClientDaoSupport; import com.ssm.iface.IUserDao;//import com.ssb.baseutil.SqlMapClientDaoSupport;//import com.ssb.iface.IUserDao;//import org.springframework.orm.ibatis.support.SqlMapClientDaoSupport; public class UserDaoImpl extends SqlMapClientDaoSupport implements IUserDao {public List selectUserById(int id){// TODO Auto-generated method stubreturn getSqlMapClientTemplate().queryForList("selectUserById", id);}public boolean userVaild(String name, String password){// TODO Auto-generated method stubreturn false;}/*public boolean userVaild(String name, String password){return false;}public List selectUserById(String id){return getSqlMapClientTemplate().queryForList("getUserById", id);}*/}业务类IUserServices.javapackage com.ssm.seriface;import java.util.List;public interface IUserService{public boolean userVaild(String name, String password); public List selectUserById(int id);}UserServicesImpl.javapackage com.ssm.seriface.impl;import java.util.List;import com.ssm.iface.IUserDao;import com.ssm.seriface.IUserService;public class UserServiceImpl implements IUserService{private IUserDao serviceUserDao= null;public IUserDao getServiceUserDao(){return serviceUserDao;}public void setServiceUserDao(IUserDao serviceUserDao) {this.serviceUserDao = serviceUserDao;}public List selectUserById(int id){// TODO Auto-generated method stubreturn serviceUserDao.selectUserById(id);}public boolean userVaild(String name, String password){// TODO Auto-generated method stubreturn erVaild(name, password);}}mybatis实体配置文件User.xml<?xml version="1.0" encoding="UTF-8" ?><!DOCTYPE mapper PUBLIC"-////DTD Mapper 3.0//EN""/dtd/mybatis-3-mapper.dtd"><mapper namespace="user"><resultMap type="User" id="userResultMap"><id property="id" column="ID"/><result property="name" column="NAME"/><result property="password" column="PASSWORD"/><result property="birthday" column="BIRTHDAY"/></resultMap><select id="selectUserById" parameterType="ng.String" resultType="User"><![CDATA[SELECT * FROM USER SUWHERE SU.ID = #{id}]]></select></mapper>sprng配置文件applicationContext.xml<?xml version="1.0" encoding="UTF-8"?><beans xmlns="/schema/beans" xmlns:xsi="/2001/XMLSchema-instance"xmlns:p="/schema/p" xmlns:context="/schema/context"xmlns:jee="/schema/jee" xmlns:tx="/schema/tx"xsi:schemaLocation="/schema/beans/schema/beans/spring-beans-2.5.xsd/schema/context/schema/context/spring-context-2.5.xsd/schema/jee/schema/jee/spring-jee-2.5.xsd/schema/tx/schema/tx/spring-tx-2.5.xsd"><!-- 数据源属性配置文件--><!-- <bean id="propertyConfigurer"class="org.springframework.beans.factory.config.PropertyPlaceholderConfigurer"><property name="location" value="classpath:com/databaseconfig/database.properties"/></bean>--><context:property-placeholder location="classpath:database.properties"/><bean id="dataSource" class="boPooledDataSource"><property name="driverClass" value="${jdbc.driverClassName}" /><property name="jdbcUrl" value="${jdbc.url}" /><property name="user" value="${ername}" /><property name="password" value="${jdbc.password}" /><property name="autoCommitOnClose" value="true"/><property name="checkoutTimeout" value="${cpool.checkoutTimeout}"/><property name="initialPoolSize" value="${cpool.minPoolSize}"/><property name="minPoolSize" value="${cpool.minPoolSize}"/><property name="maxPoolSize" value="${cpool.maxPoolSize}"/><property name="maxIdleTime" value="${cpool.maxIdleTime}"/><property name="acquireIncrement" value="${cpool.acquireIncrement}"/><property name="maxIdleTimeExcessConnections" value="${cpool.maxIdleTimeExcessConnections}"/> </bean><!-- 数据连接管理--><bean id="transactionManager" class="org.springframework.jdbc.datasource.DataSourceTransactionManager"><property name="dataSource" ref="dataSource"/></bean><!-- myBatis文件--><!--<bean id="sqlSessionFactory" class="org.mybatis.spring.SqlSessionFactoryBean"><property name="dataSource" ref="dataSource" /><property name="configLocation" value="classpath:myBatis-config.xml"/></bean>--><bean id="sqlSessionFactory" class="org.mybatis.spring.SqlSessionFactoryBean"><property name="configLocation" value="classpath:myBatis-config.xml"/><property name="dataSource" ref="dataSource"/></bean><!-- ibatis2.x 配置<bean id="sqlMapClient" class="org.springframework.orm.ibatis.SqlMapClientFactoryBean"><property name="configLocation" value="classpath:myBatis-config.xml"/><property name="dataSource" ref="dataSource"/></bean>--><bean id="mapDao" class="org.mybatis.spring.MapperFactoryBean"><!-- 这里是接口,不是接口实现类了--><property name="mapperInterface" value="com.ssm.iface.IUserDao"/><property name="sqlSessionFactory" ref="sqlSessionFactory"/></bean><bean id="userServices" class="erServiceImpl"><property name="serviceUserDao" ref="mapDao"/></bean><bean id="LoginAction" class="com.ssm.action.LoginAction"><property name="userServices" ref="userServices"/></bean></beans>数据库连接属性配置文件(其实可以不用这么复杂)database.Propertiesjdbc.driverClassName=com.mysql.jdbc.Driverjdbc.url=jdbc:mysql://127.0.0.1:3306/ddtest?characterEncoding=utf8 ername=rootjdbc.password=123cpool.checkoutTimeout=5000cpool.minPoolSize=20cpool.maxPoolSize=50cpool.maxIdleTime=7200cpool.maxIdleTimeExcessConnections=1800cpool.acquireIncrement=10log4j 随便到log4j里copy一个吧mybatis-config.xml<?xml version="1.0" encoding="UTF-8" ?><!DOCTYPE configuration PUBLIC"-////DTD Config 3.0//EN""/dtd/mybatis-3-config.dtd"><configuration><typeAliases><typeAlias alias="User" type="er"/></typeAliases><mappers><mapper resource="com/ssm/sqlmap/User.xml" /></mappers></configuration>struts配置文件struts.Properties##整合spring的struts.objectFactory=springeClassCache = truestruts.locale=zh_CNstruts.i18n.encoding=GBKstruts的Action配置文件struts.xml<?xml version="1.0" encoding="UTF-8" ?><!DOCTYPE struts PUBLIC"-//Apache Software Foundation//DTD Struts Configuration 2.0//EN""/dtds/struts-2.0.dtd"><struts><package name="style" extends="struts-default"><!--<action name="loginAction" class="sys.style.design.action.LoginAction"> <result name="success">success.jsp</result><result name="error">error.jsp</result></action>--><action name="loginAction" class="com.ssm.action.LoginAction"><result name="success">success.jsp</result><result name="error">error.jsp</result></action></package></struts>。
集成方案根据官网的帮助文档而写的集成方案

STRUTS2.3+HIBERNATE4.1+SPRING3.2配置方案1所需JAR包:1.1 STRUTS2.3所需旳JAR包1.2 SPRING3.2所需旳JAR包1.3 HIBERNATE 4.1所需旳JAR包1.4 其他JAR包2所需旳配置文献2.1STRUTS配置文献第一步到官网()下载STRUTS旳struts-2.3.4.1-all.zip,这个压缩文献里面包括了SRC(源码),APPS (项目案例),DOCS(协助文档),LIB(第三方JAR包)第二步查看协助文档中旳WEBXML.HTML中我们可以看到假如要使用STRUTS2则需要在WEB.XML中添加这样旳下面旳语句<filter><filter-name>struts2</filter-name><filter-class>org.apache.struts2.dispatcher.ng.filter.StrutsPrepareAndExe cuteFilter</filter-class></filter><filter-mapping><filter-name>struts2</filter-name><url-pattern>/*</url-pattern></filter-mapping>第三步添加struts.xml文献,STRUTS2默认会在classpath:(SRC)目录下查找struts.xml文献,这个是STRUTS2旳默认旳配置文献,在我们解压旳项目案例中找到struts.xml并拷贝到我们旳项目目录下,删除多出旳配置改成我们旳自己旳配置既可!2.2HIBERNATE.XML配置文献这个配置文献是我比较头痛旳文献,由于我找了半天没有找到HIBERNATE旳案例,当然也没有找到HIBERNATE旳配置文献hibernate.cfg.xml,不过这个问题不大,我们可以用我们此前或是你随便从哪找一种hibernate.cfg.xml来进行修改就好,这个重要是对数据库连接旳某些配置,包括连接池啊,数据源,表旳映射等。
Struts2+Spring+Hibernate在企业人事管理系统中的应用
ustБайду номын сангаас ( ip d ) ; . P d t s w ( ) e h.
i d o h c L gn u ) f a. ek oi( ) { ( c
rtr eu n ”H s ee s ”; e s
S u 2 Sr g t t 和 p n 整合 的方式很 多 ,一 般采 用 三种 方式 : rs i ① Sr g的 A t nupr类 整 合 S u ;② Sr g的 D l an pn i e oSpo i t tt rs pn i e gt . e i
展 而来 的。Srt2本 身实 现 了 MV 并且 简 化 了基 于 MV t s u C, C模 式 的 We b应用 程序 的 开发 。 有模 块化 、 活性 和 重用性 的特 具 灵 点 。 用户 的角度来 看 ,t t2一共 包含 三大块 的 内容 , 从 Sr s u 分别 是 Srt2的核 心类 、t t t s u Sr s u 2的配 置文件 和 Srt t s n 2的标签 库 。
2 11 S rn .. p g的 Acin u p a 类 整 合 Sr t i t Sp o o tus
这 种 方 法 是 A t n不 再 继 承 Srt 提 供 的 Ac o , 是 继 ci o t s u tn而 i
在 这 种 方 式 中 , t n是 从 ogs n f me okw bs us Aci o r. gr w r.e。rt a t .
中 图 分 类 号 :P 1 . T 312 5 文 献 标 识 码 : A 文 章 编 号 :6 2 7 0 (0 0 0 — 0 9 0 1 7 — 8 0 2 1 )9 0 9 — 4
{ hs a = a ;} tin me nme .
Struts2+Spring3+Hibernate3 集成方法
Struts2+Spring3+Hibernate3 集成 目 录 1.Struts2集成 ..................................................... 11.1. 把Struts提供的jar包拷贝到/WEB-INF/lib/目录下 (1)1.2. 在web.xml中配置Struts的过滤器 (2)2.Struts2开发 ..................................................... 22.1 编写Struts Action程序,需要继承ActionSupport (2)2.2 创建struts.xml的Action映射文件 (3)3.Struts2+Spring集成 .............................................. 33.1 按第1步“Struts2集成”方法集成Struts2 (3)3.2 再把Struts的Spring插件把拷贝到/WEB-INF/lib/目录下 (3)3.3 把Spring提供的jar拷贝到/WEB-INF/lib/目录下 (3)3.4 web.xml配置Spring的过滤器 (3)3.5 创建applicationContext.xml配置文件 (4)4.Struts2+Spring+Hibernate集成 ..................................... 54.1 先按照“Struts2+Spring集成”方法执行 (5)4.2 导入Apache Commons几个jar包 (5)4.3 导入Hibernate几个jar包 (5)4.4 数据库的JDBC驱动 (5)4.5 在applicationContext.xml中加入如下的配置 (5)4.6 创建hibernate.cfg.xml文件 (6)5.Struts2+Spring+Hibernate开发 ..................................... 65.1 编写Model类 (6)5.2 编写Model类的HBM映射文件 (7)5.3 在applicationContext.xml中指定HBM映射文件路径 (8)5.4 编写DAO接口和实现类程序,并继承HibernateDaoSupport (8)5.5 在applicationContext.xml中配置DAO Bean (10)6.注意事项 ....................................................... 101. Struts2集成1.1.把Struts提供的jar包拷贝到/WEB-INF/lib/目录下Struts需要如下几个包:解压:struts-2.2.3.1-lib.zip需要:struts2-core-2.2.3.1.jarxwork-core-2.2.3.1.jarognl-3.0.1.jarfreemarker-2.3.16.jarjavassist-3.11.0.GA.jar和所有以“commons-”开头的包。
Spring+SpringSecurity+Hibernate4.1.1+Struts2.3+JPA
lt;bean id="dataSource" class="boPooledDataSource" destroy-method="close">
获取连接失败后该数据源将申明已断开并永久关闭。Default: false -->
<property name="breakAfterAcquireFailure" value="true" />
<!--因性能消耗大请只在需要的时候使用它。如果设为true那么在每个connection提交的 时候都将校验其有效性。建议使用idleConnectionTestPeriod或automaticTestTable
</beans>
3.整合Hibernate4.1.1
添加Hibernate jar文件
Hibernate压缩包中的
lib/required/
antlr-2.7.7.jar
dom4j-1.6.1.jar
hibernate-commons-annotations-4.0.1.Final.jar
hibernate.jdbc.fetch_size=18
hibernate.jdbc.batch_size=10
hibernate.show_sql=true
hibernate.format_sql=true
配置工厂spring管理事务
<!-- 类工厂由spring管理 -->
<param-value>
WEB-INF/applicationContext.xml ------ spring主配置文件
整合struts1+spring+hibernate框架完成简单的登录
*编写环境:*开发工具:Myeclipse6.01*SPRING :spring2.0*STRUTS :struts1.2*HIBERNATE:hibernate3.0*JDK: 1.6*TOMCAT: 6.0*WINDOW641.新建web项目。
2.选中新建项目,右键--》选择“myeclipse”--》添加Struts支持。
3.在弹出的信息框,有必要修改一下图中的地方。
4.上面的操作完成之后,打开我们的项目我们可以看到我们的项目结构发生了变化,引入了一些struts标签和生成了struts-config.xml配置文件。
5.开始添加spring支持,同样选中新建项目,右键--》选择“myeclipse”--》“添加spring 支持”,在弹出的信息框,做如下内容修改:6.点击“next”,直接选择默认,当然也可根据自己的规则做修改。
7.在添加“Hibernate”支持的时候,首先做的工作是创建一个数据源。
这个创建方法有很多中(找百度可得)这里只介绍一种:打开你的myeclipse的右上角的小三角,选择“myeclipsedatabase explorer”在弹出的界面中,在如图位置右键“new”在弹出的界面中做如下修改:修改完成后点击“test driver”成功则继续。
8.暂时回到myeclipse开发界面。
正式开始添加“Hibernate”支持。
在弹出的界面中做如图修改:点击“next”这里如图,选择spring的配置文件。
下一步操作后,做如下图修改操作:下一步之后,界面修改操作,如下图:去掉复选框中的选项,然后点击“finish”完成整个操作。
之后将会直接打开spring的配置文件,然后你核对一下您的数据库连接是否正确。
至此三大支持操作完成,启动没有问题说明框架雏形已经完成。
9.在项目中的WEB-INF下找到web.xml,做如下修改:格式头部分省略,下面是需要新增的代码<!--初始化spring配置参数 --><context-param><param-name>contextConfigLocation</param-name><param-value>classpath:applicationContext.xml</param-value></context-param><!-- 配置监听 --><listener><listener-class>org.springframework.web.context.ContextLoaderListener</list ener-class></listener><!-- 配置spring过滤器解决中文乱码问题 --><filter>Ps :这个时候我们再次启动服务的时候,发现可能会报错:因为我们在刚才已经把spring 的配置文件做了初始化,而在spring 的配置文件中有数据源的连接,而我们的项目中可能还缺少一个包:commons-pool-1.4.jar(/detail/u013806366/7897665 )当我们把这个包放在lib 下,我们再次启动项目的时候,错误信息应该会消失。