
博能Polar_V800心率表使用手册(中文说明书)
V800目錄V800目錄1簡介12V80012H7心率傳感器*12USB連接線13PolarFlow應用程式13PolarFlowSync軟件13PolarFlow網上服務13開始使用14電池充電14電池操作時間15電池電量低通知15基本設定16按鈕功能、手勢與功能表結構17按鈕功能17時間畫面和功能表17準備訓練模式18訓練期間18輕擊手勢19HeartTouch19功能表結構19我的最愛20計時器20測試20設定21今日活動21狀態21日誌21相容的傳感器22Polar步速傳感器Bluetooth®Smart22Polar速度傳感器Bluetooth®Smart22Polar腳踏圈速傳感器Bluetooth®Smart22PolarLOOKKéoPowerBluetooth®Smart22配對23將心率傳感器與V800配對23將步速、速度或腳踏圈速傳感器與V800配對23將行動裝置與V800配對24刪除配對25同步25使用Flow應用程式進行同步25透過FlowSync與Flow網上服務同步26設定27運動內容設定27設定28體格設置29體重30身高30出生日期30性別30訓練背景資料30最高心率30靜止心率31Vo2max31一般設定31配對與同步32飛航模式32按鈕音32按鈕鎖定32時間模式輕擊靈敏度32單位32語言32我穿戴產品在33訓練視圖色彩33關於本產品33心率錶設定33鬧鈴33時間33日期34一週開始日34錶面34快顯菜單34時間視圖34訓練視圖34固件更新35如何更新固件36PolarFlow網頁服務與應用程式37PolarFlow應用程式37PolarFlow網上服務37訓練目標38建立訓練目標39快速目標39比賽步速目標39階段目標39我的最愛40我的最愛40在我的最愛中新增路線40在我的最愛中新增訓練目標:40編輯我的最愛41移除我的最愛41訓練42配戴心率傳感器42心率傳感器的配對42開始訓練43開始多項運動訓練44開始設有目標的訓練45開始設有路線指引的訓練45開始設有比賽步速的訓練45訓練期間的功能46在多項運動訓練中切換運動46記一圈46鎖定心率範圍46變更特定運動輕擊靈敏度46在進行一已計劃的階段訓練時變更階段46檢視快顯功能表46將背光設定為長亮47將位置指引設定為開啟47儲存POI(關注的地點)47倒數計時器47Intervaltimer(間歇計時器)47自動暫停47HeartTouch48暫停/停止訓練48刪除訓練48訓練後49V800上的訓練摘要49單一運動摘要49多項運動摘要51PolarFlow應用程式52PolarFlow網上服務52狀態52恢復狀態52功能53GPS53返回起點54路線指引55顯示屏上的引導55新增路線至V80055比賽步速55氣壓計55SmartCoaching56訓練負荷57依照全天候活動算出的恢復狀態57檢視您的恢復狀態58檢視您的日常卡路里58活動追蹤59Activitydata(活動資料)59訓練效益60運作方式60跳躍測試62深蹲跳躍62執行深蹲跳躍62測試結果63屈膝下蹲跳躍63執行屈膝下蹲跳躍63測試結果64連續跳躍64執行連續跳躍64測試結果65有氧健康測試65測試前65進行測試65測試結果66有氧適能等級66男性66女性67恢復測試67測試前67進行測試68測試結果68跑步指數68短期分析69男性69女性69長期分析70心率區71SmartCalories73智能通知73提示(需要iOS8.0或更高版本)73通知74设置74手机74V80074请勿打扰74消除通知74速度區75速度區設定75帶速度區的訓練目標75訓練期間75訓練後75運動內容75新增運動內容76編輯運動內容76訓練視圖76基本資料77心率77手勢與回饋78GPS與海拔高度78多項運動78游泳78游泳指標(泳池游泳)79泳式79步速與距離79划水率79SWOLF79選擇泳池長度80開始泳池游泳訓練80在您游泳後80R-R記錄80進行R-R記錄81測試結果81傳感器83Polar步速傳感器Bluetooth®Smart83將步速傳感器與V800配對83校準步速傳感器83手動校準84設置正確的每圈距離84設置因素84自動校準84跑步步頻和步距85Polar速度傳感器Bluetooth®Smart85將速度傳感器與V800配對85測量車輪大小86Polar腳踏圈速傳感器Bluetooth®Smart87將腳踏圈速傳感器與V800配對87PolarLOOKKéo功率傳感器Bluetooth®Smart88將KéoPower與V800配對88V800上的功率設定89校準KéoPower89重要資訊90V800產品維護90V80090心率傳感器90步速傳感器Bluetooth®Smart、速度傳感器Bluetooth®Smart和腳踏圈速傳感器Bluetooth®Smart91
存放91維修91技術規格91V80091H7心率傳感器92PolarWebSync軟件和USB連接線93PolarFlow行動裝置應用程式相容性93防水性94電池94更換心率傳感器電池94注意事項95訓練時干擾95訓練時儘量降低風險96Polar全球有限保養97免責聲明98簡介歡迎使用嶄新的V800!V800專為要求嚴格的運動員和運動愛好者而設計,配備GPS、SmartCoaching和全天候活動量測量,可協助您的表現達到顛峰。您可以使用Flow應用程式,在訓練完成後立即收到訓練的簡介,並且使用Flow網上服務,詳細計畫和分析您的訓練。
本使用者手冊可協助您開始使用這全新的訓練夥伴。欲查看教學影片和本使用手冊的最新版本,請造訪www.polar.com/en/support/v800。
V800監控您的訓練資料,例如心率、速度、距離和路線,甚至您日常生活中最細微的動作。H7心率傳感器*
訓練期間可在V800上查看準確的即時心率,即使游泳時也不例外。您的心率是用於分析訓練進行狀況的資訊。USB連接線使用特配的USB連接線為電池充電,並且透過FlowSync軟件同步V800和PolarFlow網上服務的資料。
POLARFLOW應用程式
每次訓練後,一目了然地檢視訓練資料。Flow應用程式能夠以無線的方式將您的訓練資料與PolarFlow網上服務同步。請從AppStore或GooglePlay下載。
POLARFLOWSYNC軟件
Flowsync軟體可讓您透過USB連接線同步V800和電腦上Flow網上服務的資料。請造訪www.flow.polar.com/start下載和安裝PolarFlowSync軟件。
POLARFLOW網上服務
請造訪polar.com/flow計畫和分析您訓練的每一個細節、自訂您的裝置,並進一步了解您的成績。*僅隨附於包含套裝心率傳感器的V800。如果您購買不含心率傳感器的組合,請不用擔心,您日後隨時可以購買。開始使用電池充電14電池操作時間15電池電量低通知15基本設定16按鈕功能、手勢與功能表結構17按鈕功能17時間畫面和功能表17準備訓練模式18訓練期間18輕擊手勢19HeartTouch19功能表結構19我的最愛20計時器20測試20設定21今日活動21狀態21日誌21相容的傳感器22Polar步速傳感器Bluetooth®Smart22Polar速度傳感器Bluetooth®Smart22Polar腳踏圈速傳感器Bluetooth®Smart22PolarLOOKKéoPowerBluetooth®Smart22配對23將心率傳感器與V800配對23將步速、速度或腳踏圈速傳感器與V800配對23將行動裝置與V800配對24刪除配對25同步25使用Flow應用程式進行同步25透過FlowSync與Flow網上服務同步26電池充電
在將V800拆封後,您必須做的第一件事就是充電。第一次使用V800之前,先將它完全充滿電。V800擁有可充電的內置電池。使用產品組合中隨附的自訂USB連接線,經由您電腦上的USB連接埠對其充電。您也可以藉由牆壁插座進行電池充電。在透過牆壁插座充電時,請使用USB電源適配器(並未隨附於產品組合中)。如果您使用AC適配器,請確保適配器上標示「output5Vdc0.5A-2Amax」(輸出5伏特直流電,最高0.5-2安培)。請務必使用擁有足夠安全保障的AC適配器(標示有「LPS」、「LimitedPowerSupply」或「ULlisted」)。請勿在低於-10°C或高於+50°C的溫度下對電池充電。
1.將自訂的USB接頭插入V800。2.將纜線另一端插入電腦的USB連接埠。
SPORTSTAR 心率监测手表 说明书

心率监测手錶
外殼及環形錶圈:ABS 顯示:正面玻璃顯示屏 錶面:亞加力(丙烯酸) 錶帶:PU黑色膠帶 及不鏽鋼扣 防水深度:50米 M
时间功能
星期几
日期 时间
[M] 模式键 切换功能模式 长按此键进入相应的设置状态 在设置状态,按此键进入下一设置 在设置状态长按此键退出设置 [S/S]开始/暂停键 在时间模式,按此键显示闹钟时间, 长按此键进入闹钟设置 在心率计时器模式,按此键开启计时器、 记录圈数,长按此键停止计时 在倒计时模式,按此键开启/暂停倒计时 [R] 重置键 在心率计时器模式下,按此键选择子功能; 当计时器暂停,长按此键将计时器重置为零 在倒计时模式下,倒计时暂停,长按此键将 倒计时重置为目标时间 [L] 背光灯键 在任意显示下,按此键开启背光灯,背光灯 将持续亮3秒钟
总计时均 心率
总圈数心率显示
总圈数
倒计时模式
心率区间内计时
低于心率下限计时
- 长按[M]键设置倒计时时间 - 按[S/S]键开启/关闭倒计时功能
免责条款:
本公司不承担使用本产品或文字说明带来的任何直接或意外的伤 害和损失。
高于心率上限计时
计时器计时
单圈平均 心率 单圈心率显示
单圈序 列号
消耗卡路里
最大/平均心率
倒计时功能
记忆功能
心率信 号检测
时间
自动切换
倒计时时间
心率扫描
注意事项:
心率带背面有两个传感器,在测量心率过程中需紧贴皮肤 在水下请勿测量心率 定期用干净的软布蘸上温和的肥皂水或者用类似的清洁溶液清理 心率带 清洁与心率带接触的皮肤以增强信号传输 如果较长时间测不到心率,可能是由于以下原因: 原因一:皮肤干燥 解决方法:在与两传感器接触的皮肤上蘸些水改善接触 原因二:传感器与皮肤接触不好 解决方法:确保心率带按照正确的方法佩戴好,与皮肤接触良好 原因三:肌肉抖动过于强烈 解决方法:确保心率带与皮肤接触良好 原因四:心率失常 解决方法:那些长期使用心脏起搏器、心率不齐或者心率失常 的人可能不适合使用心率表,手表很难监测到他们的心率 原因五:低电压 解决方法:更换心率带或手表电池再测 原因六:其它电磁干扰 解决方法:远离高电磁物
PC15心率表-中文说明书
PC15心率表中文说明书(请以收到的实物为准)前言恭喜您!您决定购买SIGMA SPORT所生产之心跳监测手表。
您所购买的PC15心跳监测手表,在未来将会是您运动及休闲的忠实伴侣。
PC15心跳监测手表是设计极精密的测量工具。
故使用前请事先详读使用说明书,以便了解熟悉其产品功能,进而能正确使用您购买之心跳手表。
SIGMA SPORT希望您能喜爱您购买之PC15心跳手表。
配置:◎PC15心跳手表◎连接胸带◎心跳传输器◎使用橡皮圈连接自行车手把配置使用及安装方法:◎传输器与胸带连接◎胸带可以依个人情况调整。
请将胸带调整至紧密而舒适,但不至于影响呼吸。
◎男性将传输器穿戴在胸肌底部。
SIGMA SPORT的标志位于前方,且不要颠倒。
◎女性将传输器穿戴在胸部的底部。
SIGMA SPORT的标志位于前方,且不要颠倒。
◎用水或唾液湿润传送带内两侧的螺纹导电橡胶垫。
◎固定于自行车车把手上。
英文译为中文SET 译为设定目录LANGUAGE 译为语言选择设定HR ZONES 译为心跳区间设定CLOCK 译为时间设定DATE 译为日期设定ALARM 译为闹铃设定MY NAME 译为命名功能设定TIME 译为时间功能目录CLOCK 译为时间显示HEALTH-Z 译为健康模式显示FITNESS-Z 译为健身模式显示POWER-Z 译为专业模式显示STOPWATCH 译为计时码表功能TOTALTIME 译为总运动时程计算功能ALARM 译为闹铃功能HEART 译为心跳功能目录TRAINTME 译为训练时间显示AVERAGE 译为平均心跳值显示MAXIMUM 译为最高心跳值显示KCAL 译为卡路里消耗计算功能TOTALKCAL 译为卡路里消耗总值计算功能LAP COUNTER 译为动动时程计数功能COUNTER 译为动动时程计数器MEMORY 译为记忆功能MANAGER 译为训练管理功能NO♥SIGNAL 译为训练管理功能1、在您开始使用前,您需要“唤醒PC15心跳手表”其方法为按住任一按键3秒钟。
bose 800 用户手册说明书
bose 800 owners manual Home | Contact |DMCAFile Name: bose 800 owners manual.pdfSize: 3921 KBType: PDF, ePub, eBookCategory: BookUploaded: 10 May 2019, 16:54 PMRating: 4.6/5 from 796 votes.Status: AVAILABLELast checked: 1 Minutes ago!In order to read or download bose 800 owners manualebook, you need to create a FREE account.eBook includes PDF, ePub and Kindle versionBook Descriptions:We have made it easy for you to find a PDF Ebooks without any digging. And by having access to our ebooks online or by storing it on your computer, you have convenient answers with bose 800 owners manual . To get started finding bose 800 owners manual , you are right to find our website which has a comprehensive collection of manuals listed.Our library is the biggest of these that have literally hundreds of thousands of different products represented.Book Descriptions:bose 800 owners manualLearn more or change settings here. Just type your request belowQuick tip Try searching for just one or two words e.g., connection help. And by having access to our ebooks online or by storing it on your computer, you have convenient answers with Bose 801 User Guide. To get started finding Bose 801 User Guide, you are right to find our website which has a comprehensive collection of manuals listed. Our library is the biggest of these that have literally hundreds of thousands of different products represented. I get my most wanted eBook Many thanks If there is a survey it only takes 5 minutes, try any survey which works for you. Search results for found ask for a document File Date Descr Size Popular Mfg Model Found in chassis2model Found in repair tips. Owner’s GuidePlease read this guide. Please take the time to follow the instructions in this owner’s guide carefully. It will help you set up and operate yourPlease save this guide for future reference. The lightning flash with arrowhead symbol within an equilateral triangle alerts the user to the presence ofThe exclamation point within an equilateral triangle, as marked on the system, is intended to alert the userAs with any electronic products, use care not to spill liquids into any. Always use the correct charger and refer to theIf contact has been made, wash the affected area with copious amounts of waterCorporation is under license. WiFi is a registered mark of the WiFi Alliance. No part of this work may be reproduced, modified, distributed, or otherwise used without prior written permission.WARNING This product contains magnetic material. Please contact your physician if you have anyIt is neither designed nor tested for useImportant Safety InstructionsInstall in accordance with the manufacturer’s instructions.Servicing is required when the apparatus has been damaged in anyThis device complies with FCC and Industry Canada RF radiation exposure limits set forth for general population./userfiles/94-cadillac-seville-owners-manual.xml bose 800 owners manual, bose 700 owners manual, bose 800 owners manual pdf, bose 800 owners manual download, bose 800 owners manual free, bose 800 owners manual 2017.It must not be colocated or operating in conjunction with any other antennas or transmitters.English 3U.S.A. only. NOTE This equipment has been tested and found to comply with the limits for a Class B digital device, pursuant to. Part 15 of the FCC Rules. These limits are designed to provide reasonable protection against harmful interferenceThis equipment generates, uses, and can radiate radio frequency energy and, if notHowever, there is no guarantee that interference will not occur in a particular installation. If this equipment doesCanada. This Class B digital apparatus complies with Canadian ICES003. This device complies with Industry Canada licenceexempt RSS standards. Operation is subject to the followingBose Corporation hereby declares that this product is in compliance with the essential requirements and. Names and Contents of Toxic or Hazardous Substances or Elements. Toxic or Hazardous Substances and Elements. Lead. Mercury. Cadmium. Hexavalent. Polybrominated. Polybrominated DiphenylEther PBDE. Part Name Pb. PCBs. MetalPlasticSpeakers. Cables. O Indicates that this toxic or hazardous substance contained in all of the homogeneous materials for this part is. X Indicates that this toxic or hazardous substance contained in at least one of the homogeneous materials used. Please complete and retain for your records. The serial and model number can be found on the bottom of the speaker. We suggest you keep your receipt with this owner’s guide.Introduction. Overview. Unpacking. Operation. Connecting to AC power. Pairing and connecting a device to the speaker. Firsttime setup. Adding another device to the speaker.Troubleshooting.OverviewFeatures. Bluetooth device. Unpacking. Open the carton and remove the speaker and AC power supply. Depending onThese provide the safest. Contact yourauthorized Bose dealer immediately or call Bose Customer Service.AC powersupply./paddyspalmspub/temp/94-camaro-manual-transmission-fluid .xmlAC power supplyConnecting to AC powerWhile the battery is charging,Or,Slide the AC power adapter for your region onto the AC power supply. English 7The speaker emits a tone to confirm connection to AC power, and cPairing and connecting a device to the speakerFirsttime setup. The first time you turn on your speaker, it is ready to pair and connect yourOn your device, turn Bluetooth on, locate the Bluetooth device list, and selectSettings. Bluetooth. BluetoothBose SLIII. Connected. When pairing is complete and your device is connected to the speaker, theNote If the speaker turns off after five minutes, it has not paired or connected withEnglish 9Adding another device to the speaker. Pair another device to the speaker by making the speaker discoverable.When the device connects to the speaker, the BSpeaker memory. The speaker can remember up to six paired devices. If you pair the speaker withNote To clear the speaker memory of all devices, press and hold BluetoothAll devices are cleared and theReconnecting a device. When turned on, the speaker attempts to reconnect with a device in memory. If the last connected device is not. The speaker searches for a paired device for approximately 30 seconds. Switching to a different device. You can switch the speaker from your connected device to another previouslyThe Bluetooth status indicatorOn your device, select “Bose SLIII” from the Bluetooth device list. The Bluetooth status indicator blinks white, while the speaker attempts to connect to the device.Control buttons. Control buttons are located on the top of the speaker. ControlDescription. Press to turn the speaker on or off. If there are no paired devices. See “Pairing and connecting a devicePress to select the Bluetooth source. If there are noPress again toPress to listen to a device plugged into the AUX connector. See “ConnectingPress to decrease the speaker volume incrementally. Press and hold to. Press to increase the speaker volume incrementally. Press and hold to.English 11System status indicators. Status indicators illuminate to show when an audio source or speaker state is. StatusSystem statusBlinks as the volume of the speaker increases or decreases when. When the indicator blinks twice, the maximum orBlinks when the sound is muted. Indicates the battery power level or the battery charging state. See “CheckingConnecting a device using the AUX connectorTo use the AUX IN connectorNotes. It cannot be used to connect an audio device. English 13Operating on battery power. Battery performance varies with the content played and the loudness at whichChecking the battery. When the speaker is turned on, the battery status indicator briefly illuminates, thenHowever, if the battery requires charging, theTo check the battery charge level, press and hold PowerSolid green. Full charge. Solid yellow. Medium charge. Blinking red. Charging is neededCharging the batteryTo charge the battery, connect the speaker to AC power see “Connecting to ACRecommended charging time is three hours to fully charge the battery. The bYou can use the speaker whileBlinking yellow. Battery is charging. Solid green. Battery is fully charged. Battery protection mode. When the speaker is unplugged and unused for more than 24 days, it enters. To reactivate the speaker,Tips on placing the speaker. When using your speaker indoors, the tonal quality can vary depending on whereFollow these guidelines when placing your speakerBass response decreases as the speaker isDo not lay the speaker on its back. Sound is emittedEnglish15Troubleshooting. Problem. What to do. Speaker willIf using AC power, ensureIf using battery power, the battery may be in protection mode or discharged. ConnectCannot pairSee “Pairing and connecting a device to the speaker” on page 9.Try moving it closer to the speaker.You may need to play an audio track to finalize theSee “Firsttime setup” on page 9 and “Adding another device” on page 10. Turn the speaker onPaired.See “Pairing and connecting a device to the speaker” on page 9. Try moving it closer to the speaker.See “Reconnecting a device” on page 10.Turn the speaker onPair and connect the device to the speaker again. See “Speaker memory” on page 10 and “Firsttime setup” on page 9.Problem.What to do. The speakerTry moving it closer to the speaker.Turn the speaker onPoor soundConnect your Bluetooth device to the speaker using the AUX connection. If soundTry moving it closer to the speaker.Running multiple. Pair your device and the speaker again.Turn the speaker onNo audio orEnglish 17Replacing the battery. The battery should be replaced when. Only Bose can replace the battery in your speaker. If you need a new battery. For contactTo clean the exterior surface of your product, wipe it using a soft, dry cloth. Contacting customer serviceLimited warranty. Refer to the card for instructions on how to register. Failure to register will not affect your limited warranty rights. Technical information. AC power supply rating. Output 17 VDC, 1A Max. Input power rating. Input 17 20 VDC, 1A Max. Dimensions. WeightTemperature range for useFramingham, MA 017019168Weekdays 830 a.m. to 8 p.m. Saturdays 9 a.m. to 3 p.m.Canada. Bose LimitedMarkham, Ontario. Canada L6C 3A1Weekdays 9 a.m. to 5 p.m.Australia. Newington NSW 2127Bose N.V., Limesweg 2. B3700 TongerenChina. Bose Greater China OperationsEast Dong Baoxing Road. Shanghai 200080 P.R.C. People’s Republic of ChinaDeutschland. Bose GmbH. Kundenbetreuung. Neuenhauser Str. 73. D48527 NordhornFinland. Bose Finland. Kornetintie 6BFrance. BoseS.A.S.Hong Kong. Nederland. Bose B.V. Nijverheidstraat 8Suite 1203, Midas Plaza, 1 Iai. Yau Street, San Po Kong. Kowloon, Hong KongIndia. Kongsvinger FestningBose Corporation India Private Limited. The Bose Service Centre. C13, Ground Floor. SDA Commercial Complex. Community Centre. New Delhi, India 110016Bose SMS Ltd. Castleblayney Road. Carrickmacross, Co MonaghanItalia. Bose S.p.A.Via della Magliana 876Japan. Bose K.K. Sumitomo Fudosan Shibuya. Garden Tower 5F,Shibuyaku, Tokyo 1500036Luxemburg. Bose N.V. Limesweg 2. B3700 TongerenMexico. Bose de Mexico S. de R.L. de C.V. Despacho 204. Lomas de Chapultepec. C.P. 11000, Mexico D.F., MexicoNorge. Poland. Bose sp. z o.o.Osterreich. Bose Ges.m.b.H. Vienna Business Park. Wienerbergstrasse 7 10.OG.A1100 ViennaSchweiz. Bose AG. Hauptstrasse 134Sverige. Johannefredsgatan 4. S43153 Molndal. United Kingdom. Bose LimitedGillingham Business Park. Gillingham, Kent ME8 ONJWorld Wide WebEnglish 19. Framingham, MA 017019168 USA. AM373985 Rev. 00PDF Version 1.4. Linearized Yes. Create Date 20130603 0933590400. Metadata Date 20130603 0934120400. Modify Date 20130603 0934120400. Creator Tool Adobe InDesign CS5.5 7.5. Page Image Page Number 1, 2. Page Image Format JPEG, JPEG. Page Image Width 256, 256. Page Image Height 256, 256. Page Image Binary data 5553 bytes, use b option to extract, Binary data 7785 bytes, use b option to extract. Instance ID uuidec0e1a4fcdd24085881737847ffdd602. Original Document IDxmp.did88C800BF66AEE111B643E04B71188892. Document IDxmp.did1B899EF404A9E2119F7EE5E6F32EE92D. Rendition Class proofpdf. Derived From Instance ID xmp.iid2AEFCF236CA8E21187188E00710954C2. Derived From Document IDxmp.did752CC0734FA8E2119B9E85CED4A40A85. Derived From Original Document IDxmp.did88C800BF66AEE111B643E04B71188892. Derived From Rendition Class default. Doc Change Count 7803. Producer Adobe PDF Library 9.9. Trapped False. Page Count 20. Creator Adobe InDesign CS5.5 7.5. If you have WiFi at home, you’re ready to enjoy your favorite music in any room you want. Refer to the quick start guide in the carton for contact information. The app guides you through connecting the system to your network see page 11. The app guides you through setup. You can do this by manually putting the system in to setup mode. Lights under the indicators glow according to system state see page 13.See page 19 for more information. Auxiliary source The auxiliary source lets you play music from an audio device connected to your system’s AUX connector. You need a stereo cable with a 3.5 mm stereo cable plug not provided. If you have not set your Presets, launch the app and set your Presets. For help, refer to the inapp help. If using the remote control, aim the remote toward the system while pressing a Preset on the remote. A gear icon Setting often represents Settings on the Home screen. If you cannot pair your device You may need to clear the system’s Bluetooth pairing list see page 21. After you clear the list, try pairing again see page 19. Note If there are multiple devicesstored in the system’s pairing list, it may take a minute or two for the paired device to connect. Your system’s Bluetooth indicator indicates connection status. See “Understanding the system status indicators” on page 12. Using the button 1. On the system’s button pad or remote control, press and release until the Bluetooth indicator blinks blue. The system connects to the last device that streamed to your system. 2. Once connected, on the Bluetooth enabled device, play music to stream to your system. Tip If a paired device is connected, you do not need to press. The system’s Bluetooth indicator glows white when connected. If the paired device is out of range of your system, move the device within range. You may need to clear the pairing list if you cannot connect to a device. Once you clear the list, you need to pair previouslypaired devices again. The AUX connector accepts a 3.5 mm stereo cable plug not provided. 1. Using a stereo cable, connect your audio device to the AUX connector on the system. However, you can also update system software using the button pad. 1. Press to power the system on. 2. On the button pad, press and hold 4 and about 5 seconds. The WiFi indicator glows when WiFi is enabled.Resetting the system Factory reset clears all source, volume, and network settings from the system and returns it to original factory settings. 1. Press to power the system on. 2. On the button pad, press and hold 1 and about 10 seconds. Post in the comments.Also the the device is not recognized by the phone Trying to troubleshoot but nothing is happening.。
胸带心率表(388)使用手册
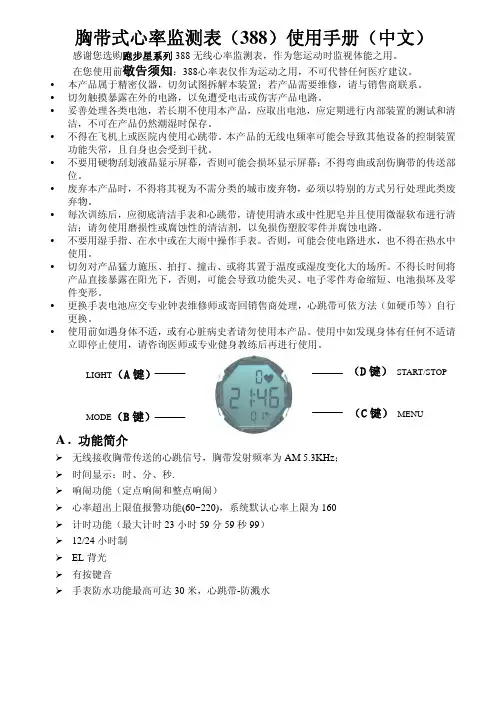
感谢您选购跑步星系列 388 无线心率监测表,作为您运动时监视体能之用。 在您使用前敬告须知:388心率表仅作为运动之用,不可代替任何医疗建议。 本产品属于精密仪器,切勿试图拆解本装置;若产品需要维修,请与销售商联系。 切勿触摸暴露在外的电路,以免遭受电击或伤害产品电路。 妥善处理各类电池,若长期不使用本产品,应取出电池,应定期进行内部装置的测试和清 洁,不可在产品仍然潮湿时保存。 不得在飞机上或医院内使用心跳带。本产品的无线电频率可能会导致其他设备的控制装置 功能失常,且自身也会受到干扰。 不要用硬物刮划液晶显示屏幕,否则可能会损坏显示屏幕;不得弯曲或刮伤胸带的传送部 位。 废弃本产品时,不得将其视为不需分类的城市废弃物,必须以特别的方式另行处理此类废 弃物。 每次训练后,应彻底清洁手表和心跳带,请使用清水或中性肥皂并且使用微湿软布进行清 洁;请勿使用磨损性或腐蚀性的清洁剂,以免损伤塑胶零件并腐蚀电路。 不要用湿手指、在水中或在大雨中操作手表。否则,可能会使电路进水,也不得在热水中 使用。 切勿对产品猛力施压、拍打、撞击、或将其置于温度或湿度变化大的场所。不得长时间将 产品直接暴露在阳光下,否则,可能会导致功能失灵、电子零件寿命缩短、电池损坏及零 件变形。 更换手表电池应交专业钟表维修师或寄回销售商处理,心跳带可依方法(如硬币等)自行 更换。 使用前如遇身体不适,或有心脏病史者请勿使用本产品。使用中如发现身体有任何不适请 立即停止使用,请咨询医师或专业健身教练后再进行使用。
B . 产品功能操作模式(请操作时勿混淆模式届面! )
B键
正常时间模式 D键
响闹模式
心跳测量/计时模式
1. 2.
任意模式下按 A 键 EL 亮三秒。 时间模式 轮流显示平均心率和计时时间各 2 秒;停止计时状态按住 D 键 2 秒计时与心率值清零后 自动返回正常时间模式。
心率表使用说明书
SIGMA心率表使用说明书发布: 2008-7-29 09:39 | 作者: 网络转载 | 来源: 本站收集整理 | 查看: 1246次SIGMA心率表使用说明书一、配置pc1600心率表一块弹力带一条传感器一个自行车车把安置座二、佩戴(安置)方法A.心率表可象普通手表一样佩戴;或固定车把上。
B.将传感器与弹力带接上,戴在胸部的下边缘(男性戴在胸肌的下边缘)。
调节弹力带,应感觉舒适不影响呼吸。
C.传感器应贴紧皮肤,并用唾液将其背面弄湿(其实佩戴一会儿,皮肤出汗就可以了)它就开始传出心率信号了。
三、功能●心率数●时间显示●计时功能(STP)●日期显示●闹铃功能(AL)●心率数上下限设定●心率数超出设定区域声音警示●显示超出和处在设定心率区的训练时间(Hi-Lo-In)●最高心率数●平均心率数(AVG)●总热量(卡路里)消耗(KCAL)●脂肪燃烧克数●停止训练(停表)后3分钟恢复心率测定(R)●倒计时功能(CDT)●每一训练单元计时(LAP)●显示器背光照明其中KCAL、AVG、Hi-Lo-In等功能只在计时(即训练)开始后才工作。
四、各键所对应的操作功能SET键(左上):此键为各项功能中数字调整的设定键,可设置时间、闹钟、日期、心率上下限、选择性别、体重设定、运动类型参数设定、计时及恢复MENU键(左下):此键为各项功能的切换键,可切换至计时、平均心率、卡路里消耗计算、时间、设定心率区训练时间等功能SUBMENU键(右上):此键为每项功能中所包含子功能的切换键,可切换至燃烧脂肪克数、警示音、日期、最大心率、倒计时、每一训练单元计时等功能ALARM键(右下):此键可开启/关闭警示音和背光显示五、基本设定1.时间设定按MENU键直到表上部显示时间;按住SET键两秒以上,直到表上显示“hold”字样接着变成闪动的“24:”(或12:);此时按SET键选择时间显示方式24小时即选“24:”,12小时显示即选“12:”,按MENU键确定;随后表上时间显示,例如“18:23”,此时“时”在闪动,按SET键调“时”,按MENU键确认,此时“分”闪动,按SET键调“分”,按MENU键确认,时间设定完成。
手表说明书
手表说明书手表说明书1. 简介本手表是一款智能穿戴设备,采用先进的技术和设计,方便用户进行各项身体健康监测、通讯和生活娱乐等功能。
本说明书将为您详细介绍手表的各项功能和使用方法,以便您更好地使用和享受手表带来的便利。
2. 技术规格- 尺寸:适合手腕周长为14cm至20cm的用户使用- 屏幕:高清彩色屏幕- 材质:手表表壳采用高强度金属材质,表带采用柔软舒适的环保材料- 防水等级:IP68级别,支持水深达50米的防水性能注意:请勿在深水中长时间使用手表,以免影响防水性能。
3. 功能介绍3.1 健康监测功能手表内置多项健康监测功能,可对用户的身体状况进行实时监测。
以下是主要的健康监测功能:- 心率监测:手表能够通过光电传感器实时监测用户的心率,并提供相应的心率报告。
- 血压监测:手表支持非侵入式血压监测,帮助用户掌握自身的血压状况。
- 睡眠监测:手表可以智能监测用户的睡眠情况,包括深度睡眠、浅度睡眠和醒睡比例等。
注意:手表提供的健康监测数据仅供参考,不能替代专业医疗设备的诊断结果。
3.2 运动模式手表内置多种运动模式,可以满足不同用户的运动需求。
用户可以选择相应的运动模式来记录运动数据,并通过手机APP进行数据分析和分享。
以下是手表支持的常见运动模式:- 室内跑步- 室外跑步- 骑行- 健身- 游泳- 爬山注意:在进行特殊运动(如游泳)时,请确保手表处于防水状态。
3.3 通讯功能手表内置蓝牙模块,支持与手机进行连接,实现通话和短信的接收和发送。
用户可以通过手表进行语音通话和发送短信,方便日常生活和工作中的沟通。
注意:手表仅支持与支持蓝牙功能的手机进行连接。
3.4 生活娱乐功能手表除了以上提到的功能外,还内置了一些生活娱乐功能,方便用户在日常生活中的使用和娱乐。
以下是一些主要的生活娱乐功能:- 天气预报:手表可以通过连接手机的天气应用,提供实时的天气信息和预报。
- 闹钟:用户可以根据自身需求设置手表的闹钟,方便日常使用。
迈欧(MIO)心率表说明书
操作模式按MODE 键依次进入下一模式.时间&日期(显示时间,日期,星期几和姓名)闹钟(设置闹钟)凈卡路里(显示净卡路里;输入卡路里摄入量)运动定时器(运动和其它活动定时器,包括走/跑5种定时器模式)心率回复功能(检测运动后心率回复功能---一个心血管功能健康指标)静止时心率(检测和显示静止时心率)我的MIO(设置个人基本参数和体重管理标)B. 快捷方式快捷方式快捷键: 从任一模式转换至时间模式, 长按MODE 键2秒; 从任一模式进入定时器模式按START 键; 从任一设置模式退出无须进行完所有的设置操作, 只须长按SET 键2秒设置模式: 无论在任一模式下, 长按SET 键进入设置模式: 1. 长按SET 键直至听到哔哔声(2秒); 2. 所需设置项将闪动; 3. 按+或-键调节设定值, 长按+或-键自动滚动字符; 4. 调节至所需值再次按SET 确认; 5. 重复步骤2至4进行各项设置或长按SET 2秒退出设置模式.C. 启动MIO MIO首次使用时MIO 可能处于睡觉模式(屏幕为空白屏) 长按START 直至屏幕上出现闪动的12H 或24H, 开始对MIO 进行设置.设定时间&日期: 按+或-键切换格式, 12H=12小时时制(AM/PM)&月份/日期格式, 24H=24小时时制&日期/月份格式, 按SET 键移动至下一设置项; 如上方法依次设定时间, 日期, 您的姓名; 体重单位; 体重; 性别; 出生年份; 按SET 键完成启动.D. 设定时间设定时间&&日期日期显示屏显示时间, 自动循环显示姓名, 日期和星期A.A.主要功能主要功能主要功能几. 设定时间&日期: 长按SET(2秒)直至听到哔哔声. 12H 或24H 闪动; 按+或-键切换时间&日期格式, 12H=12小时时制(AM/PM)&月份/日期格式, 24H=24小时时制&日期/月份格式; 按SET 键设定小时; 按+或- 键选择小时数值, 长按+或-键快速选择数值, 按SET 键确认; 如上方法设定分钟数值; 复位至0秒按+或-键. 按SET 键移动至下一项设置; 使用+或-键选择数值然后按SET 键确认依次设定年, 月, 日; 任一时间 停止设置, 长按SET 键2秒.E. 设置我的MIO MIO按MODE 键6次从时间模式进入我的MIO 模式; 在我的MIO 模式中设置个人基本参数, 长按SET 键2秒直到听到哔哔声;名字第一个字母闪现. 使用+或-调定. 快速选择长按+或-. 按SET 移动至下一个字母. 同法设定体重单位,体重,性别,出生年份,活动水平和每周增/减体重目标 活动水平项将显示 ACT LO(低)或MI(中)HI(高). 每个水平定义的详情请查阅本说明书L 部分. 每周增/减体重目标项将显示LB/WK(英磅/周)或KG/WK(公斤/周). 使用+或-调节每周增或减体重的目标.然后按SET. 例如,如果目标是每周失去一磅, 设置这个值为-1.0. 减少体重使用负数;增加体重使用正数. 注意每周体重改变超过2磅或0.9公斤是不被推荐的, 因此限定每周增/减体重最大范围为2磅或0.9公斤. 无论何时停止设定长按SET 键(2秒)直至听到哔哔声. MIO 将直接进入日常卡路里目标模式.MIO 根据体重改变目标和个人基本参数设定计算出日常卡路里目标. 目标模式中最右边数字将闪动. 接受这个计算值按SET4次. 如果需手动调节这个目标使用+或-和SET 调节每个数字. 设定日常卡路里目标详情请查阅本说明书L 部分. 返回至时间模式, 按MODE 键.G. G. 设置闹钟设置闹钟设置闹钟按MODE 键一次从时间模式进入到闹钟模式; 按SET 键交替选换闹钟开或关;更改闹钟时间,长按SET 键(2秒)直至听到哔哔声, 使用+/-设定小时, 按SET 键确认, 使用+/-设定分, 然后按SET 键确认. 快速选择数值长按+或-; 闹钟开启闹铃符号显示;长按MODE 键2秒返回至时间模式.H. H. 检测心率检测心率检测心率按背光键可以打开背光显示,5秒钏内若没有任何按键动作,背光关闭I. 设置静止时心跳设置静止时心跳为读数更精确,当早晨自然醒时(无闹钟状态)设置这个功能. 之后将使用这个默认静止时心跳(70BPM). 按MODE 键5次 从时间模式进入静止时心跳模式. 最近一次RHR 显示;依照H 部分描述放手指于MIO 传感器上.心跳符号闪 动. 在4至7秒内显示静止时心跳. 按MODE 键2次返回时间模式. J. J. 使用运动定时器使用运动定时器使用运动定时器按START 键从其它模式进入运动定时器模式或者按MODE 键3次从时间模式进入运动定时器. 有五种类型. 可选择适合的运动方式.从零计算从零计算((适合限时走适合限时走))定时器必须是停止的;长按SET 键直到听到哔哔声(2秒);按+或-调节定时器类型至TMR↑.按SET 键确认. 按START 键开始计时;暂停按STOP 键. 继续按START 键;将定时器重置到零及清除卡路里,长按RESET 键(2秒)直至听到哔哔声.倒计时至零停止计时至零停止((适合限时走适合限时走))定时器必须是停止的;长按SET 键直到听到哔哔声(2秒);按+或-调节定时器类型至TMR↓.按SET 键确认. 按+或-调节小时.按SET 确认; 同法调节分和秒; 按START 键开始计时;暂停按STOP 键. 继续按START 键; 当倒计数至零时定时器将发出哔哔声;重置定时器至开始时刻和清除卡路里, 长按RESET 键(2秒)直至听到哔哔声.倒计时至零和总计时倒计时至零和总计时((适合于慢跑或热身定时器时器))定时器必须是停止的;长按SET 键直到听到哔哔声(2秒);按+或-调节定时器类型至TMR↓↑.按SET 键确认. 按+或-调节热身所需小时.按SET 确认; 同法调节分和秒; 按START 键开始计时;暂停按STOP 键. 继续按START 键;当TIMER↓至零和自动算出总计时间时定时器将发出哔哔声;重置定时器至开始时刻和清除卡路里, 长按RESET (2秒)直至听到哔哔声.最大心率百分比大卡完成状态显示完成状态显示(显示你离卡路里目标还有多远,形象表达每次心跳测量最大心率百分比)心跳标志 (闪动时表明正在测量) 设定(指示你处于 设定模式)次/分開始/停止/+按鍵開始,停止,運動定時器,設定時數值增加背光/重置键开启背光,重置数值设定 测量电极(左)测量电极(右) 模式键更换模式,数值减少设定键长按进入设定模式,按一下启动/关闭闹铃迈欧(MIO)心率表使用说明书使用走使用走//跑(两者间隔时间两者间隔时间))定时器定时器((适合于训练训练))走/跑的程序请查阅您的MIOSENSE 指南, 设置跑的间隔时间,其次是走的. 定时器必须是停止的;长按SET(2秒)直至听到哔哔声;按+或-调节定时器类型至TIMER↓↓.按SET 键确认.按+或-调节TIMER1(跑)所需小时数值.按SET 确认; 同法调节TIMER1分和秒;按+或-调节TIMER2(走)所需小时数值.按SET 确认; 同法调节TIMER2分和秒;按+或-调节走和跑重复的次数. 按SET 键确认; 开始走/跑计时, 按START 键开始跑;当第一个间隔时间倒计数为零时定时器发出哔哔声;走至第二个间隔时间倒计数为零时MIO 发出哔哔声; 如此反复直至完成所设重复次数;任一时间暂停按STOP 键, 继续按START 键; 重置定时器至开始时刻和清除卡路里, 长按RESET 键(2秒)直至听到哔哔声.倒计时至零和重复训练倒计时至零和重复训练((适合训练适合训练))定时器必须是停止的;长按SET(2秒)直至听到哔哔声;按+或-调节定时器类型至TMR REP.按SET 键确认. 按+或-调节所需小时数值.按SET 确认; 同法调节分和秒;按+或-调节重复的次数. 按SET 键确认; 按START 键开始计时;暂停按STOP 键. 继续按START 键;当倒计为零时定时器发出哔哔声, 然后再次倒计时直到完成所设重复的次数; 按STOP 停止定时器;重置定时器至开始时刻和清除卡路里, 长按RESET 键(2秒)直至听到哔哔声.清除累积的卡路里消耗量清除累积的卡路里消耗量定时器必须是停止的;在EXERCISE TIME 模式按SET 键多次直至看到屏幕显示如下, 长按RESET 直至听到哔哔声. 如果不删除,卡路里会自动累加。
V800和V810 VERIS Verabar 安装与维护指南说明书
V800 and V810 VERIS Verabar®Installation and Maintenance Manual176-EN Please read and savethese instructionsContentsGeneral Safety Information (3)Product Information (3)Section 1: Scope (3)Purpose of this Manual (3)Section 2: Receiving and InspectingReceiving and Inspecting the Verabar® (3)Section 3: Safety Precautions (3)Section 4: Installation Preparations ......................................................3-5Location (3)Orientation (4)Horizontal Piping (4)Vertical Piping (5)DP Transmitter/Local Indicator Location (5)Installation Drawings and Bill of Materials (5)Section 5: Installation Procedure .........................................................5-8Preparing the Pipe (5)Weld Mounting Flange to Pipe (6)Insert Sensor (7)Insert Instrument Vales or Manifold (7)Installed V500 & V510 (8)Section 6: Periodic Maintenance (9)Limited Warranty and Remedy (11)2Designs, materials, weights and performance ratings are approximate and subject to change without notice.Visit armstrong for up-to-date information.3Designs, materials, weights and performance ratings are approximate and subject to change without notice.Visit armstrong for up-to-date information.Section 1 ScopeThese instructions provide a description of procedures for installing the V800 and V810 Verabar ® model flow sensors. Procedures are given for all industrial flow measurement applications including liquid, steam and gas, for both horizontal and vertical piping configurations.Section 2 Receiving and InspectionThe following tasks should be performed as part of the receiving inspection procedure:• Check items received against the packing list.• Check sensor nameplate for proper model number, serial number and tag number.• Verify the actual pipe diameter matches the ID stated on the sensor nameplate.• Check the sensor tube for any signs of damage. Damage to the sensor tube may result in erroneous flow readings. Section 3 Safety PrecautionsThe following process should be conducted prior to installing the Verabar ® flow sensor:• Check the maximum operating conditions on the flow sensor nameplate. Verify that the maximum operating conditions of the application do not exceed the parameters stated on the nameplate. If any pressure, temperature, or flow limits will be exceeded, contact the factory before proceeding.• Check to ensure the pipe is depressurized and drained prior to installation.• Verify all pressure containing components are properly installed and tightened prior to pressurizing the system. Section 4 Installation Preparations4.1 LocationFor the most accurate flow measurement, a minimum straight run of pipe is required. Table 1 shows the minimum straight run requirements.If longer straight runs are available, position the Verabar ® such that the ratio of upstream straight run to downstream straight run is approximately 4 to 1. If straight run lengths are less than the values stated in Table 1, consult the factory for additional accuracy and location information. For additional piping configuration, see Table 1.Straightening vanes should be positioned such that the end closest to the Verabar ® is half way between the Verabar ® and the closest upstream configuration. For elbow installations, mount the Verabar ® in the same plane as the closestupstream elbow.General Safety InformationProduct InformationInstructions and procedures listed in this manual may require special precautions to ensure the safety of the individuals performing the operations. Review the entire manual, taking note of safety messages prior to performing any operations listed in the manual.The VERIS Verabar ® averaging pitot flow sensor provides unsurpassed accuracy and reliability. The special round-bar design of the V800 model is constructed of Ni-Al-Br and specifically designed for use in sea water applications.The V800 features flanged mounting components.The V810 model includes additional support on the opposite wall of the pipe.4Designs, materials, weights and performance ratings are approximate and subject to change without notice.Visit armstrong for up-to-date information.Table 1. Straight Run Requirements4.2 OrientationVerify the proper sensor orientation by checking for an “-H” (horizontal piping) or a “-V” (vertical piping) in the model number on the Verabar ® sensor nameplate.Deviation from the following mounting location instructions may cause inaccuracy in the flow measurement.4.2.1 Horizontal PipingFor air or gas installations, mount the Verabar ® in the upper 160° of the pipe to allow any condensate to draininto the pipe (Figure 1). For liquid or steam installations, mount the Verabar ® in the lower 160° of the pipe. This allows any entrained air to bleed back into the pipe for liquid applications and allows condensate to collect in theinstrument piping for steam applications.5Designs, materials, weights and performance ratings are approximate and subject to change without notice.Visit armstrong for up-to-date information.4.2.2 Vertical PipingThe Verabar ® may be mounted in any location around the circumference of the pipe for vertical piping applications.4.3 DP Transmitter/Local Indicator LocationWhen choosing a Verabar ® location, consider the DP transmitter/local indicator location:• The transmitter must be mounted below the Verabar ® for liquid and steam applications.• The transmitter must be mounted above the Verabar ® for air and gas applications.4.4 Installation Drawings and Bill of MaterialsAdditional information is available in the Installation Drawings and Bill of Materials VB-7061. (Contact factory foraccess information). It contains standard and alternate transmitter locations and a complete bill of materials based on the fluid type and sensor orientation on the pipe.Section 5 Installation Procedure5.1 Preparing the Pipe• Completely depressurize and drain pipe prior to installation of the Verabar ®.• Mark the location of the hole through which the Verabar ® will be mounted. For V810, mark the location of the hole for the opposite end support 180° from the first hole. Use a center punch to mark the hole to prevent the drill bit from walking on the pipe.• Drill the pipe with the proper sized hole per the following table (Important: Do not torch cut hole!):• IMPORTANT:Deburr the hole on the inside of the pipe.Figure 1. Verabar ® Orientation in Horizontal Pipe6Designs, materials, weights and performance ratings are approximate and subject to change without notice.Visit armstrong for up-to-date information.• Note the flange orientation per Figure 4. The bolt holes on the flange MUST straddle the centerline of the pipe(2-holing pattern). For V810 models, loosely bolt together the flanged opposite support, gasket and mounting flange and slide over the tip of the sensor and tack weld into position.5.2 Fitting Welding• Loosely bolt together (hand tight) the sensor, gasket and mounting flange. Insert the assembly into the pipe. Align the head of the sensor so that the arrow labeled “FLOW” on the head is in the direction of the flow to within 3°. The contour of the wed coupling should match the contour of the pipe. Check that the bottom of the weld coupling is in contact with the pipe wall.• Using the appropriate weld gap (1/16” [1.5mm] typical), tack weld the mounting flange into position (see Figure 3).Figure 2. Verabar ® Model V800 & V810 AssemblyFor Verabar ®Model V810Gap (1/16” [1.55mm] Typical)Tack weldProtect threads Complete weldFigure 3. Weld Gap7Designs, materials, weights and performance ratings are approximate and subject to change without notice.Visit armstrong for up-to-date information.Figure 4. Bolt Hole Orientation5.3 Insert Sensor• Install the sensor with the gasket between the flanges such that the flow arrow on the head of the sensor is in thedirection of the flow (Figure 5). The nuts should be tightened until the gasket is completely crushed (the gasket thickness should be approximately 1/8” [3mm]).5.4 Insert Instrument Vales or Manifolds5.4.1 Valves• If the Verabar ® does not have a valve head, install instrument valves using proper thread sealant. Be sure instrument shut-off valves are installed and shut prior to re-pressurizing the pipe.5.4.2 Manifold• If the Verabar ® has a direct or integral manifold, be sure the high and low pressure block valves are shut off prior to re-pressurizing the pipe.5.5 Pipe Pressurization• Pressurize the pipe and check for leaks. If leaks are present, retighten the flange nuts until leaking is eliminated.Figure 5. Orientation of Flow Arrow• Remove the sensor and finish welding the weld coupling(s) per applicable piping codes. For V810 models, weld theopposite support mounting flange into position.Vertical Pipe OrientationsHorizontal Pipe OrientationsDirection of Flowof Flow Direction of Flow8Designs, materials, weights and performance ratings are approximate and subject to change without notice.Visit armstrong for up-to-date information.Figure 6. Installed V800 & V810The Verabar ® is now properly installed (Figure 6).Verabar ®Model V800Verabar ®Model V8109Designs, materials, weights and performance ratings are approximate and subject to change without notice.Visit armstrong for up-to-date information.Section 6 Periodic MaintenanceThe assembly should be periodically checked.Verify that no leaks are present.Tighten the flange nuts if necessary.Inspect sensor for wear or damage.Notes10Designs, materials, weights and performance ratings are approximate and subject to change without notice.Visit armstrong for up-to-date information.11Designs, materials, weights and performance ratings are approximate and subject to change without notice.Visit armstrong for up-to-date information.VERIS, Inc. (“VERIS”) warrants to the original user of those products supplied by it and used in the service and in the manner for which they are intended shall be free from defects in material and workmanship for a period of five (5) years from the date of installation, but not longer than 63 months from the date of shipment from the VERIS factory, unless a Special Warranty Period applies, as noted below. This warranty does not extend to any product that has been subject to misuse, neglect or alteration after shipment from the VERIS factory. Except as may be expressly provided in a written agreement between VERIS and the user, which is signed by both parties, VERIS DOES NOT MAKE ANY OTHER REPRESENTATIONS OR WARRANTIES, EXPRESS OR IMPLIED, INCLUDING, BUT NOT LIMITED TO, ANY IMPLIED WARRANTY OF MERCHANTABILITY OR ANY IMPLIED WARRANTY OF FITNESS FOR A PARTICULAR PURPOSE. The sole and exclusive remedy with respect to the above limited warranty or with respect to any other claim relating to the products or to defects or any condition or use of the products supplied by VERIS, however caused, and whether such claim is based upon warranty, contract, negligence, strict liability, or any other basis or theory, is limited to VERIS’ repair or replacement of the part or product, or, at VERIS’ option, to repayment of the purchase price. In addition to replacing any part of parts found to VERIS’ satisfaction to be defective, VERIS will pay the cost of shipment of both the defective part to the VERIS plant and the replacement part to the original user. As a condition of enforcing any rights or remedies relating to VERIS products, notice of any warranty or other claim relating to the products must be given in writing to VERIS: (i) within 30 days of last day of the applicable warranty period, or (ii) within 30 days of the date of the manifestation of the condition or occurrence giving rise to the claim, whichever is earlier. IN NO EVENT SHALL VERIS BE LIABLE FOR SPECIAL, DIRECT, INDIRECT, INCIDENTAL OR CONSEQUENTIAL DAMAGES, INCLUDING, BUT NOT LIMITED TO, LOSS OF USE OR PROFITS OR INTERRUPTION OF BUSINESS. The Limited Warranty and Remedy terms herein apply notwithstanding any contrary terms in any purchase order or form submitted or issued by any user, purchaser, or third party and all such contrary terms shall be deemed rejected by VERIS.Special Warranty Periods are as follows:Electronic components, including without limitation, differential pressure transmitters, multivariable transmitters, flow computers, rate or totalizer displays: one (1) year from the date of installation, but not longer than 15 months from the date of shipment from the VERIS factory.VERIS, Inc.Limited Warranty and RemedyArmstrong International - VERIS Flow Measurement Group5820 Glacier Way, Frederick, CO 80205 - USA Phone: 303-652-8550 Fax: 303-652-8552armstrong 176-ENPrinted in U.S.A. - 3/16/16© 2016 Armstrong International, Inc.Designs, materials, weights and performance ratings are approximate and subject to change without notice.Visit armstrong for up-to-date information.V800 and V810 VERIS Verabar ®Installation and Maintenance Manual。
手表使用说明
手表使用说明1、手表使用说明调校方法:时间的调整校对时间时,如果您要求时间相当精确,先让秒针走到12时位臵拉出表冠至位臵3,顺时针或逆时针转动表冠调整时针和分钟的位臵,当各指针与标准时间(以电视机或收音机为参考)一致时,将表冠推回原位(位臵1)。
日历的调整将表冠拉至位臵2,顺时针方向转动表冠调整日历。
星期日历手表的调整将表冠拉出至位臵2,逆时针转动表冠调整星期,顺时针转动调整日历。
注意事项:手表的日历、星期、月相之调整切勿在手表时间21:00PM~3:00AM之间操作,此期间日历功能正在进行运作,同时也是齿轮齿合度较低的时候,频繁的动作会损伤手表的内部零件。
星期日历跳格,由于制格不同分为快慢两种,第一种在±5分钟之内日历跳格完成,第二种在3小时内日历跳格完成。
如遇采用螺旋式表冠的手表,切勿硬拔,请先逆时针方向旋转打开锁紧的表冠,在调整好时间后,将表冠顺时针方向转动并推入锁紧,以免进水。
如遇带日历的手表需调节日期,请先将日历调到您所需要日期的前一天,之后转动时针来调节日期,当时针经过午夜12点时日期会变更,这样可以避免直接调节日期造成日夜的混淆。
如遇功能复杂的手表,请先详读专门附带的说明书。
2、防水性能的介绍手表的防水性能主要依靠表镜、后盖、表冠等处的防水胶圈,并采用螺旋式表冠,从而达到相应的防水标准。
手表的防水性能通常按其等级分为:不防水(表后盖勿标识)。
防汗(SWEAT-RESISTANT)。
一般性防水(WATER-RESISTANT),30米防水(30M、3ATM、3BAR),50米防水(50M、5ATM、5BAR)。
潜水表100米防水,200米防水,300米防水等。
关于手表的防水性能,国家标准和国际标准都有明确的规定:凡是标明防水的手表,最低要耐受2个大气压,即20米水深处不进水。
30米防水表示手表可以耐受3个大气压,依此类推。
此标准的前提是在进行测试的时候是在实验室条件下:温度保持在20-25摄氏度,且手表和水都呈静止状态。
PolarTeam2使用说明
PolarTeam2使用说明Polar team2 简单操作说明欢迎您选用世界顶级品牌POLAR 团队系统team 2。
为了让您能更好的使用本产品,在使用之前请详细阅读此操作说明,并依据操作说明进行基本操作。
快速查询:Team2组成(请查阅第2页)1、安装前准备(请查阅第2页)2、安装与配对(请查阅第3页)软件安装(请查阅第3页)语言选择(请查阅第8页)仪器配对(请查阅第10页)增加心率传感器(请查阅第14页)3、仪器使用(请查阅第16页)编辑团队(请查阅第16页)测试(请查阅第20页)分析(请查阅第23页)数据传输(请查阅第26页)备份与还原(请查阅第27页)更新(请查阅第28页)4、联系方式查询(请查阅第28页)Team2 组成含:主机基站1台\T eam2心率传感器10条\充电器1个\T eam2个人电脑及PDA中文软件1套\USB存储装置1个不含:心率表、手提电脑及PDA一、安装前准备1、第一次使用本产品,请将基站和心率带充电24小时以上。
2、配备1台笔记本电脑,电脑要求是:具有2GHZ处理器至少2GB内存至少100GB硬盘XGA显示卡乙太网连接器WLAN(wifi)IEEE802.11b/g无线网卡操作系统可以是Windows XP或Windows 7,安装的操作系统必须是用系统盘一步一步安装的,用GHOST安装的系统不能使用。
Polar team2 简单操作说明二、安装与配对软件安装1、将随机配备的软件插入光驱中,安装软件自动运行,出现选取语言页面时,选ENGLISH。
2、在选取软件类型时,点击install PC software3、按以下步骤按照安装提示点击4、在选取国家栏目中,选otherPolar team2 简单操作说明5、点击接受协议6、在下栏上打勾,在桌面上创建图标长,在这个过程中不需要进行如何操作,计算机自己按照以下图例运行安装。
Polar team2 简单操作说明8、直到出现上述图例,点击Finish,软件安装完成。