
液晶监视器说明书.doc
液晶监视器说明书
至客户:
感谢阁下购买及使用本彩色液晶监视器,开箱时请检查箱内的附件是否齐全。
在连接部件及接通电源之前,请先详细阅读本使用说明书并请保
留本使用说明书以备后用。
目录
一、安全指南______________________________________________ 1
二、附件__________________________________________________ 2
三、面板控制与端子接口的说明______________________________ 3
四、遥控器说明____________________________________________ 4
五、液晶监视器与各种信号的连接____________________________ 5
六、OSD基本调整___________________________________________ 6
七、PC显示模式____________________________________________ 7
八、产品规格______________________________________________ 8
九、故障维修______________________________________________ 9
一、安全指南
重要注意事项!
高压危险!
本机内有高压,请勿打开机壳,以免触电。
维修时应委托专业人员。
不正确的操作方法可能会导致触电或火灾事故,为确保您的安全及彩色液晶
监视器的使用寿命,请在使用前仔细阅读下述安全注意事项。
●在使用本机前,必须阅读并理解所有使用指示。
●必须妥善保存使用说明书,以备将来之需要。
●必须严格遵守本机其使用说明书上的警告指示。
●操作时必须遵照所有使用说明。
●请勿使用制造商没有推荐的附设装置,不恰当地使用设置可能会发生
意外故障。
●请使用彩色液晶监视器所配的电源适配器,在把AC 电源线接到电源
插座之前,请检查电视规格的电压源要求是否合适本地电源供应条件,
如果您不能确定使用电源的类型,请与经销店或当地的电力部门联系。
●不要用任何物品压迫或缠绕电源线。
破损的电源线会导致触电或引起
火灾。
●请勿试图自行维修本机,由于本机内有高压装置和其他易损坏器件,
会对人体或电视本身造成各种危害,请务必让专业维修员进行维修。
●请勿触摸使用说明书中没有提及的控制部件。
对使用说明中没有提及
的控件部件进行不适当的调整会损坏本机,也会增加专业技术人员的
维修工作量。
●本机需要更换配件时,请向维修人员确认使用制造商指定的或性能与
原件相同的配件。
配件使用不当会导致火灾、触电、电视损坏等危险。
●若要将本机挂装在墙上或吊在天花板上时,请按照制造商推荐的方法
进行安装。
●清洁本机前,先拔掉电源。
请使用略湿的抹布清洁本机。
清洁时请勿
使用液体清洁剂或喷雾清洁剂。
●长时间不使用本机时,请拔出交流电源插头。
●不要将本机放置在不稳固的手推车、支架、三脚架或桌子上。
●请保证本机周围空气流通,本机通气孔不被覆盖或堵塞。
●本机的液晶面板使用敏感材料制造,不要用任何物品碰击液晶监视器。
如果本机从高处掉落或受到撞击,液晶面板有可能会破裂。
此时请立
即停止使用本机。
●不要将本机置与阳光直射处或热源附近,如散热器、暖气设备、火炉
和其他发热物体。
●每次开关时间间隔不小于 3 秒。
二、附件(请根据实际情况修改附件列表)
1、中文说明书(X1)
2、交流电源线(X1)
3、红外遥控器(X1)
三、面板控制与端子接口
【一】、面板控制说明
1、控制说明
(1) 红外线接收头(REM)(2) 主菜单(MENU)
(3) 输入信号选择键(INPUT)(4) 菜单向上选择键(UP+)
(5) 菜单向下选择键(DOWN)- (6) 音量减小(LEFT)
(7) 音量增大(RIGHT)(8) 电源按键(POWE)R
2
【二】、端子接口说明
示意图
端子说明:
1、HDMI 、DVI 为高清数字信号接口,可以兼容DVI 数字接口;
2 、VGA 可以连接电脑或其它设备的VGA 信号输出终端;
3 、Y ,Pb,Pr 为高清视频输入接口,三个端口组成视频分量信号输入;
4、SV1-Y;SV1-C 为S 端子输入接口;
5 、AV1,A V2, AV3 为标准的视频信号输入接口;
6、AV1-OUT 、AV2-OUT: 为标准视频信号输出接口;
7、L1,R1: AV,S-Vi,Y ,Pb,Pr 信号对应的音频输入接口;
8、L2,R2: VGA,DVI 信号对应的音频输入接口;
四、遥控器说明
遥控示意图
遥控器的按键说明(表一)
1.POWER 电源开关按键
2.MUTE 静音键
3.PICTURE 画面模式选择
4.FREEZE 画面静止键
5.INPUT 输入信号选择键
6.UP↑菜单向上选择键
7.DOWN↓菜单向下选择键
8.RIGHT→菜单内容调节/ 音量增大键
9.LEFT←菜单内容调节/ 音量减小键
10.MENU 菜单键
11.VGA VGA信号选择键
12.YPbPr YPbPr信号选择键
13.HDMI HDM信I号选择键
14.AV AV信号选择键
15.DVI DVI信号选择键
特别说明:
1 RIGHT→键在菜单调节中,有进入某项菜单中的功能,相当于ENTER键
五、液晶监视器与各种信号的连接
( 一)接驳计算机信号
将液晶监视器与计算机连接,便可享受到更清晰逼真的画面和声音. 连接步骤:
■确认液晶监视器和计算机的电源已关闭;
■将 D 型15 针VGA 接口连接到计算机的VGA 视频接口上,将另一端连接到液晶监视器的DB15VGA 端子输入口,并拧紧螺丝;。
LG LED LCD 监视器 22EA53T 23EA53T 24EA53T 说明书

OWNER’S MANUALLED LCD MONITOR22EA53T 23EA53T 24EA53TPlease read this manual carefully before operating your set and retain it for future reference.LED LCD MONITOR MODEL ENGLISH2TABLE OF CONTENTS CONTENTS3 ASSEMBLING AND PREPAR-ING3 Unpacking4 Parts and buttons5 Setting up the Monitor set5 - Attaching the Stand Base6 - Detaching the Stand Base6 - Mounting on a table6 - Using the cable holder8 - Mounting on a wall9USING THE MONITOR SET9 Connecting to a PC9 -D-SUBconnection9 -DVI-Dconnection11 CUSTOMIZING SETTINGS12 CustomizingSettings12 -MenuSettings13 -P ICTURE14 -C OLOR15 -D ISPLAY16 -O THERS17 MY KEY Setting18 FUNC. Setting18 - P icture Mode Setting19 - S UPER ENERGY SAVING Setting20 - D UAL DISPLAY Setting20 - D UAL WEB Setting21 - M Y KEY Setting 22 TROUBLESHOOTING24 SPECIFICATIONS24 22EA53T25 23EA53T26 24EA53T27 Preset Modes (Resolution)27 Indicator28 PROPER POSTURE28 Proper posture for using the Monitor set.3ASSEMBLING AND PREPARING ASSEMBLING AND PREPARINGUnpackingCheck your product box for the following items. If there are any missing accessories, contact the local dealer where you purchased your product. The illustrations in this manual may differ from the actual product4ASSEMBLING AND PREPARING5ASSEMBLING AND PREPARINGAttach the Stand Body to the monitor set.Attach the Stand Base .Tighten the screw to the right with a coin.Setting up the Monitor setAttaching the Stand Base1 Place the Monitor set with the screen sidedown on a flat and cushioned surface.2123Detaching the Stand Base1 Place the Monitor set with the screen sidedown on a flat and cushioned surface.Stand BasePull out the Stand Body and Stand Base fromthe monitor set.Turn the screw to the left with a coin.Pull out the Stand Base .12326ASSEMBLING AND PREPARING7ASSEMBLING AND PREPARINGUsing the Kensington security systemThe Kensington security system connector is located at the back of the Monitor set. For more information of installation and using, refer to the manual supplied with the Kensington security system or visit .Connect the Kensington security system cable between the Monitor set and a table.Do not hold this set like below picture.Monitor screen can detach from stand base and injure8ASSEMBLING AND PREPARINGMounting on a wallFor proper ventilation, allow a clearance of 10 cm on each side and from the wall. Detailedinstructions are available from your dealer, see the optional Tilt Wall Mounting Bracket Installation and Setup Guide.If you intend to mount the Monitor set to a wall, attach Wall mounting interface (optional parts) to the back of the set.When you install the Monitor set using a wall mounting interface (optional parts), attach it carefully so it will not drop.1 Please, Use the screw and wall mount interfacein accordance with VESA Standards.2 If you use screw longer than standard, themonitor might be damaged internally.3 If you use improper screw, the product might bedamaged and drop from mounted position. In this case, LG Electronics is not responsible for it.4 VESA compatible.5 Please use VESA standard as below.784.8 mm (30.9 inch) and under * Wall Mount Pad Thickness : 2.6 mm * Screw : Φ 4.0 mm x Pitch 0.7 mm x Length 10 mm787.4 mm (31.0 inch) and above * Please use VESA standard wall mount pad and screws.10 cmModel24EA53TVESA (A x B)75 x 75100 x 100Standard screw M4Number of screws 422EA53T 23EA53T9USING THE MONITOR SETUSING THE MONITOR SET Connecting to a PC Array Your Monitor set supports Plug & Play*.*Plug & Play: A PC recognizes a connecteddevice that users connect to a PC and turnon, without device configuration or userintervention.D-SUB connectionTransmits analog video from your PC to theMonitor set. Connect the PC and the Monitor setwith the supplied D-sub 15 pin signal cable asshown in the following illustrations.10 USING THE MONITOR SETDVI-D connectionTransmits a digital video signal from your PC to the Monitor set. Connect the PC and the Monitor set with a DVI cable as shown in the following illustrations.Self Image Setting FunctionPress the power button on the front panel to turn the power on. When monitor power is turned on, the "Self Image Setting" Function is executed automatically. (Only supported in Analog Mode)CUSTOMIZING SETTINGS1Press the desired button on the bottom of the Monitor set.2Change the value of the menu item by pressing the buttons on the bottom of the Monitor set.To return to the upper menu or set other menu items, use the up arrow () button.3 Select EXIT to leave the OSD menu.Menu Settings1 Press MENU button on the bottom of the Monitor setto display the Menu OSD.2Set the options by pressing the ◄ or ► or ▼buttons.3Select the "Next Menu" button to enter the more option settings.4 Select EXIT to leave the OSD menu.To return to the upper menu or set other menu items,use the up arrow () button.Each option is explained below.Analog: D-SUB(Analog signal) input.Digital: DVI-D(Digital signal) input.Picture1 PressMENU button on the bottom of the Monitor set to display the Menu OSD.2 Select the "Next Menu " button to enter the moreoption settings.3 Enterto Picture by pressing the ▼ button.4 Set the options by pressing the ◄ or ► or ▼buttons.5 SelectEXIT to leave the OSD menu.To return to the upper menu or set other menu items,use the up arrow () button.Each option is explained below.Color Array 1 Press MENU button on the bottom of the Monitor setto display the Menu OSD.2Select the "Next Menu" button to enter the more option settings.3 Select Color by pressing the ► button.4 Enter to Color by pressing the ▼ button.5Set the options by pressing the ◄ or ► or ▼buttons.6 Select EXIT to leave the OSD menu.To return to the upper menu or set other menu items, use the up arrow () button.Each option is explained below.ENG Display1 PressMENU button on the bottom of the Monitor set to display the Menu OSD.2 Select the "Next Menu " button to enter the moreoption settings.3 SelectDisplay by pressing the ► button. 4 Enterto Display by pressing the ▼ button.5 Set the options by pressing the ◄ or ► or ▼buttons.6 SelectEXIT to leave the OSD menu.To return to the upper menu or set other menu items,use the up arrow () button.Each option is explained below.Others1 Press MENU button on the bottom of the Monitor set2Select the "Next Menu" button to enter the more option settings.3 Select Others by pressing the ► button.4 Enter to Others by pressing the ▼ button.5Set the options by pressing the ◄ or ► or ▼buttons.6 Select EXIT to leave the OSD menu.To return to the upper menu or set other menu items, use the up arrow () button.Each option is explained below.ENG ENGLISHMY KEY Setting1 PressMY KEY button on the bottom of the Monitor set to display the MY KEY OSD.2 Set the options by pressing the ◄or ►or ▼buttons.3 SelectEXITto leave the OSD menu. Each option is explained below.FUNC. SettingPicture Mode1 PressFUNC. button on the bottom of the Monitor set to display the FUNC. OSD.2 Enterto Picture Mode by pressing the ▼ button. 3 Set the options by pressing the ◄ or ► buttons.4 Select EXIT to leave the OSD menu.To return to theupper menu or set other menu items, use the up arrow()button.Each option is explained below.SUPER ENERGY SAVING1 Press FUNC. button on the bottom of the Monitor set todisplay the FUNC. OSD.2 SelectSUPER ENERGY SAVING by pressing the ► button.3 Enterto SUPER ENERGY SAVING by pressing the ▼ button.4 Set the options by pressing the ◄ or ► or ▼buttons.5 SelectEXIT to leave the OSD menu.To return to the upper menu or set other menu items, use the up arrow () button.Each option is explained below.DUAL DISPLAY1 Press FUNC. button on the bottom of the Monitor setto display the FUNC. OSD.2 SelectDUAL DISPLAY by pressing the ► button. 3 Enterto DUAL DISPLAY by pressing the ▼ button.4 Set the options by pressing the ◄ or ► buttons.5 SelectEXIT to leave the OSD menu.To return to the upper menu or set other menu items, use the up arrow () button.* Before using below functions, please install DUAL SMART SOLUTION programme.Each option is explained below.DUAL WEB1 Press FUNC. button on the bottom of the Monitor setto display the FUNC. OSD.2 SelectDUAL WEB by pressing the ► button. 3 Enterto DUAL WEB by pressing the ▼ button.4 Set the options by pressing the ◄ or ► buttons.5 SelectEXIT to leave the OSD menu.To return to the upper menu or set other menu items, use the up arrow () button.* Before using below functions, please install DUAL SMART SOLUTION programme.Each option is explained below.21CUSTOMIZING SETTINGSEach option is explained below.MY KEY Setting1 Press FUNC. button on the bottom of the Monitorset to display the FUNC. OSD.2 SelectMY KEY Setting by pressing the ► button. 3 Enterto MY KEY Setting by pressing the ▼ button.4 Set the options by pressing the ◄ or ► buttons.5 SelectEXIT to leave the OSD menu.To return to the upper menu or set other menu items, use the up arrow () button.22SPECIFICATIONS TROUBLESHOOTINGCheck the following before calling for service.23 SPECIFICATIONSENG ENGLISH24SPECIFICATIONSSPECIFICATIONSDisplayScreen Type54.6 cm (21.5 inch) Flat Panel Active matrix-TFT LCDAnti-Glare coatingVisible diagonal size: 54.6 cmPixel Pitch0.08265*RGB(H) mm x 0.24795(V) mm Sync InputHorizontal Frequency 30 kHz to 83 kHz (Automatic)Vertical Frequency 56Hz to 75Hz (D-SUB, DVI-D)Input Form Separate Sync. DigitalVideo InputSignal Input 15 pin D-SUB Connector /DVI-D Connector (Digital)Input Form RGB Analog (0.7 Vp-p/ 75 ohm), Digital ResolutionMaxD-SUB(Analog) : 1920 x 1080 @ 60 Hz DVI (Digital) : 1920 x 1080 @ 60 Hz RecommendVESA 1920 x 1080 @ 60 HzPlug & Play DDC 2B(Analog,Digital )PowerConsumption On Mode : 25 W(Typ.)Sleep Mode ≤ 0.3 W Off Mode ≤ 0.3 W Power Input 19 V 1.3 AAC-DC AdapterType ADS-40SG-19-3 19025G, manufactured by SHENZHEN HONOR ELECTRONICor Type ADS-40FSG-19 19025GPG-1, manufactured by SHENZHEN HONOR ELECTRONIC or Type ADS-40FSG-19 19025GPBR-1, manufactured by SHENZHEN HONOR ELECTRONIC or Type ADS-40FSG-19 19025GPI-1,manufactured by SHENZHEN HONOR ELECTRONIC or Type ADS-40FSG-19 19025GPCU-1, manufactured by SHENZHEN HONOR ELECTRONIC or Type ADS-40FSG-19 19025GPB-2, manufactured by SHENZHEN HONOR ELECTRONIC or Type LCAP21, manufactured by LIEN CHANG ELECTRONIC ENTERPRISE or Type LCAP26-A, manufactured by LIEN CHANG ELECTRONIC ENTERPRISE or Type LCAP26-E, manufactured by LIEN CHANG ELECTRONIC ENTERPRISE or Type LCAP26-I, manufactured by LIEN CHANG ELECTRONIC ENTERPRISE or Type LCAP26-B, manufactured by LIEN CHANG ELECTRONIC ENTERPRISE or Type PSAB-L203A, manufactured by LG Innotek Co.,Ltd or Type PSAB-L202B, manufactured by LG Innotek Co.,Ltd or Type PSAB-L202C, manufactured by LG Innotek Co.,Ltd or Type PSAB-L202D, manufactured by LG Innotek Co.,LtdOUTPUT: 19 V 1.3 ADimensions(Width x Height x Depth)With Stand 50.8 cm x 38.5 cm x 18.1 cm Without Stand 50.8 cm x 31.2 cm x 5.5 cmWeight 2.8 kgTilt Range Environmental conditionsOperating Temperature Operating Humidity 10°C to 35 °C 10 % to 80 % Storage Temperature Storage Humidity-20°C to 60 °C5 % to 90 % non-CondensingStand Base Attached ( ), Detached (O)Power cord Wall-outlet typeProduct specifications shown above may be changed without prior notice due to upgrade of product functions.22EA53T-5°(±3°) to 20°(+5°/-0°)25SPECIFICATIONSSPECIFICATIONSDisplayScreen Type58.4 cm (23 inch) Flat Panel Active matrix-TFT LCDAnti-Glare coatingVisible diagonal size: 58.4 cm Pixel Pitch0.265 mm x 0.265 mm (Pixel Pitch)Sync InputHorizontal Frequency 30 kHz to 83 kHz (Automatic)Vertical Frequency 56Hz to 75Hz (D-SUB, DVI-D)Input Form Separate Sync. DigitalVideo InputSignal Input 15 pin D-SUB Connector /DVI-D Connector (Digital)Input Form RGB Analog (0.7 Vp-p/ 75 ohm), Digital ResolutionMaxD-SUB(Analog) : 1920 x 1080 @ 60 Hz DVI (Digital) : 1920 x 1080 @ 60 Hz RecommendVESA 1920 x 1080 @ 60 HzPlug & PlayDDC 2B(Analog,Digital )PowerConsumption On Mode : 26 W(Typ.)Sleep Mode ≤ 0.3 W Off Mode ≤ 0.3 W Power Input 19 V 1.3 AAC-DC AdapterOUTPUT: 19 V1.3 ADimensions(Width x Height x Depth)With Stand 54.4 cm x 40.6 cm x 18.1 cm Without Stand 54.4 cm x 33.2 cm x 5.5 cmWeight 3.1 kgTilt Range Environmental conditionsOperating Temperature Operating Humidity 10°C to 35 °C 10 % to 80 %Storage Temperature Storage Humidity -20°C to 60 °C 5 % to 90 % non-Condensing Stand Base Attached ( ), Detached ( O )Power cordWall-outlet typeProduct specifications shown above may be changed without prior notice due to upgrade of product functions.23EA53TType ADS-40SG-19-3 19025G, manufactured by SHENZHEN HONOR ELECTRONICor Type ADS-40FSG-19 19025GPG-1, manufactured by SHENZHEN HONOR ELECTRONIC or Type ADS-40FSG-19 19025GPBR-1, manufactured by SHENZHEN HONOR ELECTRONIC or Type ADS-40FSG-19 19025GPI-1,manufactured by SHENZHEN HONOR ELECTRONIC or Type ADS-40FSG-19 19025GPCU-1, manufactured by SHENZHEN HONOR ELECTRONIC or Type ADS-40FSG-19 19025GPB-2, manufactured by SHENZHEN HONOR ELECTRONIC or Type LCAP21, manufactured by LIEN CHANG ELECTRONIC ENTERPRISE or Type LCAP26-A, manufactured by LIEN CHANG ELECTRONIC ENTERPRISE or Type LCAP26-E, manufactured by LIEN CHANG ELECTRONIC ENTERPRISE or Type LCAP26-I, manufactured by LIEN CHANG ELECTRONIC ENTERPRISE or Type LCAP26-B, manufactured by LIEN CHANG ELECTRONIC ENTERPRISE or Type PSAB-L203A, manufactured by LG Innotek Co.,Ltd or Type PSAB-L202B, manufactured by LG Innotek Co.,Ltd or Type PSAB-L202C, manufactured by LG Innotek Co.,Ltd or Type PSAB-L202D, manufactured by LG Innotek Co.,Ltd-5° ±5° to 20°(+5°/-0°)DisplayScreen Type60.4 cm (23.8 inch) Flat Panel Active matrix-TFT LCDAnti-Glare coatingVisible diagonal size: 60.4 cmPixel Pitch0.2745 mm x 0.2745 mm (Pixel Pitch)Sync InputHorizontal Frequency 30 kHz to 83 kHz (Automatic)Vertical Frequency 56Hz to 75Hz (D-SUB, DVI-D)Input Form Separate Sync. DigitalVideo InputSignal Input 15 pin D-SUB Connector /DVI-D Connector (Digital)Input Form RGB Analog (0.7 Vp-p/ 75 ohm), Digital ResolutionMaxD-SUB(Analog) : 1920 x 1080 @ 60 Hz DVI (Digital) : 1920 x 1080 @ 60 Hz RecommendVESA 1920 x 1080 @ 60 HzPlug & PlayDDC 2B(Analog,Digital)PowerConsumption On Mode : 27 W(Typ.)Sleep Mode ≤ 0.3 W Off Mode ≤ 0.3 W Power Input 19 V 1.6 AAC-DC AdapterType ADS-40SG-19-3 19032G, manufactured by SHENZHEN HONOR ELECTRONICor Type ADS-40FSG-19 19032GPG-1, manufactured by SHENZHEN HONOR ELECTRONIC or Type ADS-40FSG-19 19032GPBR-1, manufactured by SHENZHEN HONOR ELECTRONIC or Type ADS-40FSG-19 19032GPI-1, manufactured by SHENZHEN HONOR ELECTRONIC or Type ADS-40FSG-19 19032GPCU-1, manufactured by SHENZHEN HONOR ELECTRONIC or Type LCAP21A, manufactured by LIEN CHANG ELECTRONIC ENTERPRISE or Type LCAP26A-A, manufactured by LIEN CHANG ELECTRONIC ENTERPRISE or Type LCAP26A-E, manufactured by LIEN CHANG ELECTRONIC ENTERPRISE or Type LCAP26A-I, manufactured by LIEN CHANG ELECTRONIC ENTERPRISE or Type LCAP26A-B, manufactured by LIEN CHANG ELECTRONIC ENTERPRISEOUTPUT: 19 V 1.7 ADimensions(Width x Height x Depth)With Stand 56.7 cm x 41.6 cm x 18.1 cm Without Stand56.7 cm x 34.4 cm x 5.9 cmWeight 3.3 kgTilt Range Environmental conditionsOperating Temperature Operating Humidity 10°C to 35 °C 10 % to 80 % Storage Temperature Storage Humidity-20°C to 60 °C5 % to 90 % non-CondensingStand Base Attached ( ), Detached (O)Power cord Wall-outlet typeProduct specifications shown above may be changed without prior notice due to upgrade of product functions.S N O I T A C I F I C E P S24EA53TRange-5°(±3°) to 20°(+5°/-0°)Preset Modes (Resolution) 22EA53T 23EA53T, 24EA53TIndicator28PROPER POSTUREProper posture for using the Monitor set.PROPER POSTUREangle.Declaration of Conformity Trade Name: LGModel : 22EA53TA 23EA53TA 24EA53TAResponsible Party: LG Electronics Inc.Address : 1000 Sylvan Ave. Englewood Cliffs NJ 07632 U.S.A TEL: 201-266-2534*above information is only for USA FCC Regulatory Make sure to read the Safety Precautions before using the product.Keep the Owner’s Manual (CD) in an accessible place for future reference.The model and serial number of the SET is located on the back and one side of the SET . Record it below should you ever need service.As an ENERGY STAR Partner LGE U. S. A.,Inc. has determined that this product meets the ENERGY STAR guidelines for energy efficiency.ENERGY STAR is a set of power-saving guidelines issued by the U.S.Environmental Protection Agency(EPA).MODELSERIAL。
Philips 170P6ES LCD监视器商品说明说明书

Philips Brilliance LCD monitor with LightFrame™ DR43 cm (17")SXGA170P6ESsuperb display for professional tasksProfessionals like you get more done with the 170P6: Digital LightFrame™ and the Perfect Panel warranty for superb performance, productivity-enhancing remote asset management, advanced ergonomics and lead-free design.Outstanding front of screen performance•LightFrame™ DR maximizes your on-screen experience •ISO 13406-2 Class I compliant dot-defect-free display •SXGA 1280 x 1024 resolution for sharper display•Fast 8ms On/off response time:Great text & graphics display •Dual input accepts both analog VGA and digital DVI signals Maximum comfort for maximum productivity •90 degree screen rotation and smart cable management •Built-in high-speed USB 2.0 solution for easy connections •Brightness automatically adjusts to ambient light •Built-in speakers for audio without desktop clutter •Stand-alone audio for efficient net conferencingBest total cost of ownership solution•SmartManage compatibility enables LAN-based asset management •Lead-free design safeguards our environmentHighlightsLightFrame™ DRLightFrame™ Digital Reality is an integrated software and hardware solution for Philips high-end monitors that delivers high quality visual display enhancements to users through quick and convenient hardware or software interfaces.PerfectPanel™Bright dots and dark dots are defects in a LCD panel. While some manufacturers still consider bright and dark defects in a LCD panel an inevitable part of the manufacturing process, Philips doesn't. Philips monitors, compliant with ISO 13406-2 Class I standard, are produced with zero tolerance for LCD panel defects and backed by Philips PerfectPanel™ globally valid warranty providing repair or replacement of any LCD monitors that display even a single defective bright or dark dot.8ms response time (On/Off)On-Off response time is the period required for a liquid crystal cell to go from active (black) to inactive (white) and back to active (black) again. It is measured in milliseconds. Faster is better: Lower response time means faster transitions and, therefore, results in fewer visible image artifacts in the display of transition of text and graphics. On-Offresponse time is a more important measure inthe display of business content like documents,graphs and photos.Super Ergo BaseThe Super Ergo base is a monitor base thatdelivers ergonomic display comfort andprovides intelligent cable management. Thebase's people-friendly height, swivel, tilt androtation angle adjustments position themonitor for maximum comfort that can easethe physical strains of a long workday;intelligent cable management reduces cableclutter and keeps the workspace neat andprofessional.USB connectivity solutionThe universal serial bus or USB is a standardprotocol for linking PCs and peripherals.Because it delivers high speed at a low cost,USB has become the most popular method forconnecting peripheral devices to a computer.By placing a USB 2.0 solution in a monitor,Philips provides a conveniently located, easy-to-use, high-speed USB connection for reading,writing, loading and transferring programs,data, digital media or music files to, from oramong your PC and one or more USB devices.SmartBrightSmartBright is an exclusive Philips feature thatemploys a built-in sensor to automaticallyadjust display settings, delivering the very bestviewing experience, reduced energyconsumption and prolonged monitor life whileeliminating bright-screen-dark-room and dark-screen-bright-room eyestrain fatigue - allwithout the bother of manually adjustingdisplay brightness as room lighting conditionschange.SmartManage enabledSmartManage is a system for monitoring,managing and checking status of display devicesas well as delivering remote support to userswho experience difficulties - all accomplishedover a LAN.Lead-freeLead-free display products are designed andproduced in compliance with strict EuropeanCommunity directives on Restriction ofHazardous Substances (RoHS) standards thatrestrict lead and other toxic substances thatcan harm the environment. USBConnectivityIssue date 2011-06-07 Version: 3.0.1212 NC: 8639 000 16206 EAN: 87 10895 89061 8© 2011 Koninklijke Philips Electronics N.V.All Rights reserved.Specifications are subject to change without notice. Trademarks are the property of Koninklijke Philips Electronics N.V. or their respective owners. SpecificationsPicture/Display•LCD panel type: 1280 x 1024 pixels, Anti-glare polarizer, RGB vertical stripe•Panel Size: 17"/ 43 cm•Effective viewing area: 337.9 x 270.3 mm •Pixel pitch: 0.264 x 0.264 mm•Brightness (nits): 250 nit•Contrast ratio (typical): 500:1•Display colors: 16.2 M•Viewing angle: @ C/R > 5•Viewing angle (H / V): 160 / 160 degree •Response time (typical): 8 ms•White Chromaticity, 6500K: x = 0.313 / y = 0.329•White Chromaticity, 9300K: x = 0.283 / y = 0.297•Maximum Resolution: 1280 x 1024 @ 75 Hz •Optimum resolution: 1280 x 1024 @ 60 Hz •Factory Preset Modes: 15 modes•User definable modes: 50 modes•Video Dot Rate: 140 MHz•Horizontal Scanning Frequency: 30 - 83 kHz •Vertical Scanning Frequency: 56 - 76 MHz •Picture enhancement: LightFrame™ Digital Reality •sRGBConnectivity•Signal Input: VGA (Analog ), DVI-D, PC Audio in •Audio output: Stereo Audio (3.5 mm jack) 1x •USB: USB 2.0•Sync Input: Composite Sync, Separate Sync, Sync on GreenConvenience•Built-in Audio: 2 W RMS x 2 Stereo Speakers •User convenience: On-screen Display, SmartManage enabled•Monitor Controls: Auto, Brightness Control, Left/Right, LightFrame, Menu (OK), Power On/Off, Up/ Down, Volume control•OSD Languages: English, French, German, Italian, Simplified Chinese, Spanish•Other convenience: Kensington lock compatible •Plug & Play Compatibility: DDC/CI, sRGB, Windows 98/ME/2000/XP•Regulatory approvals: CE Mark, E2000, EMC, Energy Star, FCC-B, UL, CSA, SEMKO, TCO '03, TÜV/GS, TÜV Ergo•Swivel:+/-45°•Tilt: -5° to 25°•VESA Mount: 100 x 100 mmAccessories•Included accessories: AC Power Cord, Audio Cable, DVI-D cable, USB cable, VGA cable •User ManualDimensions•Dimensions (with base) (W x H x D):375 x 395 x 201 mm•Height adjustment range: 130 mm•MTBF: 50,000 hrs•Relative humidity: 20% - 80%•Temperature range (operation): 5°C to 40°C •Temperature range (storage): -20°C to 60°C •Weight:5.6 kgPower•Complies with: E2000, Energy Star, NUTEK •Consumption(On mode): 43 W (Typical)•Consumption(Off Mode): < 1 W•Power LED indicator: Operation - Blue, Stand by/ sleep - Amber•Power supply: Built-in, 100-240VAC, 50/60Hz。
松下 BT-LH2600W MC 彩色液晶视频监视器 说明书
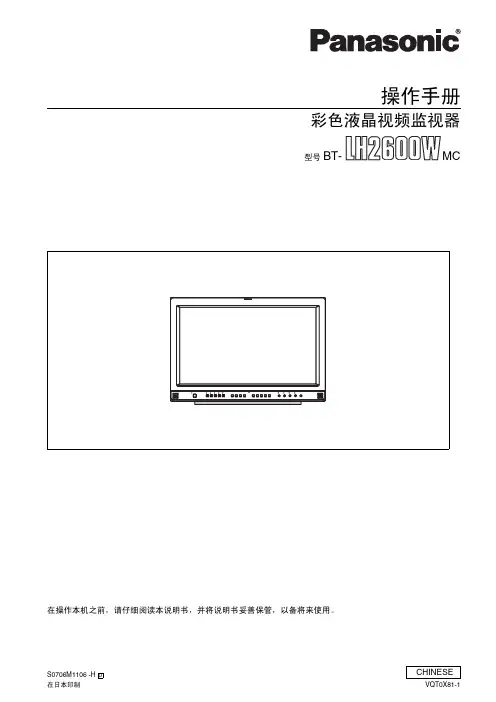
操作手册彩色液晶视频监视器型号 BT-MCS0706M1106 -H 在日本印制VQT0X81-1CHINESED在操作本机之前,请仔细阅读本说明书,并将说明书妥善保管,以备将来使用。
显示安全信息。
ACAC ••• 535•请先阅读!2•液晶部分采用高精密技术制造而成。
其包含99.99%以上的有效像素,但0.01%或以下的像素可能缺失或者有定光(红,蓝,绿)。
不过,这并不表明有故障。
•液晶保护板是特殊制造的元件。
使用硬布或者用力擦拭均会划伤表面。
•如果长时间显示静态图像,会导致短时生成余像(磷光质老化)。
(但是,在显示了一段时间常规的移动图像后,这些余像即会消失。
)•液晶的响应速度和亮度因环境温度而异。
•请勿将本装置安装于阳光直射处。
否则将导致机壳老化或液晶屏幕损坏。
•本机不支持VESA安装。
•安装时,请保持显示屏离后墙和周围物体10厘米或以上。
目录请先阅读! . . . . . . . . . . . . . . . . . . . . . . . . . . . . . 2使用注意事项 . . . . . . . . . . . . . . . . . . . . . . . . . . . 3标准附件 . . . . . . . . . . . . . . . . . . . . . . . . . . . . . . . 3概述 . . . . . . . . . . . . . . . . . . . . . . . . . . . . . . . . . . 4尺寸 . . . . . . . . . . . . . . . . . . . . . . . . . . . . . . . . . . 4控制与功能 . . . . . . . . . . . . . . . . . . . . . . . . . . . . . 5视频显示器装置 (5)面板 (6)后面板 (7)电源 . . . . . . . . . . . . . . . . . . . . . . . . . . . . . . . . . . 8如何使用画面上的菜单 . . . . . . . . . . . . . . . . . . . . 9用户数据 . . . . . . . . . . . . . . . . . . . . . . . . . . . . . . 12主菜单 . . . . . . . . . . . . . . . . . . . . . . . . . . . . . . . 13菜单配置 (13)MARKER (14)MARKER类型 (15)VIDEO CONFIG (16)SYSTEM CONFIG (18)FUNCTION (19)GPI (23)INPUT SELECT (24)AUDIO (25)CONTROL (26)H OURMETER (26)遥控器规格 . . . . . . . . . . . . . . . . . . . . . . . . . . . 27错误/警告显示 . . . . . . . . . . . . . . . . . . . . . . . . .31维护 . . . . . . . . . . . . . . . . . . . . . . . . . . . . . . . . 31维修检查 . . . . . . . . . . . . . . . . . . . . . . . . . . . . . 31规格 . . . . . . . . . . . . . . . . . . . . . . . . . . . . . . . . 32标准附件电源线x 1电源线钩x 1螺丝x 1使用注意事项34BT -LH2600W 液晶显示器专门设计用于广播服务和商务场合。
7D中文说明书20120312

为了可靠的、长期的正常使用,达到最佳视听效果,请认真阅读本使用说明书 。 注意事项
1. 请采用随机配置的电源适配器,如果因为需要,请注意提供合格的电源。 2. 不要将机子放于日光下爆晒,也不要在过冷过热或潮湿的地方存放、使用。 3. 使用时显示屏幕应避开强光照射,以保证图像效果及机子的长期使用。 4. 机子内部虽有防震保护措施,但还应避免剧烈碰撞。 5. 不要用化学试剂或溶剂擦洗机子.请用软布擦除机子上的尘污,以保证本机的亮丽。 6. 机内无用户可调组件,非专业人员,请勿自行打开本机或自行尝试修理本产品!以免造成 不必要的损坏。
6
1. F970 电池扣板可适配的型号: 索尼 F970 F960 F950 T930 F770 T750 F730 F570 F550 F530 QM91D OM91 QM90D QM90 QM71D QM71 QM70D QM70 QM51D QM51 FM71 FM70 等系列 2. LP-E6 电池扣板可适配的池型号: Canon LP-06 3. D28 电池扣板可适配的电池型号: 松下 D55 D54S D54SE D40 D35 D33 D32 D28 D25 D22 等系列 4. 索尼 V 型摄像机电池扣板 5. 松下安东电池扣板 ● 分别对应上图中电池扣板的几种类型电池
图像画幅选择
4︰3 16︰9
MENU
菜单功能操作
颜色 菜单 功能 声音
▲
亮度调整快捷键
6 级亮度循环调整
◀
音量调整键或中心标记--音量减小或中心标记开关
▶
音量调整键
音量加大
9
2 .菜单操作说明: 进行菜单功能设置之前,请仔细检查设备都已连接正确,接入相应的信号及电源。电
源开关(在机身右下角)拨至 ON 位置,机器开始进入工作状态,当需要关机时,将电源开关 拨动至 OFF 位置。在机器进入工作状态后,根据所输入的视频信号,选择面板上相应的 HDMI、YPbPr、COMPOSITE 按键,进行相应的信号之间的切换。(在无菜单显示的情况下,可 使用面板上的快捷键进行相应的参数操作)。按下机子上的“ ”键,即进入相应的 OSD
M及PD系列说明书

液晶监视器,DID拼接显示器说明书型号:M系列/ PD系列目录第一章外形、接口介绍 (2)1.1例如PD46N3介绍 (2)1.2接口端子介绍 (3)1.3 OSD按键介绍 (4)第二章信号连接 (4)2.1 RS232串口控制 (4)2.2电脑信号(RGB/HV或VGA)及色差分量信号(YPbPr) (5)2.3 DVI信号 (5)2.4视频信号 (6)2.5 HDMI信号 (6)第三章遥控器、输入信号介绍 (7)3.1遥控器介绍 (7)3.2信号接入使用介绍 (7)3.3菜单介绍 (8)3.4工业菜单介绍 (11)第四章液晶幕墙控制软件说明 ....................................................................................................... 错误!未定义书签。
第一章外形、接口介绍1.1 例如PD46N3介绍:正面:侧面:背面:底部电源开关1.2接口端子介绍:A.AC IN:电源B.RS232 INPUT/OUTPUT : RS232 串行接口C.BNC/RGB/HV、YPbPr IN: (R(Pr), G(Y), B(Pb), H, V) 信号输入端子D.DVI (DVI–D) IN: (数字信号输入连接端子) ;VGA (D-SUB) IN: (计算机输入连接端子)E.BNC/VIDEO IN,VIDEO1 OUT视频输入输出端子F.KEY BOARDG.HDMIH.LAN(PD系列)1.3 OSD按键介绍:1)在菜单模式下左右按钮,从一个菜单左右选择到另一个菜单,或者调整所选菜单值,不在菜单下,也可用于调整音量。
2)打开OSD 菜单。
也用于退出OSD 菜单或回到上一菜单3) 按此按钮,出现输入信号窗口。
4) 用来选择输入信号,第二章信号连接2.1 RS232串口控制:监视器可以通过RS232和电脑连接,双控制接口,一个输入,一个输出,在连接前必须对每个屏设定ID 号.LAN网口控制(PD系列):监视器可以通过LAN和电脑连接,双控制接口,在连接前必须对每个屏设定ID 号.2.2电脑信号(RGB/HV 或VGA )及色差分量信号(YPbPr)1、 使用15PIN (D-SUB )接头(或5BNC)的RGB HV 信号线连接监视器,输入标准信号,监视器信号源切换到 电脑通道2、 使用YPbPr 信号线连接电脑和监视器,输入标准信号,监视器信号源切换到YPbPr 通道。
SONY LMD-2140MD LMD-1950MD医疗级液晶监视器 说明书
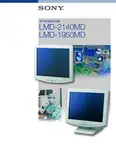
医疗级液晶监视器LMD-2140MD LMD-1950MD结合数十年来在视音频技术方面的专业经验和现代液晶技术的飞速发展,Sony公司不断创新,在推出了广播级应用的专业液晶监视器后,又陆续推出了两款专门用于医疗领域的医疗级液晶监视器LMD-2140MD和LMD-1950MD, 完全符合医学安全以及EMC标准,可满足医疗手术室应用的高标准要求。
它们都采用超一流质量的液晶面板,LMD-2140MD为21英寸*1 XGA(1024X768) 的液晶面板,LMD-1950MD为19英寸*1 SXGA (1280×1024) 的液晶面板,可以提供极高等级的亮度、对比度和色深。
同时,Sony将自己独特的X-算法技术运用到I/P (隔行到逐行) 转换中,LMD-1950MD还采用全10比特数字视频信号处理器,产生精准的颜色还原,逼真再现自然、真实的画面。
而且,超高的分辨率,画面细节异常清晰,非常适合于内窥镜等诊疗应用。
广泛的配置了多种标准接口,使用户可以监看来自于各种信号源的图像。
从模拟到数字视频信号,包括各种标清高清信号、电脑信号等。
使用选购的接口板,还可以接收更多种类信号。
此外,还具有了“Native Scan Mode (本地扫描模式)”,使用者即可用视频原始的分辨率,而不改变像素结构,清晰的监看来自于高清晰度摄像机的视频图像。
符合VESA安装标准,可以轻松安装在手术悬臂上,非常适合于手术室应用。
Sony医疗级液晶监视器还具有很多便捷的功能,如用户设置存储功能、可选扫描模式、自动色度相位调整,以及用于遥控的并行/串行接口等。
LMD-2140MD作为标准清晰度的液晶监视器,LMD-1950MD作为高清晰度的液晶监视器,不论是标清还是高清应用,Sony专业的医疗级液晶监视器都将成为医疗内窥镜手术等各种应用的理想选择。
*1 对角线测量可视区域。
符合医用安全标准LMD-2140MD 和LMD-1950MD 都遵循UL60601-1标准,CSA C22.2第60601条,以及EN 60601-1安全标准要求,完全适合于专业医学应用领域。
导演液晶监视器 FW-679SD 说明书
︳导演液晶监视器使用说明书型号FW-679SD尊敬的用户:欢迎使用本公司生产的摄影,广播传媒等配套的彩色液晶监视器,本监视器采用先进的集成电路与专业的TFT LED液晶屏,具有高亮度、功耗低、性能稳定、无辐射等优点。
本监视器外观小巧、操作方便、安全,具有SDI、HDMI ,分量COMPONET,复合Video,音频Audio输入,SDI,分量COMPONET, 复合Video,音频Audio输出,可方便的安装在数码单反相机和摄像机上,是摄影的最佳伴侣。
为了可靠的、长期的正常使用,达到最佳视听效果,请认真阅读本使用说明书注意事项1. 请采用随机配置的电源适配器,如果因为需要,请注意提供合格的电源。
.2. 不要将机子放于日光下爆晒,也不要在过冷过热或潮湿的地方存放、使用.3. 使用时显示屏幕应避开强光照射,以保证图像效果及机子的长期使用.4. 机子内部虽有防震保护措施,但还应避免剧烈碰撞。
5. 不要用化学试剂或溶剂擦洗机子.请用软布擦除机子上的尘污,以保证本机的亮丽.6. 机内无用户可调组件,非专业人员,请勿自行打开本机或自行尝试修理本产品!以免造成不必要的损坏.目录前面板功能示意图后面板功能示意图按键操作说明功能菜单简介信号格式列表电源输入方式TALLY的使用与连接规格与参数产品配置故障探寻与排除一.前面板功能示意图●.按键说明1.TALLY(提示灯) 7.向下调整键/图像暂停键(标清信号)2.安装固定螺母8.向上调整键/图像放大快捷功能键3.扬声器9.菜单键4.电源指示灯10.输入信号切换键5.向右调整键/模拟量增大键11.4:3/16:9切换键6.向左调整键/模拟量减小键12.耳机插孔(音频输出)二.后面板功能示意图●.后面板功能说明1.电源输入接口 6.7.8 分量Ypbpr输入/输出2.TALLY信号输入9.复合视频输入/输出3.电源开关10.音频输入(左右双声道)4.电池扣板11.SDI输入/输出5.HDMI输入三.按键操作说明如果在工作状态下按下机子的“”键,即进入相应的OSD菜单操作按本机上的“▲”或“▼”键来选择所需查看或调整的选项:(显示效果)(声音)(系统设置)(扫描位置调整),在选择相应的选项后,按动本机上或遥控器上的“”或“”键进行确认,然后再用“”或“”键进行各调整量的调整。
JVC-HD3说明书
1 红外线光束发射窗2 zoom(t/w)键记录期间:拉近/推远播放期间:音量调高/调低暂停期间:拉近/推远3 调高键旋转键(逆时针)4 后跳键5 左按键6 后退键7 playlist键8 start/stop键9 snapshot键10 info键11 前跳键12 play/pause键13 右按键14 下一步键15 调低键旋转键(顺时针)16 index键17 date键将芯线过滤器安装到音频电缆和直流电源线将芯线过滤器安装到音频电缆,该电缆用于将选购外部麦克风连接到摄像机上。
此外,请将芯线过滤器安装到直流电源线。
芯线过滤器用于降低干扰。
将带有芯线过滤器的电缆一端连接到摄像机。
液晶监视器上的指示记录视频和静像时1 选定的记录模式指示2 近拍模式指示3 近似变焦比4 抑制指示5 变焦指示6 聚焦辅助指示7 快门速度8 亮度/锐度控制指示9 电池指示10 日期/时间11 手动聚焦调整指示12 选定的记录媒体指示13 防摔保护指示([防摔保护]设为[关]时出现。
)14 效果模式指示16 白平衡指示17 光圈值(f值)18 led灯指示19 ±0:曝光调节指示20 光圈锁定指示仅记录视频时1 模式指示2 风声消除指示3 图像质量4 剩余时间5 计数器外部麦克风输入音量指示8 事件指示9 手振补偿指示([手振补偿]设为[关]时出现。
)仅在记录静像时1 模式指示2 iso 感光度(增益):设为[自动]时无指示。
3 聚焦指示4 图像像素5 图像质量剩余拍摄张数8 拍摄指示9 自拍定时指示仅在视频播放时1 模式指示2 p:播放列表播放指示(仅在播放播放列表时出现。
)3 图像质量4 播放模式5 计数器6 音量指示7 电池指示8 日期/时间9 选择媒体指示10 防摔保护指示([防摔保护]设为[关]时出现。
)11 效果模式指示12 画面切换效果指示在播放静像时1 模式指示2 文件夹/文件号码3 幻灯片放映指示4 电池指示5 日期/时间选择媒体指示防摔保护指示([防摔保护]设为[关]时出现。
AL1912M BM LCD 监视器说明手册说明书
Table of Contents Preface (2)FCC Statement Warning (2)Canadian DOC Notice (2)Important Safety Instructions (3)Chapter 1 Installation (4)Unpacking (4)Connecting the LCD Monitor and Base (4)Viewing Angle Adjustment (4)Detaching LCD Monitor from Its Stand (5)Interface for Arm Applications (5)Connecting the Display (5)Connecting the AC Power (5)Connecting the Audio Cable (For AL1912 m and AL1912 bm) (6)Power Management System (6)Chapter 2 Display Controls (7)General Instructions (7)Front Panel Control (8)How To Adjust A Setting (9)Adjusting The Picture (9)Chapter 3 Technical Information (11)Specifications (11)Standard Timing Table (13)Troubleshooting (15)PrefaceThis manual is designed to assist users in setting up and using the LCD Monitor. Information in this document has been carefully checked for accuracy; however, no guarantee is given to the correctness of the contents. The information in this document is subject to change without notice. This document contains proprietary information protected by copyright. All rights are reserved. No part of this manual may be reproduced by any mechanical, electronic or other means, in any form, without prior written permission of the manufacturer.FCC Statement WarningThis equipment has been tested and found to comply with the limits for a Class B digital device, pursuant to Part 15 of the FCC Rules. These limits are designed to provide reasonable protection against harmful interference in a residential installation. This equipment generates, uses, and can radiate radio frequency energy, and if not installed and used in accordance with the instruction, may cause harmful interference to radio communications. However, there is no guarantee that interference will not occur in a particular installation. If this equipment does cause harmful interference to radio or television reception, which can be determined by turning the equipment off and on, the user is encouraged to try to correct the interference by one or more of the following measures:• Reposition or relocate the receiving antenna.• Increase the separation between the equipment and the receiver.• Connect the equipment into an outlet on a circuit different from that to which the receiver is connected.• Consult the dealer or an experienced monitor technician for help.WarningUse only shielded signal cables to connect I/O devices to this equipment. You are cautioned that changes or modifications not expressly approved by the party responsible for comliance could void your authority to operate the equipment.Canadian DOC NoticeThis Class B digital apparatus meets all requirements of the CanadianInterference-Causing Equipment Regulations.Cet appareil numérique de la classe B repecte toutes les exigences du Règlement sur le matériel brouilleur du Canada.Important Safety InstructionsPlease read the following instructions carefully. This manual should be retained for future use.1. To clean LCD Monitor screen;-- Power off LCD Monitor and unplug the AC Cord.-- Spray a non-solvent cleaning solution onto a rag.-- Gently clean the screen with dampened rag.2. Do not place the LCD Monitor near a window. Exposing the monitor to rain water, moisture orsunlight can severely damage it.3. Do not apply pressure to the LCD screen. Excess pressure may cause permanent damage to thedisplay.4. Do not remove the cover or attempt to service this unit by yourself. Servicing of any nature shouldbe performed by an authorized technician.5. Store LCD Monitor in a room with a room temperature of -20° ~ 60°C (or -4° ~ 140°F). Storing theLCD Monitor outside this range could result in permanent damage.6. If any of the following occurs, immediately unplug your monitor and call an authorized technician.* Monitor to PC signal cable is frayed or damaged.* Liquid spilled into LCD Monitor or the monitor has been exposed to rain.* LCD Monitor or the case is damaged.7. Only use the supplied main lead to connect the monitor. For a nominal current up to 6A and adevice weight above 3 kg, a line not lighter than H05VV-F, 3G, 0.75 mm2 must be used.Chapter 1 InstallationUnpackingBefore unpacking the LCD Monitor, prepare a suitable workspace for your Monitor and computer. You need a stable and clean surface near a wall power outlet. Make sure that LCD Monitor has enough space around it for sufficient airflow. Though the LCD Monitor uses very little power, some ventilationis needed to ensure that the Monitor does not become too hot.AL1912 AL1912 b AL1912 m AL1912 bm AUDIO No No Yes Yes After you unpack the LCD Monitor, make sure that the following items were included in the box:* LCD Monitor* User's Manual* 1.8M Monitor-to-PC VGA Cable* 1.8M Stereo Jack Audio Cable (for AL1912 m and AL1912 bm)* 1.8M Power Cord* BaseIf you find that any of these items is missing or appears damaged, contact your dealer immediately.Connecting the LCD Monitor and BaseWhen you open the box to take the base and put onthe desk first. Then connect the LCD Monitor andbase please.(See fig.1-1 )Figure 1-1Viewing Angle AdjustmentThe LCD Monitor is designed to allow users to havea comfortable viewing angle. The viewing angle canbe adjusted from -5°to +15°.(See fig. 1-2)Figure 1-2 WarningDo not force the LCD Monitor over its maximum viewing angle settings as stated above. Attemptingthis will result in damaging the Monitor and Monitor stand.Detaching LCD Monitor from Its Stand Unscrew screws the swivel base support column and pull down the hinge to release.Interface for Arm ApplicationsBefore installing to mounting device, please refer toFig.1-3.The rear of this LCD display has four integrated 4 mm, 0.7 pitches threaded nuts, as well as four 5 mm access holes in the plastic covering as illustrated in Figure 1-4. These specifications meet the VESA Flat Panel Monitor Physical Mounting Interface Standard (paragraphs 2.1 and 2.1.3, version 1, dated 13 November 1997).Connecting the Display1. Power off your computer.2. Connect one end of the signal cable to the LCDMonitor’s VGA port.(See Fig 1-5)3. Connect the other end of the signal cable to the VGAport on your PC.4. Make sure connections are secure.Connecting the AC Power1. Connect the power cord to the LCD Monitor.(See Fig.1-6)2. Connect the power cord to an AC power source.and AL1912 bm)1. Connect the audio cable to the " LINE OUT " jack on yourPC's audio card or to the front panel's “AUDIO OUT” jackof your CD ROM drive. (See Fig. 1-7)2. Connect the other end of the audio cable to the LCDMonitor's " LINE IN " jack.Power Management SystemThis LCD Monitor complies with the VESA DPMS (version 1.0) Power Management guidelines. The VESA DPMS provides four power saving modes through detecting a horizontal or vertical sync. signal. When the LCD Monitor is in power saving mode, the monitor screen will be blank and the power LEDindicator will light yellow.Chapter 2 Display ControlsGeneral InstructionsPress the power button to turn the monitor on or off. The other control buttons are located at front panel of the monitor (See Figure 2-1). By changing these settings, the picture can be adjusted to your personal preferences.The power cord should be connected.Connect the video cable from the monitor to the video card.Press the power button to turn on the monitor position. The power indicator will light up.Figure 2-1Front Panel Control/Power Button:Press this button to turn the monitor ON or OFF, And display the monitor’s state.Power Indicator:Green — Power On mode.Orange — off modeMENU / ENTER :Activate OSD menu when OSD is OFF or activate/de-activate adjustment function when OSD is ON or Exit OSD menu when in Volume Adjust OSD status.</Volume:Activates the volume control when the OSD is OFF (only for Audio model) or navigate through adjustment icons when OSD is ON or adjust a function when function is activated.>/Volume:Activates the volume control when the OSD is OFF (only for Audio model) or navigate through adjustment icons when OSD is ON or adjust a function when function is activated.Auto Adjust button / Exit:1. When OSD menu is in active status, this button will act as EXIT-KEY (EXIT OSD menu).2. When OSD menu is in off status, press this button for 2 seconds to activate the Auto Adjustmentfunction. The Auto Adjustment function is used to set the HPos, VPos, Clock and Focus. NOTESE Do not install the monitor in a location near heat sources such as radiators or air ducts, or in aplace subject to direct sunlight, or excessive dust or mechanical vibration or shock.E Save the original shipping carton and packing materials, as they will come in handy if you everhave to ship your monitor.E For maximum protection, repackage your monitor as it was originally packed at the factory.E To keep the monitor looking new, periodically clean it with a soft cloth. Stubborn stains may beremoved with a cloth lightly dampened with a mild detergent solution. Never use strong solvents such as thinner, benzene, or abrasive cleaners, since these will damage the cabinet. As a safety precaution, always unplug the monitor before cleaning it.How To Adjust A Setting1. Press the MENU-button to activate the OSD window.2. Press < or > to select the desired function.3. Press the MENU-button to select the function that you want to adjust.4. Press < or > to change the settings of the current function.5. To exit and save, select the exit function. If you want to adjust any other function, repeat steps 2-4.Adjusting The PictureThe descriptions for function control LEDSMain Menu Icon Sub MenuIconSub Menu Item DescriptionContrast Adjusts the contrast between the foreground and background of the screen image.Brightness Adjusts the background brightness of the screen image.Focus Adjusts picture FocusClock Adjusts picture ClockH. Position Adjust picture FocusV. Position Adjust picture ClockN/A Warm Set the color temperature to warm white. N/A Cool Set the color temperature to cool white.User / RedUser / GreenUser / BlueAdjusts Red/Green/Blue intensity.N/A EnglishN/Ac N/A Deutsch N/A Français N/A Español N/A ItalianoN/A简N/Ay Multi-language selection.H. Position Adjust the horizontal position of the OSD. V. Position Adjust the vertical position of the OSD.OSD TimeoutAdjust the OSD timeout.N/A Auto ConfigAuto Adjust the H/V Position, Focus andClock of picture.N/A InformationShow the resolution, H/V frequency and input port of current iput timing.N/A ResetClear each old status of Auto-configuration and set the color temperature to Cool.N/A ExitSave user adjustment and OSD disappear.Chapter 3 Technical Information SpecificationsLCD PanelSize 19"Display Type Active matrix color TFT LCD Resolution 1280 x 1024Display Dot 1280 x (RGB) x 1024Display Area (mm)(H x V) 376.32 x 301.056Display Color 16.7MBrightness 300cd/m2 (typical), 240 cd/m2 (minimum) Contrast Ratio 700:1 (typical)Response Time Ta=25°C Tr=15ms Tf=10msLamp Voltage 750 Vrms (typical)Lamp Current 7 mA rms. (typical)Viewing Angle Vertical: -85° ~ +85°Horizontal: -85° ~ +85°VideoInput SignalInput Impedance PolarityAmplitudeMulti-mode Supported Analogue RGB 0.7Vp-p/Digital TMDS 75 Ohm ± 2%Positive, Negative0 - 0.7 ± 0.05 VpHorizontal Frequency: 24 ~ 80 KHz Vertical Frequency: 49 ~75 HzControlPower switch On/Off switch with LED indicator Audio (AL1912 m/AL1912 bm)Input 500mVrmsOutput 1W+1W OSDBrightness Contrast Horizontal Position Vertical Position PhaseClockDisplay Mode Setup DigitalDigitalDigitalDigitalDigitalDigitalUse EEPROM to save settings in memoryPower ManagementOn 60W maximum 240 VAC Green Off 3W maximum 240 VAC Yellow Soft switch off 3W maximum 240 VAC DarkDisconnected 3W maximum 240 VAC Yellow: Standby, Suspend, Off Dark: DC Power off* Meeting VESA DPMS requirements measured from AC Input end of AC power cord.Sync InputSignal Separate TTL compatible horizontal and vertical synchronization Polarity Positive and negativePlug & Play Supports VESA DDC2B functionsExternal ConnectionPower Input (AC input) AC socketVideo Cable 1.8M with 15-pin D-sub connectorAudio Cable 1.8M with Stereo JackEnvironmentOperating Condition: Storage Condition:TemperatureRelative HumidityTemperatureRelative Humidity5°C to 40°C/41°F to 104°F20% to 80%-20°C to 60° C/-4°F to140° F5% to 85%Power Supply (AC Input)Input Voltage Single phase, 100 ~ 240VAC, 50 / 60 Hz Input Current 1.2 A maximumSize and WeightDimensions 422.2 (W) x 433.5 (H) x 175 (D) mm Net Weight 5.5 ± 0.5 kgGross Weight 8.1 ± 0.5 kgStandard Timing TableIf the selected timing is NOT included in table below, this LCD monitor will use the most suitable available timing.TIMING FH(KHZ)FV(HZ)SYNCPOLARITYTOTAL(DOT/LINE)ACTIVE(DOT/LINE)SYNCWIDTH(DOT/LINE)FRONTPORCH(DOT/LINE)BACKPORCH(DOT/LINE)PIXELFOREQ(MHZ)640x350 31.469+800640 96 16 4825.175 VGA-350 70.087– 449350 2 37 60640x400 24.83–848640 64 64 8021.05 NEC PC9801 56.42 – 440 400 8 7 25640x400 31.469–800640 96 16 4825.175 VGA-GRAPH 70.087 + 449 400 2 12 35640x400 31.5–80064064 16 8025.197 NEC PC9821 70.15 – 449 400 2 13 34640X480 31.469- 800640 96 16 4825.175 VESA-PAL 50.030 - 629 480 2 62 85640x480 31.469–800640 96 16 4825.175 VGA-480 59.94– 525480 2 10 33640x480 35.00–864640 64 64 9630.24 APPLE MAC-480 66.67 – 525 480 3 3 39640x480 37.861–832640 40 16 12031.5 VESA-480-72Hz 72.809 – 520 480 3 1 20640x480 37.5–84064064 16 12031.5 VESA-480-75Hz75 – 500 480 3 1 16720x400 31.469– 900720 108 18 5428.322 VGA-400-TEXT 70.087 + 449 400 2 12 35832x624 APPLE 49.725 – 1152 832 64 32 224 57.2832MAC-800 74.55– 667624 3 1 39800x600 35.156+1024800 72 24 12836 SVGA 56.25+6256002 122800x600 37.879+1056800 128 40 88 40 VESA-600-60Hz 60.317 + 628 600 4 1 23800x600 48.077+1040800 120 56 64 50 VESA-600-72Hz 72.188 + 666 600 6 37 23TIMING FH(KHZ)FV(HZ)SYNCPOLARITYTOTAL(DOT/LINE)ACTIVE(DOT/LINE)SYNCWIDTH(DOT/LINE)FRONTPORCH(DOT/LINE)BACKPORCH(DOT/LINE)PIXELFOREQ(MHZ)800x600 46.875+1056800 80 16 16049.5 VESA-600-75Hz75 + 625 600 3 1 211024x768 48.363– 13441024 136 24 160 65 XGA 60.004–8067686 3291024x768 53.964+ 13281024 176 16 11271.664 COMPAQ-XGA 66.132 + 816 768 4 8 361024x768 56.476– 13281024 136 24 144 75 VESA-768-70Hz 70.069 – 806 768 6 3 291024x768 60.023+ 13121024 96 16 17678.75 VESA-768-75Hz 75.029 + 800 768 3 1 281024x768 60.24–13281024 96 32 176 80 APPLE MAC-768 75.02 – 803 768 3 3 291152x864 54.054+ 14801152 96 40 192 80 (60Hz) 59.270+912864 3 13 321152x864 63.851+ 14801152 96 32 20094.499 (70Hz) 70.012+912864 3 1 441152x864 67.50+16001152 128 64 256108.00 (75Hz) 75.00+9008642 2 321280x960 60.00+18001280 112 96 312108.00 (60Hz) 60.00+10009603 1 361280x960 70.00+18001280 112 96 312126.00 (70Hz) 70.00+10009603 1 361280x960 75.00+18001280 112 96 312135.00 (75Hz) 75.00+10009603 1 3664 + 1688 1280 112 48 248 108 1280x1024VESA-1024-60Hz 60 + 1066 1024 3 1 3880 + 1688 1280 144 16 248 135 1280x1024VESA-1024-75Hz 75 + 1066 1024 3 1 38Note: Mode 640x350, 640x400 and 720x400 will locate on middle position but cannot be expanded tofull screen on vertical direction.TroubleshootingThis LCD Monitor has pre-adjusted using factory standard VGA timings. Due to the output timing differences among various VGA cards in the market, users may initially experience an unstable or unclear display whenever a new display mode or new VGA card is selected.AttentionThis LCD Monitor Supports Multiple VGA Modes.Refer to the Standard Timing Table for a listing of modes supported by this LCD Monitor.The picture is unclear and unstable, please perform the following steps :1. Enter PC to “Shut Down Windows” status while you’re in MS-Windows environment, exceptWindows XP. In Windows XP open the specific application where the problems appear.2. Check the screen to see if there’s any black vertical stripes appear. If there are, take advantage of the“Clock” function in OSD menu and adjust (by increment or decrement numbers) until those bars disappear.3. Move to “Phase” function in OSD menu again and adjust the monitor screen to its most cleardisplay.4. Click “No” on “Shut Down Windows” and back to the normal PC operating environment.If there’s no picture on the LCD Monitor, please perform the following steps:1. Make sure the power indicator on the LCD Monitor is ON, all connections are secured, and thesystem is running on the correct timing. Refer to Chapter 3 for information on timing.2. Turn off the LCD Monitor and then turn it back on again. If there is still no picture, press theAdjustment Control button several times.3. If step 2 doesn’t work, connect your PC system to another external CRT. If your PC systemFunctions properly with a CRT Monitor but it does not function with the LCD Monitor, the output timing of the VGA card may be out of the LCD’s synchronous range. Please change to analternative mode listed in the Standard Timing Table or replace the VGA card, and then repeat steps1 and 2.If you have chosen an output timing that is outside of the LCD Monitor’s synchronous range (Horizontal: 24 ~ 80 KHz and Vertical: 49 ~ 75 Hz), the OSD will display a “Out of Range” message. Choose a mode that is supported by your LCD Monitor.Also, if the signal cable is not connected to LCD monitor at all or properly, the monitor screen will display a message “No Input Signal”.。
Philips LCD监视器说明书
PhilipsLCD monitor43 cm (17")SXGA170S8FBCompact display, rich performanceon your budgetOptimized performance and convenience made affordable: Packed with smart featuresfor enhanced display, the compact 170S8 also features SmartManage remote monitormanagement and green design that delivers the best total cost of ownership.Best total cost of ownership solution•SmartManage compatibility enables LAN-based asset management•PerfecTune ensures top quality LCD display delivered to you•Empowered for Windows Vista•TCO'03 guarantees the highest safety and ergonomic standardsOutstanding front of screen performance•SmartImage: Optimized user-friendly display experience•SmartContrast: For incredible rich black details•5ms fast response timeMaximum comfort for maximum productivity•Screen tilts to your ideal, individualized viewing angleGreat convenience•Dual input accepts both analog VGA and digital DVI signals•Hassle-free display performance tuning with SmartControl II•Cable management reduces cable clutter for neat workspaceHighlightsSmartManage enabledSmartManage is a system for monitoring, managing and checking status of display devices as well as delivering remote support to users who experience difficulties - all accomplished over a LAN.PerfecTunePerfectTune is industry-leading, proprietary Philips testing and algorithm technology for monitor adjustment and fine tuning, an extensive process that ensures ultimate display performance in compliance with a standard four-times more stringent than Microsoft's Vista requirements from each and every monitor that leaves the factory - not just a few review samples. Only Philips goes to these lengths to deliver this exacting level of color accuracy and display quality in every new monitor.Windows Vista readyPhilips Vista-ready monitors are empowered for vibrant, exciting display of this new, visually sophisticated and demanding Windows operating system, designed to enhance your entertainment experience, make you more productive and help you control your computing experience at home and in the office, making viewing, finding and organizing information for work or play quick, efficient and easy.TCO '03 complianceA TCO (Swedish Confederation of Professional Employees) standard even more stringent than MPR-II for safety and ergonomics, especially concerning alternatingelectric fields (AEF).SmartImageSmartImage is an exclusive leading edge Philipstechnology that analyzes the content displayedon your screen and gives you optimized displayperformance. This user friendly interfaceallows you to select various modes like Office,Image, Entertainment, Economy etc., to fit theapplication in use. Based on the selection,SmartImage dynamically optimizes thecontrast, color saturation and sharpness ofimages and videos for ultimate displayperformance. The Economy mode optionoffers you major power savings. All in real timewith the press of a single button!SmartContrastSmartContrast is a Philips technology thatanalyzes the contents you are displaying,automatically adjusting colors and controllingbacklight intensity to dynamically enhancecontrast for the best digital images and videosor when playing games where dark hues aredisplayed. When Economy mode is selected,contrast is adjusted and backlighting fine-tunedfor just-right display of everyday officeapplications and lower power consumption.5ms on/off response timeOn-Off response time is the period requiredfor a liquid crystal cell to go from active (black)to inactive (white) and back to active (black)again. It is measured in milliseconds. Faster isbetter: Lower response time means fastertransitions and, therefore, results in fewervisible image artifacts in the display oftransition of texts and graphics. On-Offresponse time is a more important measure inthe display of business content like documents,graphs and photos.Adjustable tiltAdjustable tilt is backward and forwardmovement of a screen on its base to achievecustom positioning for an ideal viewing angleand more comfort for people who spend longhours working on the computer.Dual inputDual input provides connectors toaccommodate input of both analog VGA anddigital DVI signals.SmartControl IISmartControl II is monitor-based softwarewith an easy-to-use on-screen graphicinterface that guides you through fine-tuningresolution, color calibration and other displaysettings including brightness, contrast, clock &phase, position, RGB, white point and - onmodels with onboard speakers - volumeadjustments.Cable managementCable management is an intimate design thatmaintains tidy workspace by organizing cablesand wires required for the operation of adisplay device.Issue date 2022-05-10 Version: 1.0.412 NC: 8670 000 25318 EAN: 87 12581 30188 0© 2022 Koninklijke Philips N.V.All Rights reserved.Specifications are subject to change without notice. Trademarks are the property of Koninklijke Philips N.V. or their respective owners.SpecificationsPicture/Display•LCD panel type: 1280 x 1024 pixels, Anti-glare polarizer, RGB vertical stripe•Panel Size: 17"/ 43 cm•Effective viewing area: 337.9 x 270.3 mm •Pixel pitch: 0.264 x 0.264 mm •Brightness: 300 cd/m²•Contrast ratio (typical): 800:1•SmartContrast ratio (dynamic): 3000:1•Display colors: 16.7 M•Viewing angle: 176º (H) / 170º (V), @ C/R > 5•Response time (typical): 5 ms•White Chromaticity, 6500K: x = 0.313 / y = 0.329•White Chromaticity, 9300K: x = 0.283 / y = 0.297•Maximum Resolution: 1280 x 1024 @ 75 Hz •Optimum resolution: 1280 x 1024 @ 60 Hz •Video Dot Rate: 140 MHz•Horizontal Scanning Frequency: 30 - 83 kHz •Vertical Scanning Frequency: 56 -75 Hz •Picture enhancement: SmartImage•sRGBConnectivity•Signal Input: VGA (Analog ), DVI-D•Sync Input: Composite Sync, Separate Sync, Sync on Green•Video input impedance: 75 ohm•Sync input impedance: 2.2k ohm•Video input signal levels: 0.7 Vpp Convenience•User convenience: On-screen Display, SmartManage enabled, SmartControl II •Monitor Controls: SmartImage, Input, Auto (Back), Power On/Off, Brightness Control (Up/Down), Menu (OK)•OSD Languages: English, French, German, Italian, Portuguese, Russian, Simplified Chinese, Spanish •Other convenience: Kensington lock compatible, FlexiHolder•Plug & Play Compatibility: DDC/CI, sRGB, Windows 98/ME/2000/XP/Vista •Regulatory approvals: CE Mark, EMC, Energy Star, FCC-B, UL, CSA, SEMKO, TÜV/GS, TÜV Ergo, TCO '03•Tilt: -5° to 20°•VESA Mount: 100 x 100 mmAccessories•Included accessories: AC Power Cord, VGA cable •Optional accessories: Super Ergo Base•User ManualDimensions•Box dimensions(W x H x D):451 x 391 x 159 mm•Box dimensions in inch (W x H x D):17.8 x 15.4 x 6.3 inch•Set dimensions(W x H x D):379.3 x 327.1 x 57.5 mm•Set dimensions in inch (W x H x D):14.9 x 12.9 x 2.3 inch•Set dimensions with stand (W x H x D):379.3 x 387.1 x 210.8 mm•Set dimensions with stand in inch (W x H x D): 14.9 x 15.2 x 8.3 inch•MTBF: 50,000 hrs•Relative humidity: 20% - 80%•Temperature range (operation): 0°C to 40°C •Temperature range (storage): -20°C to 60°C •Product weight (+stand): 4.6 kg•Product weight (+stand) (lb): 10.1 lb•Weight incl. Packaging: 5.88 kg•Weight incl. Packaging (lb): 13.0Power•Complies with: Energy Star•Consumption (On mode): < 33 W (Typical)•Consumption (economy mode): 27 W •Consumption(Off Mode): < 1 W•Power LED indicator: Operation - green, Stand by/ sleep - Amber•Power supply: Built-in, 100-240VAC, 50/60Hz。